


In this guide, we look at seven stunning Picfair Stores from our photographer community, and show you how they were made. So you can recreate similar looks for your Picfair Store too!

Important note!
We'll be updating this guide shortly in line with the release of Picfair Themes, which is a totally new way of configuring the look and feel of your Picfair Store.
Stay Tuned!
Read more about Picfair Themes.
Featured photographers:
Are you seeking inspiration for creating and designing your Picfair Store? In this article, we take a closer look at five photographers from the Picfair community. Each have a distinct theme and strong, individual approach to how they organise their Picfair Stores, and we show you they were made.
Each photographer also effectively utilises the features provided for Picfair Stores to exhibit their abilities, communicate with their audience, and ensure a seamless browsing and purchasing experience for visitors.
Below you'll see visuals from their Picfair Stores, as well as some of the settings used to create that look and layout for their store. This way, you can easily see how to recreate similar for your store too. We hope these inspire you, and help get the very most out of your Picfair Store experience.
So let's dig in and get started...
Seven photographers with beautifully-curated Picfair Stores
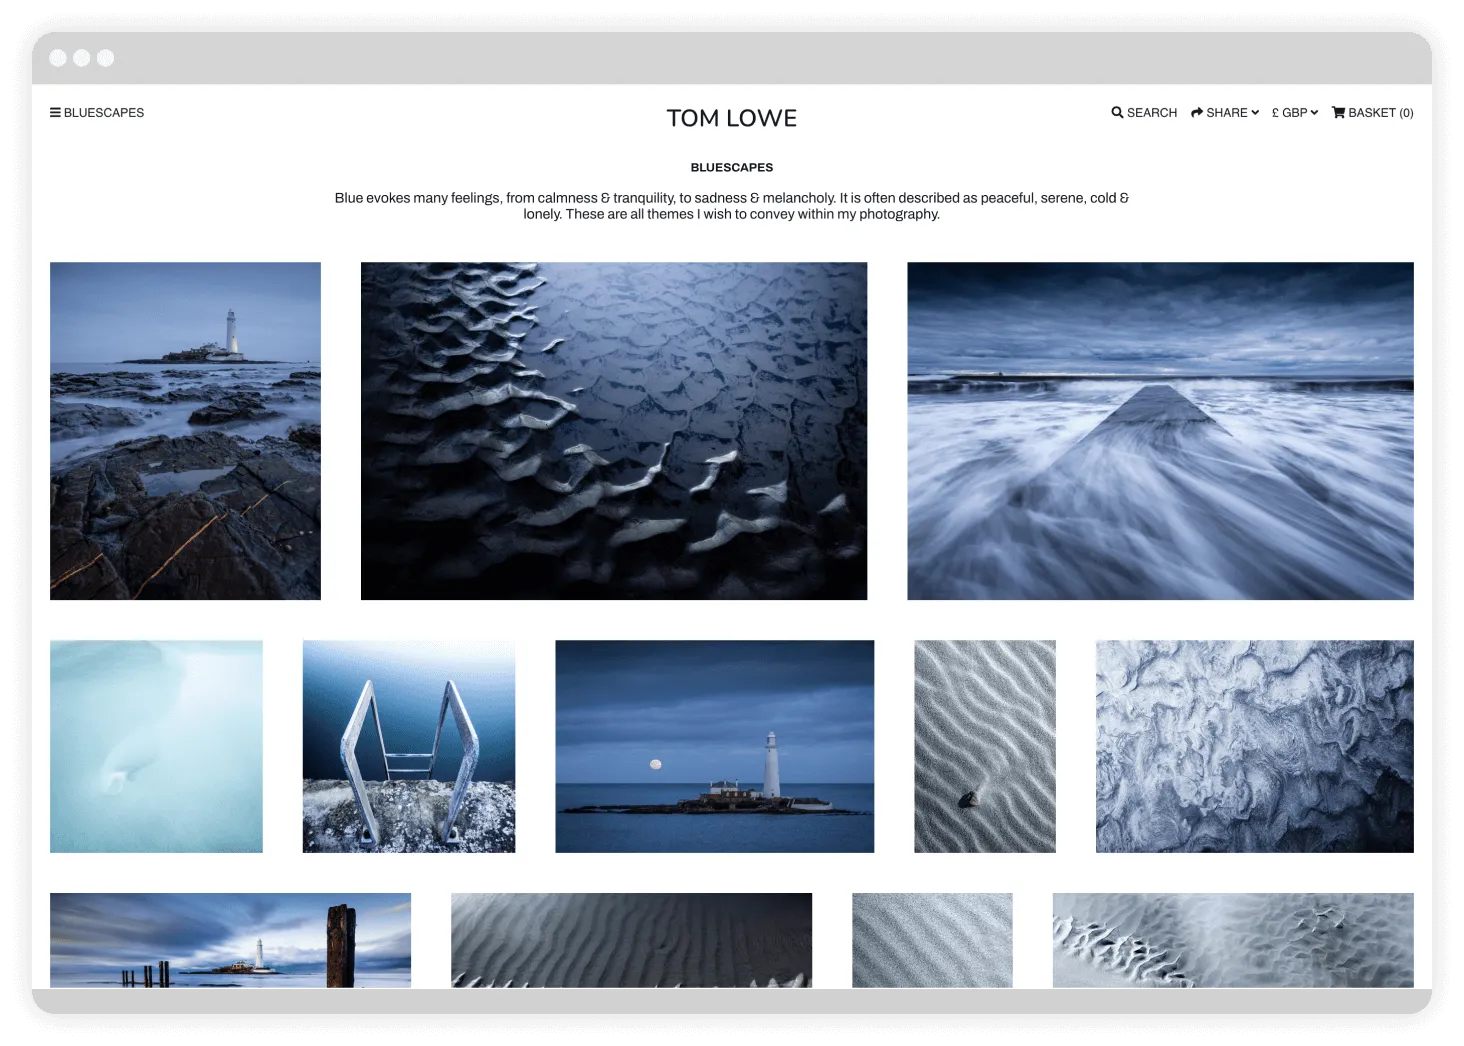
When we first land on Tom's Picfair Store, we're immediately greeted by a range of stunning albums, he's also cleverly placed some of his most commercially-significant albums at the top of the page, including the "Competition Winners & Shortlisted Images" album, meaning visitors are immediately directed to some of the very best of his work.
Learn more about configuring Albums for your Picfair Stores with our dedicated Albums guide.
.webp)
The store layout itself is low-key minimalist, using the Light theme, with images displayed in Rows.
You can configure these layout settings from the "Theme and Layout" section of "Store Settings".
.webp)
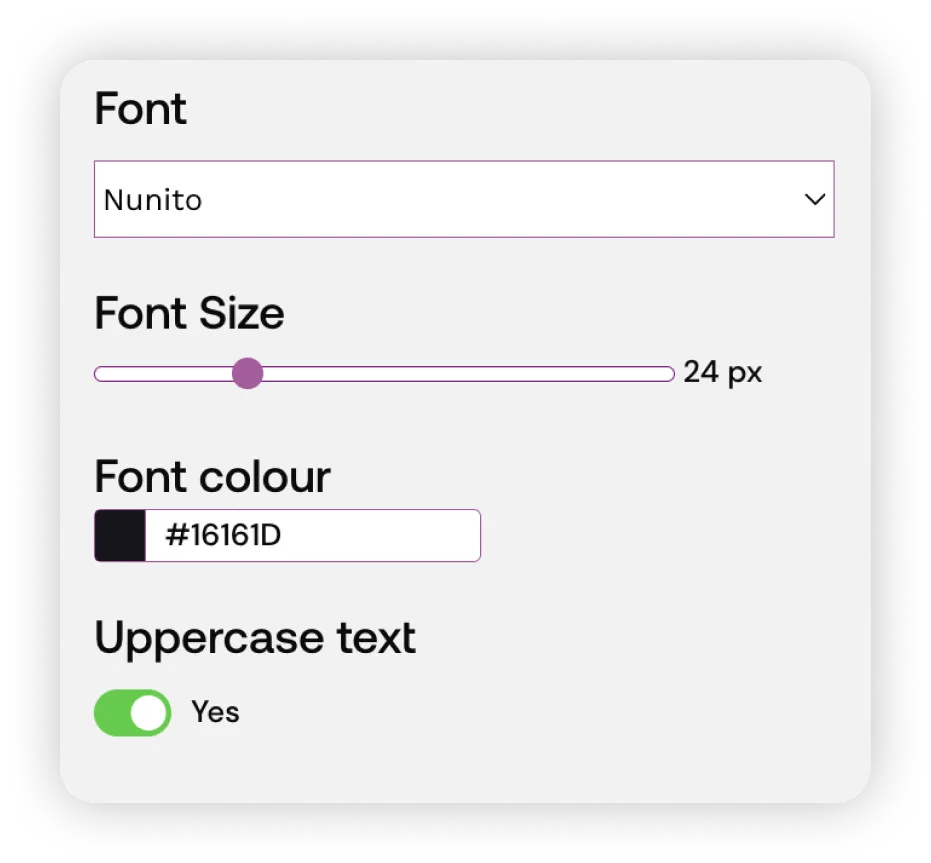
You can configure the name text and bio text for your store header and homepage from the "Header and Navigation" section of "Store Settings".
.webp)
Tom also keeps his name in the header as simple, small text using the Nunito font at 24px, which fits well alongside the bio text. All this makes the viewing process for the visitor clear and direct, and the images and albums the star of the show.
.webp)
In order to display albums on the homepage of your Picfair Store, you can configure this setting from the "Image Organisation" section of your "Store Settings".
Select option "Set as Homepage" under "Albums" to display your albums on your home page. Note, anything selected in purple will be included in your Picfair Store.
.webp)
Tom has also created an album for images he has sold on his Picfair Store. This is an excellent idea for any photographer; it shows visitors that other customers have already done business with you, which immediately adds a level of trust and professionalism to your offering. Not to mention gives you another way of displaying some of your most popular work in an album.
.webp)
For all of his albums, he has put the album features available to maximum use for his subject-themed photos. He's given each album a name that resonates with the work within, and provides a description for the content within. So visitors can be clear on exactly what the albums are about, and what messages and emotions he wishes to convey with his images.
Photographer Paul Prim very effectively uses a Custom Theme for his Picfair Store. He's chosen to use a dark grey for the store background (not black), the difference is subtle, but this look is particularly popular with professional photographers for displaying their work. He's also juxtaposed the dark background with white text for the store, so it's clear and legible.
He's also used an excellent logo for his store; one which is a picture of himself, which adds a lovely personal touch to his store. And for the Store Bio, he's listed the most essential information about his work; such as where he's based, the kit he uses take his images, and his Instagram handle.
.webp)
You can configure a Custom Theme from the "Theme and Layout" section of "Store Settings" by selecting "Custom", which will then display more options where you can choose a bespoke colour for the text and background (see the screenshot below).
You'll also be able to see a small preview of what the colour combination will look like, so you can experiment with different combinations. Once you've found a colour combination that works for you, select "Save Changes" and preview your store to see what it looks like, if it's not quite right, try a different combination until you get the ideal look!
.webp)
To add a logo to your store header, go to the "Header and Navigation" section of your "Store Settings" and select "Use Logo" which will prompt you to upload your logo file.
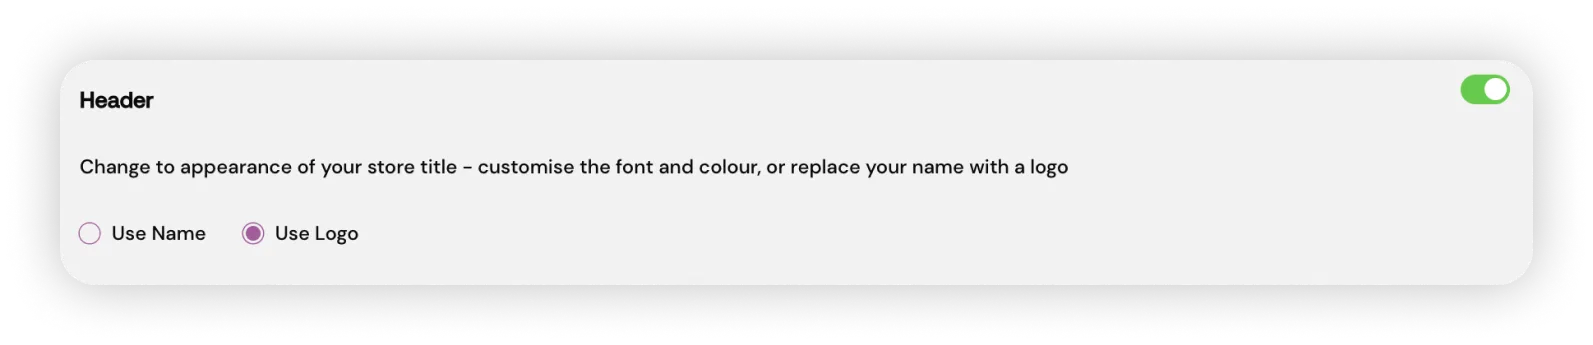
For more information and best practices for using a bespoke logo for your Picfair Store, read our ultimate guide.
For the layout across the store, all images are also displayed in Rows, and for each album Paul has given it a description.
.webp)
Paul has also used a beautiful bespoke watermark to appear over his images, which also displays his name, and appears prominently on his images.
.webp)
Watermarks can be configured from the "Advanced" section of "Store Settings". Adding a custom watermark to your store is a little more complex compared to configuring other features, but still straightforward. We have a comprehensive guide to adding watermarks, which we would highly recommend reading before you get started.
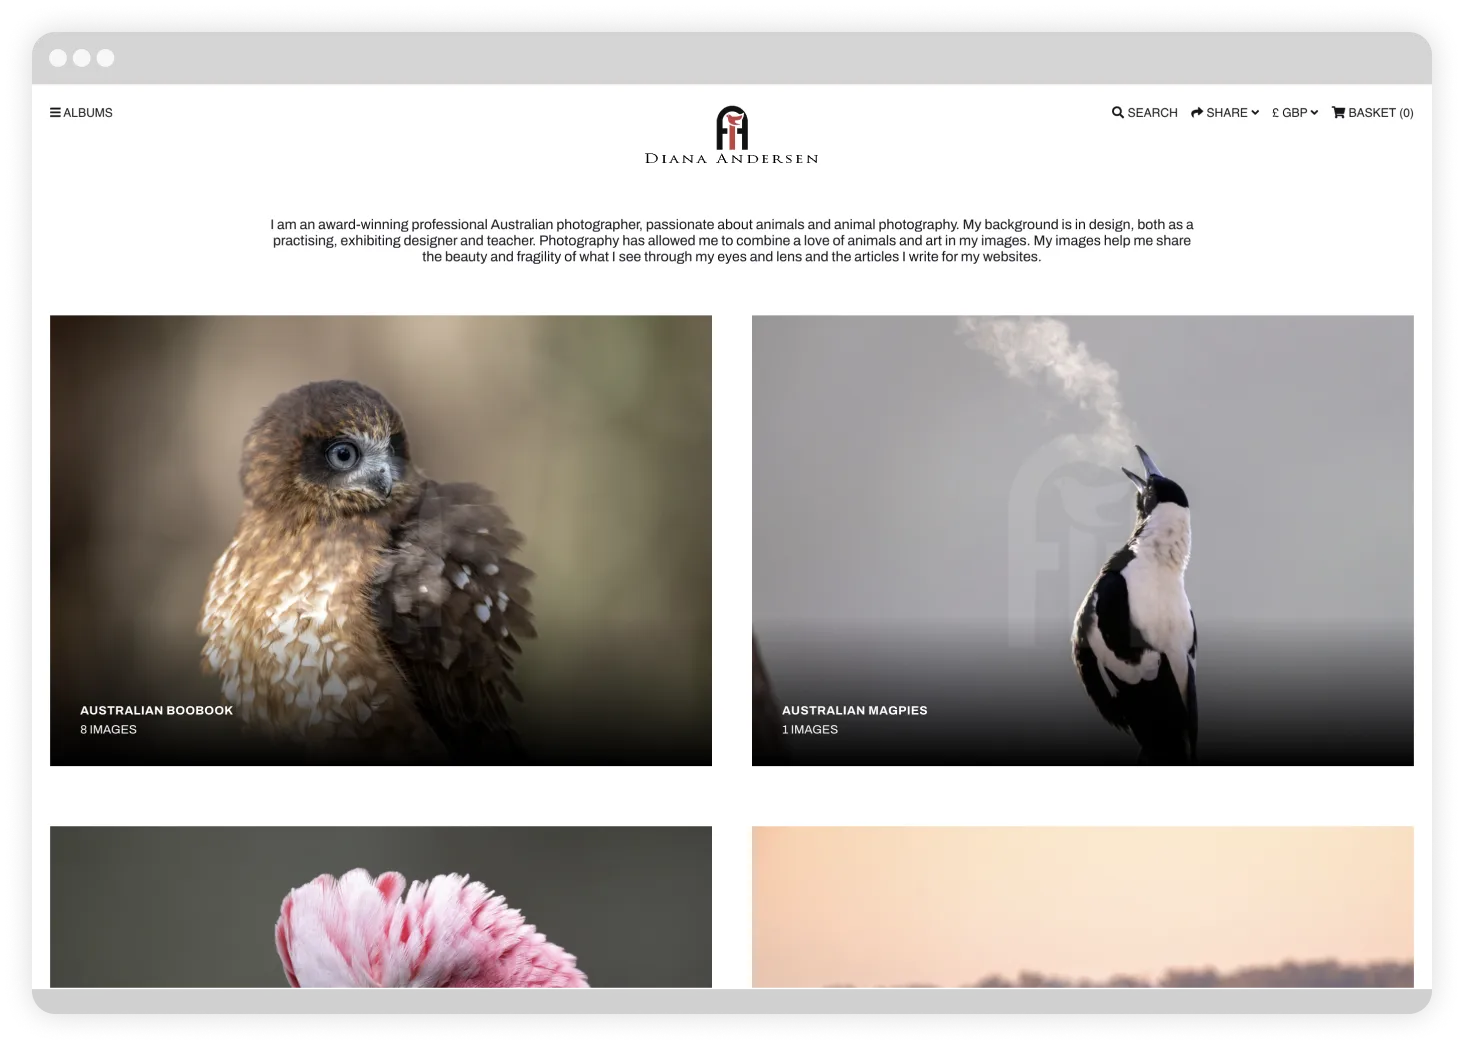
Diana, a professional animal photographer based in Australia, has a finely-curated set of albums displayed on the homepage to showcase the diversity of work in her Picfair Store, the store uses the Light Theme throughout wish images displayed in Rows.
The store header has a custom logo and extended bio text, which includes relevant information on Diana’s background and expertise.
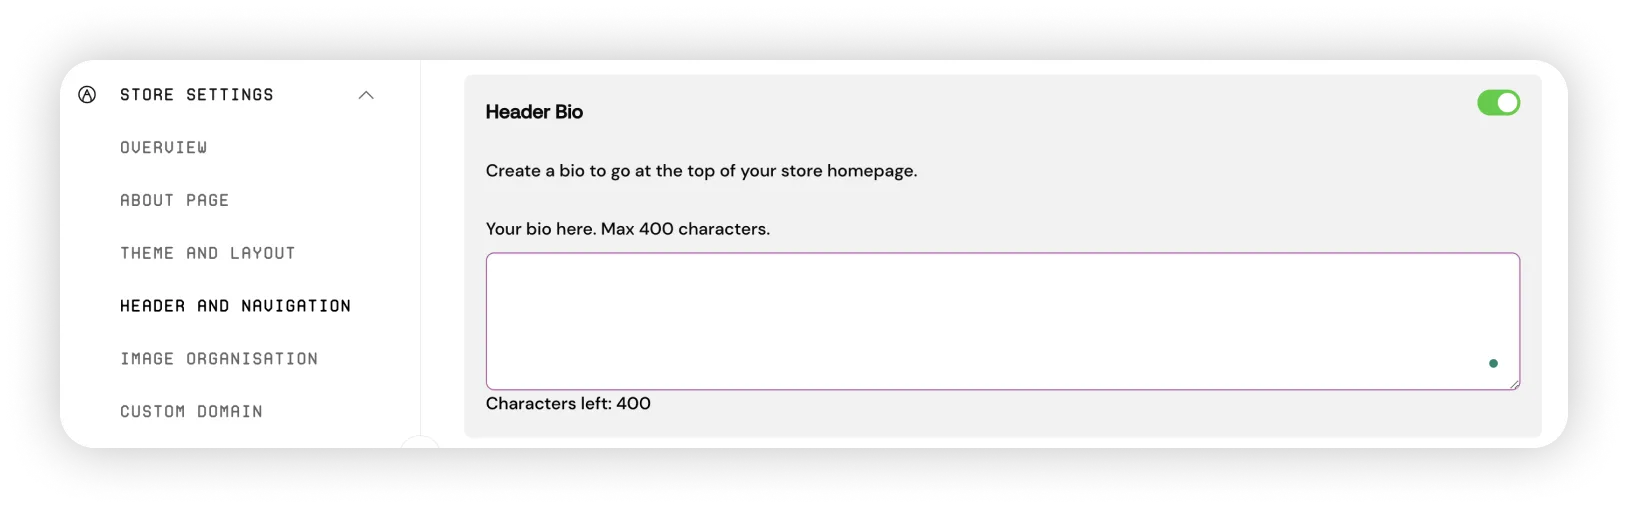
Bio text can be added from "Header and Navigation" section of "Store Settings". Here, under Header Bio, if you switch the toggle to green, you'll see the option to add 400 characters of bio text, to be displayed on the homepage of your store. For tips and advice for what to include in the bio text for your store, see our dedicated guide and as always, make sure you save changes!
With reference to the bio text, Diana has also incorporated custom links into the store menu that link to her other sites and written articles–an excellent way to direct your visitors to other valuable resources you may have (see our instructions later in this feature on how to add custom links to your store).
.webp)
Diana also uses a custom watermark designed to complement the theme of the images within the store, which is an excellent demonstration of how, when done well, a custom watermark can also enhance the branding impact.
.webp)
Roman takes unusual photos in truly unique locations, and just like Paul and Tom, he's chosen to display this important information about his work in the header bio of the homepage of his Picfair Store.
He's chosen to use a logo across his store, too, which has been beautifully-designed and compliments both the Light theme used across the store, and the square layout chosen to display images.
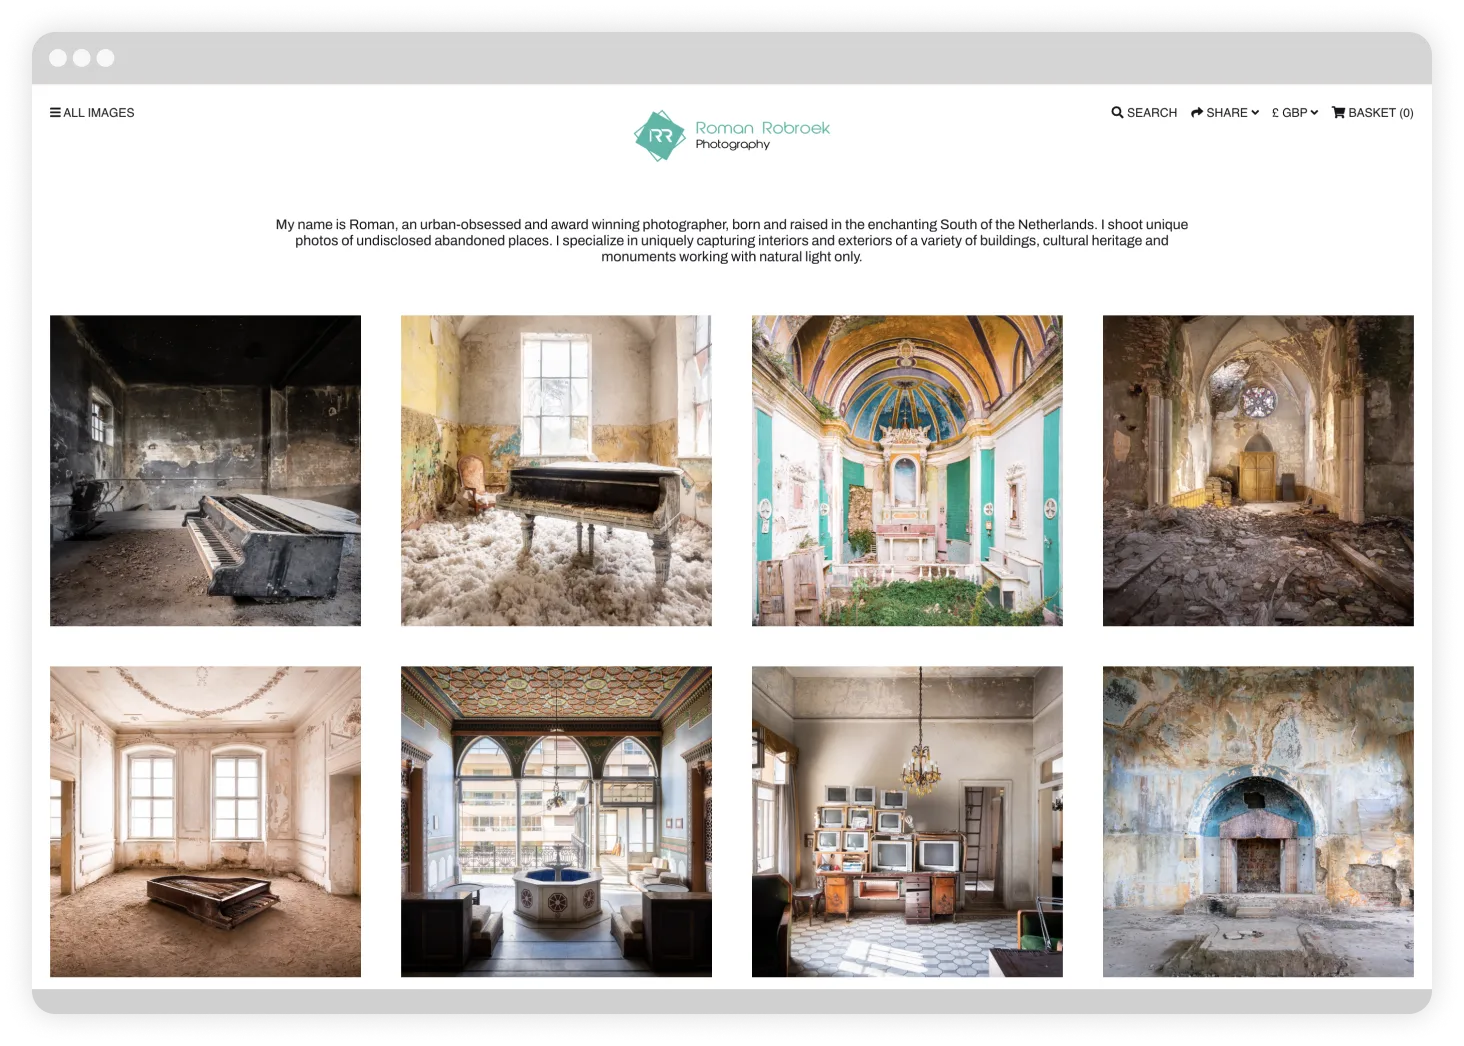
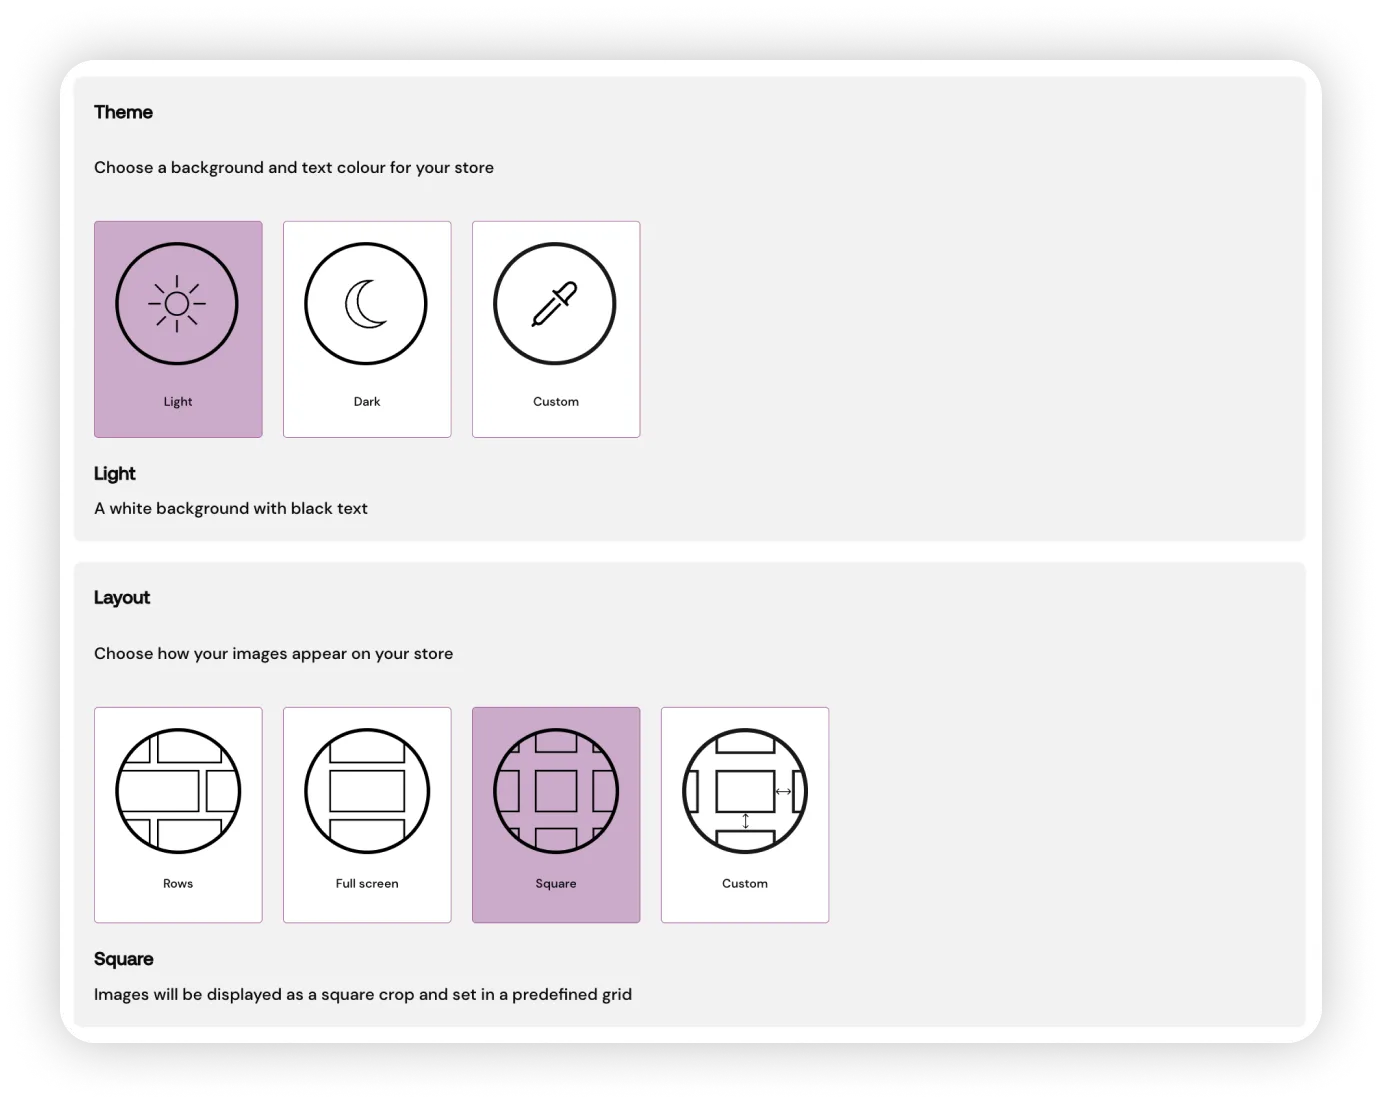
Like the other themes and layouts, the square image layout format can be selected from the the Theme and Layout section of Store Settings.
When using the square layout, it'll show you a cropped display of the image, but when you click into the image, you'll see it at it's original ratio!
.webp)
Roman has also used a bespoke watermark for his images, which is the same as part of the store logo, this is popular branding strategy for photographers, and you can read more about watermarks and branding in our watermarks guide.
.webp)
Anna is a travel photographer based in Rome, who showcases a spectacular variety of images across her Picfair Store. Her store uses the Dark Theme with images displayed in albums, along with a white and red custom logo, that juxtaposes very well with the store theme to make it stand out and look attention-grabbing.
.webp)
Within each album the images are displayed with the full-screen option, which we feel is especially fitting for the portraits in the series, and makes viewing them more impactful.
.webp)
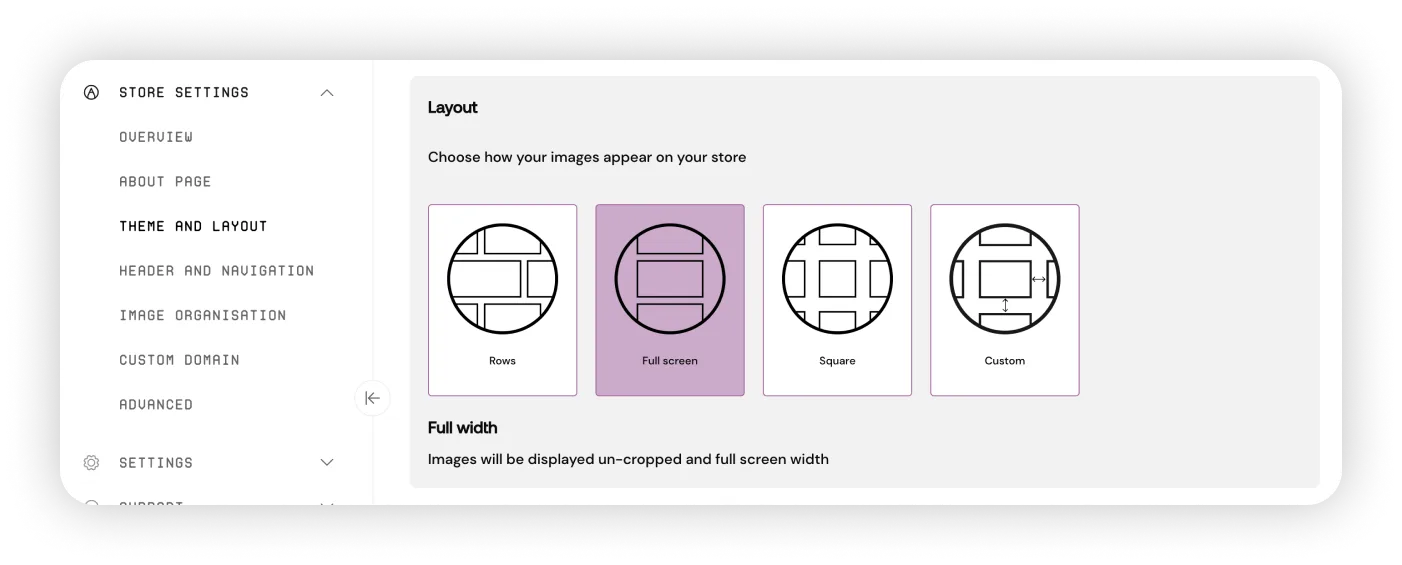
Full screen display can be configured from the "Theme and Layout" section of "Store Settings" under Layout.
Anna has also included essential information on her background and practice in the Information section of her Picfair Store, along with location information and a profile picture.
This information can be added and edited from the "About" section of your "Store Settings" and we have a separate guide with top tips and advice on what to include in this section, which we would highly recommend reading.
.webp)
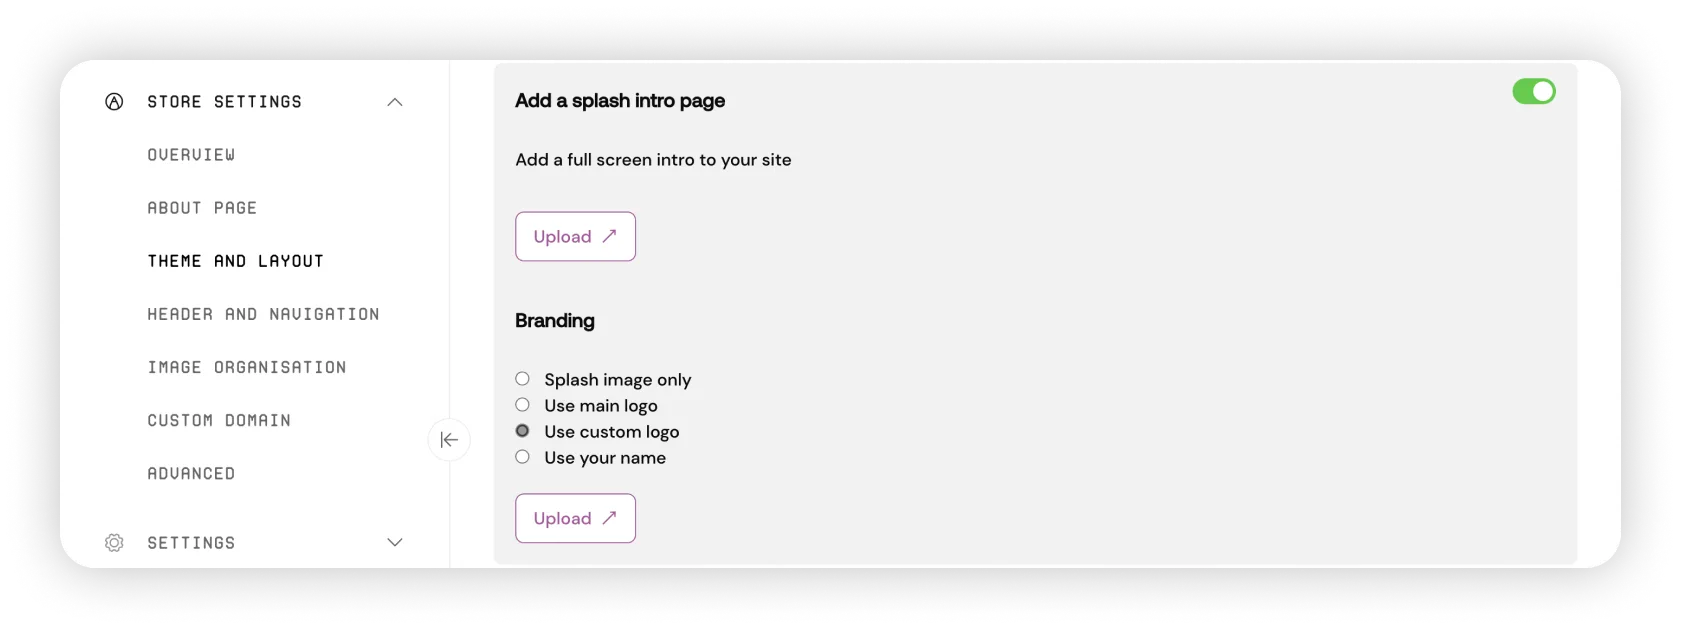
Photographer Tiberiu Sahlean has chosen to include a welcome splash page to his Picfair Store, that also includes his logo. So when you first go to Tiberiu's Picfair Store, you'll immediately see one of his stunning images at full screen size, along with his logo.
Welcome splash pages are a fantastic way to show off your best work right from the start and give your viewers that wow factor when they first land on your page. Learn more about splash pages and how to add one to your store with our splash pages feature guide.
.webp)
Welcome splash pages can be configured from the the Theme and Layout section of Store Settings. Learn more about how to create and configure a splash page for your store with our splash pages feature guide.
For displaying his images, Tiberiu uses the Dark theme along with the Square layout format.
.webp)
.webp)
We the use of the Dark theme across Tiberiu's Picfair Store fits very well with the colours and tones prominent across his photography. Like in the example below.
When you're putting together your own Picfair Store, we'd highly recommend experimenting with different themes and layouts, and how they look against your images. For more advice and inspiration, see our guide on creating the perfect layout for your Picfair Store.
.webp)
Photographer Dave Harrison-Ward has taken a highly-bespoke approach to the way he's laid out his Picfair Store, by using both a Custom Theme and Custom Display.
For the look of his store, he's chosen a pastel colour palette; which in general are very popular among photographers, particularly for still life, macro, and nature images–which are also running themes throughout Dave's work.
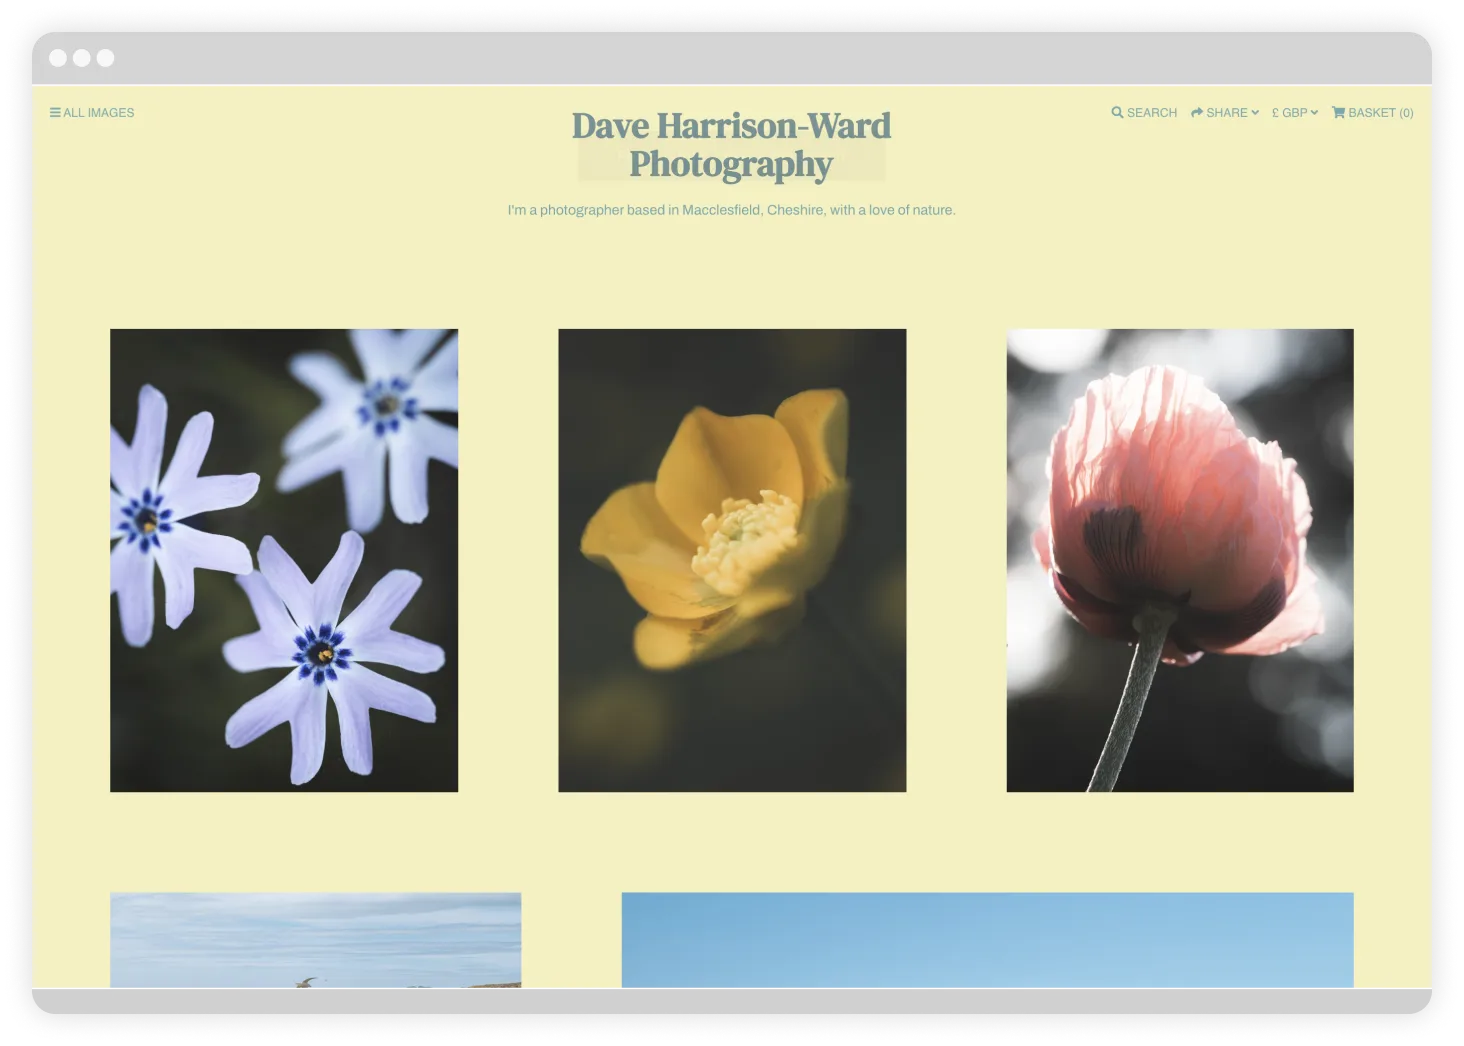
Dave has chosen to use DM serif text as the font for his name displayed on the store header, which can be configured in the Header and Navigation section of Store Settings.
The colour of the text is slightly different to the rest of the text across the store, but it closely matches. This way it adds a very subtle emphasis on the store name (and a subtle way for visitors to remember!).
Keeping a consistent colour palette throughout is also really simple way to make your store feel sleek and stylish; it shows visitors you've put thought and consideration into how you want your store to look.
.webp)
Dave's custom colour theme has been configured from the Theme and Layout section of Store Settings. By selecting Custom Theme, you can then use the colour dropper to pick the colour for the text and background or your store, or enter a hex code for each.
.webp)
For the custom layout of the store, Dave's chosen to display his images in a way where they look larger and more spaced out across the page, so that only one to three images are displayed on each row. Which can be configured by altering the line and vertical spacing under Layout in the the Theme and Layout section of Store Settings.
.webp)
See Dave's configuration settings below, again we'd highly recommend experimenting with the spacing of your images to find the combination that works best.

Dave's personalised his Picfair Store even further by adding more links to the store menu. This is a great way to link to other areas of your photography work and offering, such as your website, channels, and social profiles. Here you can see Dave's added a link to his Instagram profile, Twitter account, and Mastodon and Vero links–meaning visitors can quickly and easily navigate to other areas where Dave has a presence.
.webp)
You can add custom links to your store menu from the Header and Navigation section of Store Settings under Header Menu. Here by selecting Add link you can add your own links to appear on your menu, and edit or delete them at any time.
.webp)
As always, remember to save your changes when you're done!

Ready to create your own stunning Picfair Store?
We hope you've found this guide featuring five beautiful Picfair Stores inspirational, and equipped you with the know-how to get started with customising and creating your own stunning Picfair Store!
Get started directly from your Picfair Dashboard and see our Picfair Resources collection more feature guides and tutorials.


