


Adobe Lightroom’s new AI-powered Dust Removal Feature has significantly improved my editing workflow and removed one of the most frustrating parts of post-processing. Here’s how it works & why it makes such a difference

Adobe Lightroom’s New AI-Powered Dust Removal Feature
If there’s one thing I’ve always struggled with in my photography, it’s those pesky dust spots on the camera sensor, those grey blobs that inevitably show up in images, usually in large areas of solid colour like skies.
No matter how careful you are or how often you clean your sensor, dust spots are almost unavoidable. Dust will always find a way in, and spotting (and removing) it has traditionally been one of the most frustrating and time-consuming parts of post-processing.
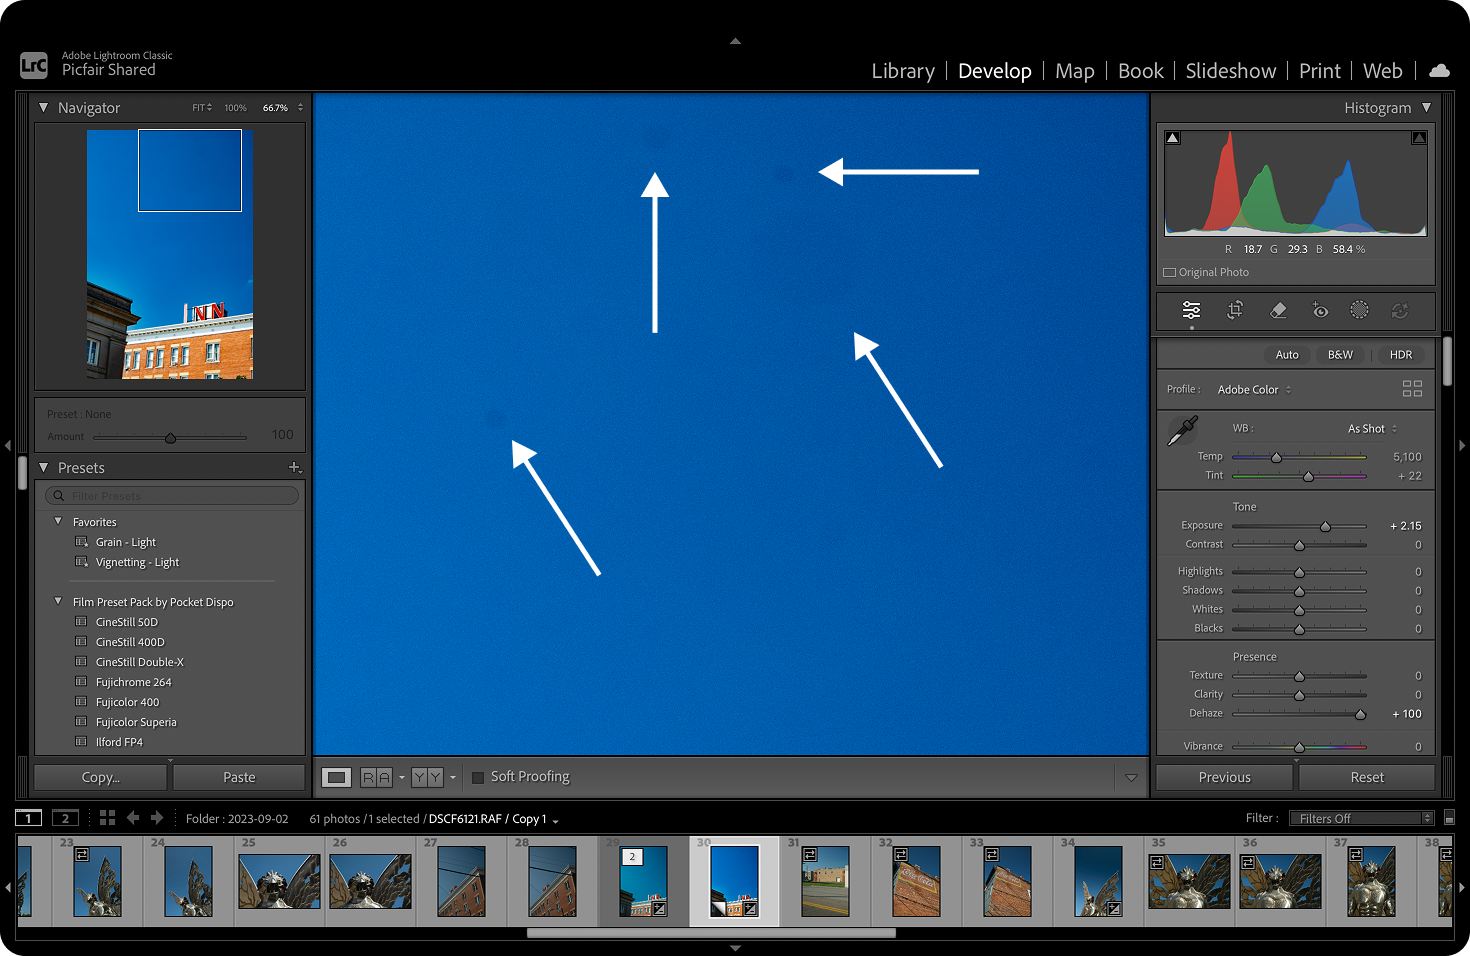
See the image below, where you can see many dust spots on a single image as indicated by the arrows. Note: I've cranked up the Dehaze adjustment to increase their visibility for the purpose of this visual.
That’s exactly why the new Dust Removal Feature in Adobe Lightroom - released in October 2025 - has been such a game-changer for me.
Lightroom's Dust Removal feature uses AI and machine learning to analyse your image for dust spots by scanning for irregular elements, such as small dots and high-contrast marks in areas where they wouldn't be expected. It then applies a "healing patch" over those marks to remove them.
How to use Lightroom’s Dust Removal Feature
Using Lightroom’s dust removal feature is super simple, and it can be applied to your image(s) in just a few steps.
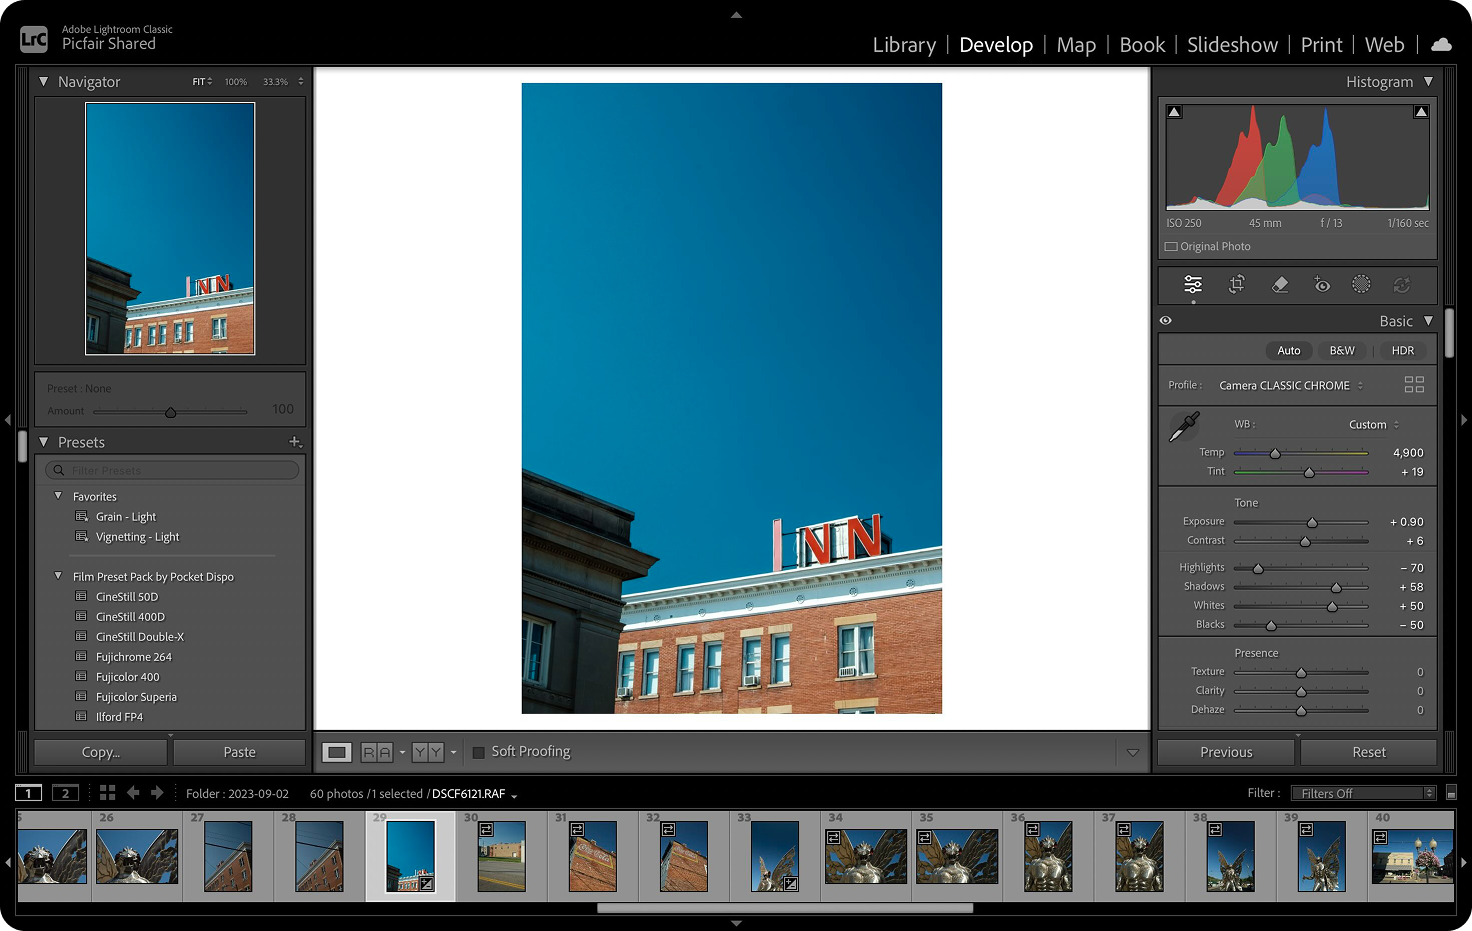
I’d recommend making all your usual edits first: exposure, contrast, colour adjustments, and so on, and running the dust removal tool as the final step in your editing workflow.
1 Open your image in the Develop module in Lightroom.
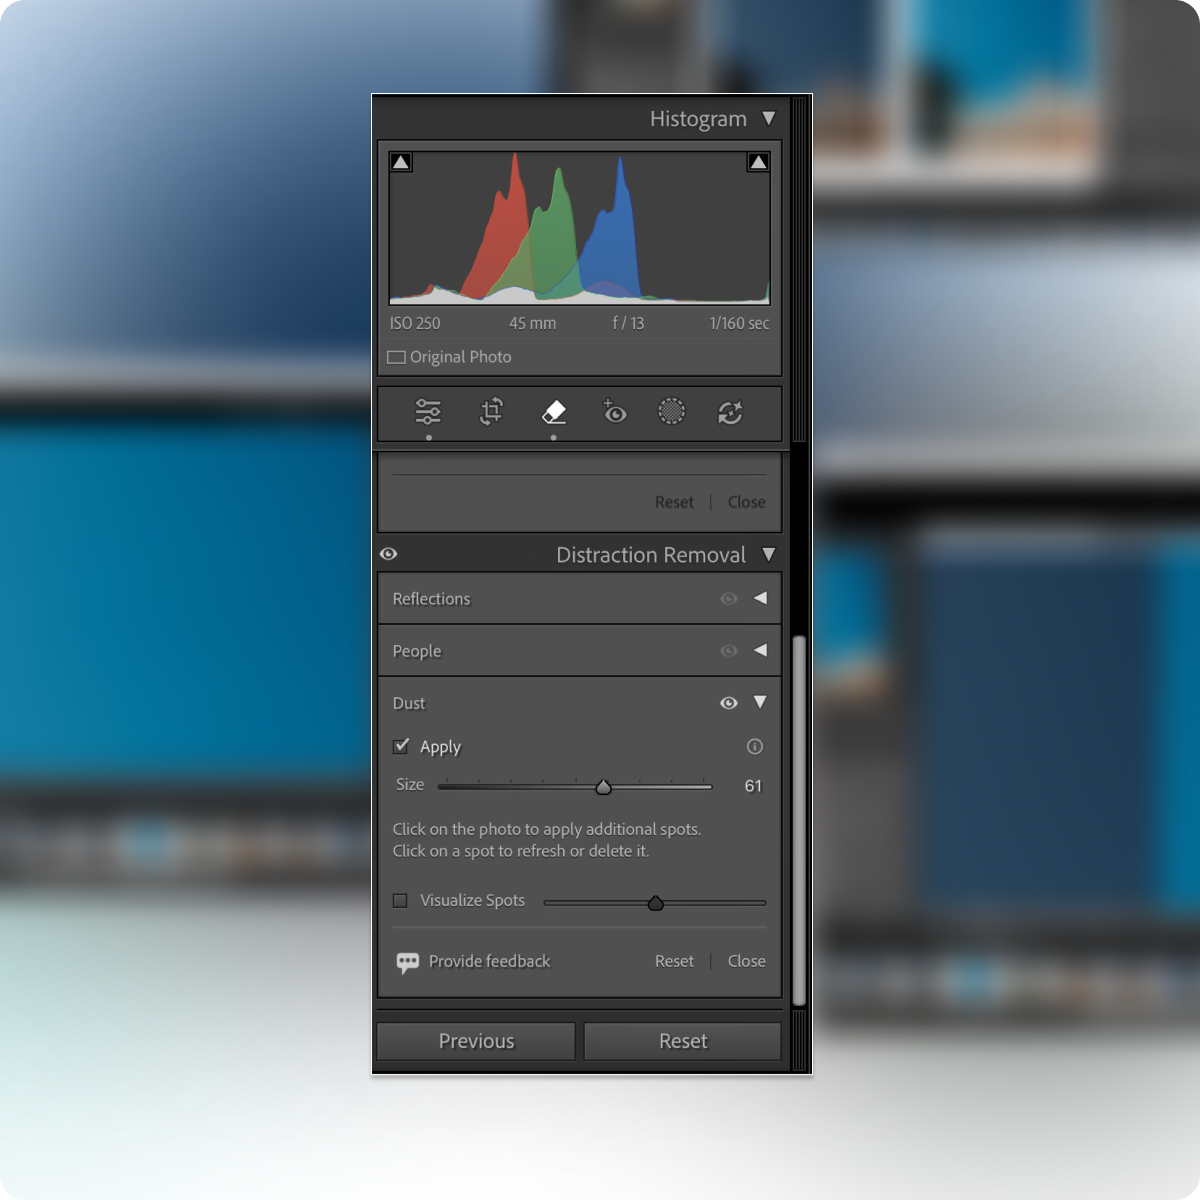
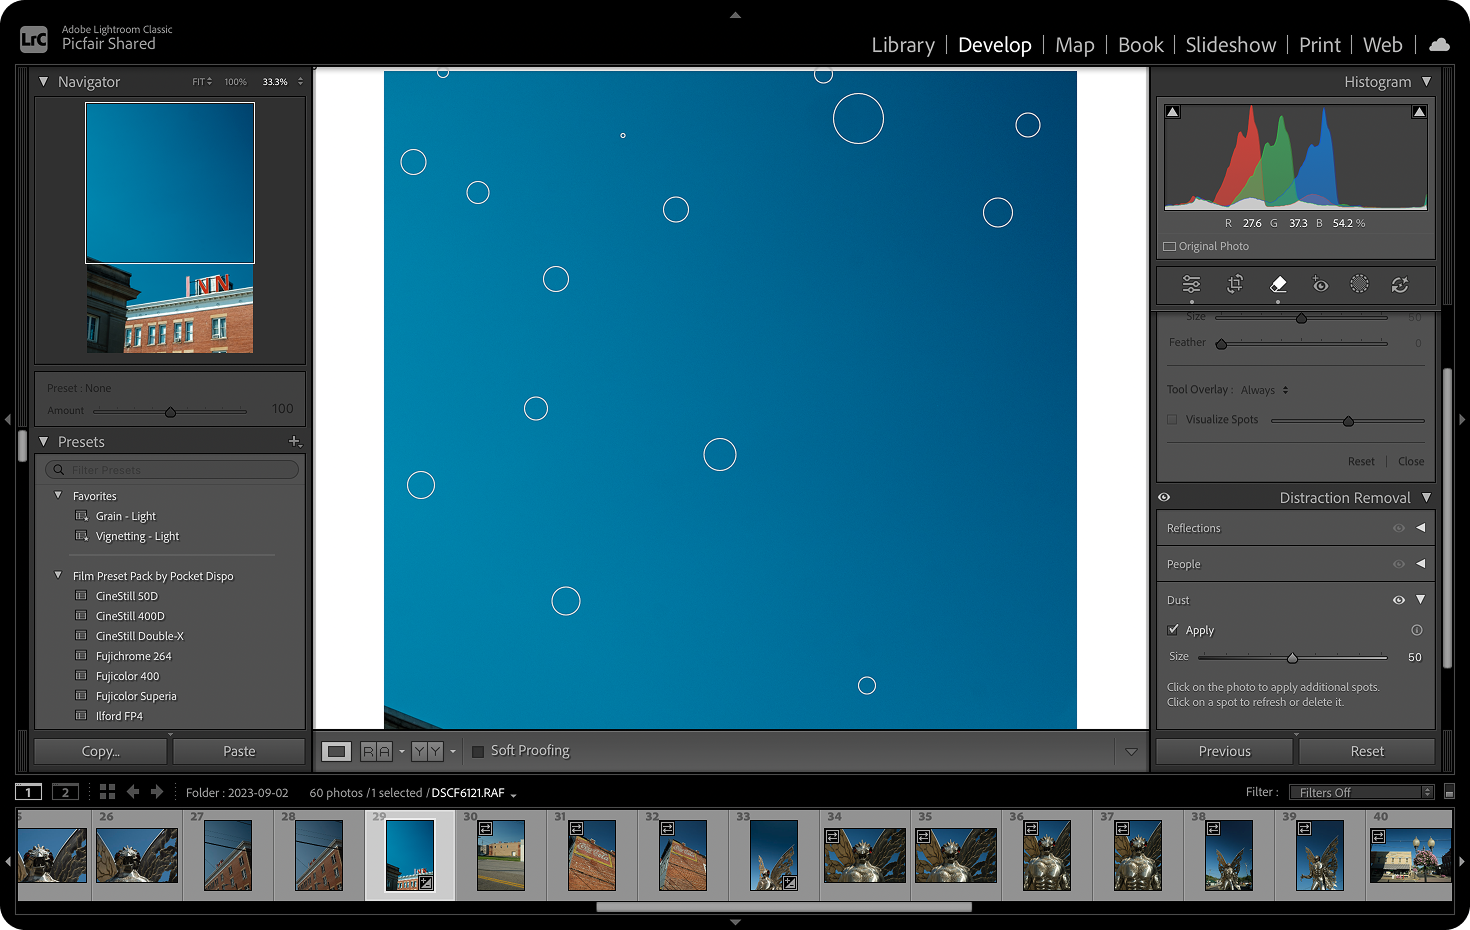
2 Navigate to the Remove icon on the right-hand side of the Develop Module, indicated by an eraser (see image below) and click to open the panel.
Once open, navigate down to Distraction Removal, select Dust, then click Apply.
3 Lightroom will then scan the image for dust spots. This can take anywhere from a few seconds up to around 30 seconds, depending on the image.
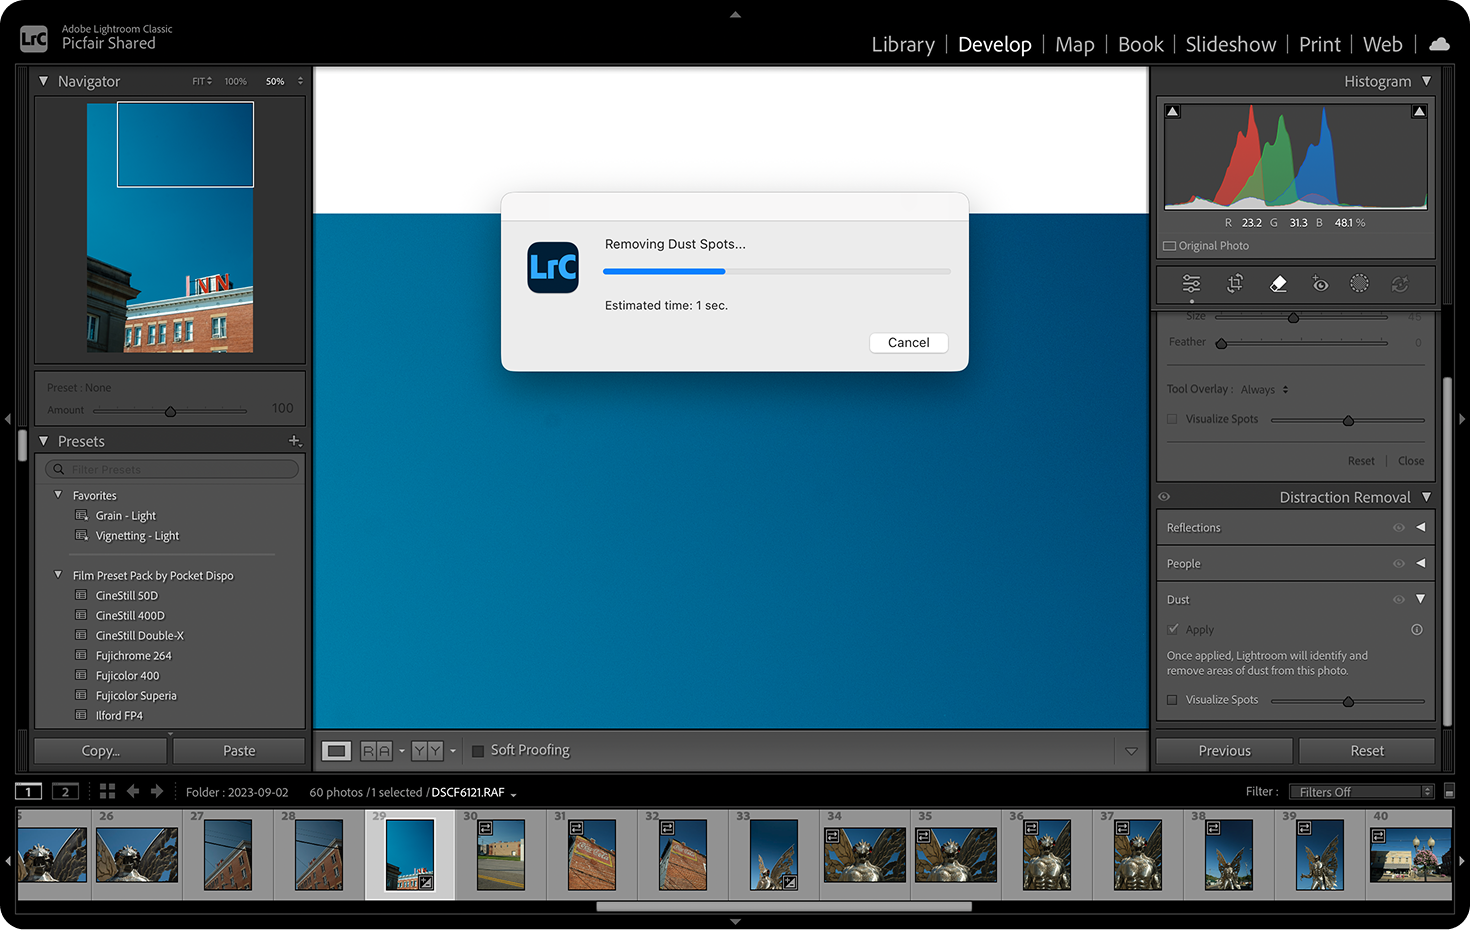
4 Once complete, Lightroom will show the detected dust spots as circles over the affected areas, where it has now applied a healing patch to remove and blend with the rest of your image (you might be surprised how many dust spots it finds).
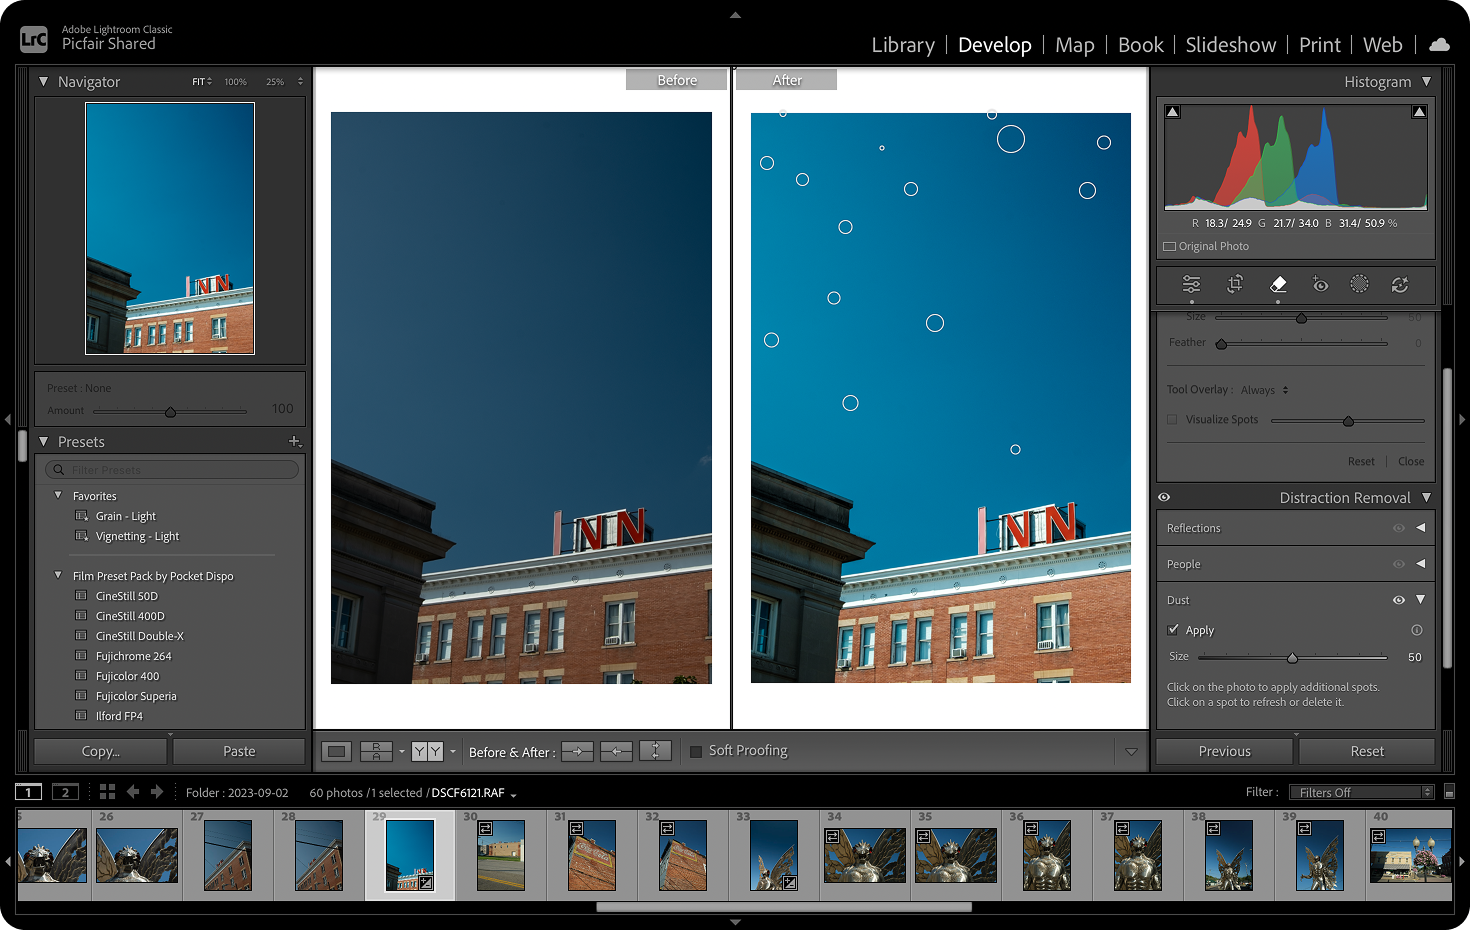
Of course, these circles don't appear on the final image. They are there to simply show you where the dust marks have been identified and removed.
And there you have it! In those four steps, dust spots have been removed from your image:

Editor's Note:
Occasionally, the tool may miss a dust spot or misinterpret an unusual mark. In those cases, it’s easy to manually remove anything additional while you’re still in the same module. In my experience, though, this is the exception rather than the rule, and as the AI continues to improve, I expect it will only get better.
Why It’s Changed How I Edit My Images
Previously, removing dust with the spot healing tool was a long, cumbersome process, especially in dusty scenes like landscape images with big blue skies, where dust spots are most noticeable.
With the new AI-powered Dust Remover, Lightroom now reduces the manual work per image from minutes to seconds. That might not sound like much, but when you’re editing dozens (or hundreds) of photos like I normally do, it adds up quickly.
What’s more, it’s now a single, automated step, and I find the results far cleaner and more accurate than manually hunting down each individual dust spot.
Dust Spots Are Easy to Miss: This Tool Takes Care of That
One thing I’ve experienced more times than I’d like to admit is spending hours carefully editing an image, feeling happy with the final result, publishing or printing it, and only then spotting a dust mark I somehow missed. Once you see it, you can’t unsee it.
What really impresses me about Lightroom’s dust removal tool is how deep it scans the image. It picks up dust spots that are easy to overlook, even those barely visible to the naked eye.
When applied, the Dust Remover delivers a thorough, clean sweep, leaving the image genuinely dust-free. That peace of mind alone makes it a hugely valuable step to your editing workflow, and it dramatically reduces the risk of missing something that could spoil an otherwise finished photograph.
Just compare your unedited image and your dust-removed image side-by-side. While you may not see all of them, you might be surprised by just how many dust spots have been removed, many of which can be hard to see with the naked eye.
Final Thoughts
Adobe Lightroom’s dust removal feature might not be the flashiest update, but it’s one of the most impactful improvements I’ve had to my editing workflow in years.
For me, it saves time, reduces frustration, and removes one of the most tedious parts of post-processing, all while delivering more consistent, reliable results than manual spot removal ever did. When you try it too, I’m sure you’ll feel the same.
If you shoot regularly, especially landscapes or images with large areas of flat tone or blocks of colour, this feature is well worth building into your editing routine. It’s one of those tools that, once you start using it, you’ll wonder how you ever edited without it.
New to Adobe Lightroom?
Visit the Adobe Website to subscribe to Lightroom.


