


With Excire Foto’s powerful AI-driven tools, searching, sorting, and culling your photos is now quicker than ever. Read on to learn how you can cut your post-shoot workflow time in half

Cut Down Your Post-Production Workflow Significantly with Excire Foto 2027
Any photographer who regularly shoots a large number of images and has a significant photo library will know how tiresome and arduous it can be to organise, cull, search through, and handle post-production.
That might be the case for you, whatever type of genre of photography you specialise in, or wherever you are on your photography journey; whether that’s a beginner, a hobbyist, a seasoned enthusiast with a photo library that spans the years, and you’re looking for specific photos to print, post, or upload to your Picfair Store, or if you’re an event, wedding, portrait, or sports photographer, and you regularly need to send your images to customers with tight turnarounds.
To help you find and cull your images, at speed, this is where Excire Foto 2027 comes in: it’s a powerful, extremely fast AI-led image organisation application that helps you to sort, search, and cull your photos in seconds, so you can quickly identify the images you want to see within your collection, or the best, most sellable images from your shoot and turn them around to your customers in no time at all.
Learn more below and discover how Excire Foto can revolutionise your post-shoot editing workflow and save you a significant amount of time finding photos in your catalogue of images.
What is Excire Foto 2027?
Excire Foto 2027 is an AI-led photo management software application that enables photographers to find and organise their images without the need to trawl through and review each photo individually. It’s fast, powerful, and its search and culling tools are at the cutting edge of AI image technology.
Excire Foto is available as a standalone application, or you can also use the Excire Search 2026 Lightroom Plugin so you can incorporate all of Excire’s tools into your Lightroom workflow, too. Read our feature on the Excire Search 2026 Lightroom Plugin to learn more.
Once you buy Excire Foto 2027, Excire Search 2026, or the combined Excire bundle, you get the licence in perpetuity, and that’s it; a one-time payment, and no subscription fees!

How Does Excire Foto 2027 Work?
Excire Foto 2027 uses AI to analyse the contents of your images, both visually and the metadata within, so you can then use its search and culling tools to find specific images within your collection and to select the best images from a batch or series of photos, fast.
It works well with both small and large collections, and you’ll see the benefits of using Excire Foto no matter where you are on your photography journey. It’s the ideal tool for both photographers just getting started, looking to find their very best shots within their collection, and also long-established photographers with a significant volume of images who need to turn them around to customers with a tight deadline, as well as any photographer looking to find images from their back catalogue quickly and easily.
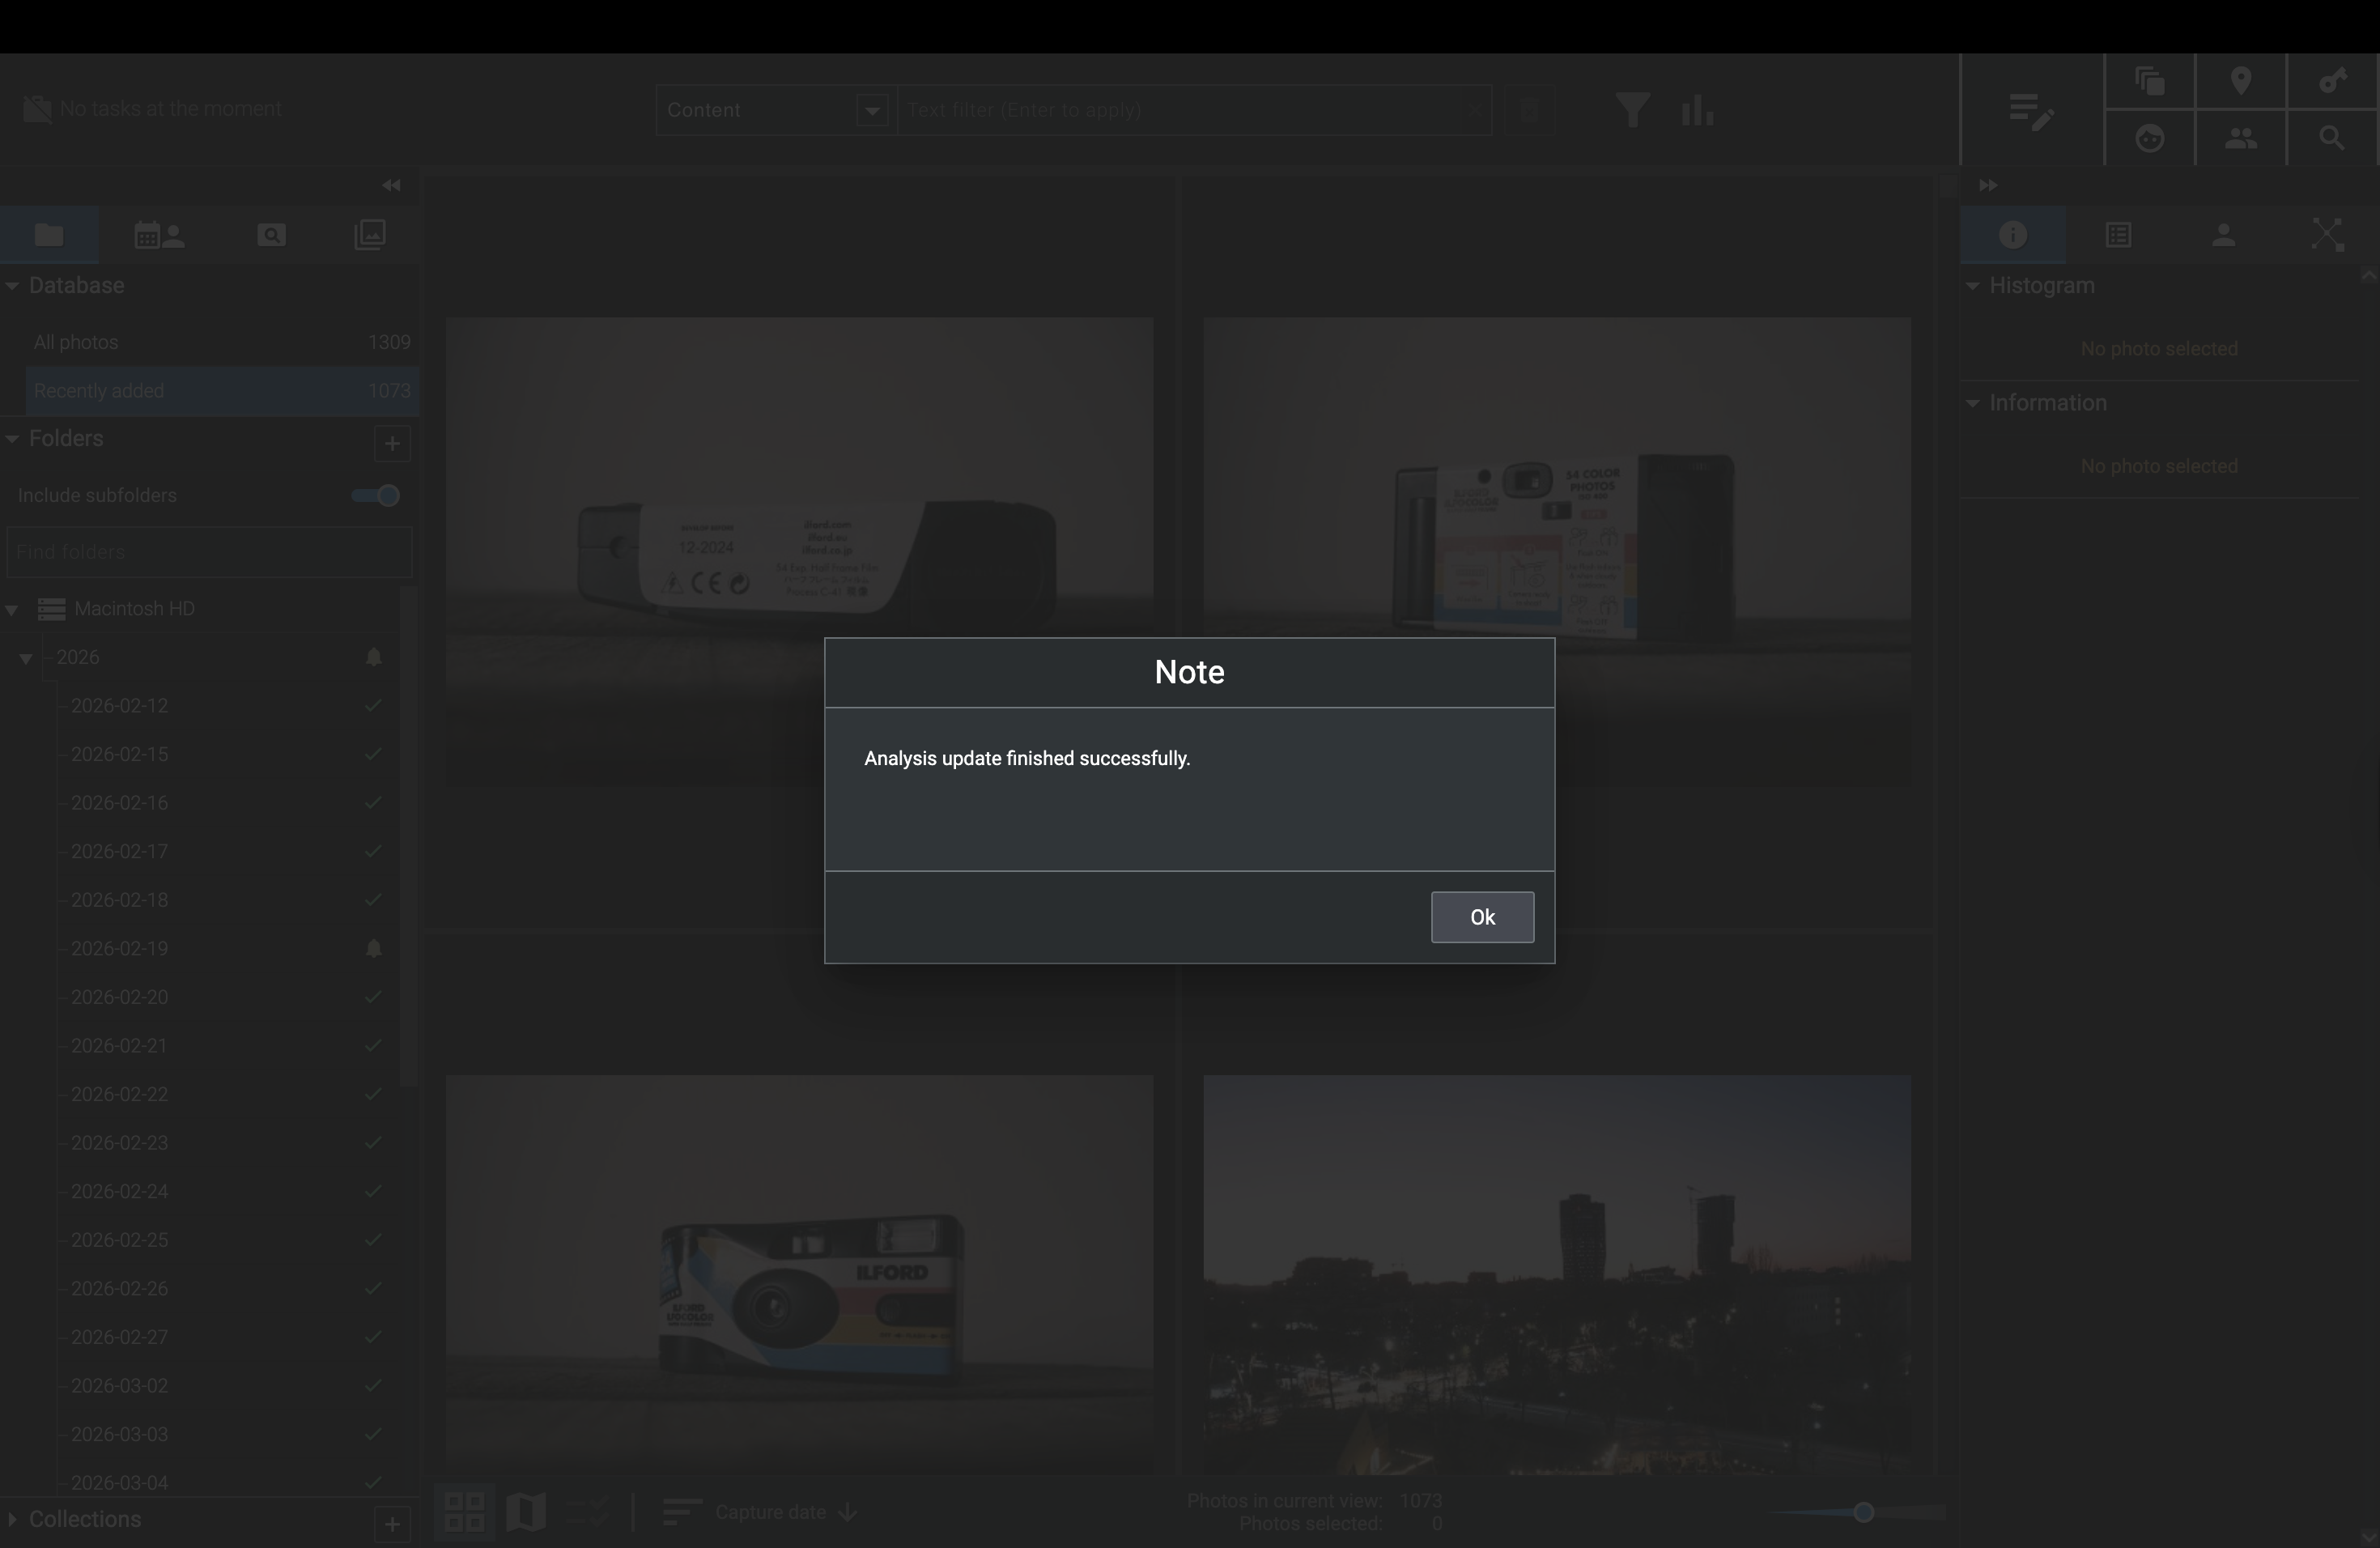
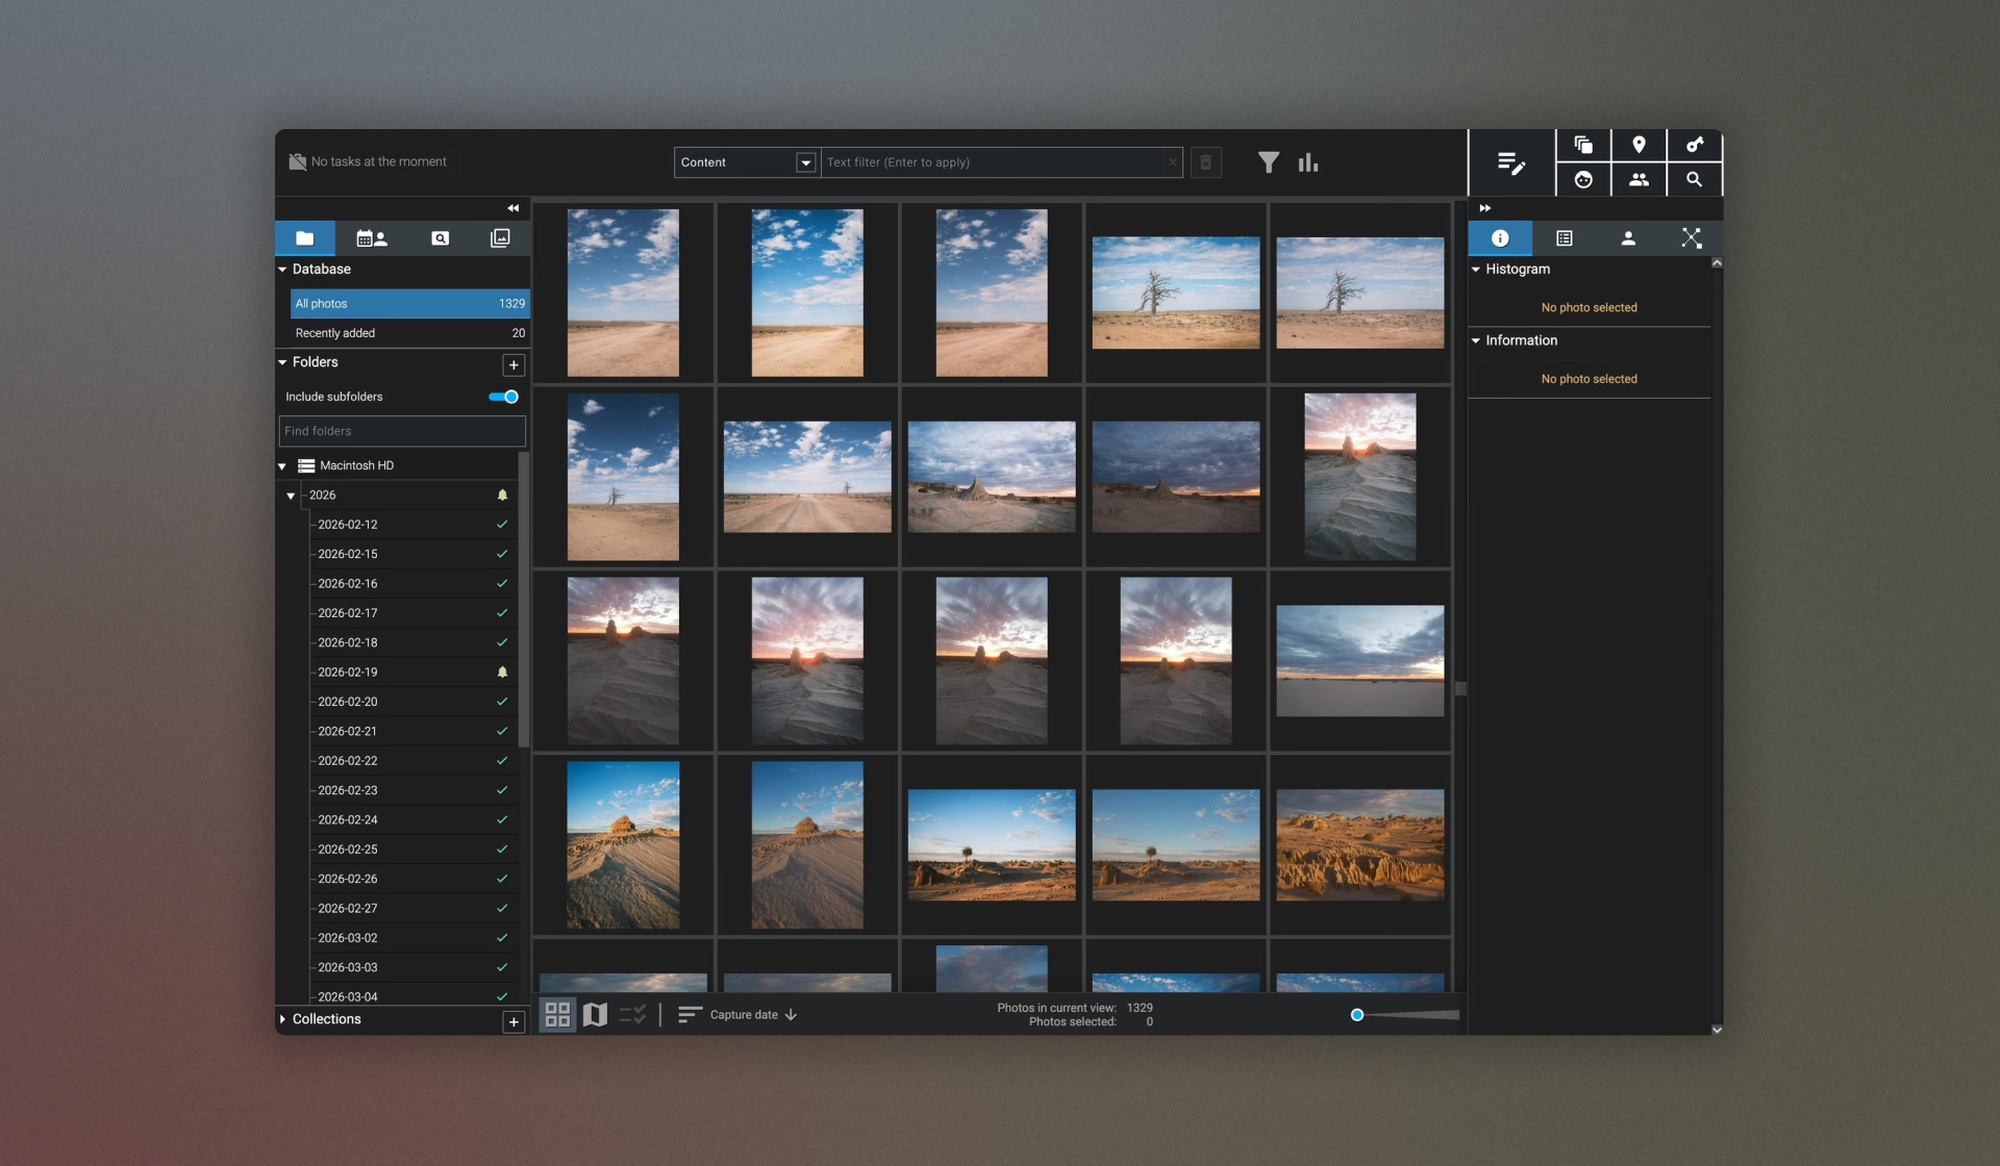
Getting started with Excire Foto 2027 is simple. Once you’ve installed it, which takes just a few steps, it’s easy to add your images to the application: simply open Excire Foto and go to Add Folders to select the folders that contain your images.
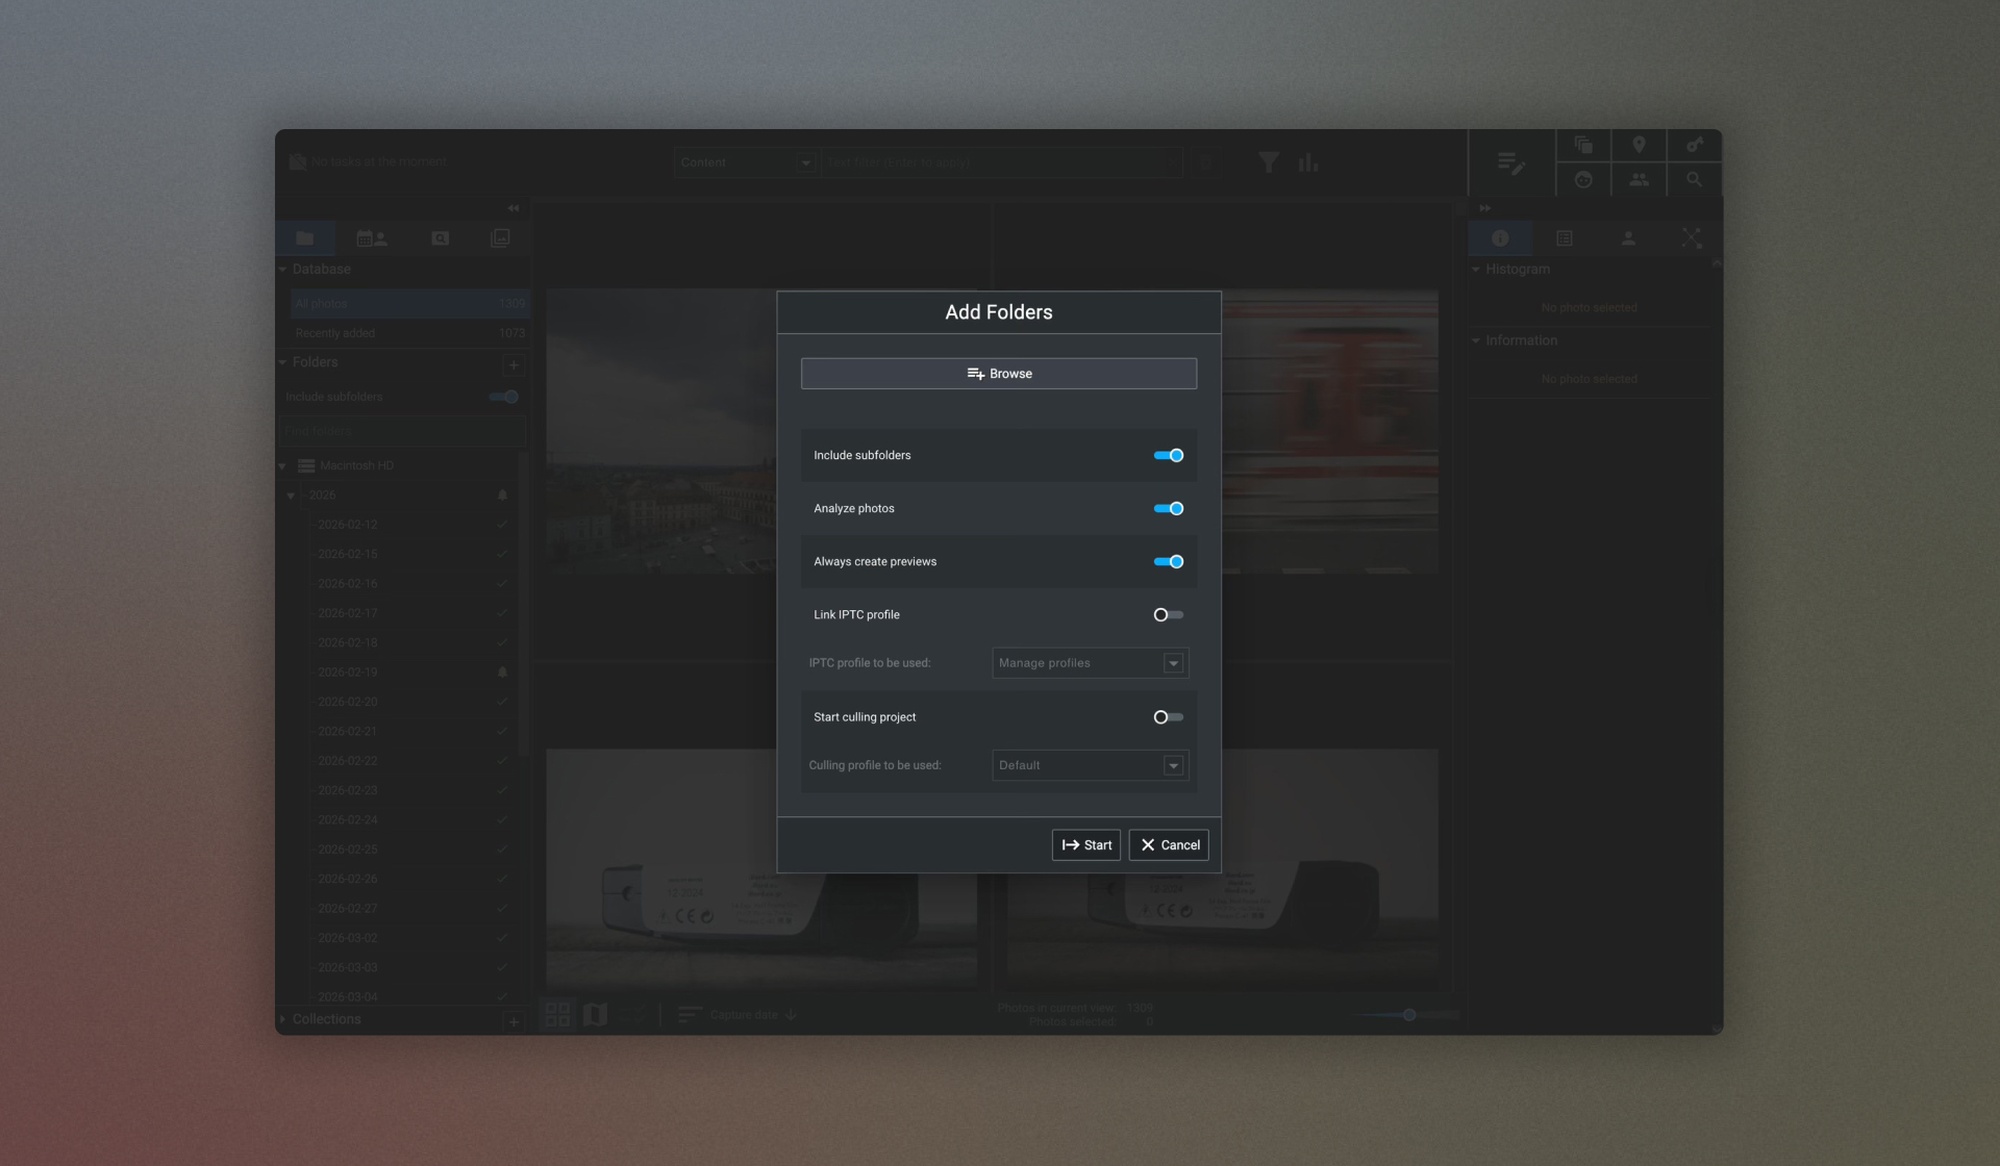
When you add your folders into Excire Foto, or every time you add new folders, it’ll analyse the photos within, so they’ll be ready to use with Excire Foto’s powerful AI tools. You don’t need to add everything at once, either; you can just add the folders you need and add more folders at any time.

Sound good so far? Read on to learn more about Excire’s game-changing search and culling tools:
The 7 Key Search Features of Excire Foto 2027 to Find Photos in Your Collection
Excire Foto offers 7 AI-driven search tools for locating images in your collection, and, as I mentioned above, they are extremely quick and intuitive to use. You can access all of these search tools from the top-right corner of Excire Foto or from the Find menu.
All of Excire Foto’s tools have been developed specifically for photographers to quickly find the images they need, with sophisticated visual and textual search options. So, for example, if you’re an event photographer and need to find all images of a specific person from a shoot, you can do that easily with the Find people search tool. Or, if you're looking for images from a particular location, you can use the Find by GPS tool. If you want to find a set of photos that contain specific visual elements (like a particular colour, objects, styles, or even moods), you can use the Find by text prompt or similar image search tools to locate those within your collection; no more trawling your library for hours and getting lost in subfolders within subfolders!
You can also combine any of these search tools to create a deeper, multi-layered search; think of them as a "toolbox" at your disposal.
Find by text prompt, Find by keyword, & Find by GPS (Perfect for large collections of images)
For photographers with an extensive photo library, the Find by keyword, Find by text prompt, and Find by GPS search tools available in Excire Foto work brilliantly, regardless of the types of images, subjects, or genres you shoot.
In the example below, when I used the Find by text prompt search tool with the word “Seascape” as the prompt, Excire Foto returned all of my seascapes from my collection in a couple of seconds. The Find by text prompt is unique in how it does a deep visual analysis of your image catalogue based on the text, and you can use highly descriptive terms to find images, for example, windswept mountain pass on a cloudy day. Give it a try and see!


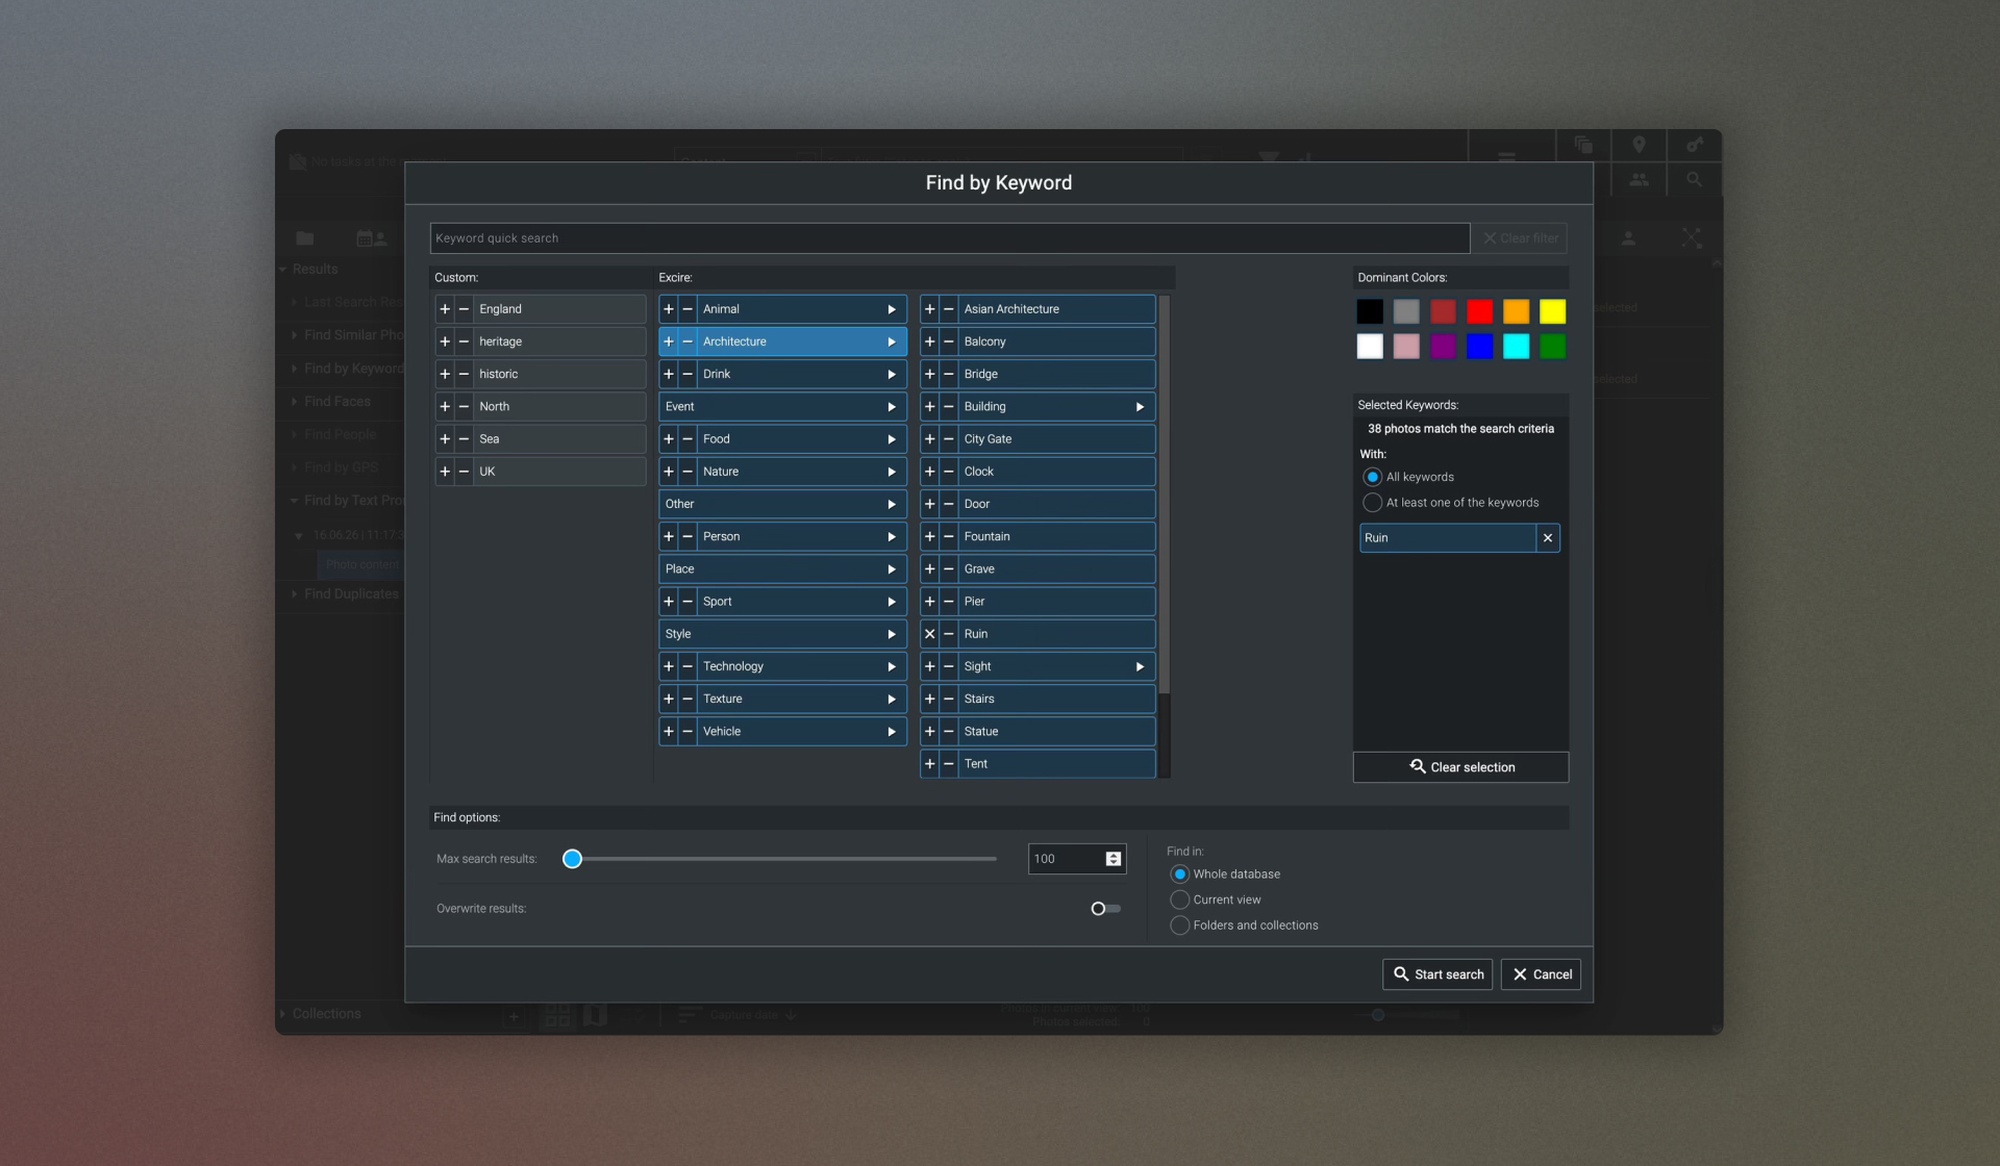
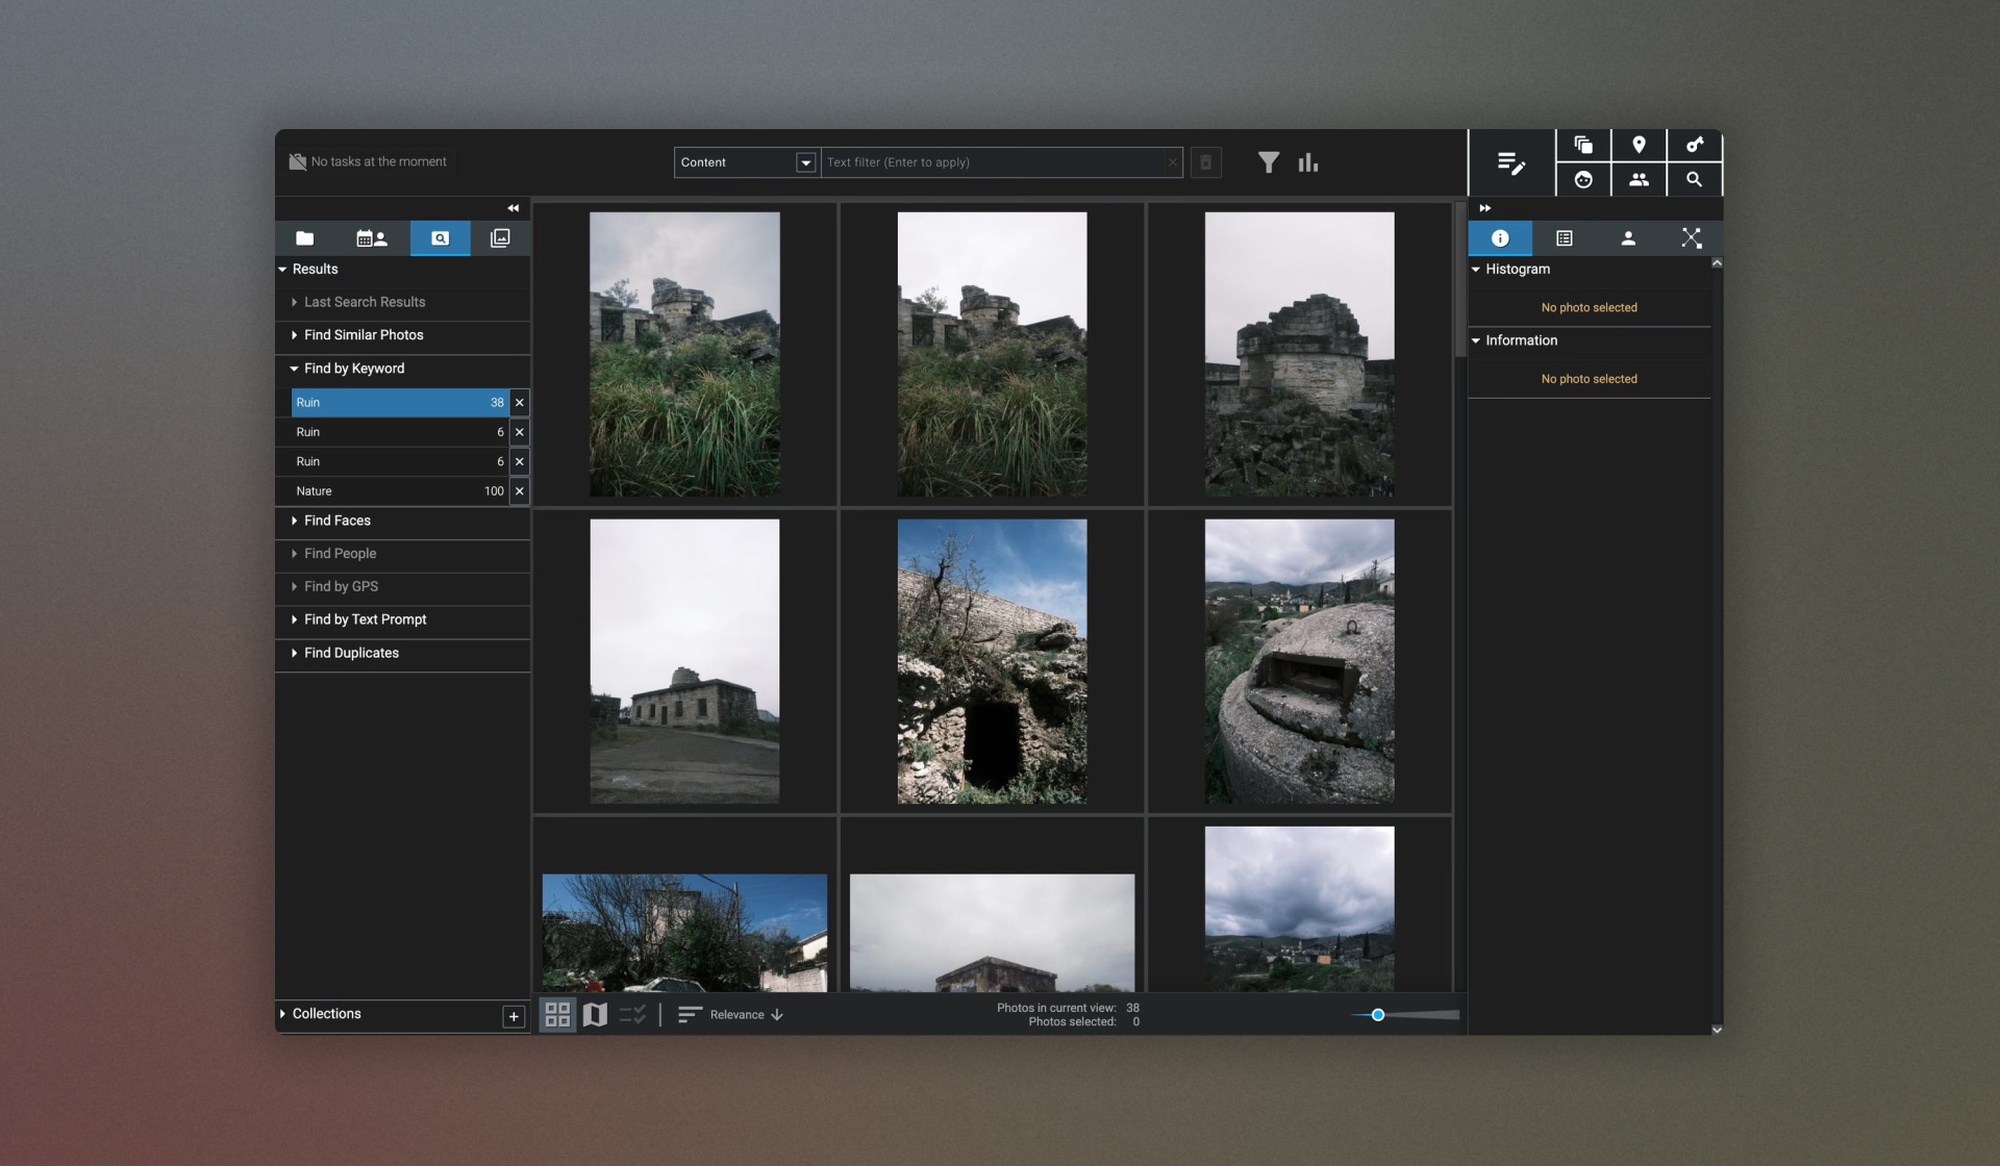
Taking the same approach with the Find by keyword search tool, you can use Excire’s series of pre-generated keywords based on typical photographic subjects, visual elements and themes to identify those pictures in your collection.
You can be as broad or as specific as you require with these, too, to really define your search. For example, I searched for images in my collection of ruins using the “Architecture” keyword, which returned a wider range of results. Then I refined that with the additional keyword “Ruins", which in turn located the very specific matching images within my collection in a matter of seconds.
Another really neat search feature is the Find by GPS tool, which lets you search for photos in your collection based solely on shoot location.
A prerequisite for using this search tool is that you have GPS metadata embedded in your images. You can also use Excire to add this metadata with the Excire metadata editor, which you can do in batches for time-saving; most smartphone images automatically record that information. The same goes for DSLR and mirrorless cameras; you may need to adjust a setting on your camera beforehand to ensure GPS metadata is enabled.
To look for images in your collection based on where you had captured them, all you need to do is drag and drop on the map, and you can set a radius for how far from that point you want to search. If you need assistance, you can also use additional filters to locate the country and city.
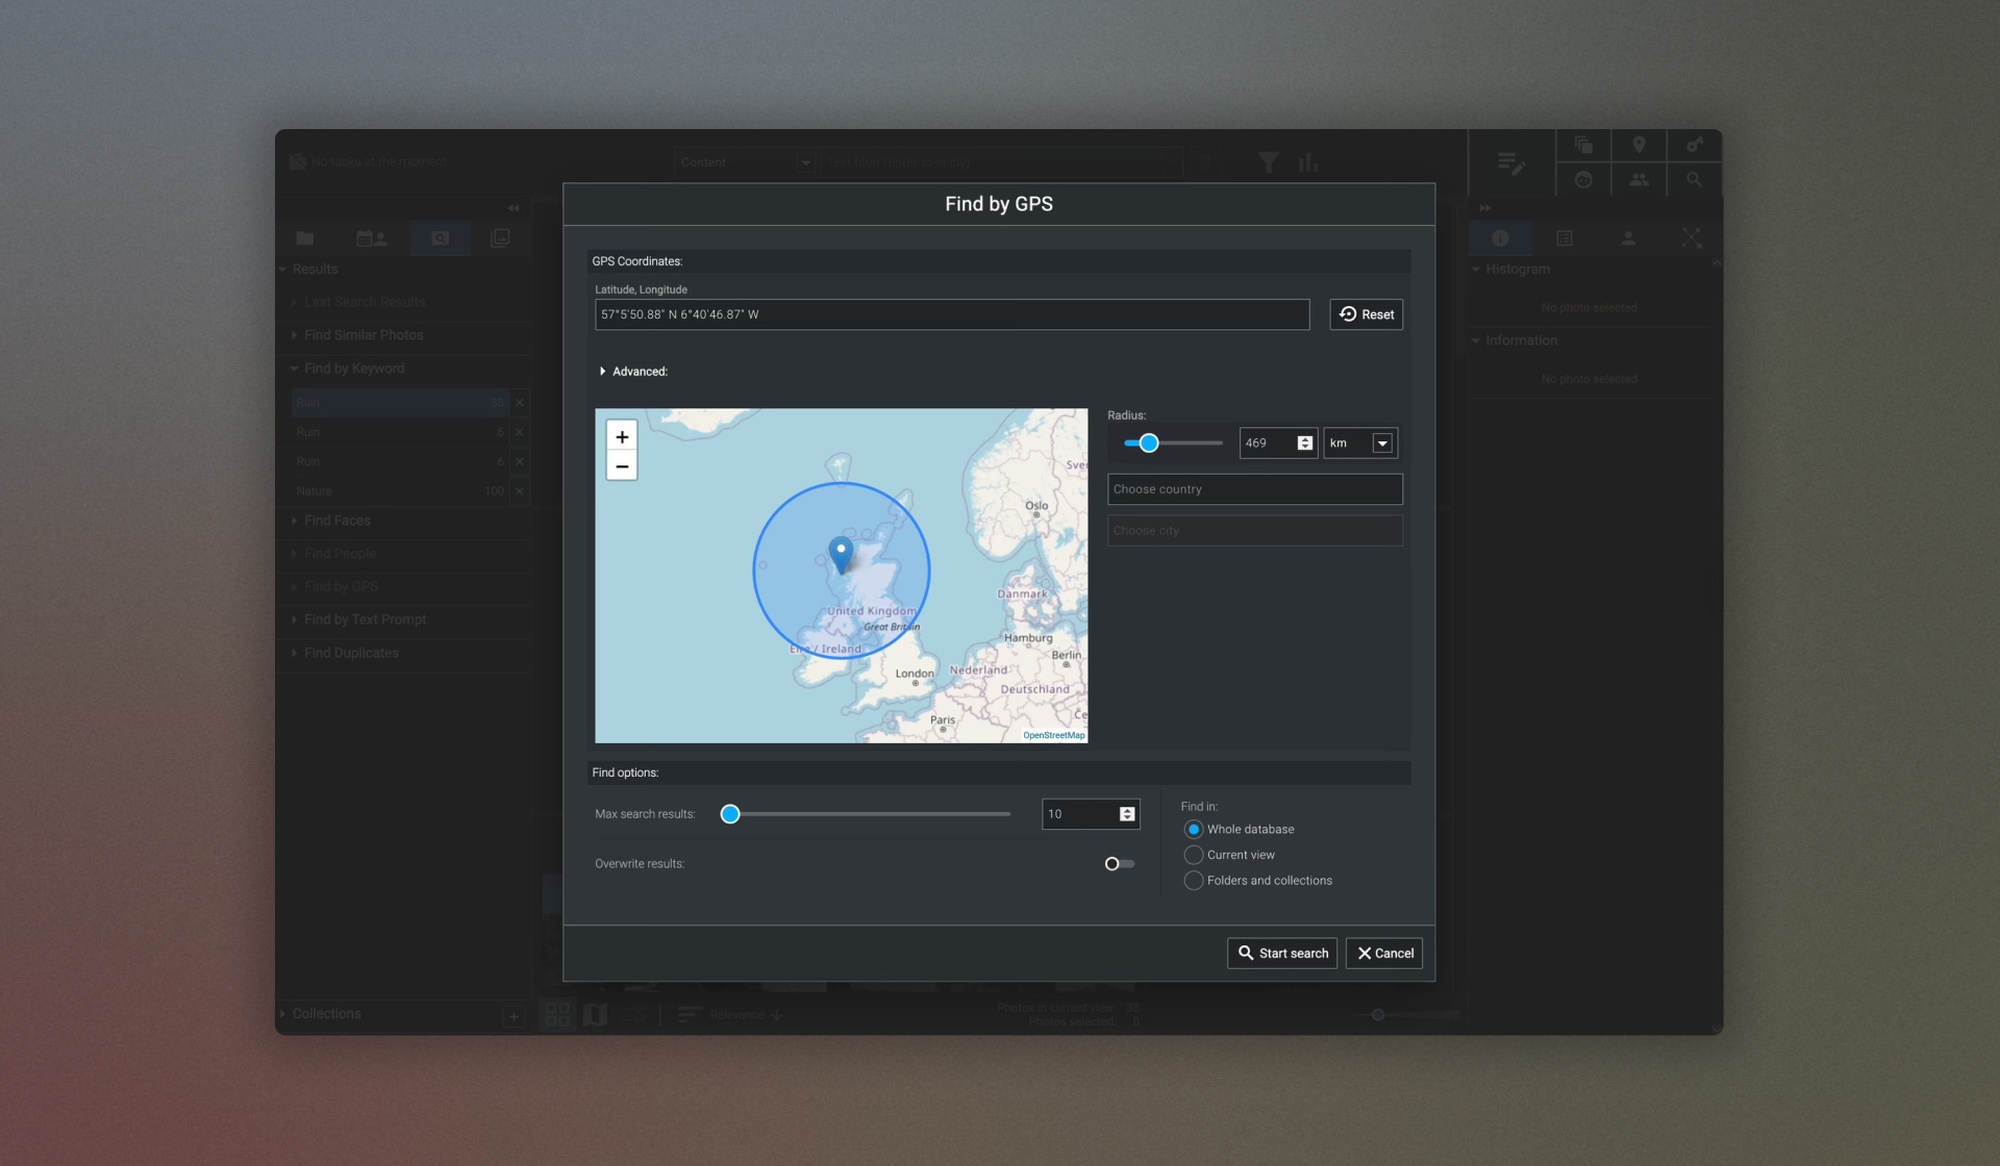
The GPS search tool is really useful if you want to find everything you’ve taken in a particular place. For example, if you've been visiting the same spot for landscape photography year after year, you can find all your photos and group them with the GPS search tool!
Find similar images and Find duplicates (fantastic for every type of photographer)
These two search tools will help you no matter what type of images you’re working with.
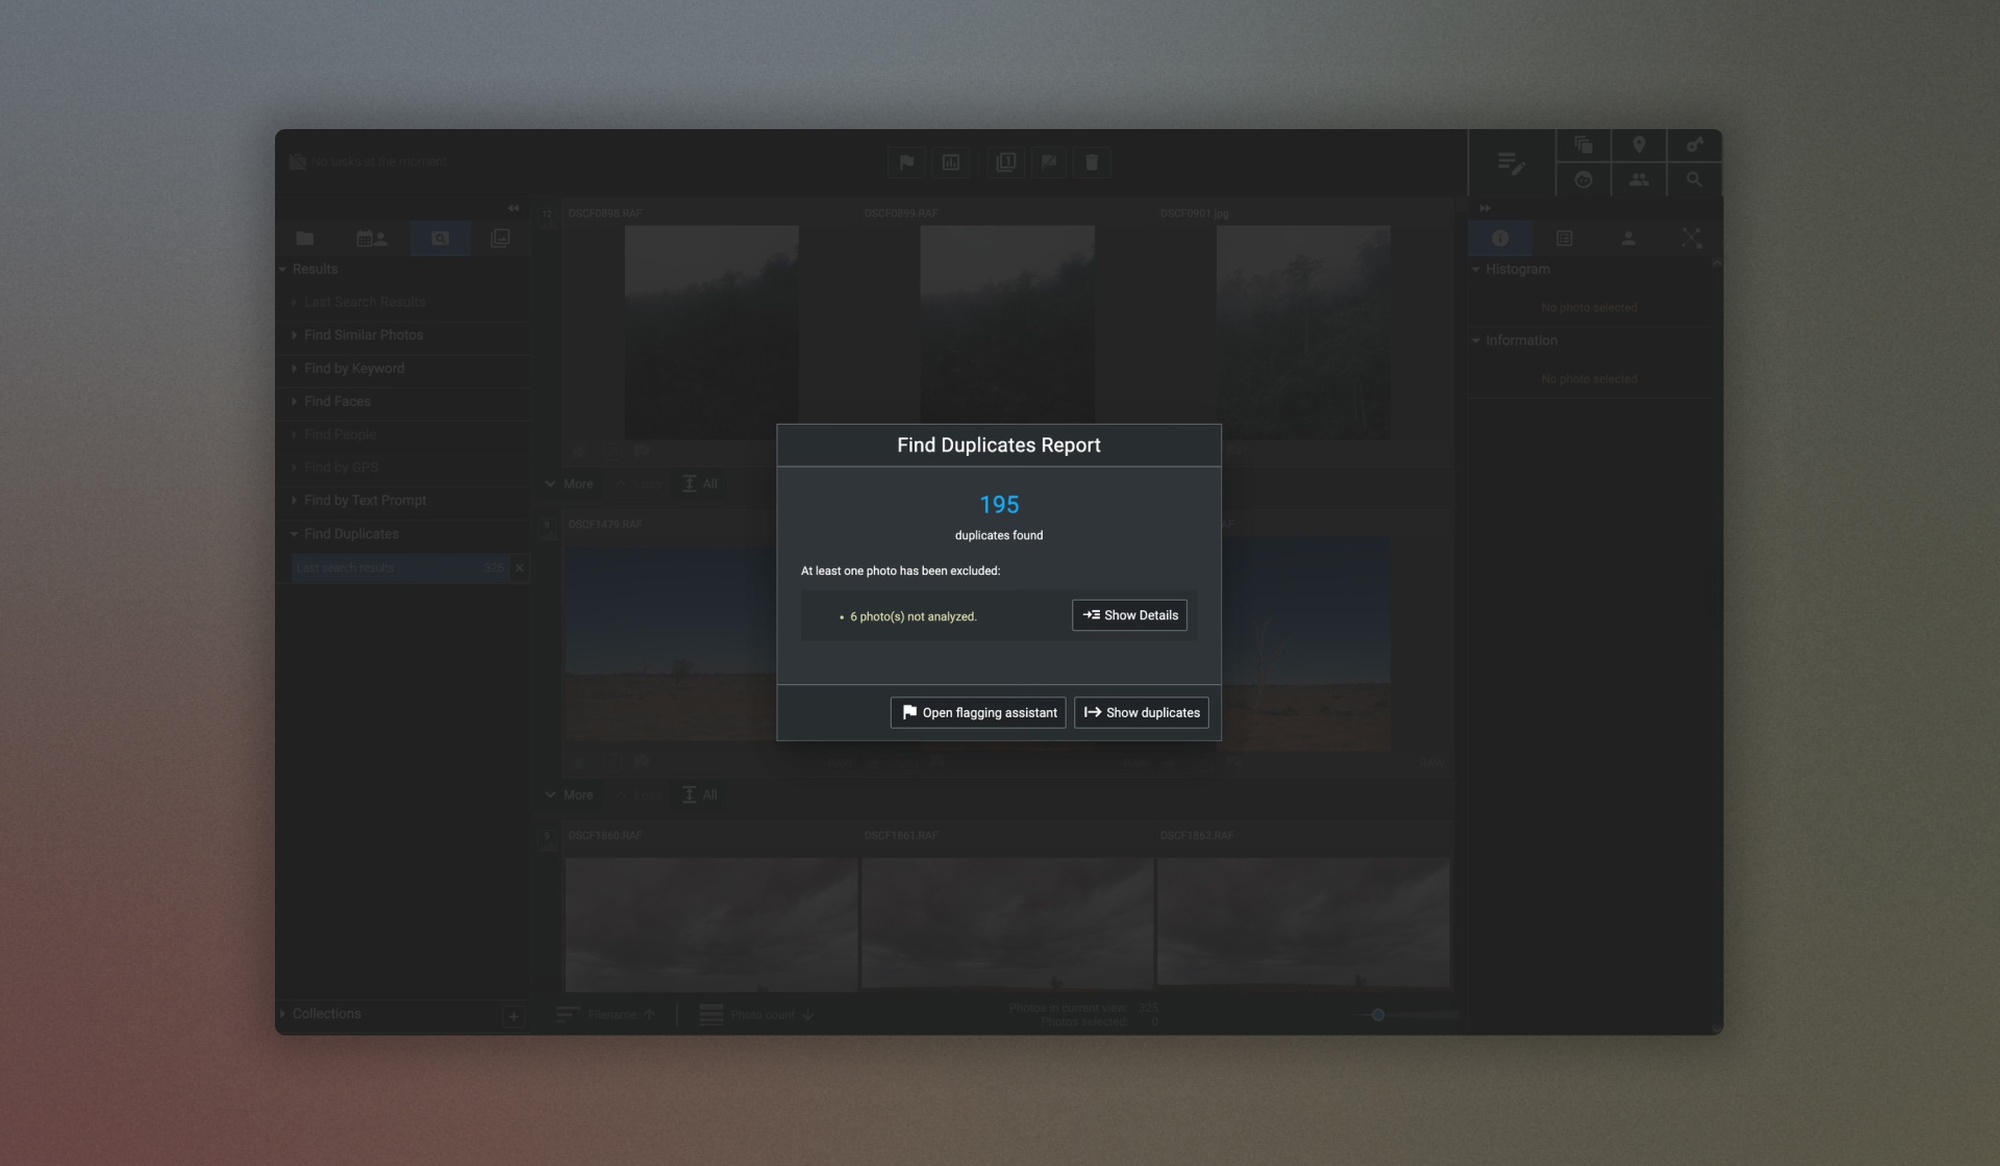
First, with the Find duplicates search tool, you can scan your collection to identify any exact duplicates, near duplicates or identify image sequences or bursts in your image folders. And for the near duplicates, you can be as strict or as loose as you like with the Similarity threshold.
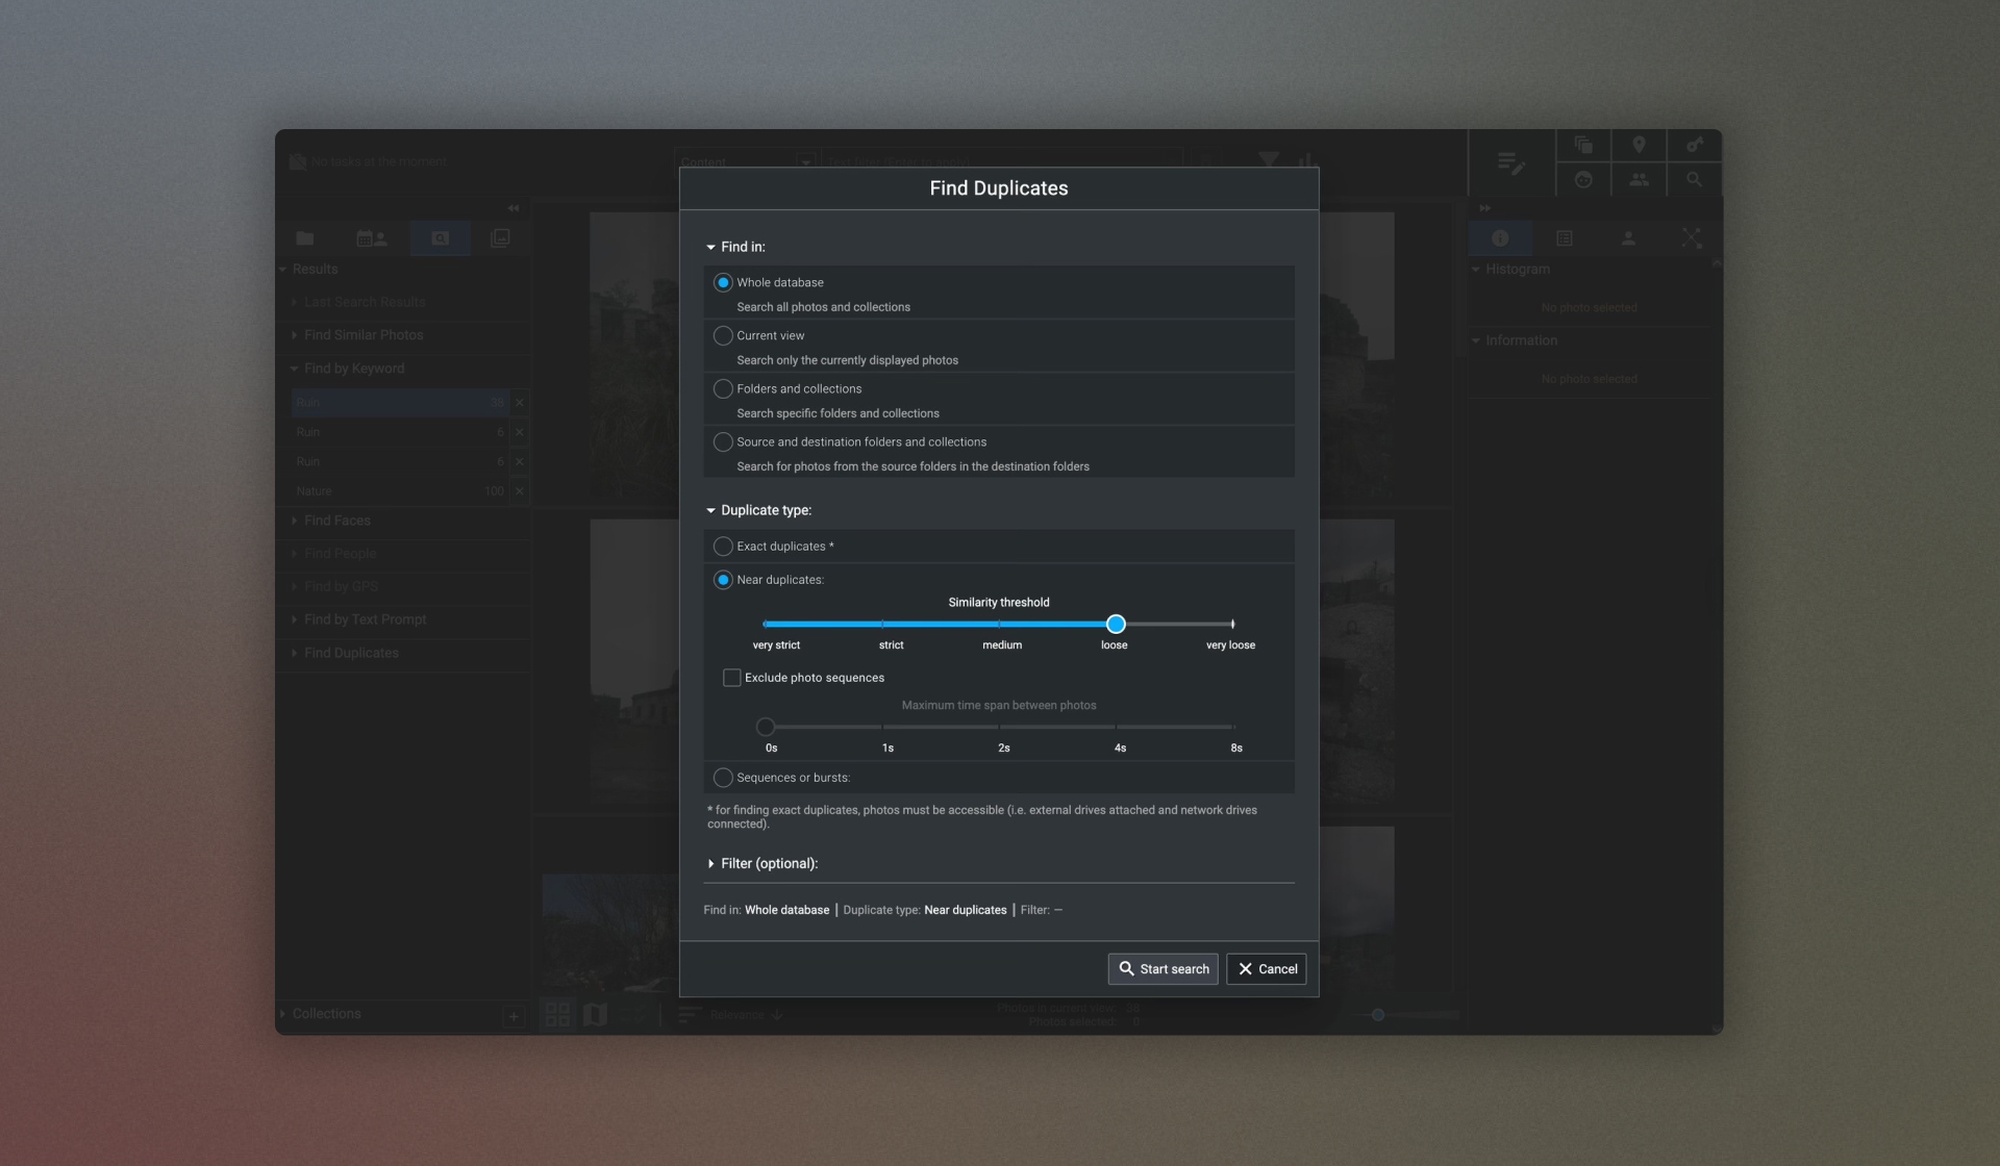
It’s also a really good idea, for image library storage and housekeeping, to avoid harbouring too many unnecessary duplicates within your files and folders.
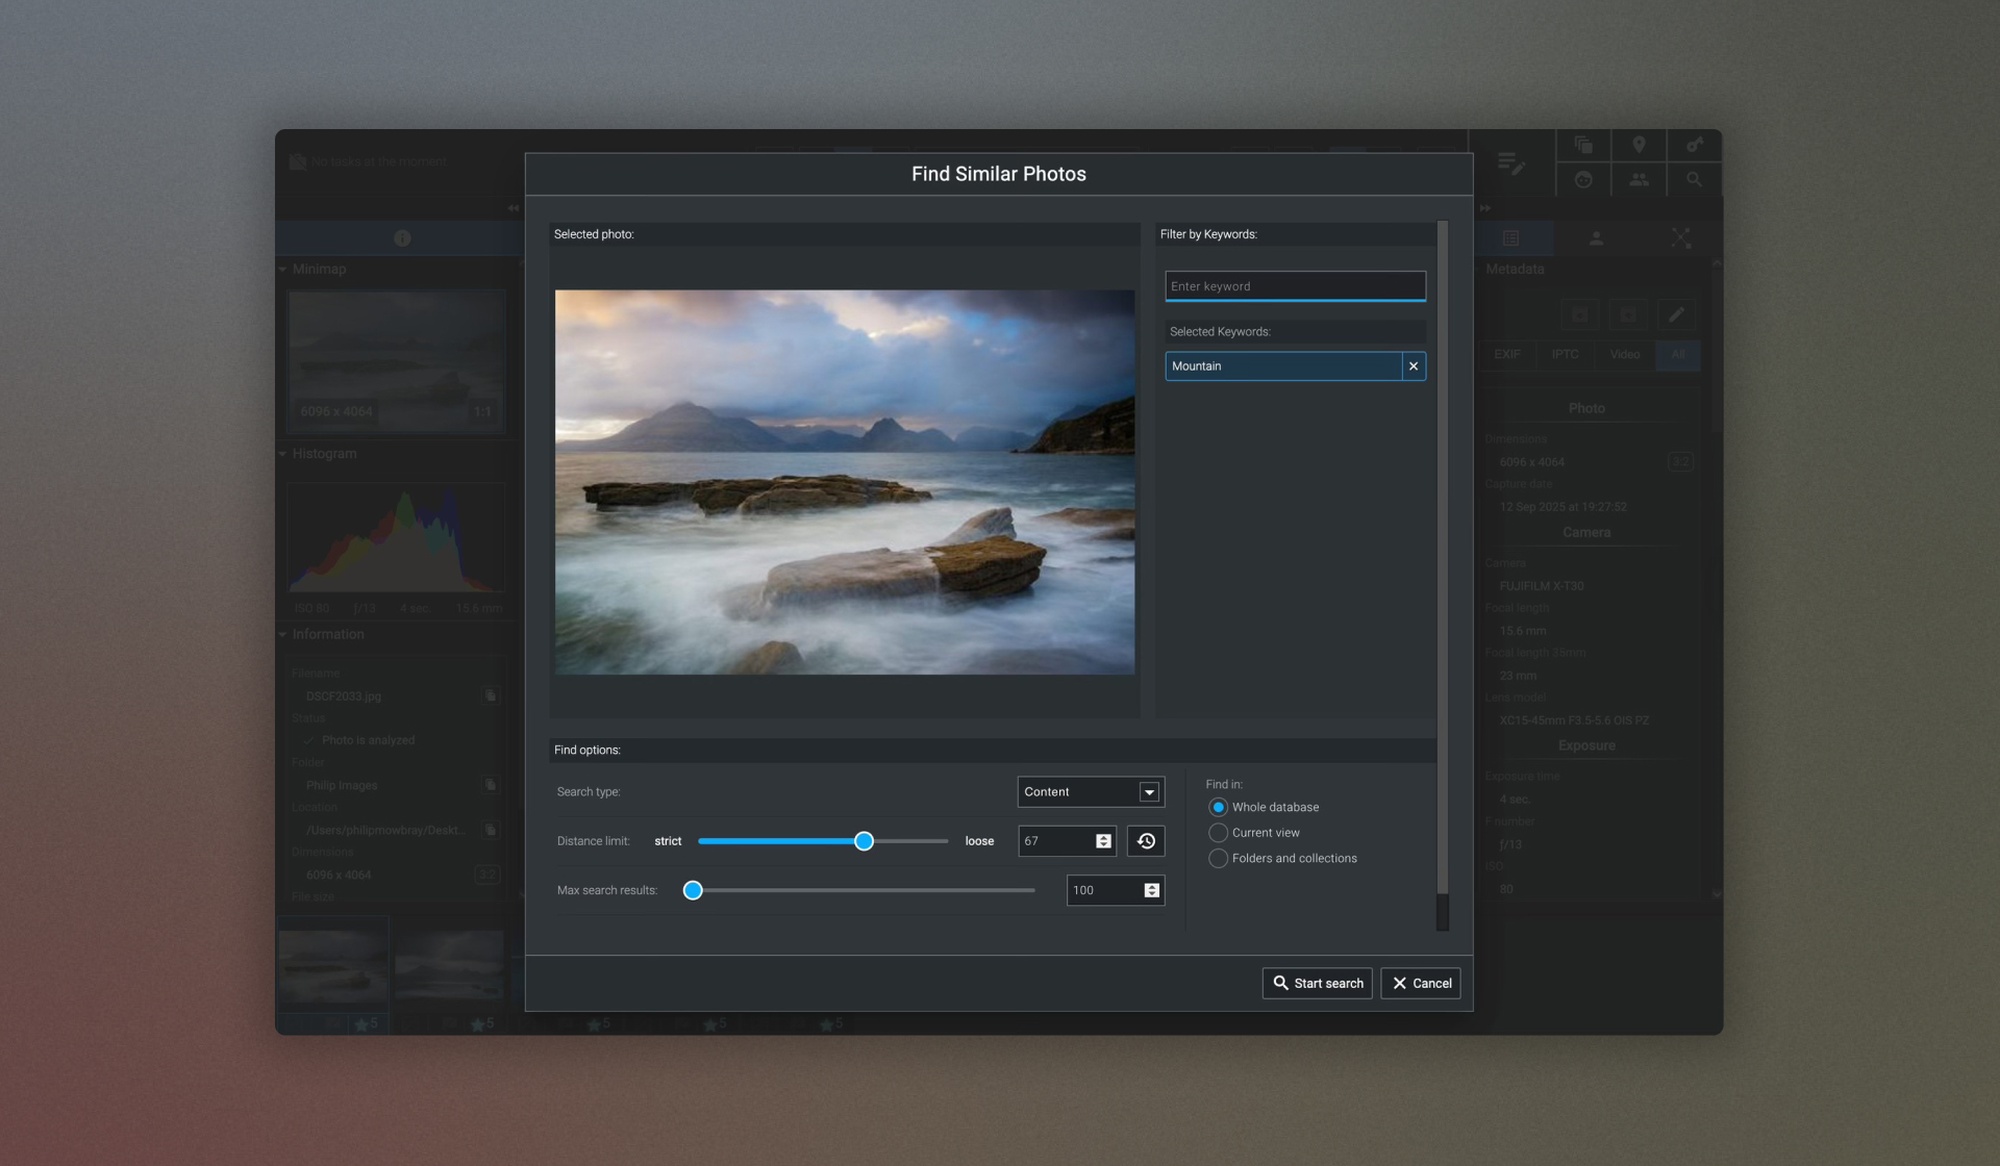
With the Find similar photos, this search tool will take your images (up to 10 at a time) and scan the rest of the collection to find images that look similar or feature similar key visual features. This search tool is particularly useful if you’re looking for all of your images featuring the same type of visual elements.
Below, I took one of my images, from the Isle of Skye, Scotland, and within a couple of seconds, scanned my archive to find similar results. Again, you’ve also got the option to tweak how strict you want the similar images to be, i.e. very similar, or a loose similarity. These options are great if you’re looking for similar images, such as those featuring a particular colour palette.

Find faces, Find people search tools (essential for event and portrait photographers)
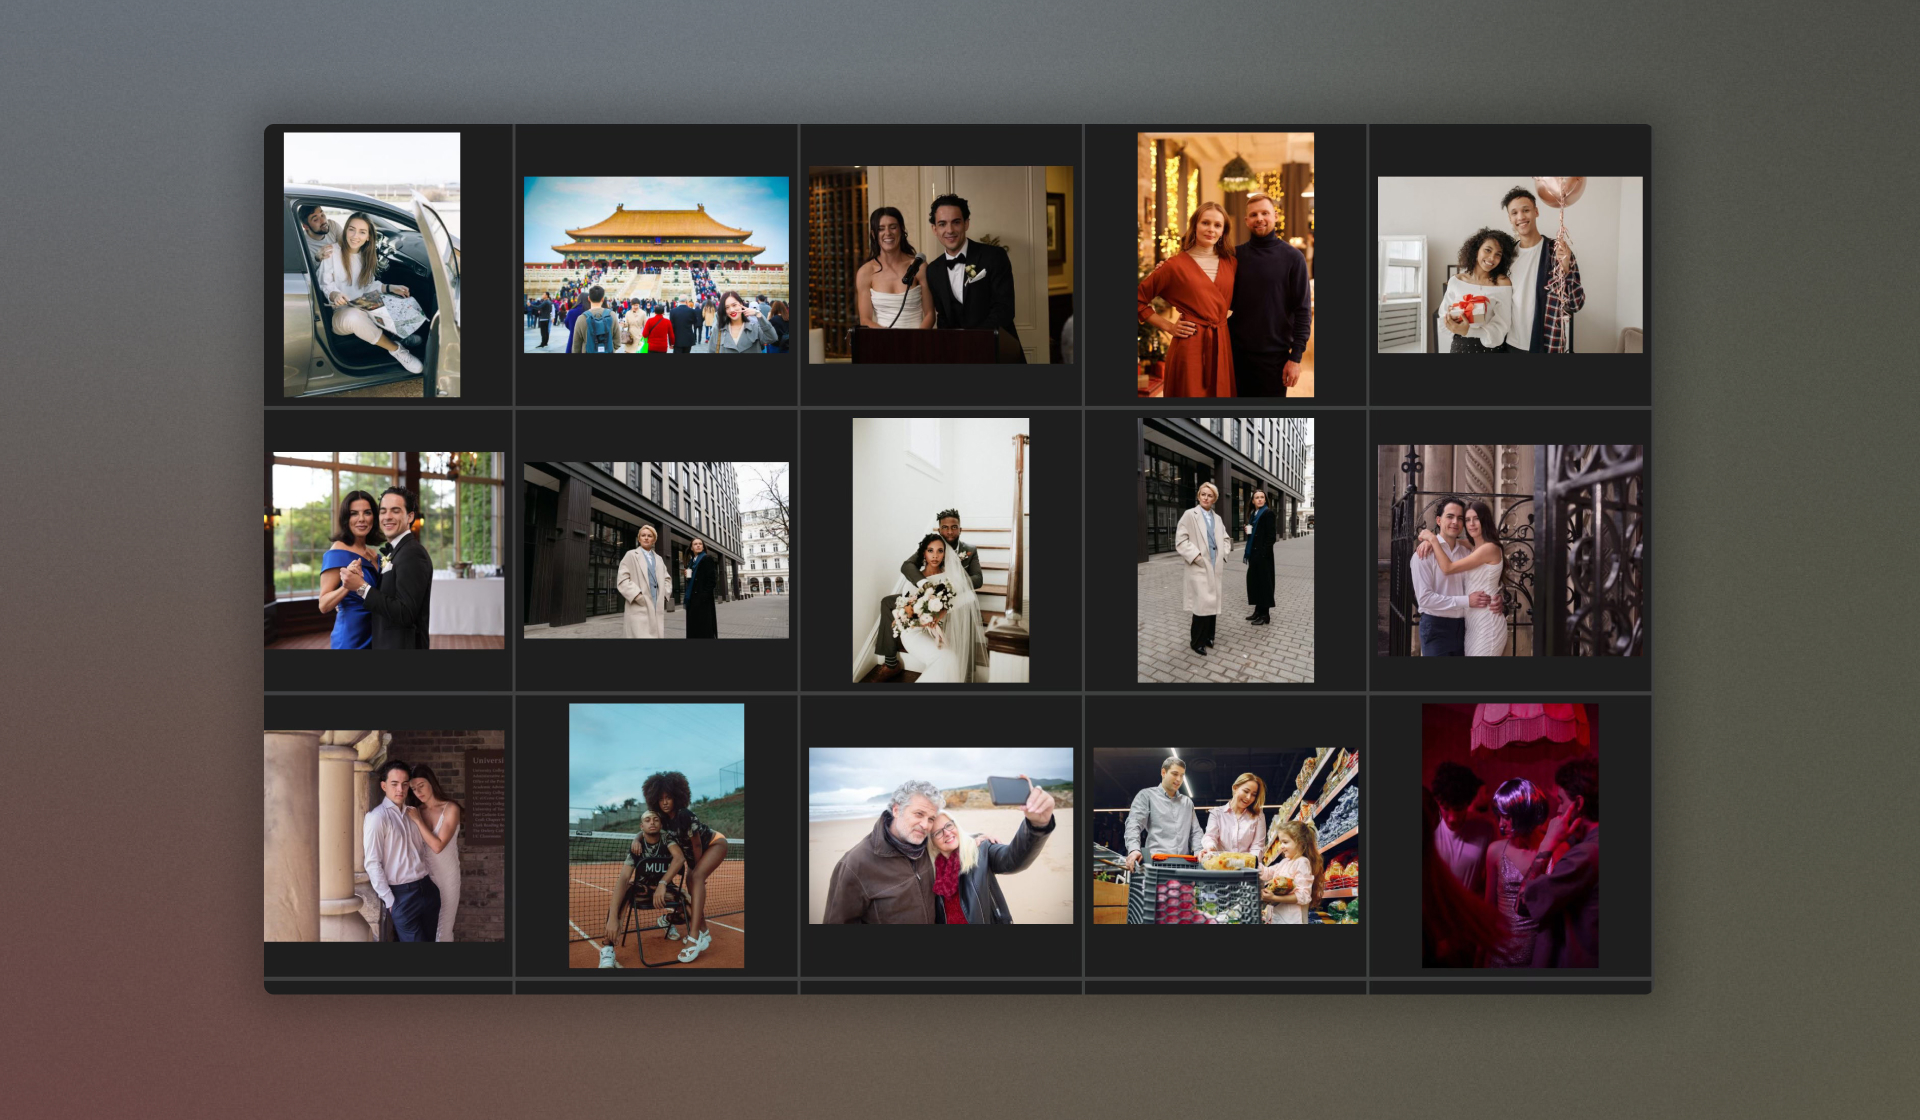
If you’re an event, sports, wedding photographer, or any type of portrait photographer with quick turnarounds, the search tools that I believe you’re going to find the most beneficial (and also very impressive) are the Find faces and Find people search tools.
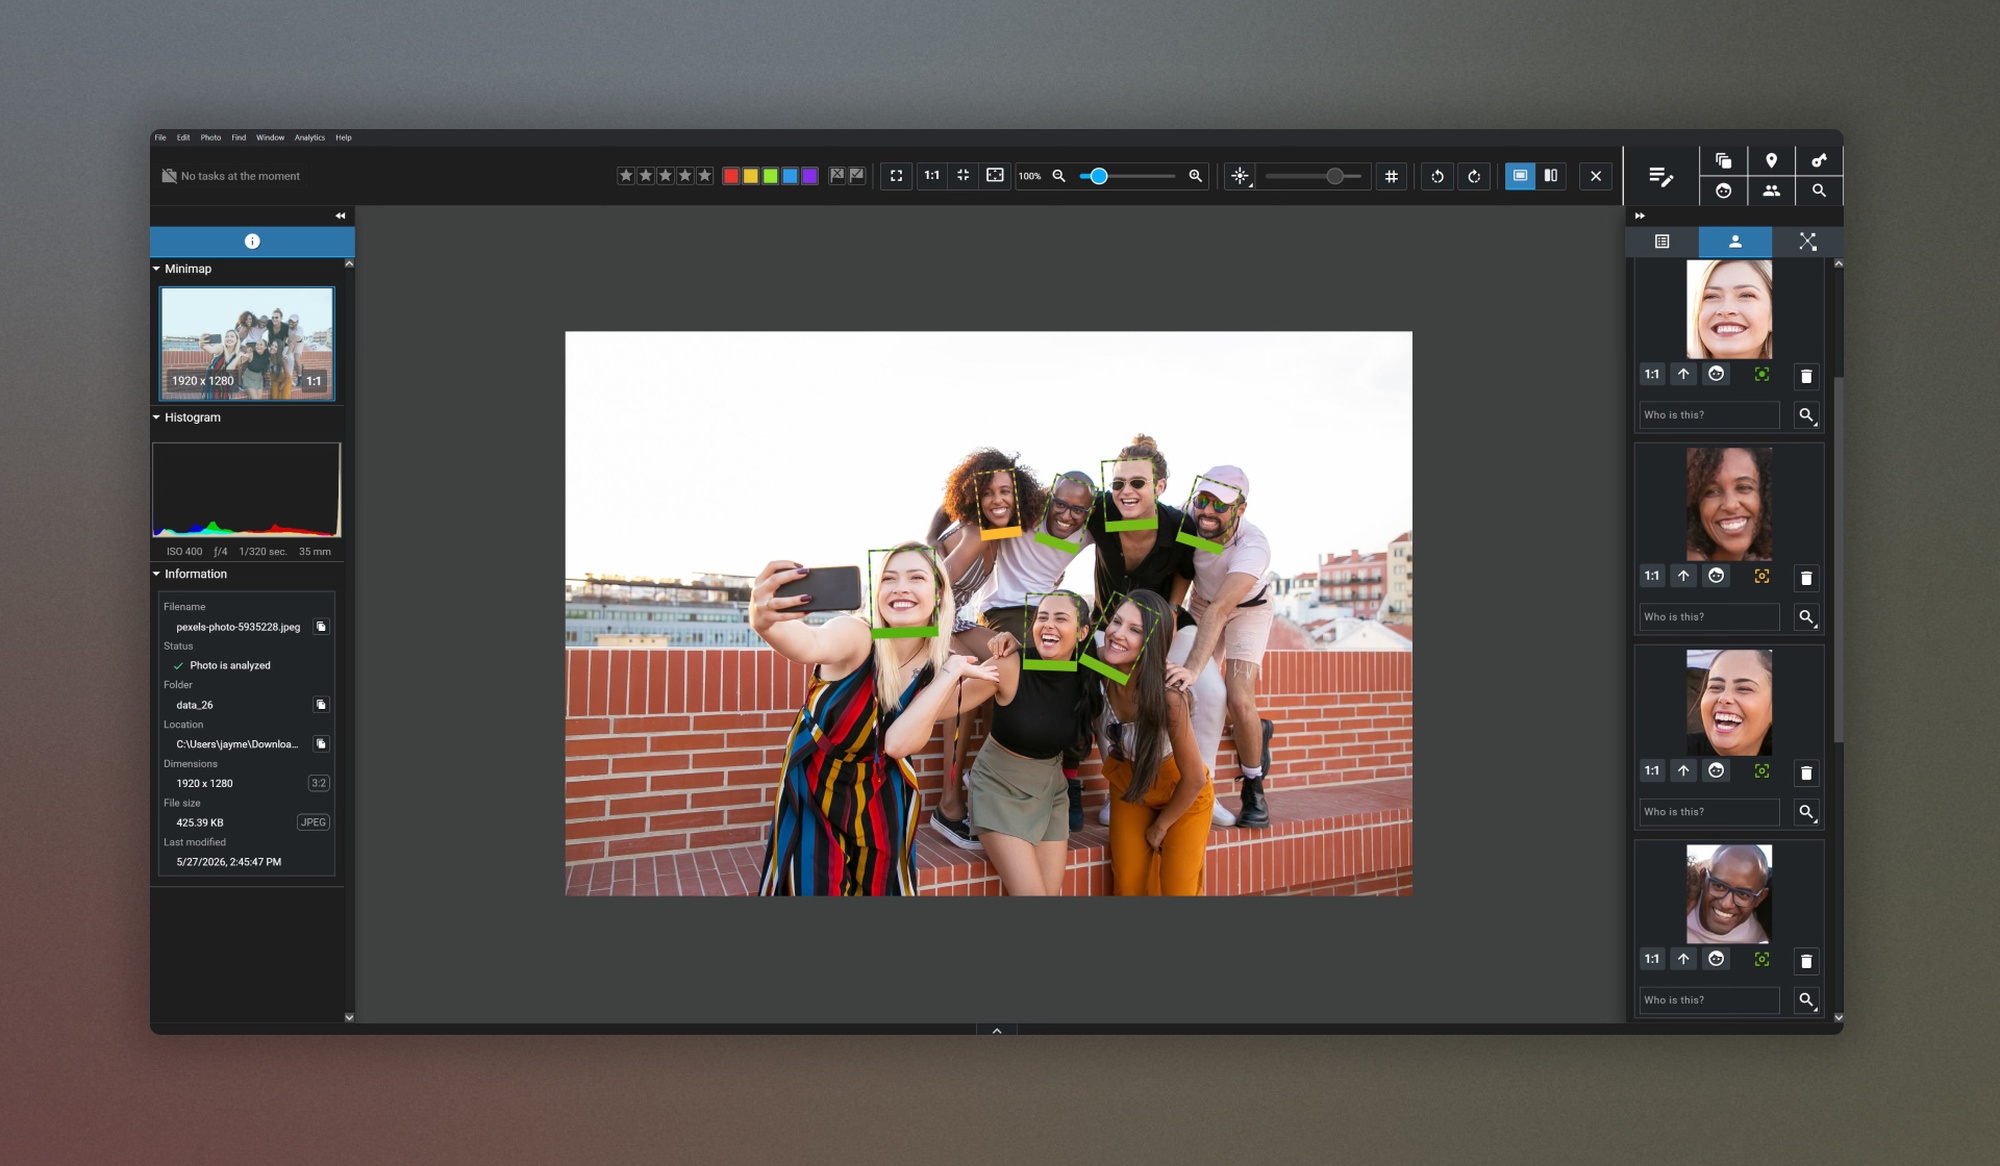
With these tools, you can search for images in your collection based on a range of common portraiture elements so that you can locate images of individuals within your collection very quickly, and you can also use a wide range of different search parameters for a much more refined result. For example, with the Find faces search tool, the AI can search by age, the number of people in the frame, whether it's an individual portrait or a group shot, whether there are just two people in it, etc.
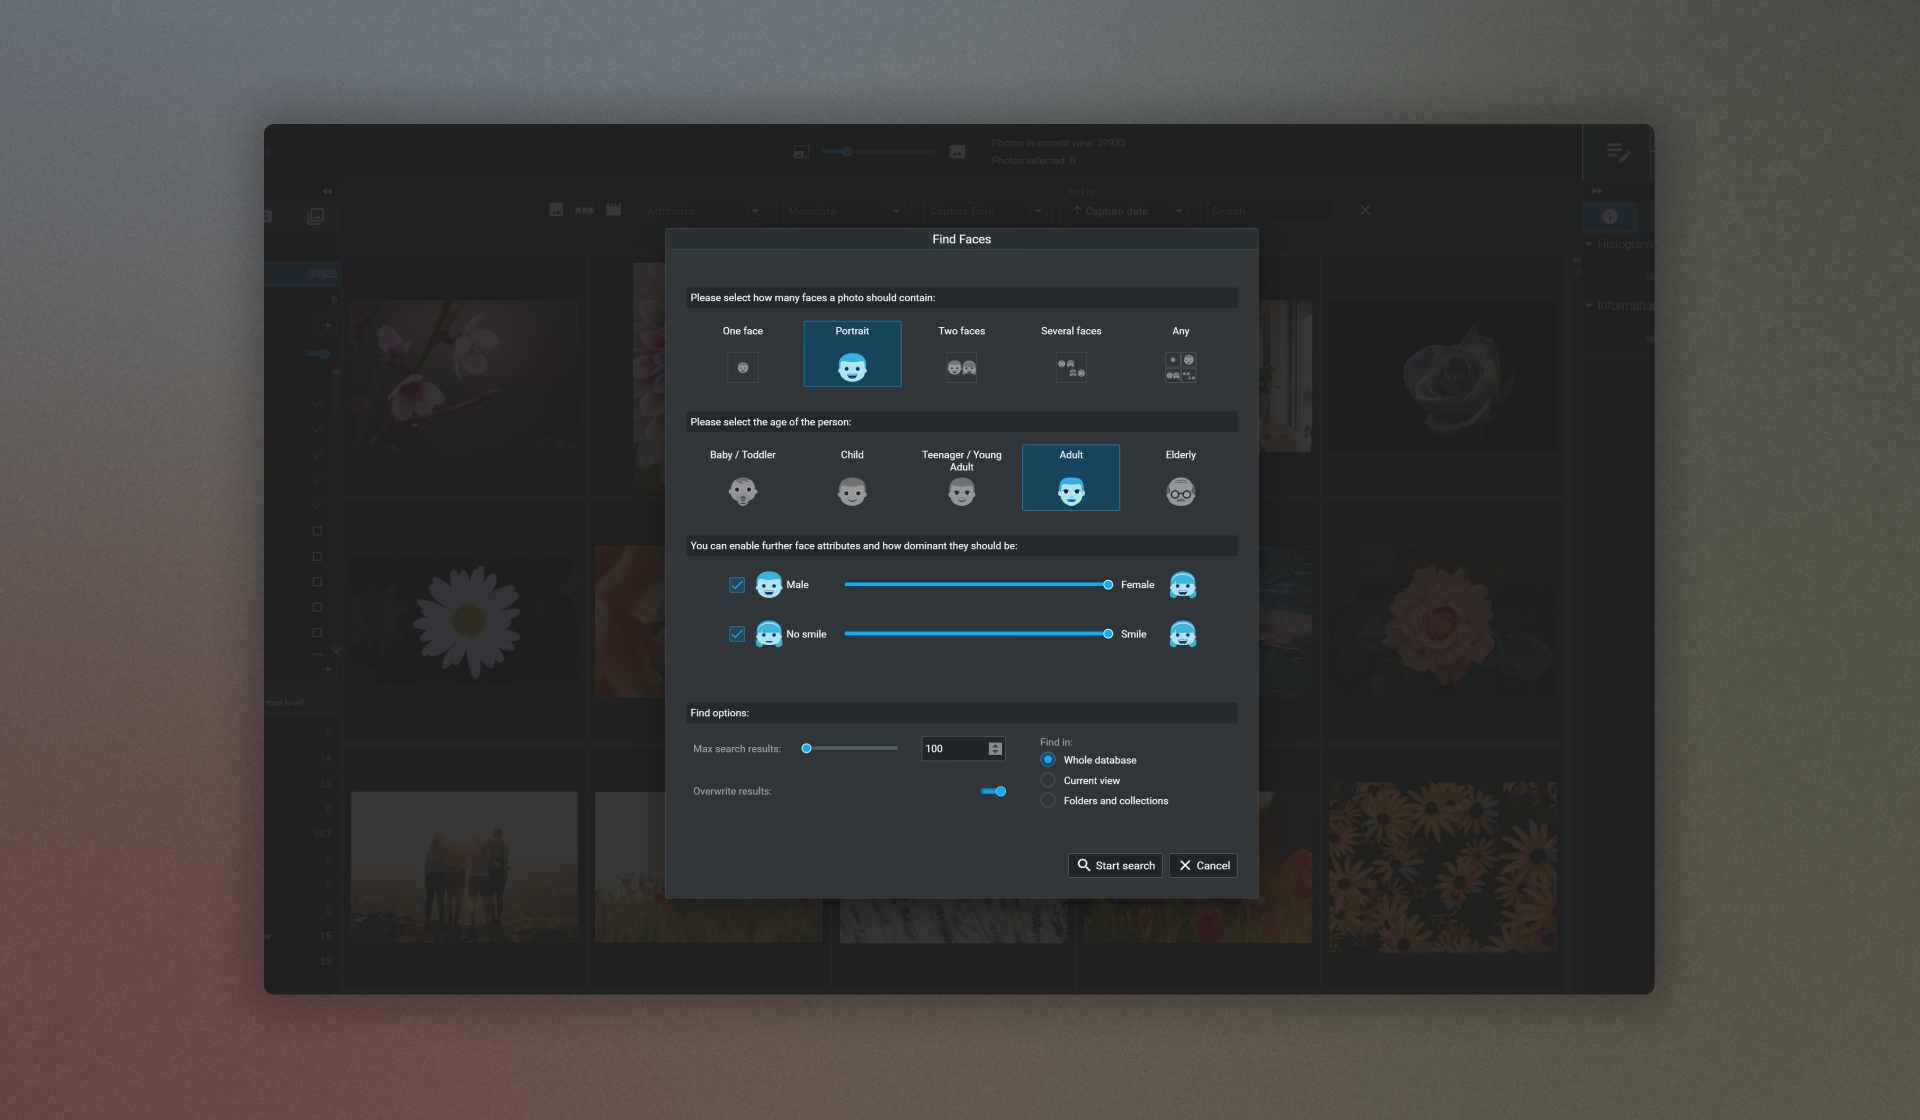
You can even filter your results by whether the people in the images are smiling. Meaning you can quickly find only the best images and disregard any photos you wouldn’t want to send to your clients and customers.
With the Find people search tool, you’re able to select an image, a group of images, or an external image that contains a person or people, and then use the AI-driven facial recognition tools to locate those same people within other photos in your collection and group them, add names, analyse sharpness and check ID. Again, you can refine these results with a broader range of search parameters.
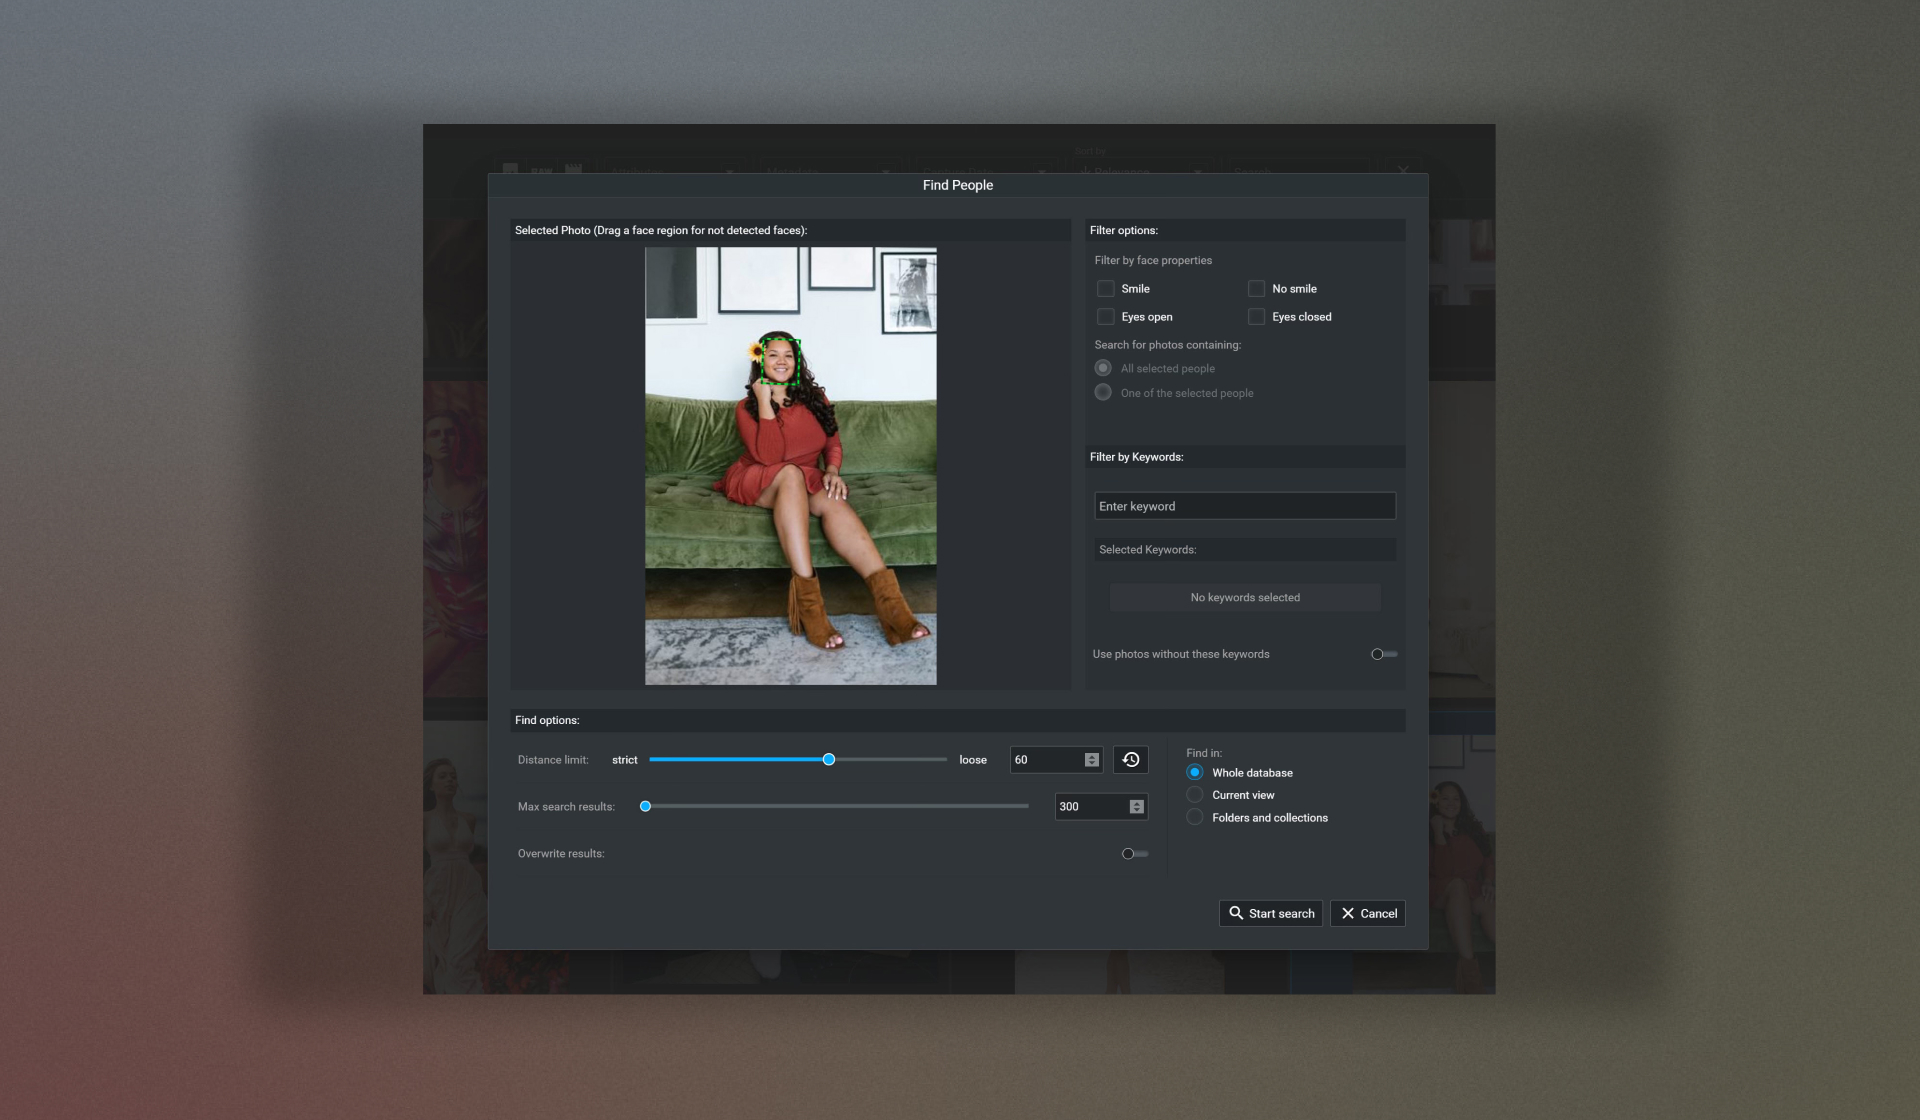

For photographers who need to find images of specific groups or individuals quickly, this search tool is a game-changer.
Get Excire Foto:
Buy Excire Foto 2027, the Excire Search 2026 Lightroom Plugin, or the Excire bundle here.
Culling Your Images Using Excire Foto to Find Your Best Work
Excire Foto’s image culling tools are extraordinary at helping you locate only your best images from a large batch or collection, and again, in record speed.
For those of you who may not be familiar with “culling” in your photography workflow, we mean sorting through an image collection to remove any undesirable photos and organise them, leaving you with only your best shots.
For example, you might have a collection of landscapes that spans years and thousands of images, and you want to find your best shots to get them printed, or post them on your social media profiles or Picfair Store, or you might be an event photographer, and you need to find the best images of your customers. In other words, Excire’s culling tools have been designed so you can get to your keepers fast, and they're perfect for any type of photographer.
As with Excire Foto’s search tools, AI also powers the culling tools, and they excel in finding your best images. They also help you restructure your image database so you can view your photos by place, date, and people, making your photo collection much easier to navigate.
Creating a Culling Project in Excire Foto: Get to your Best Images in Record Time
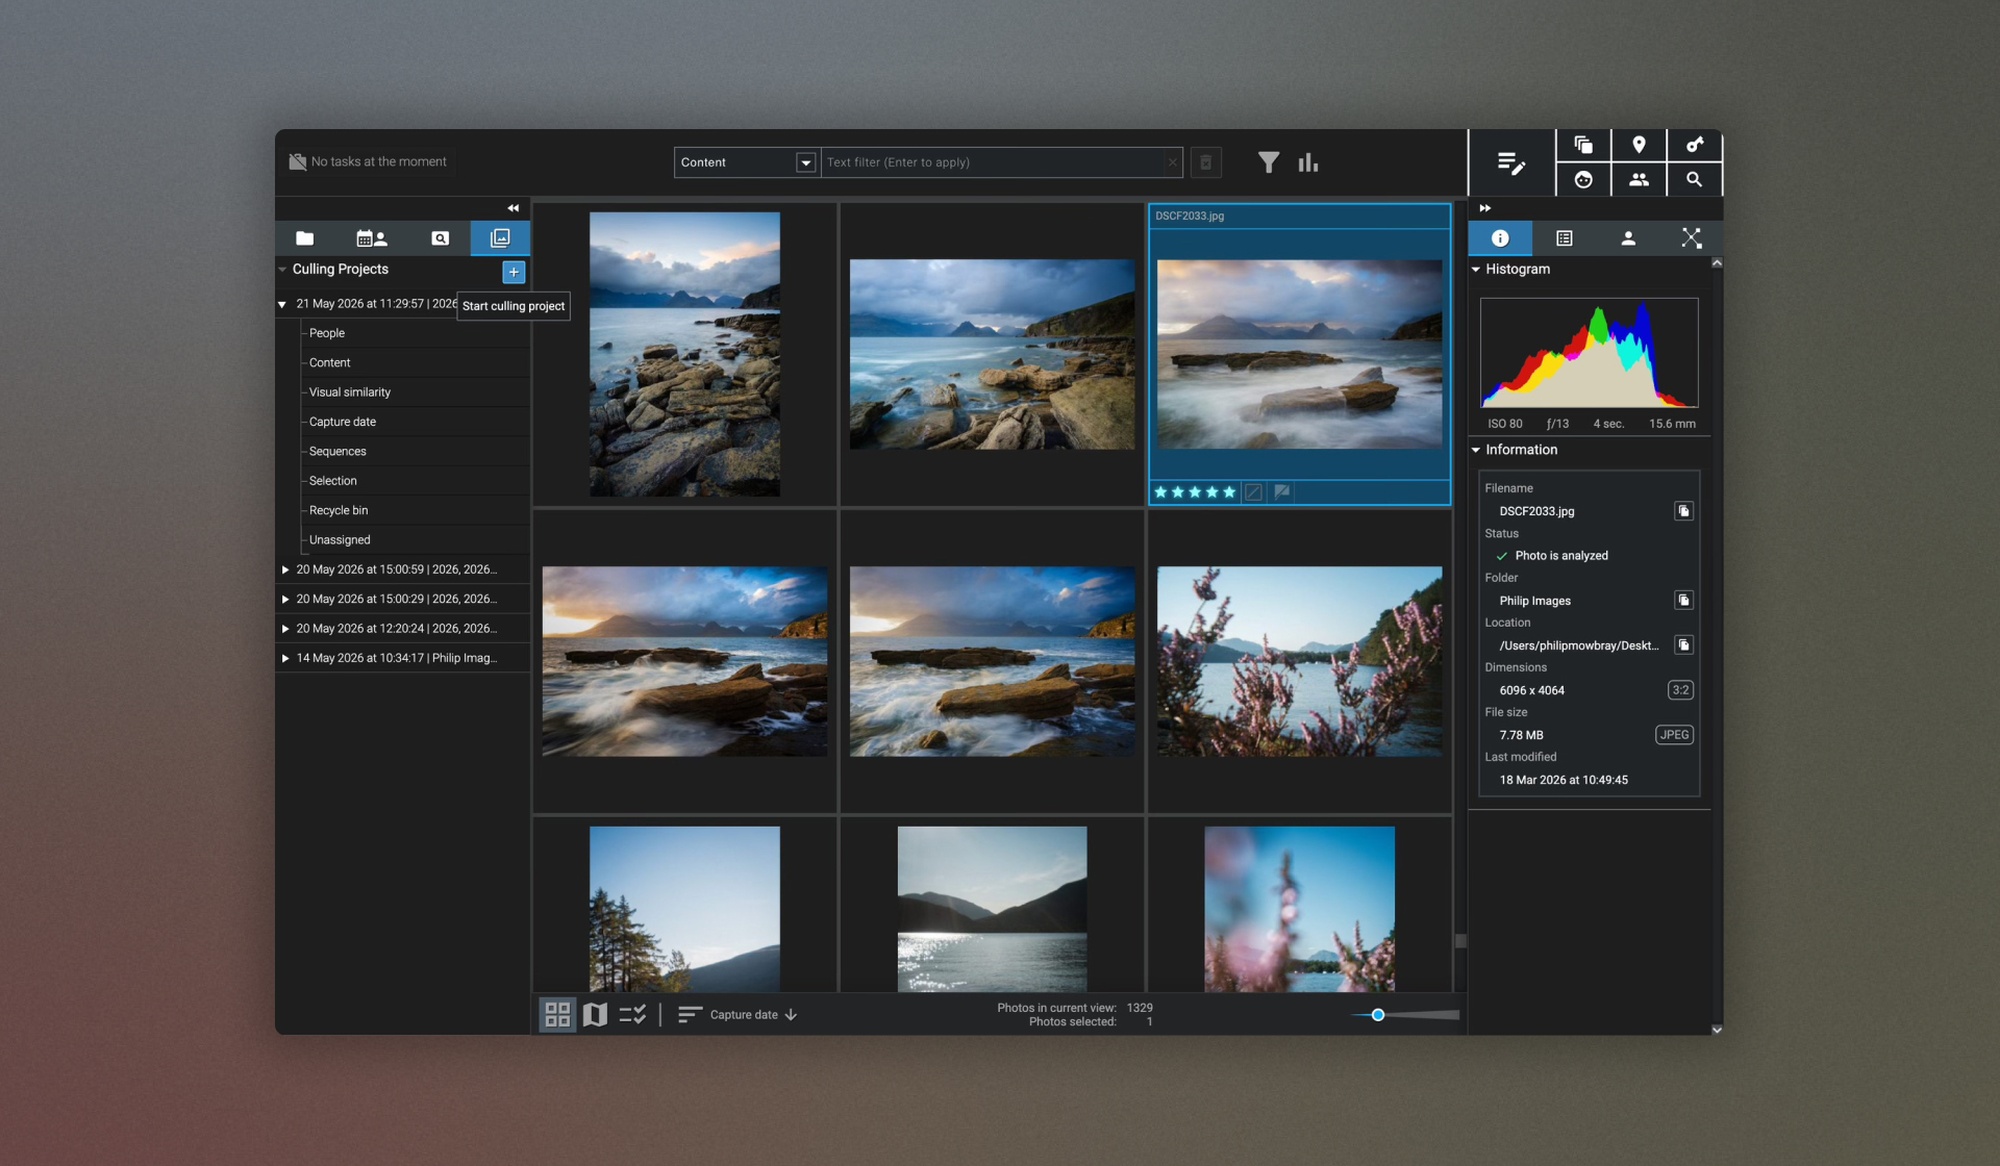
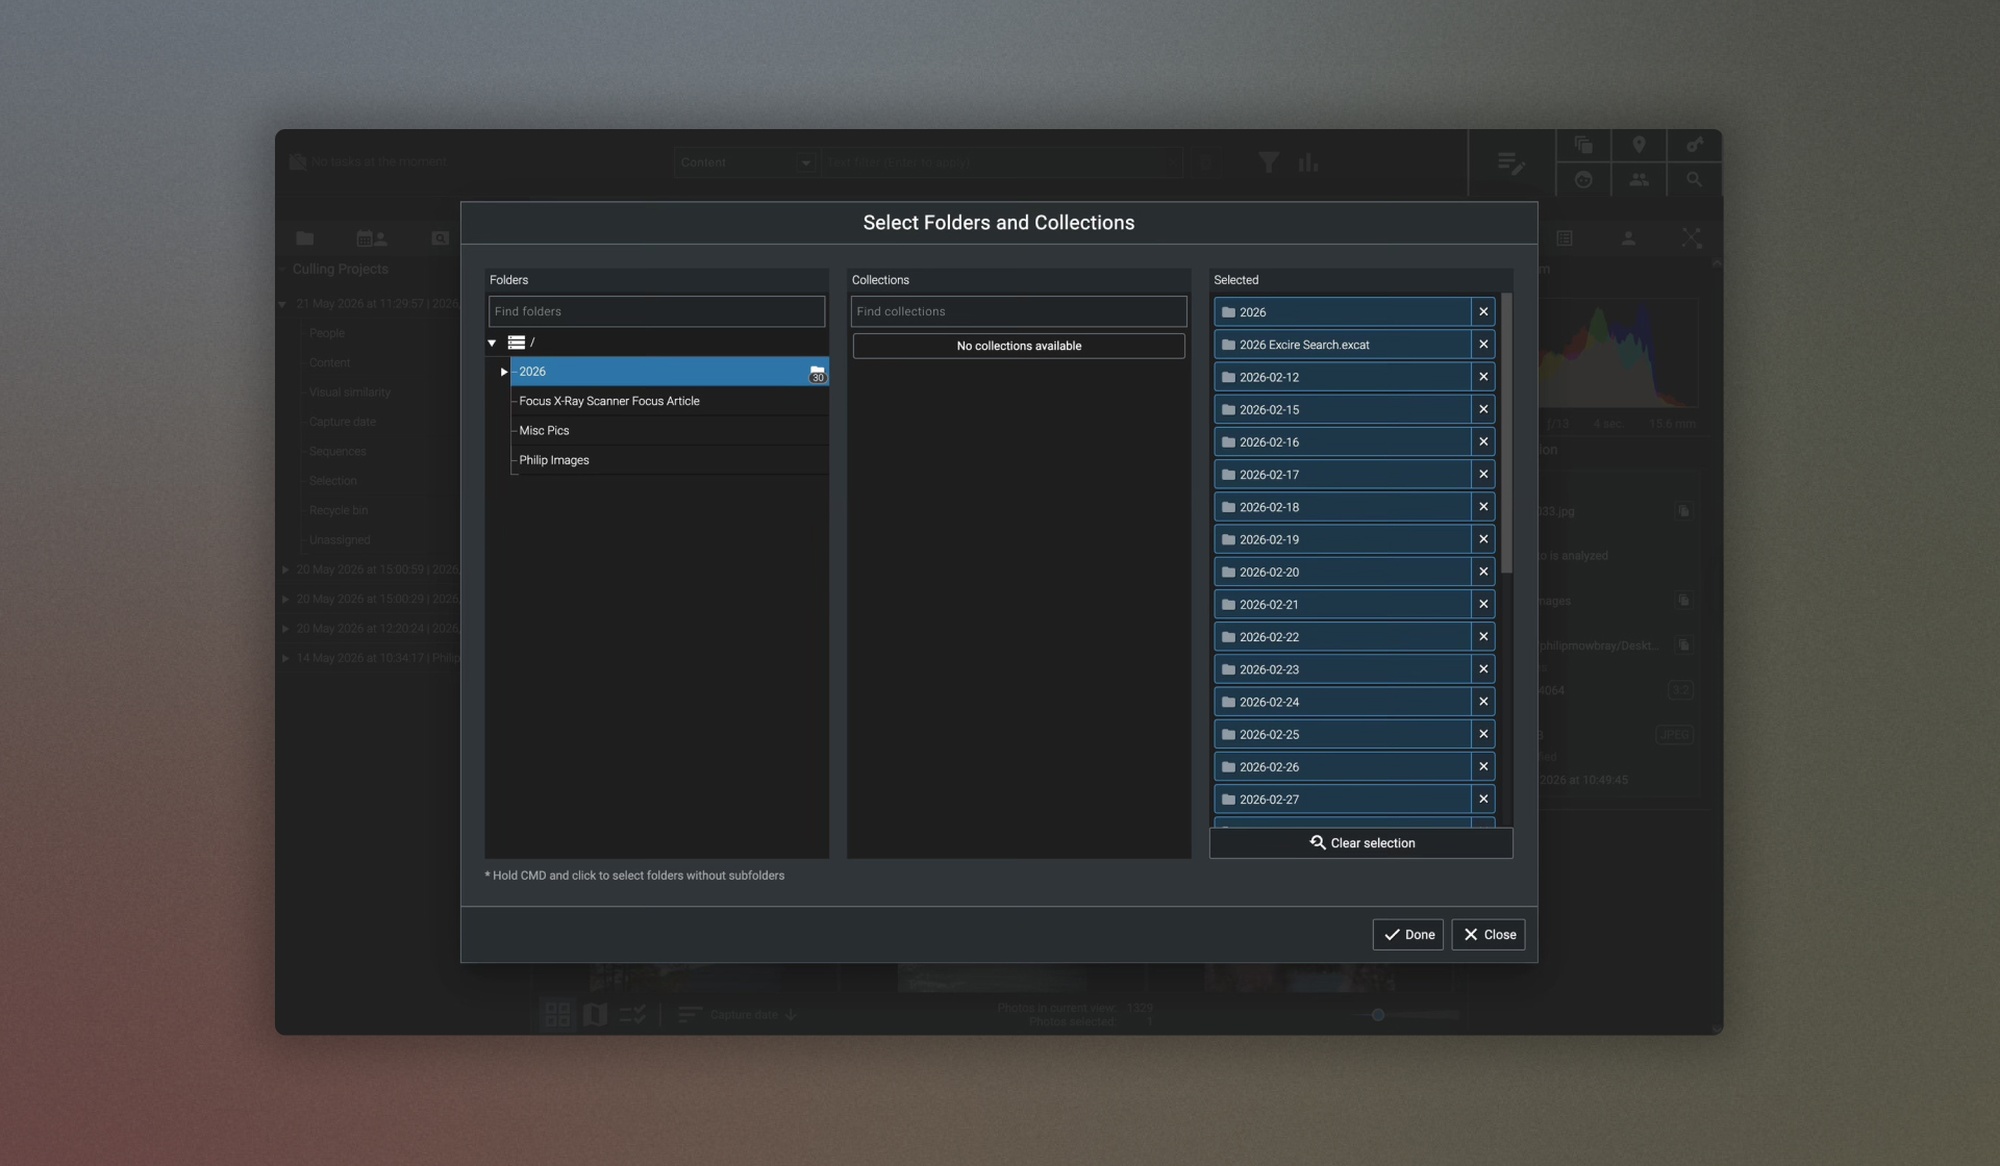
To start a culling project in Excire Foto, go to the top left panel, select the Culling Projects icon, as shown below and select + to start a new culling project. Here, you can select the folders you want Excire Foto to analyse.
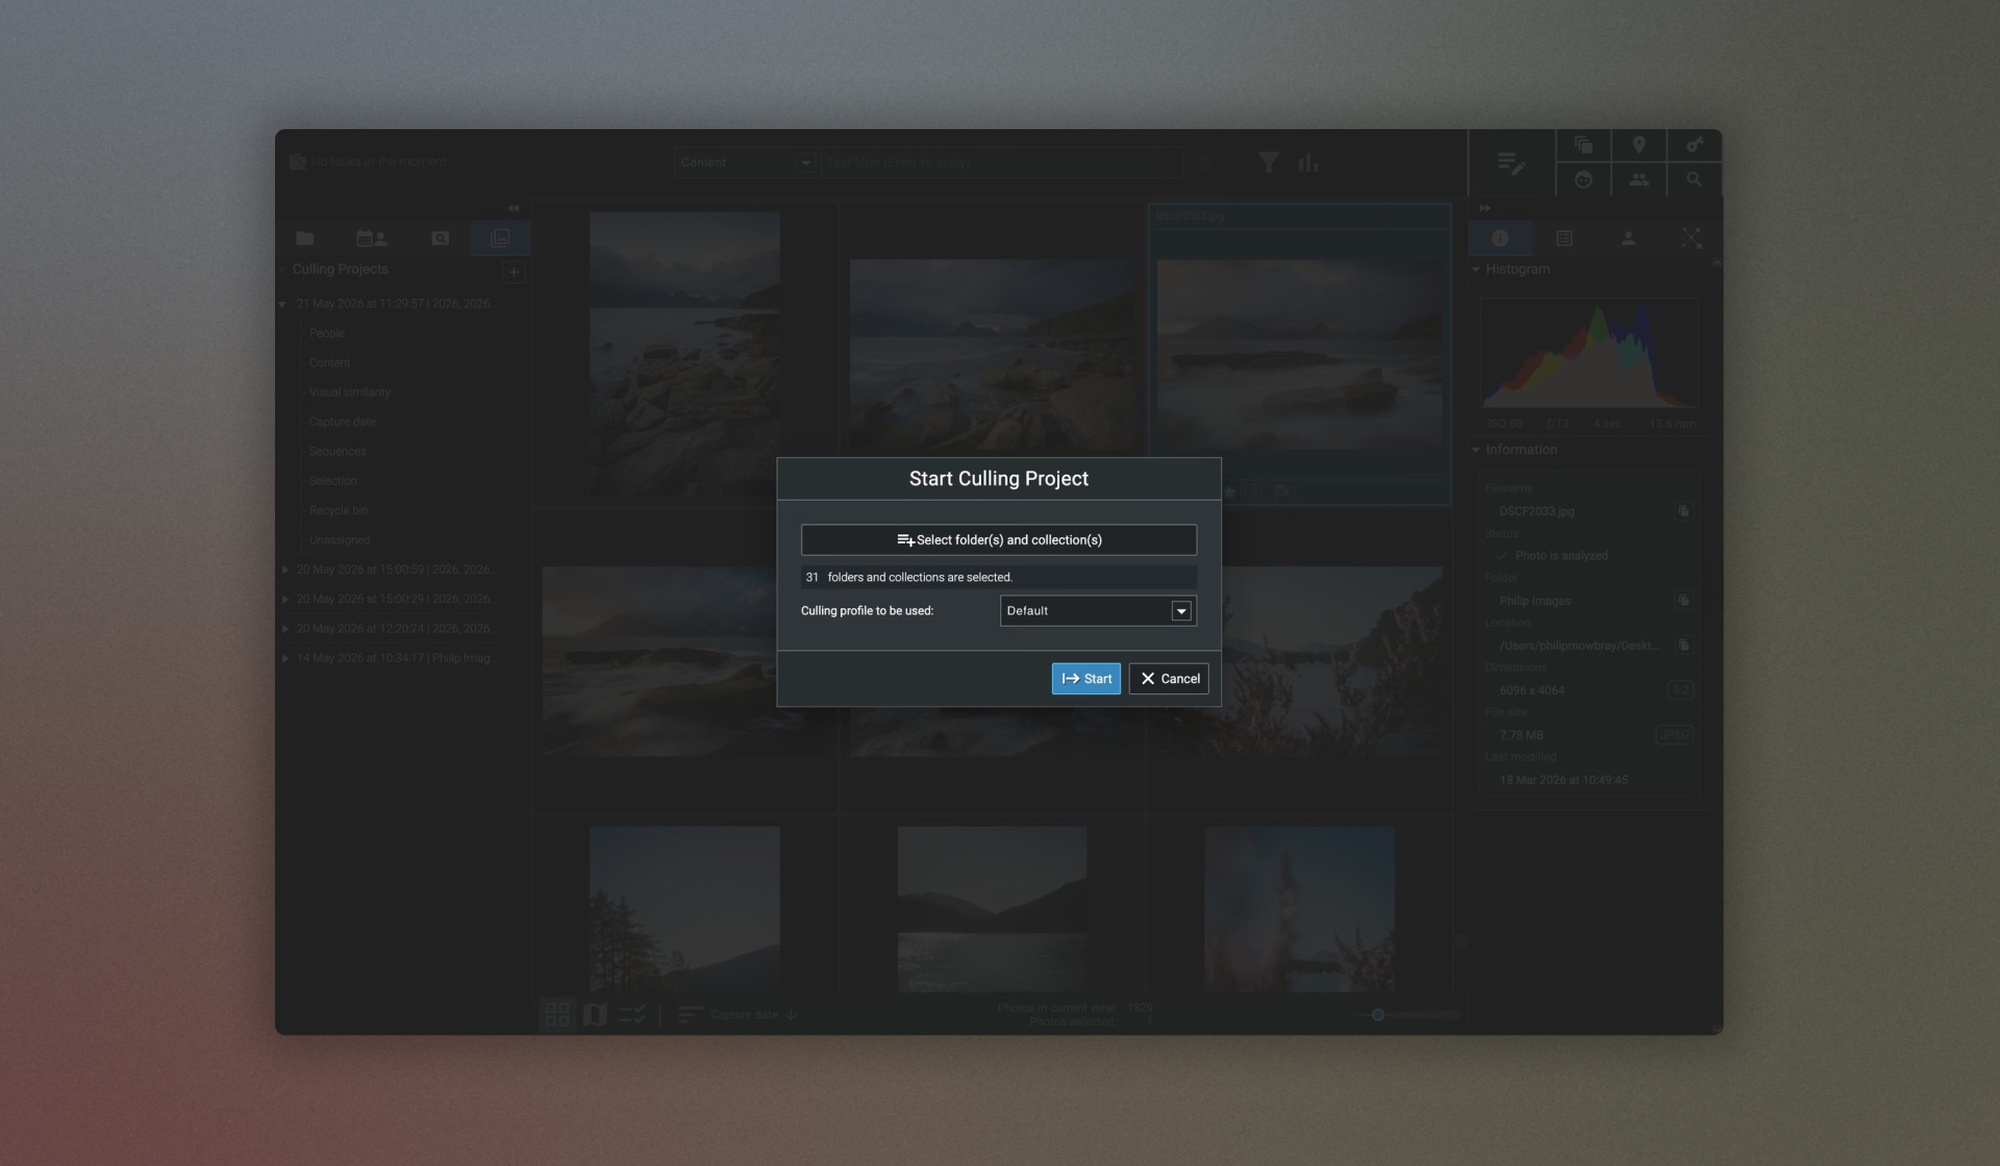
Each Culling Project uses a culling profile, too. While there’s a default option for standard culling projects, you also have the option to choose a different culling profile for more specific culling, such as the Auto reject (if you want to focus mainly on getting rid of the bad, unusable images), or People, Wedding, and Vacation, which are a brilliant option if you have a specific set based on these common themes, such as images from a holiday you’ve taken or a party or wedding.
Excire Foto uses its AI-led technology to group images based on typical themes, and you can also manage the culling parameters by selecting Manage Profiles, where you can further refine the culling rules, or even create your own culling profiles.
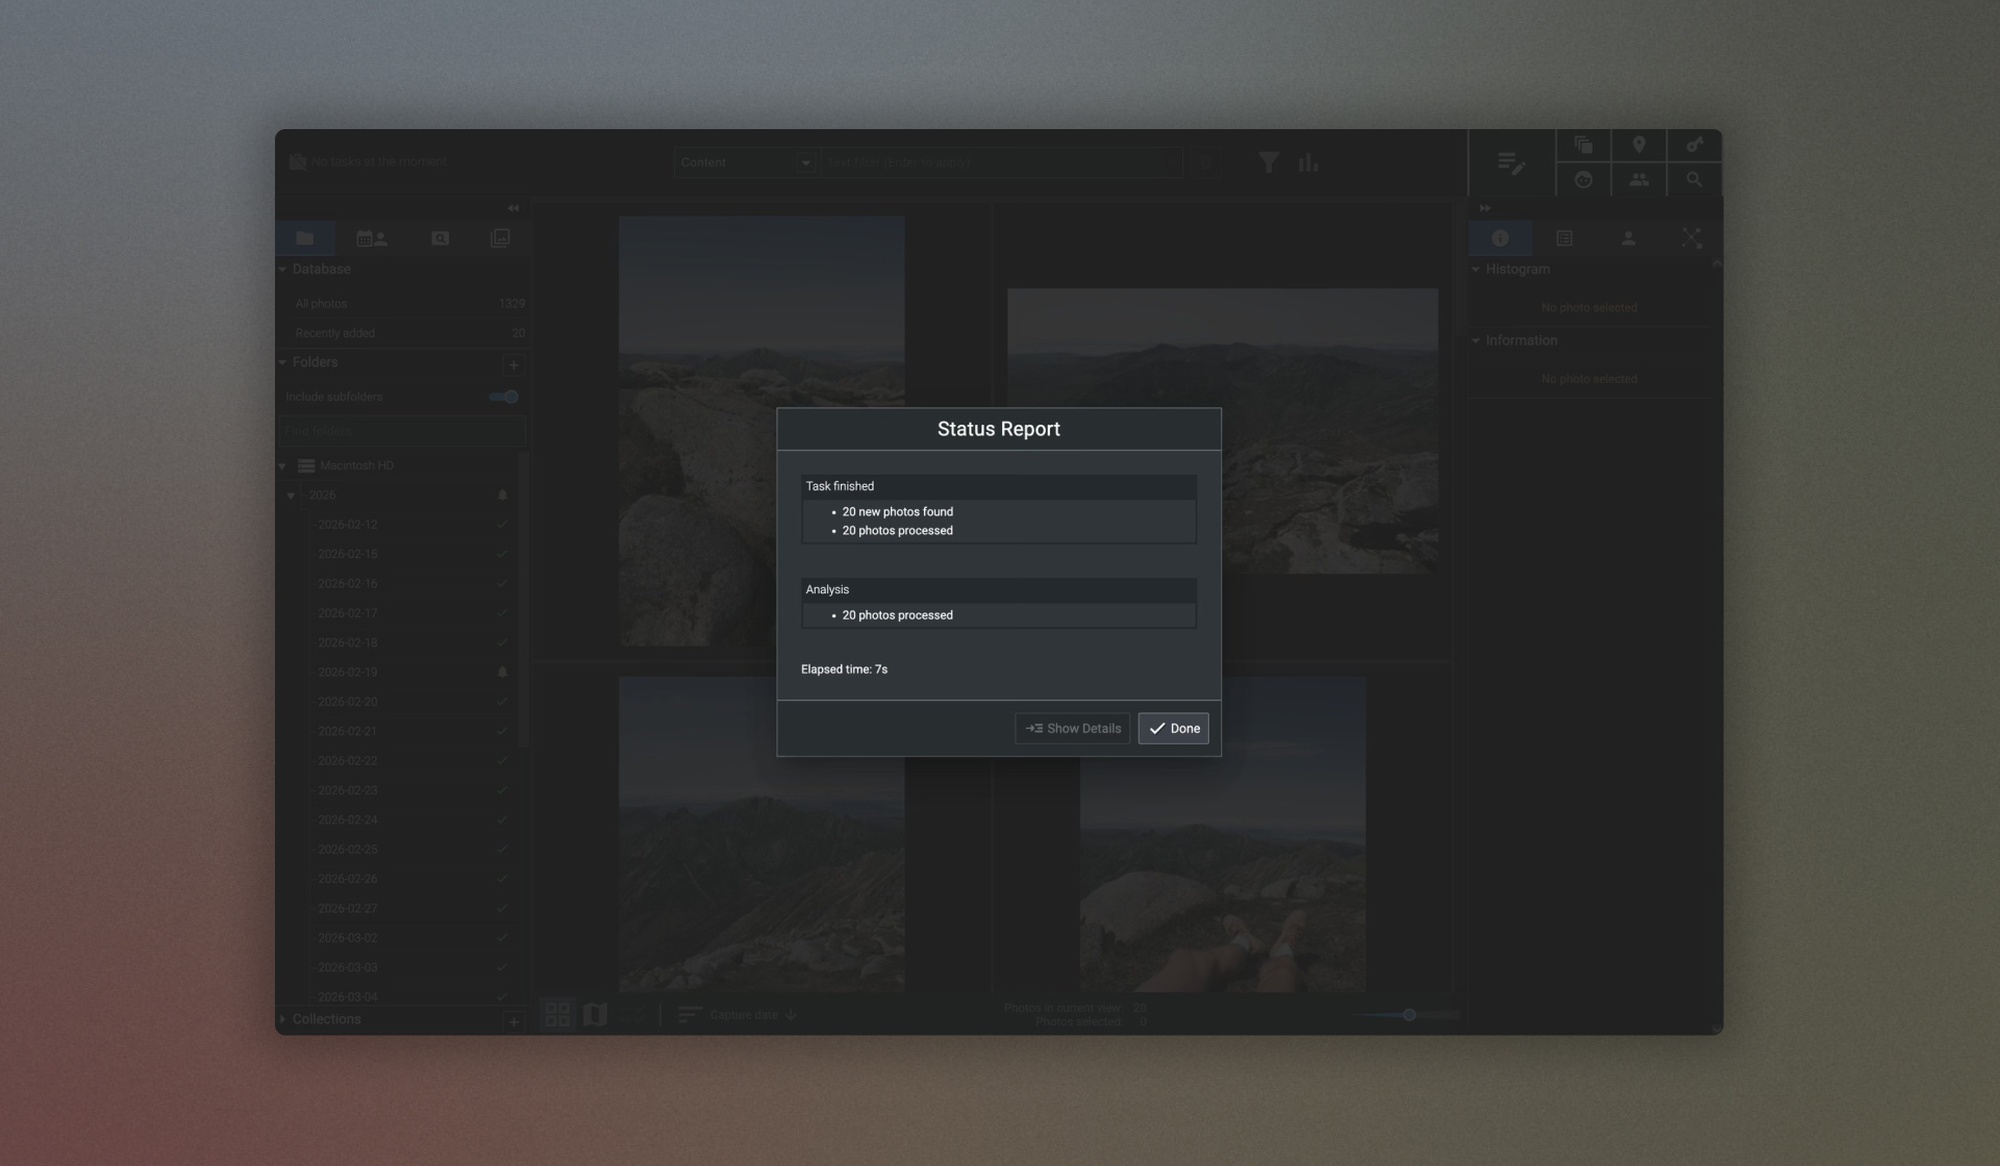
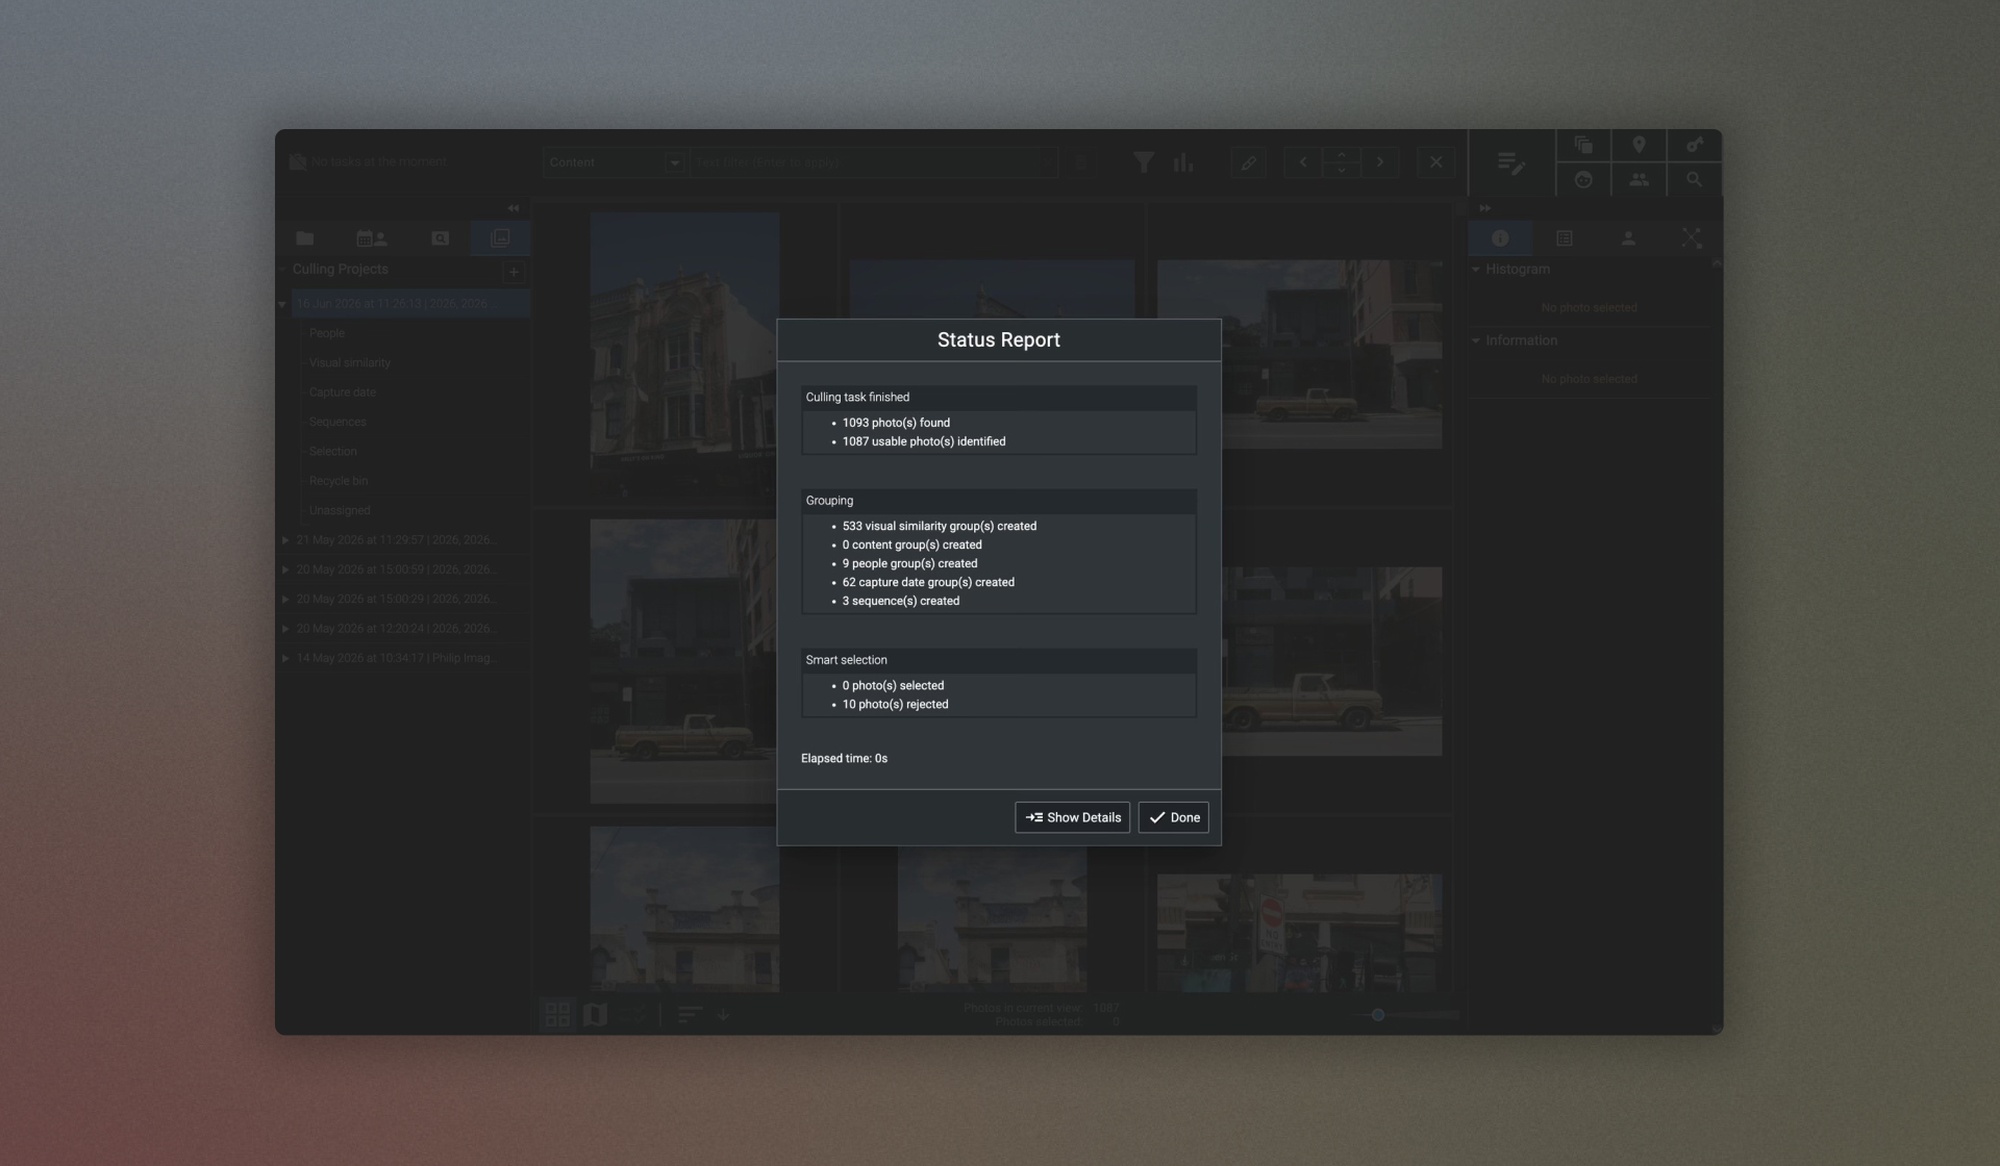
Once you’re done with setting up and running your Culling Project, you’ll get a Status Report of all the images Excire Foto has analysed once complete, and you’ll see the results of the culling project on the left-hand side. It takes just a few moments. It’s also worth noting that for significantly larger collections (those with images in the thousands), it may take a little longer.
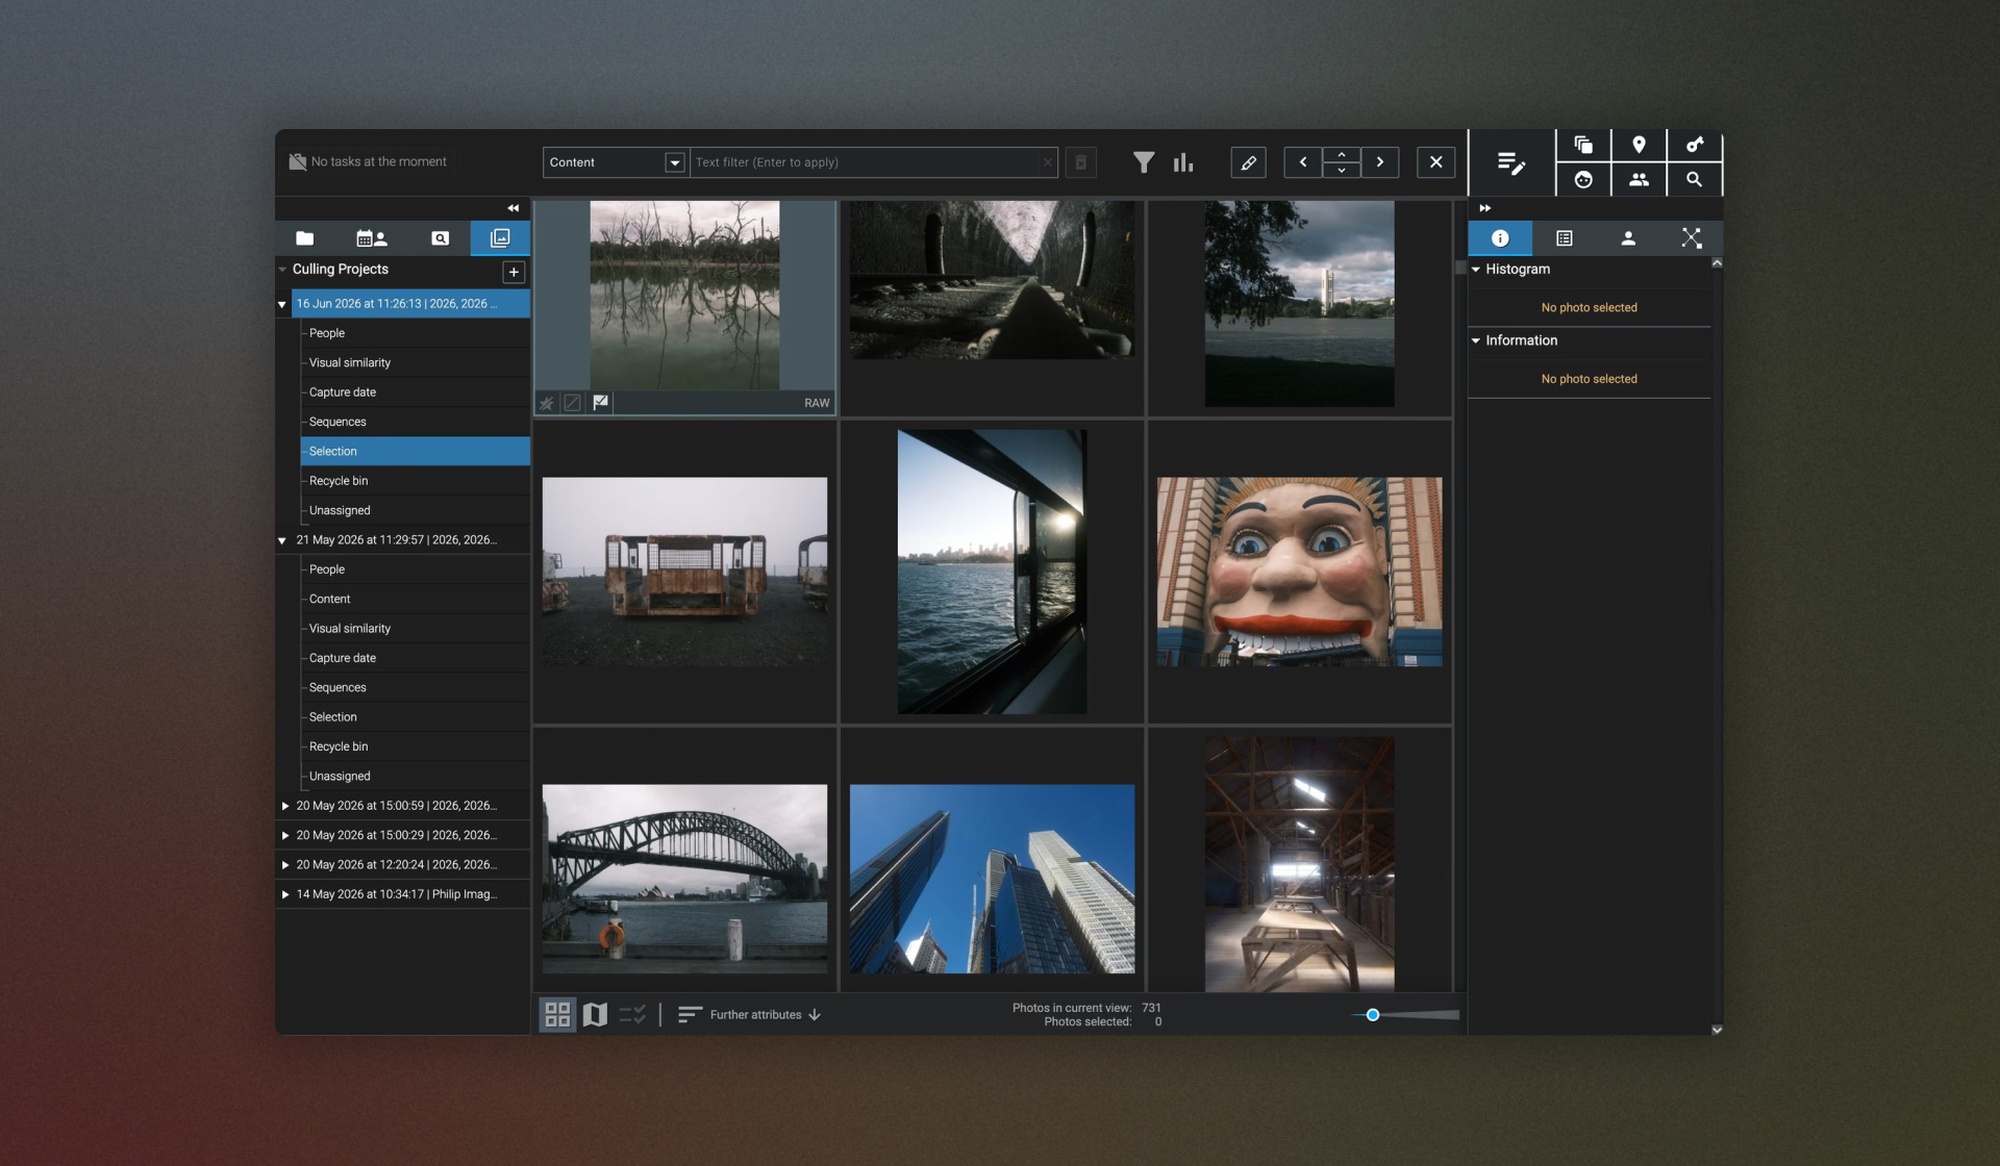
The Culling Project Results: Sort, Accept or Reject Your Images
Once the culling process is complete, you’ll see your images sorted into several categories, discussed below, and grouped within each, making it easy to digest and find your best shots, while taking a massive load off your workflow.
To select images and accept them (i.e. those you want to keep, you use the P key to apply an accepted flag to your images. To reject images, you can use the X key.
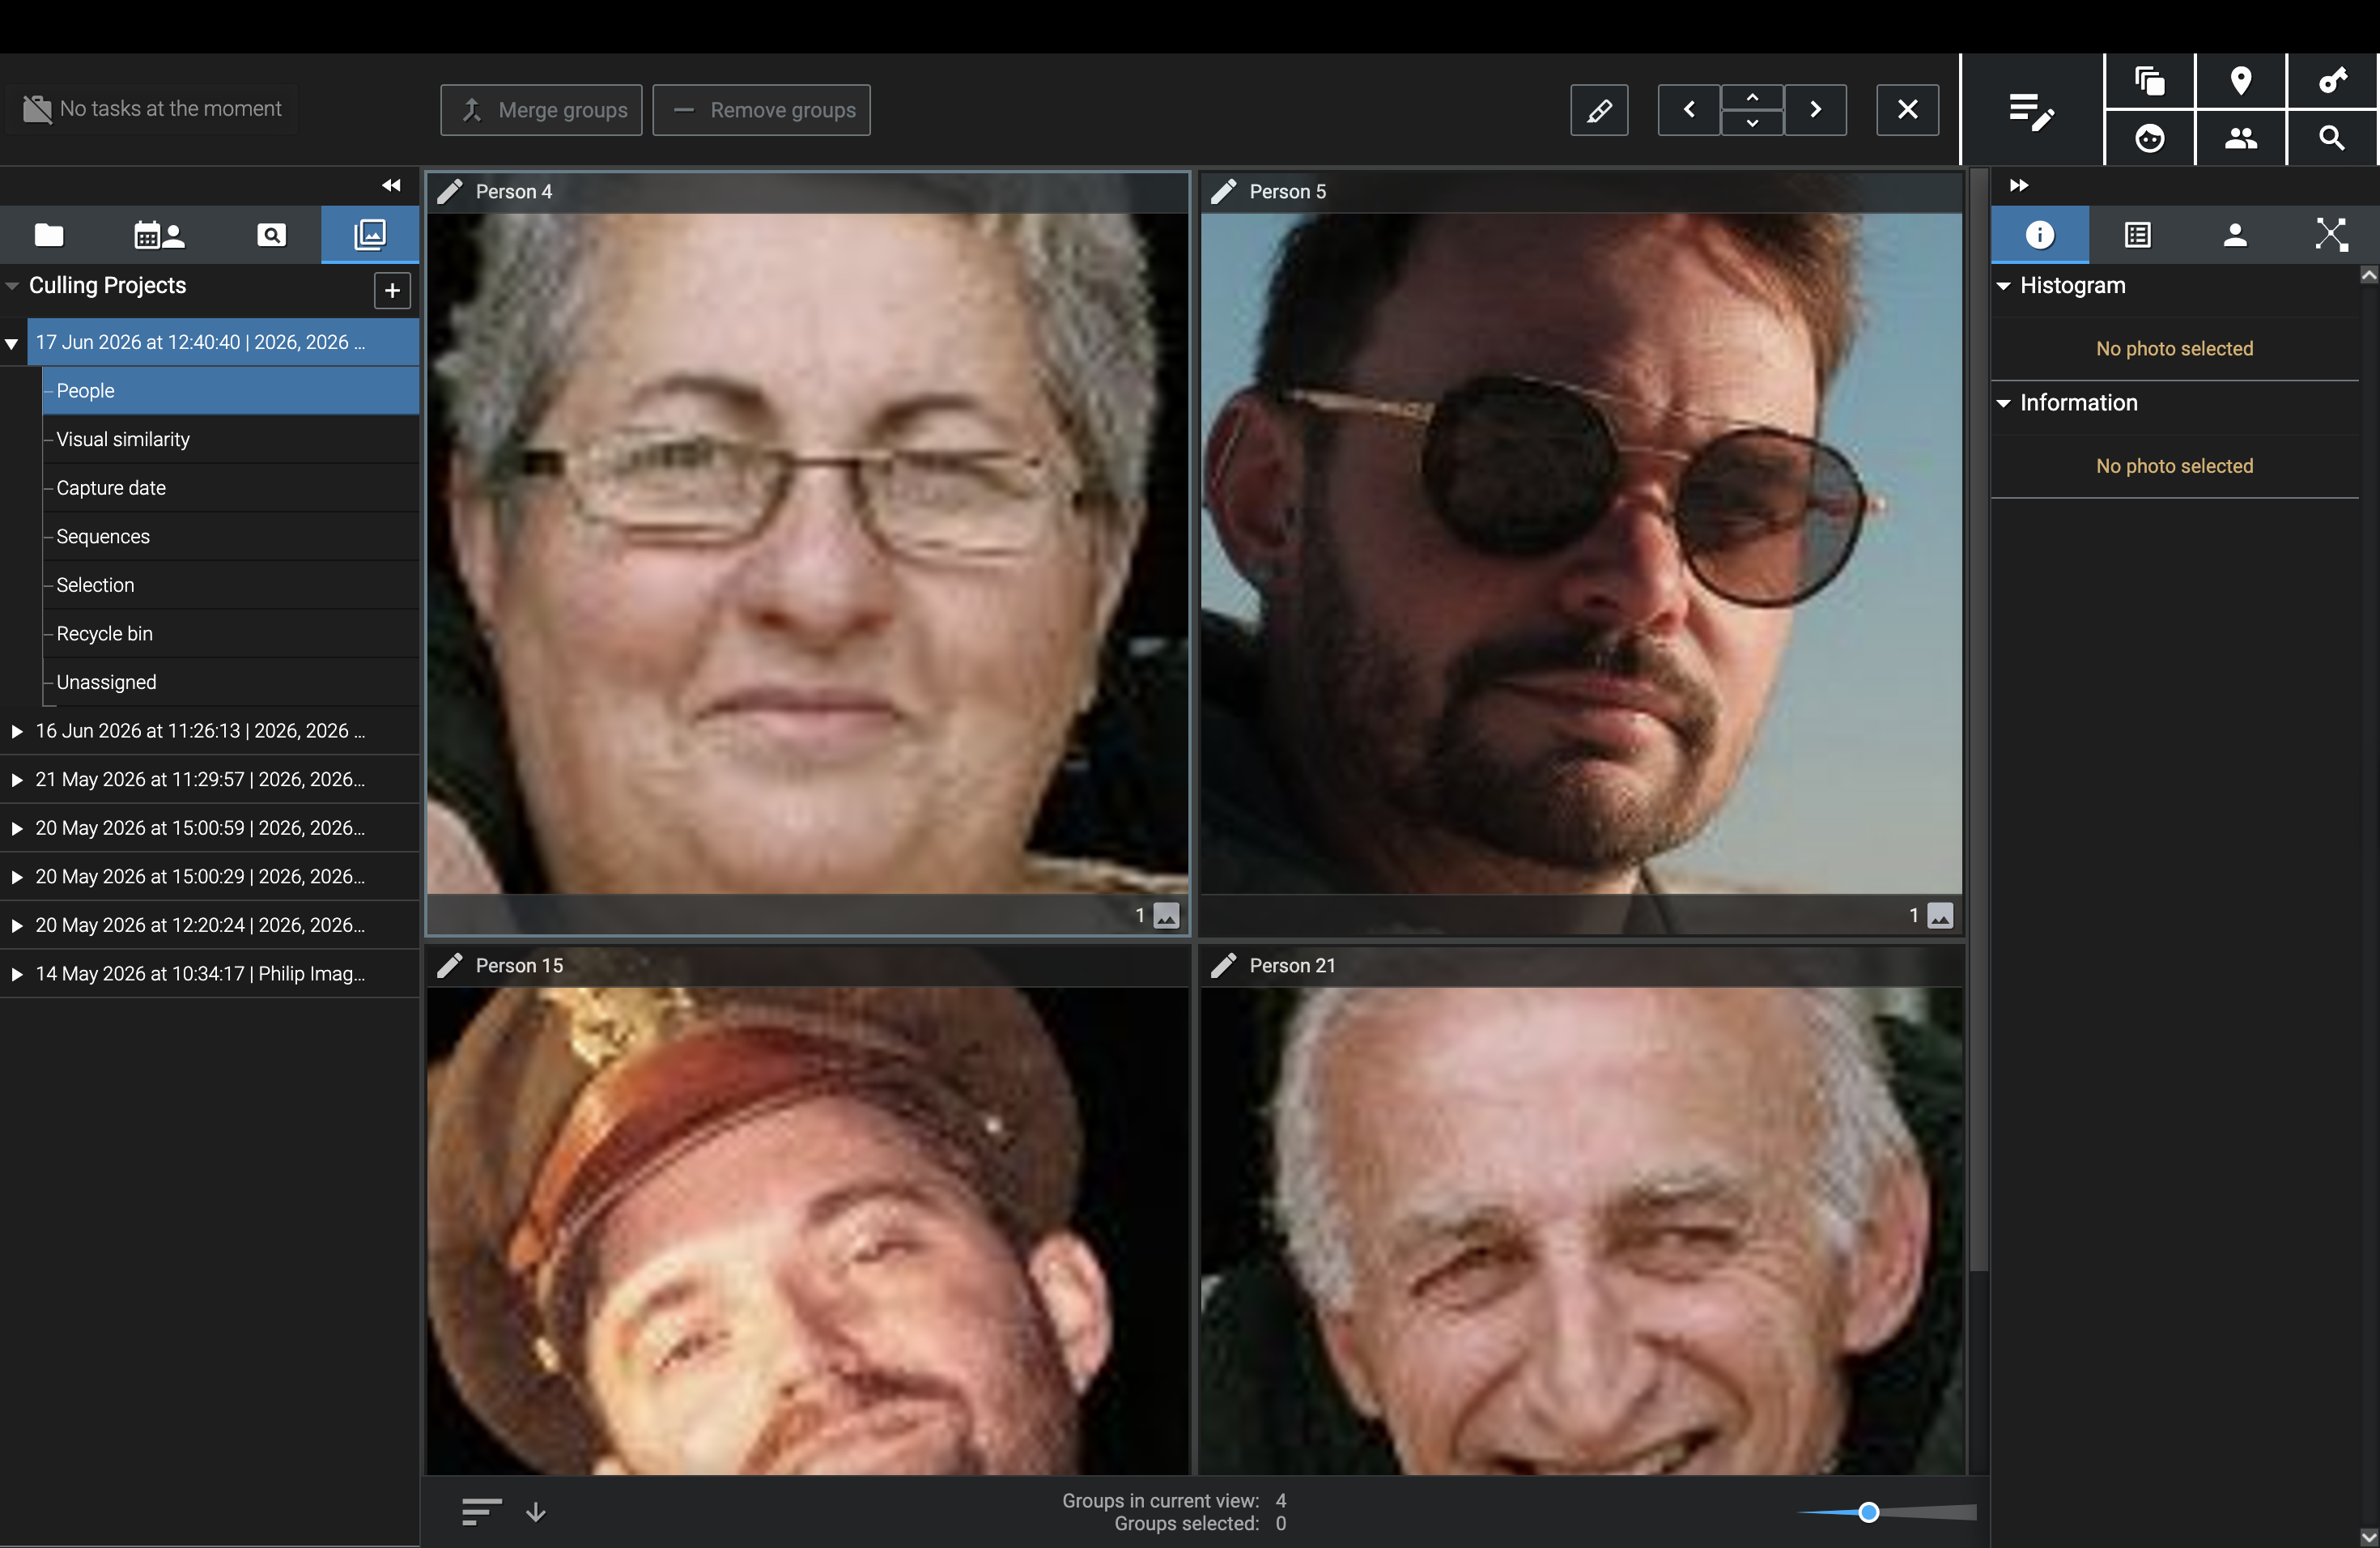
People
If your images contain people, you’ll see them grouped by person or people using AI face detection. So if you need to find the best shot of a person, or people, from a group of images you’ve taken, this category is invaluable.
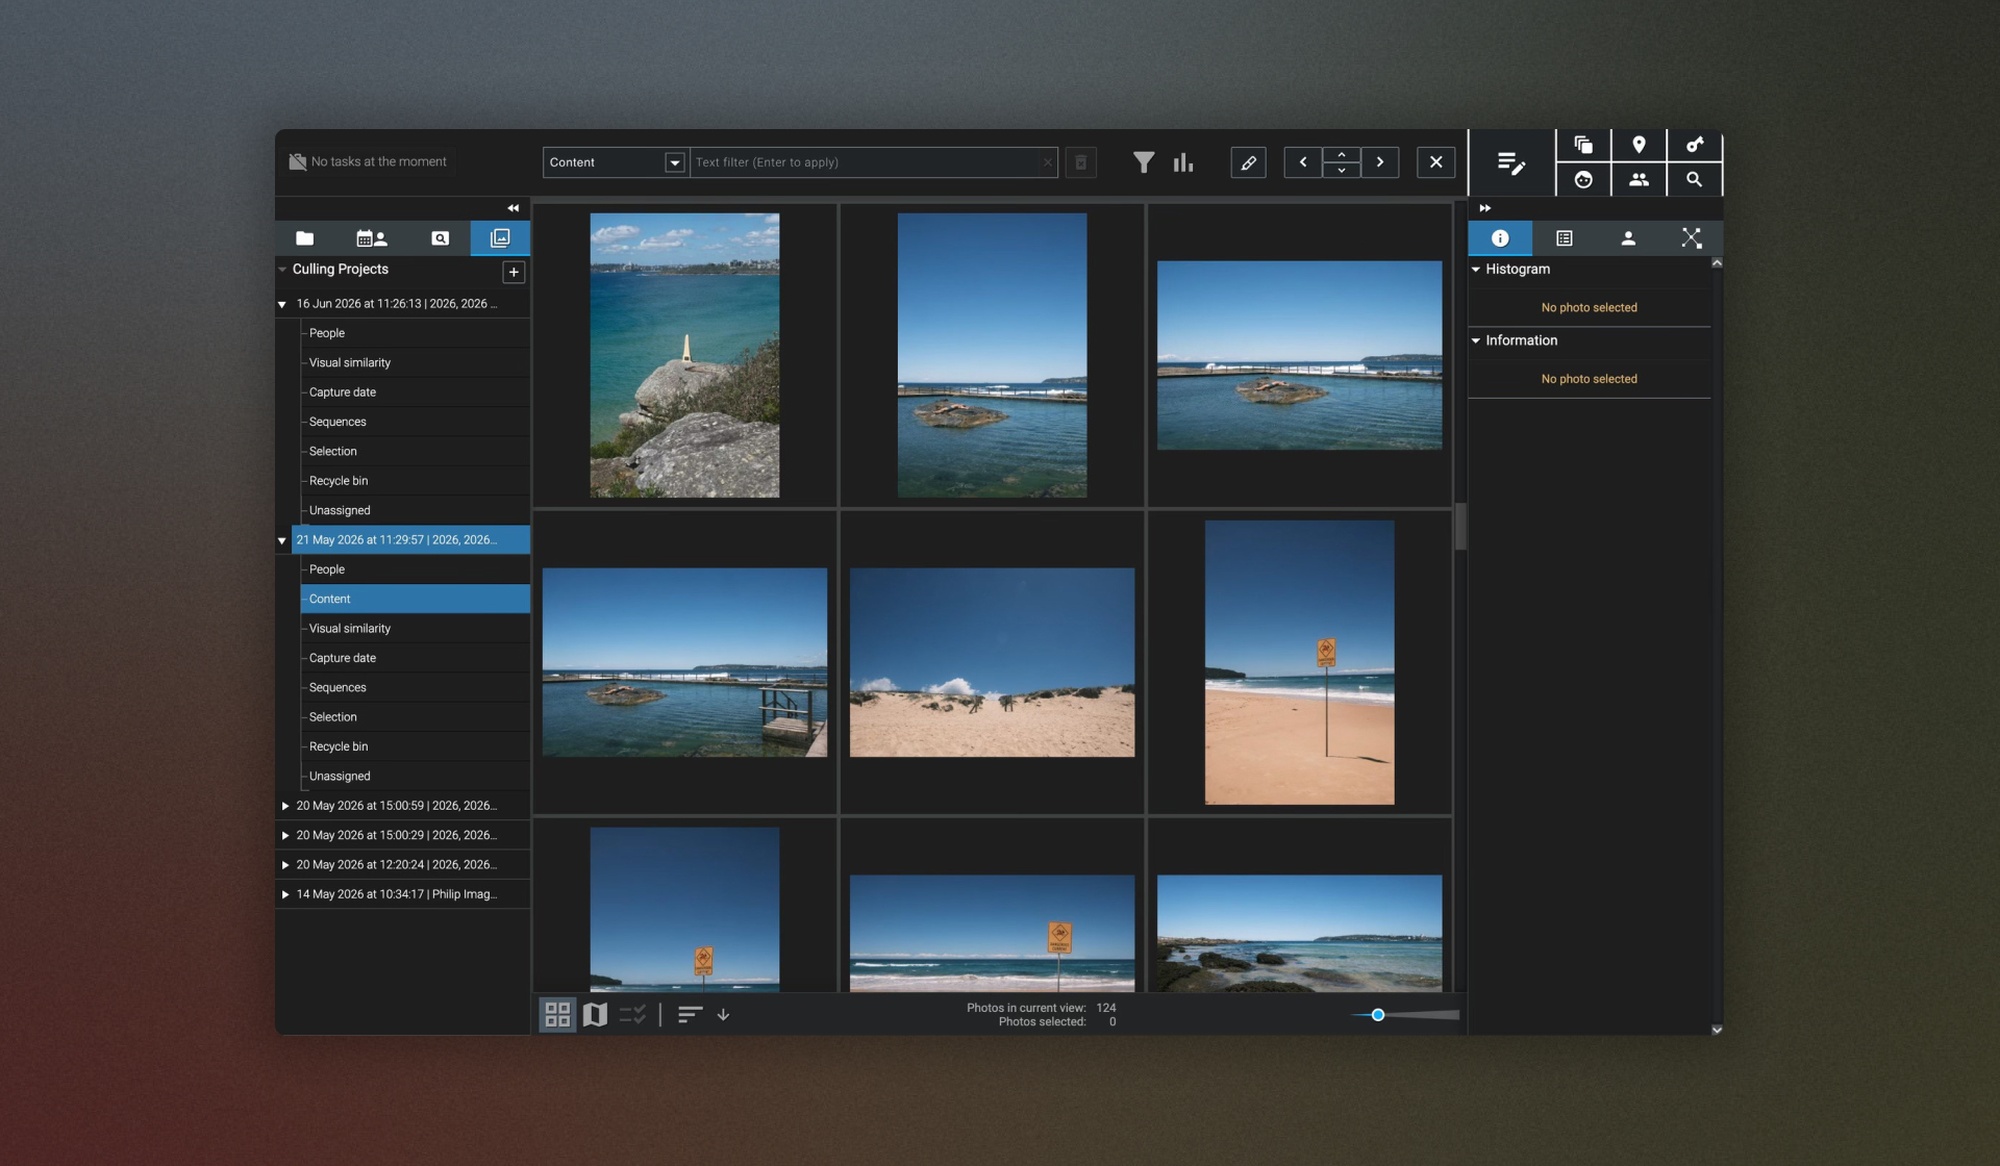
Content
If you’ve chosen a culling profile that includes culling options based on image content, then these groups of images will appear here. For example, when I created a Culling Project for a recent trip to Australia, I chose the Vacation culling profile, which grouped my images beautifully into holiday- and travel-specific categories, such as Beach, Architecture, Mountains, etc., making it much easier to go through all the images.
You can also choose from a wide range of content options when creating your own Culling profile, allowing you to customise how your content is grouped.
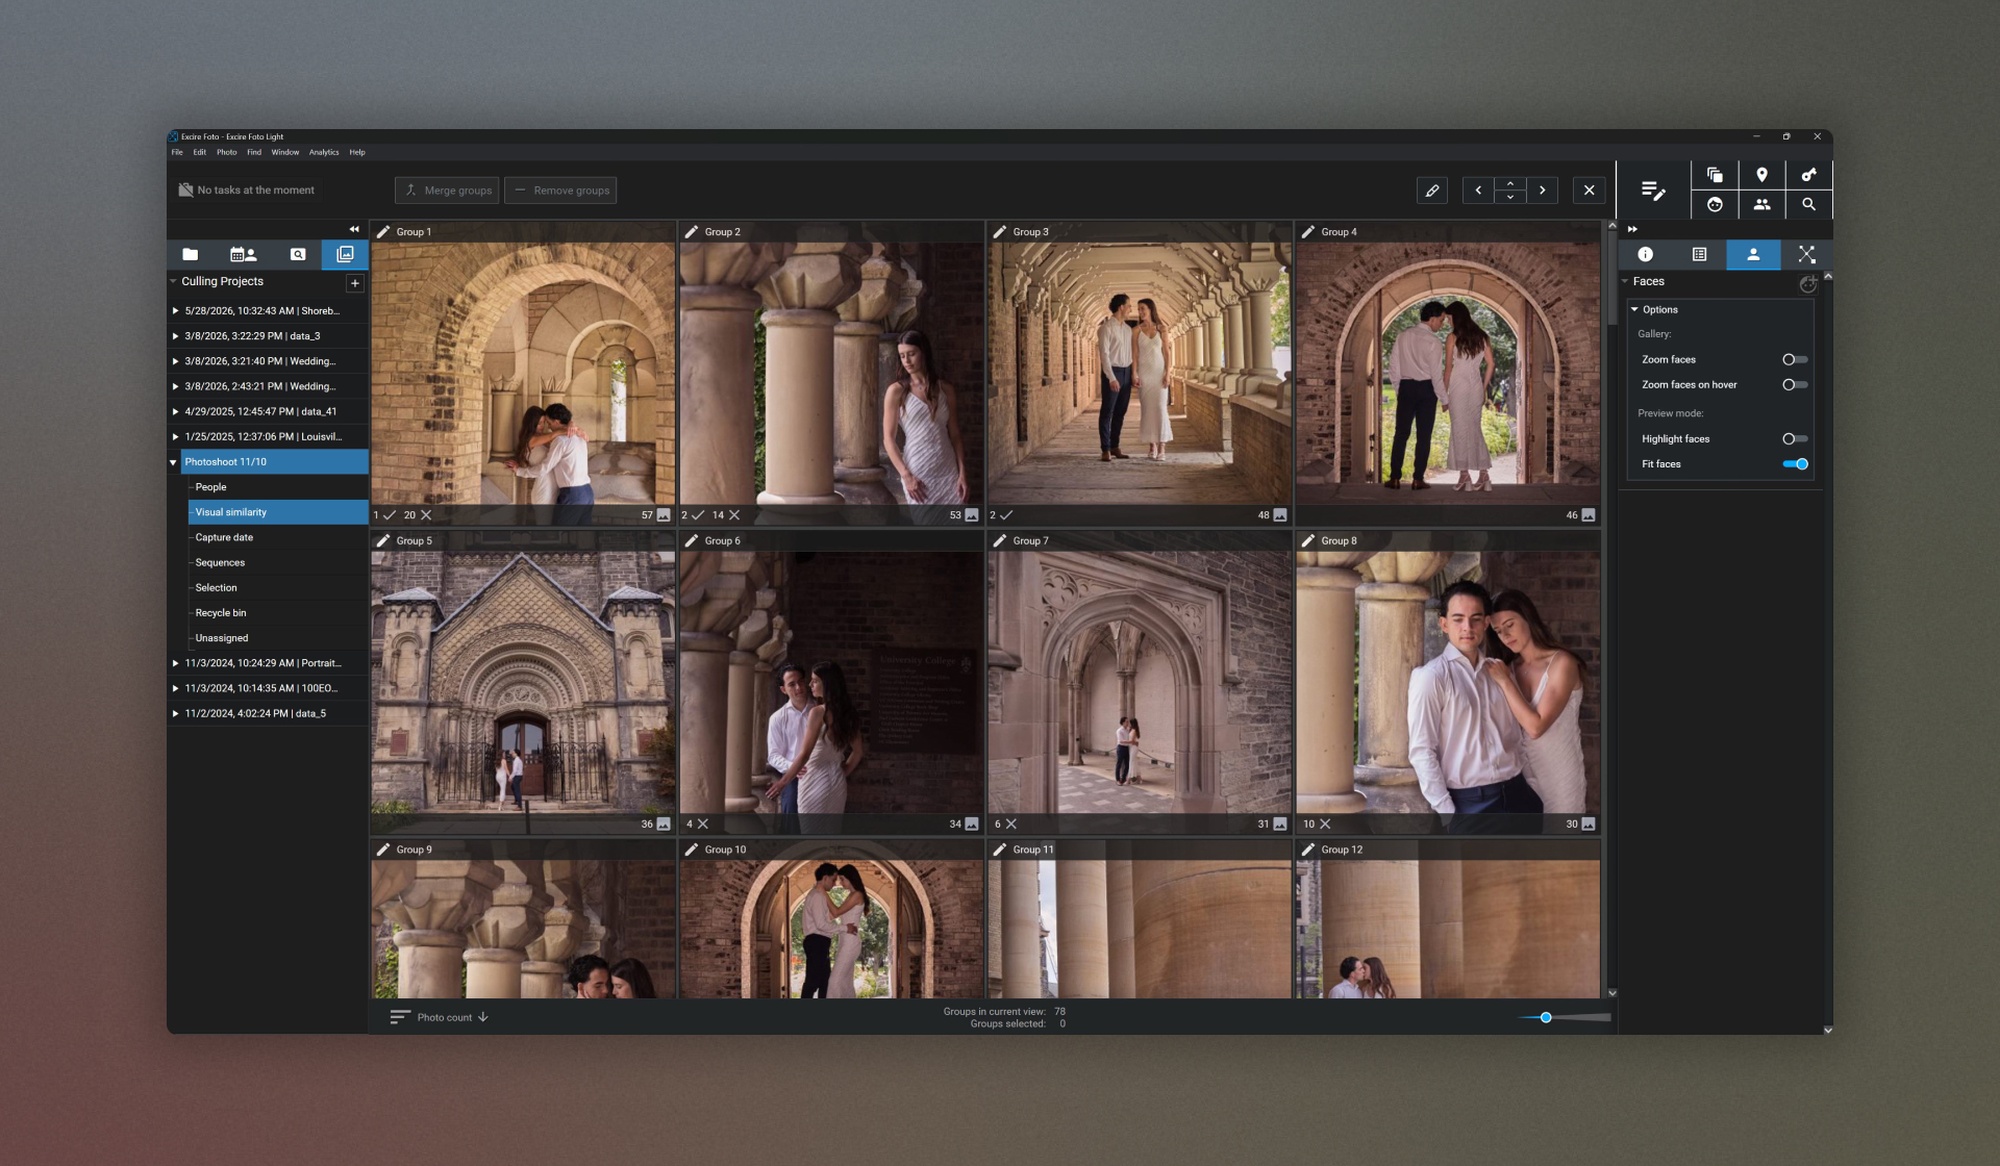
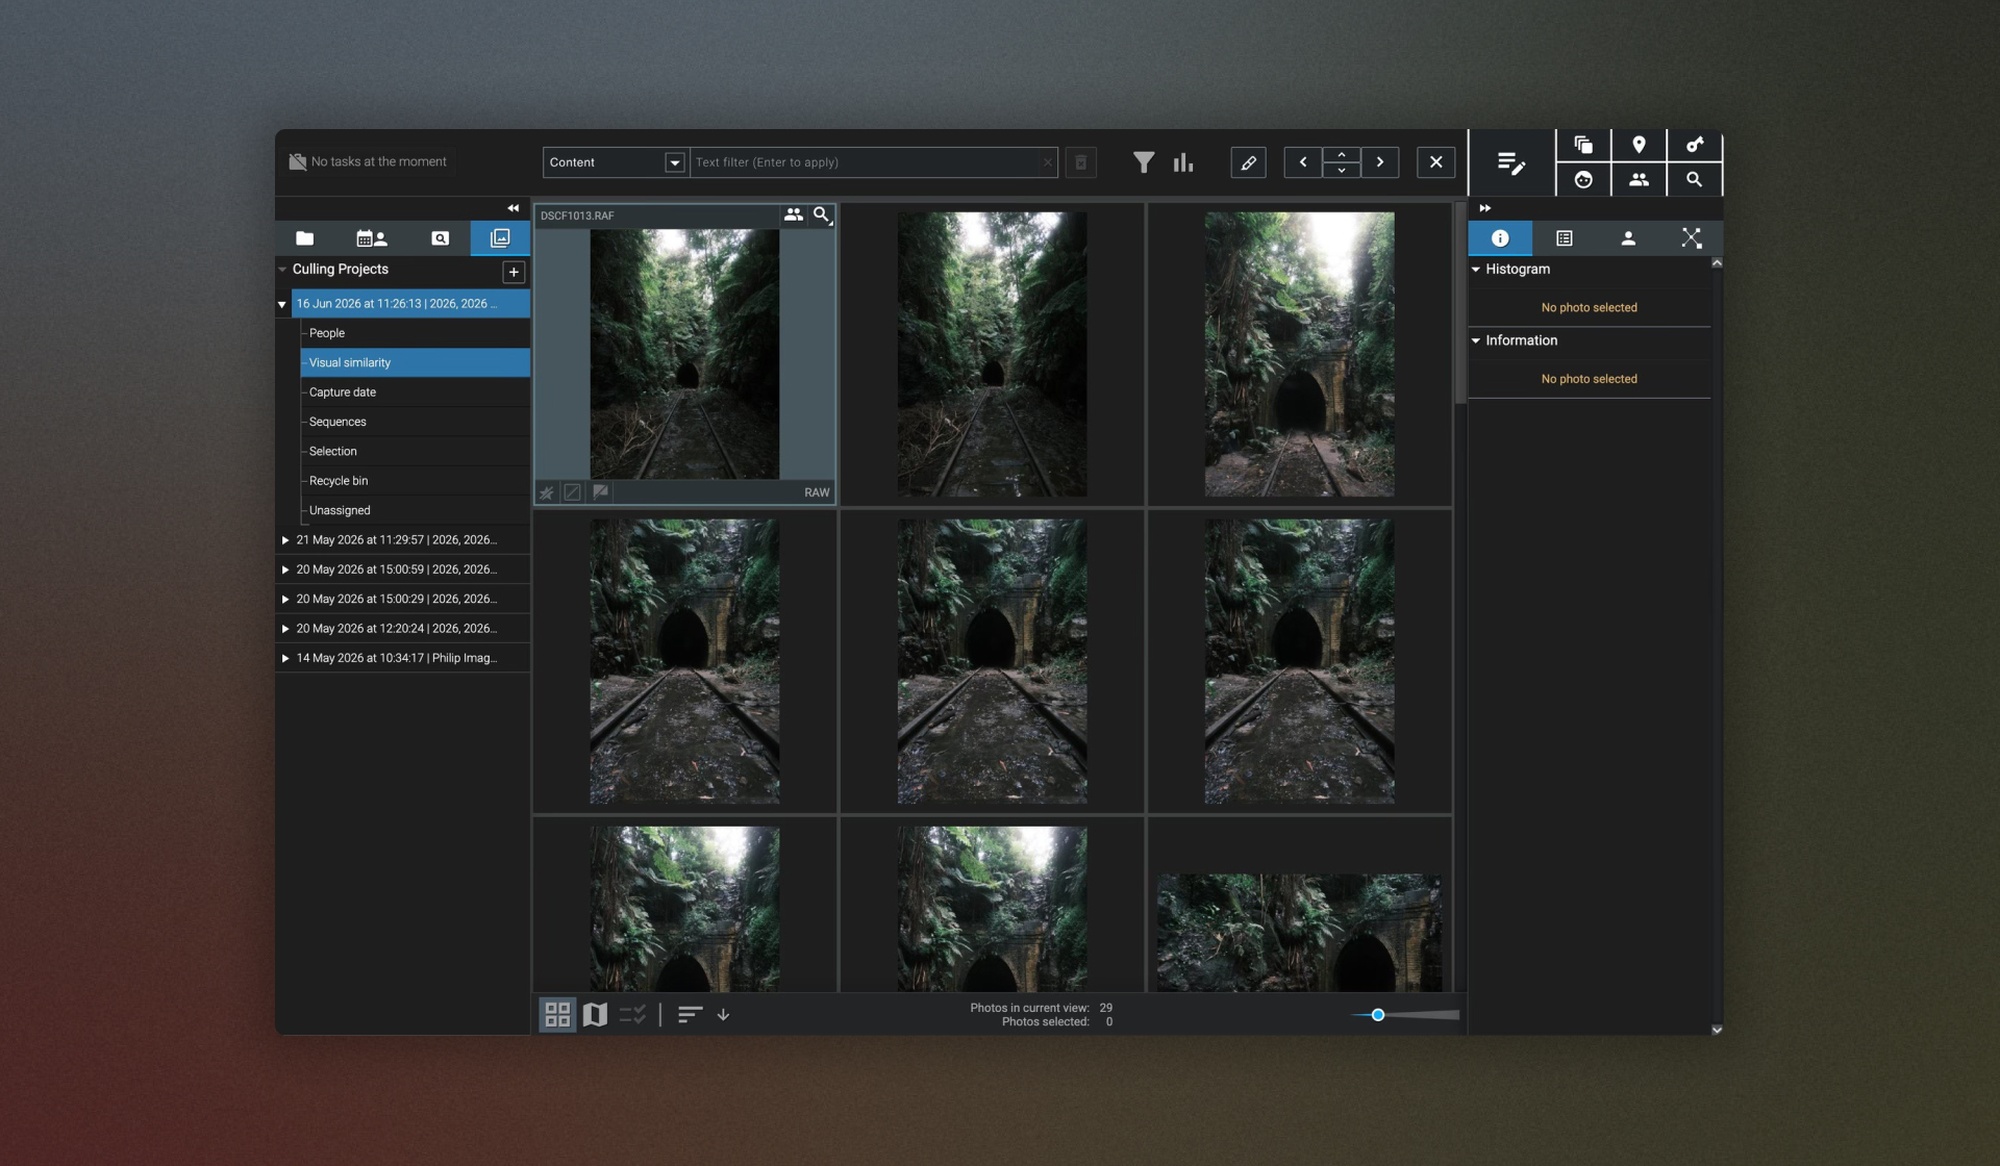
Visual similarity
Images that look similar, i.e. were photographed in the same place or include the same photographic subject or colour palette, are grouped based on having similar visual elements, meaning you can very quickly scan the images in each group and find your best version.
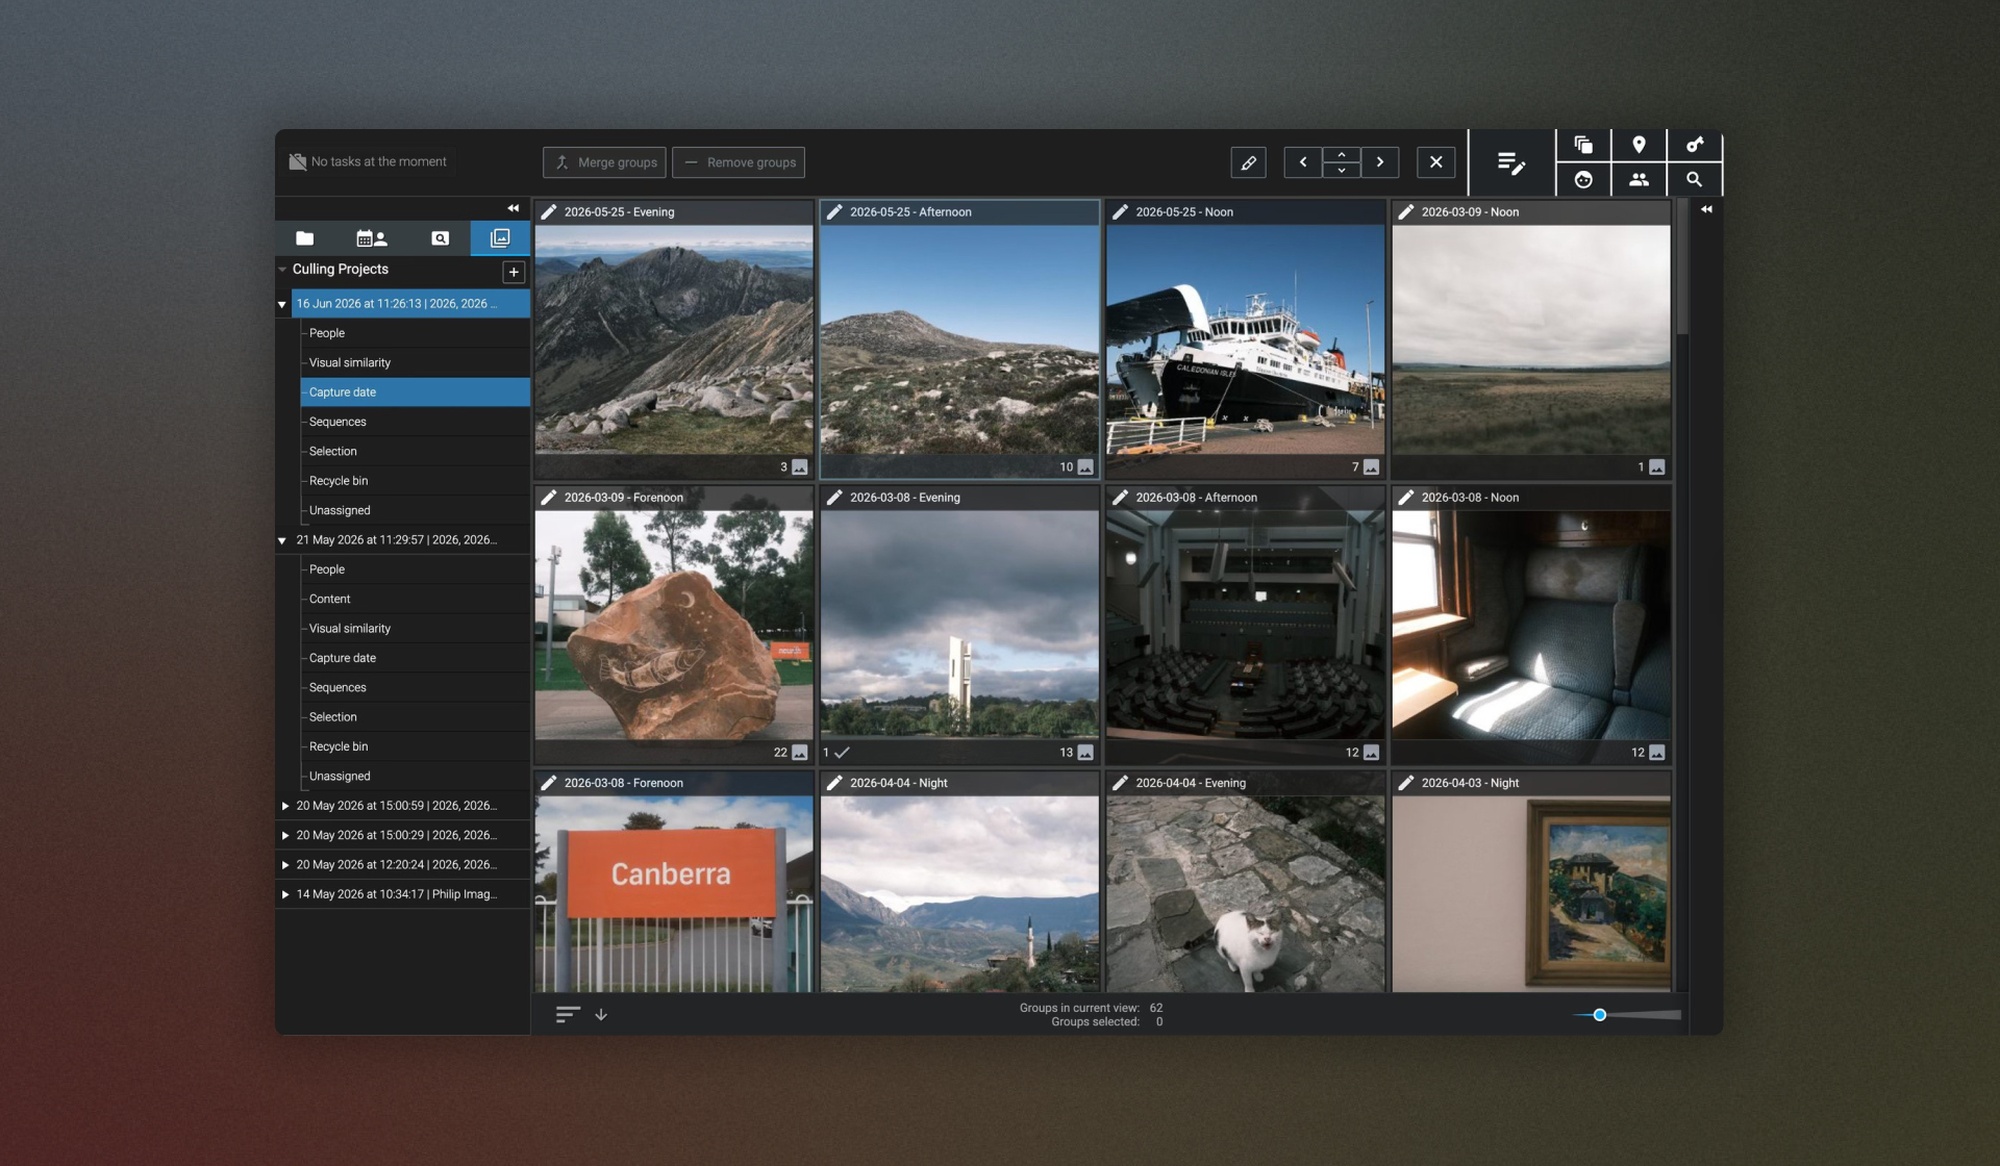
Capture date
Here, your images are grouped by capture date and by time of day on that date. For example, images photographed in the evening or morning can be grouped by time, making it easy to find your best shot from a shoot, depending on when it was taken. This category is perfect for photographers who might do several different photo shoots in a day, or for those shooting the same subject at different times of day. It is also great for shoots where there’s a narrative throughout the shooting timespan. For example, if you shoot events and need to ensure that each 15-minute segment will be represented in the final batch of images, you can configure this in the grouping as well.
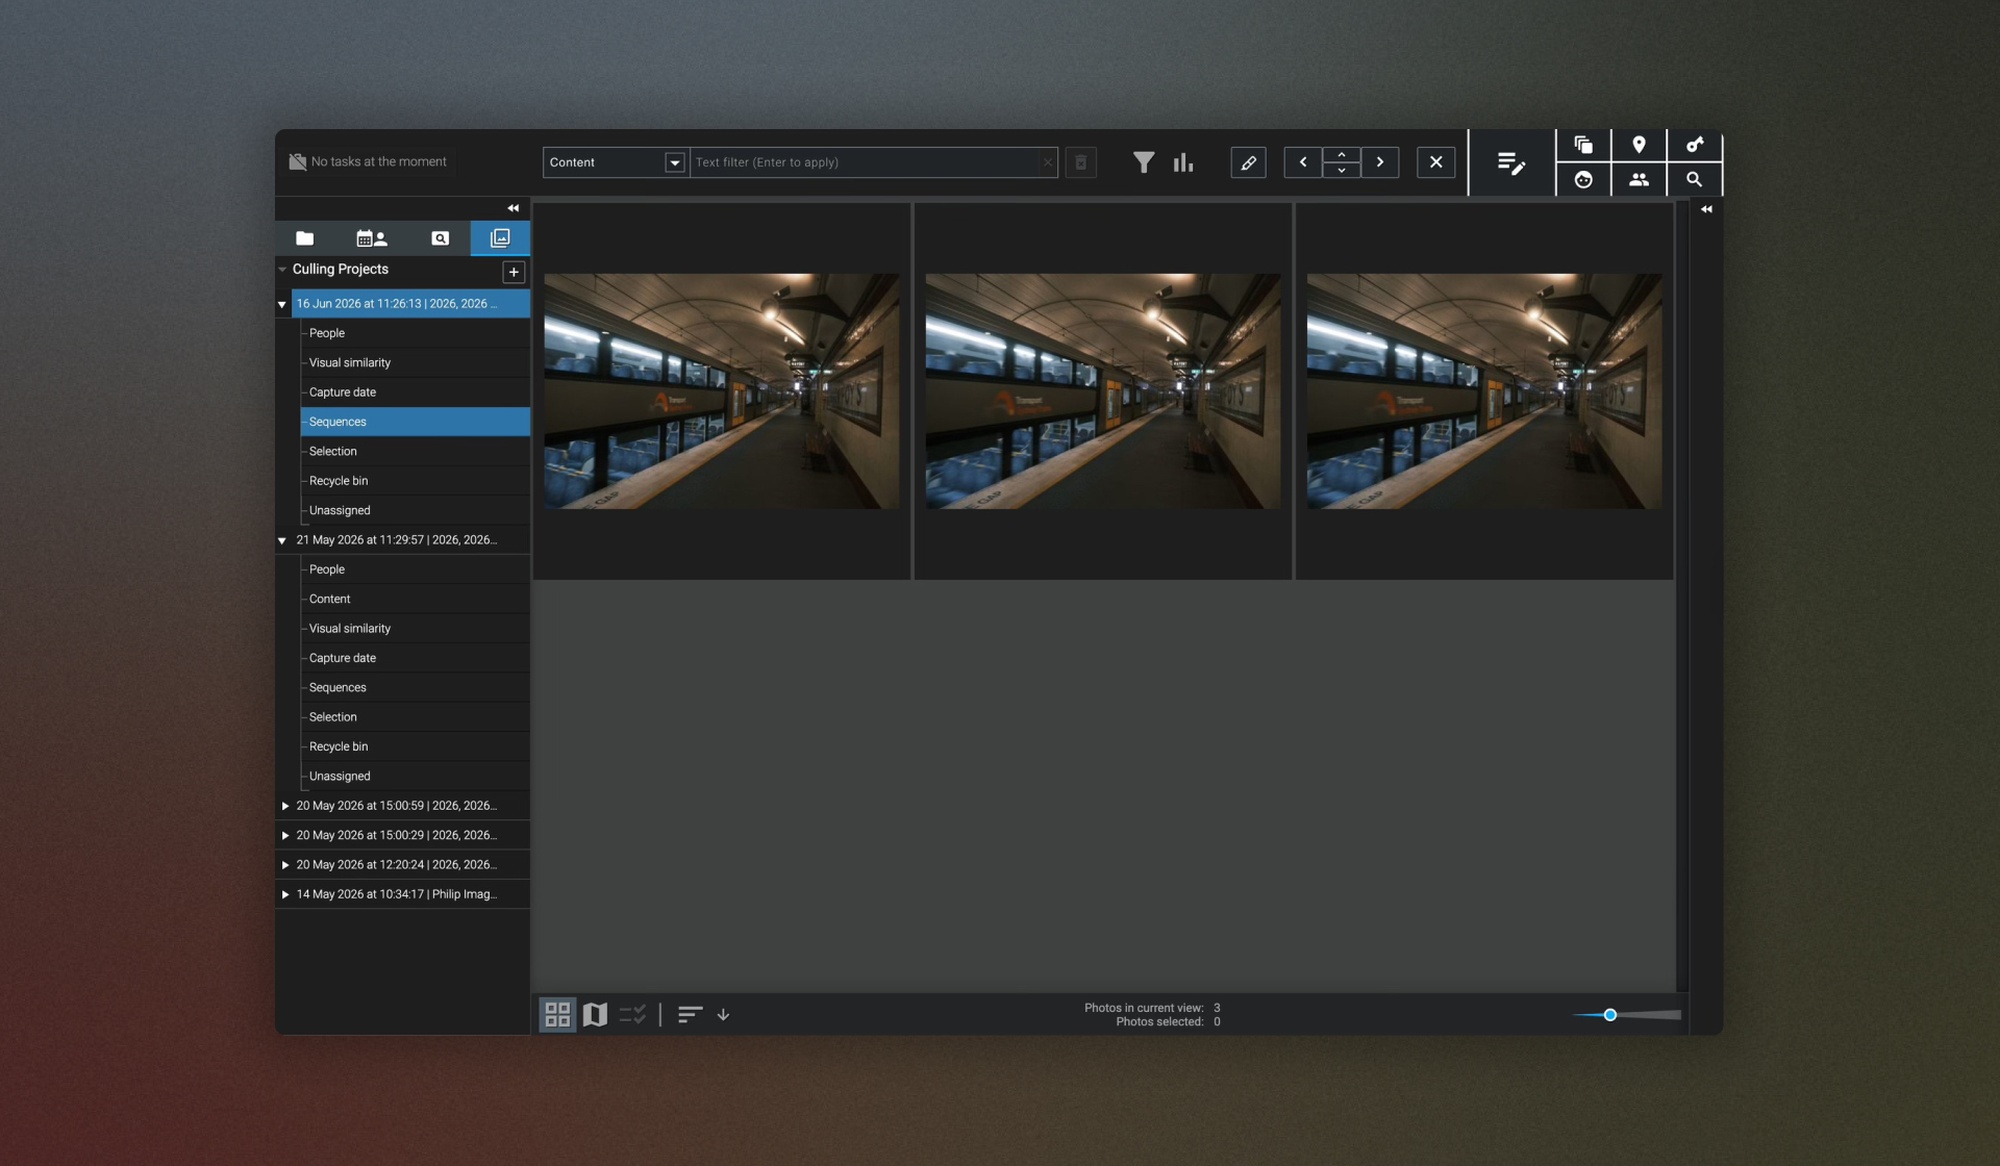
Sequences
You’ll see images that were shot in succession of each other, i.e. bursts, so you can identify the best image out of that sequence quickly and easily by seeing them next to each other side-by-side.
Selection
Images you mark as accepted will be automatically added to your Selection group, and you can also select images using the P key.
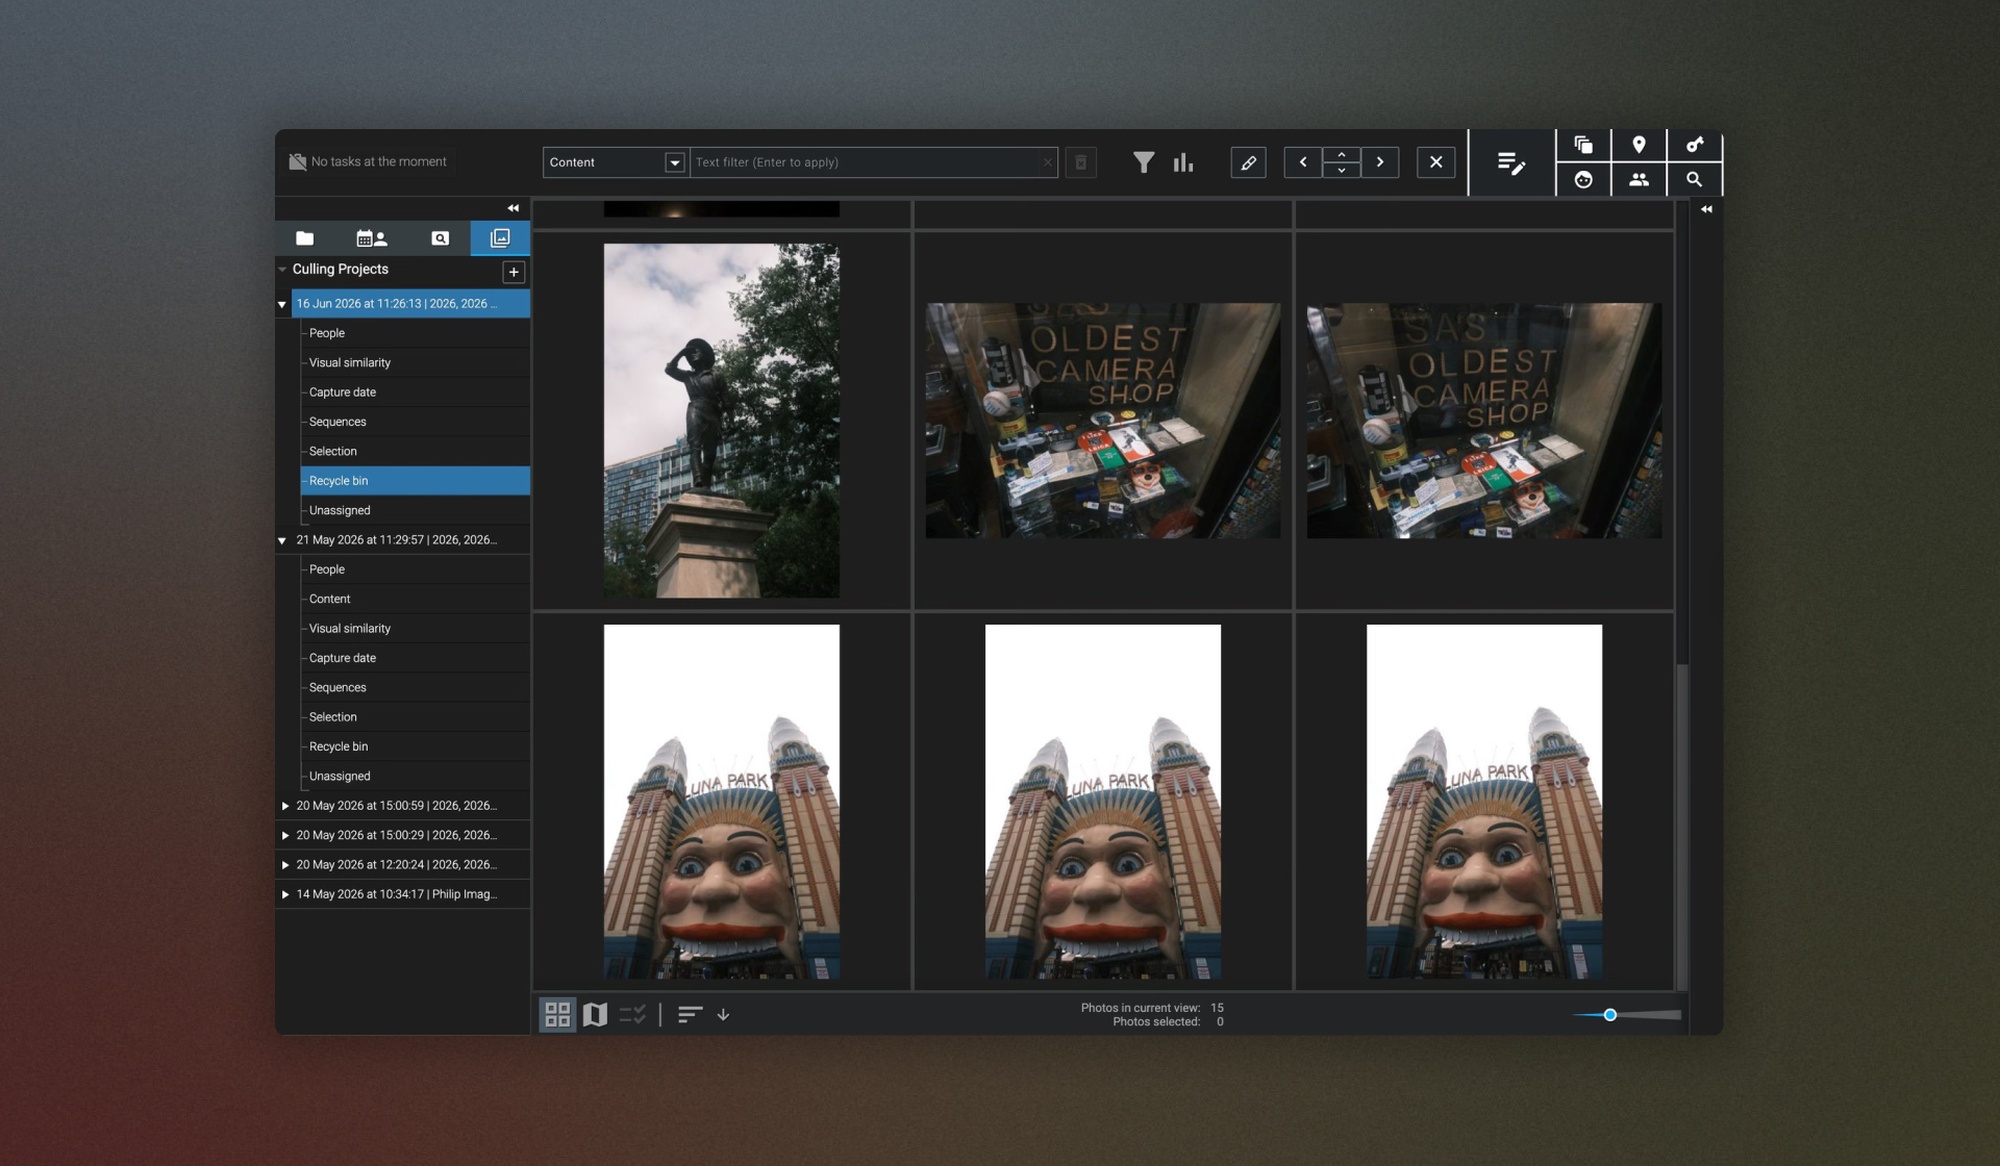
Recycle bin
Excire Foto will use its AI to automatically identify images that you can disregard and place them here. For example, Excire can reject blurry images or under- or over-exposed images, then automatically place them in the recycle bin. It’s worth noting that when these images get automatically added to the recycle bin, Excire Foto will not delete your files; you’ll always have control over that decision.
Any images you’ve marked with an X as rejected, or manually rejected, will now appear in the recycling bin too.
Unassigned
Images unassigned are those that didn’t end up in any category based on Culling projects and profile parameters, which is another really useful category for sorting images that may have no relevance to your culling project. It’s worth noting also that you can easily move images into another category should you wish.
Further refining each section and group in your Culling Project:
As well as being able to use the P and X keys to accept and reject images, within each of these categories and image groups, you can also mark image groups as favourites, so you can quickly identify the groups you want to work with.
Within each image group, you can click an image to go to a more detailed overview, where you can also open it in another application, rate it, and view all its metadata. You can also further filter images within the group, for example, by attributes such as rating or colour flags, or by individual metadata fields.
You’ve got the option to sort groups based on chronological order, filename, the number of images in each group, and also by favourites if you’ve marked any groups as a favourite, meaning they’ll appear at the top of the category for ease of access. You can also rename groups however you please and merge or remove groups should you wish.
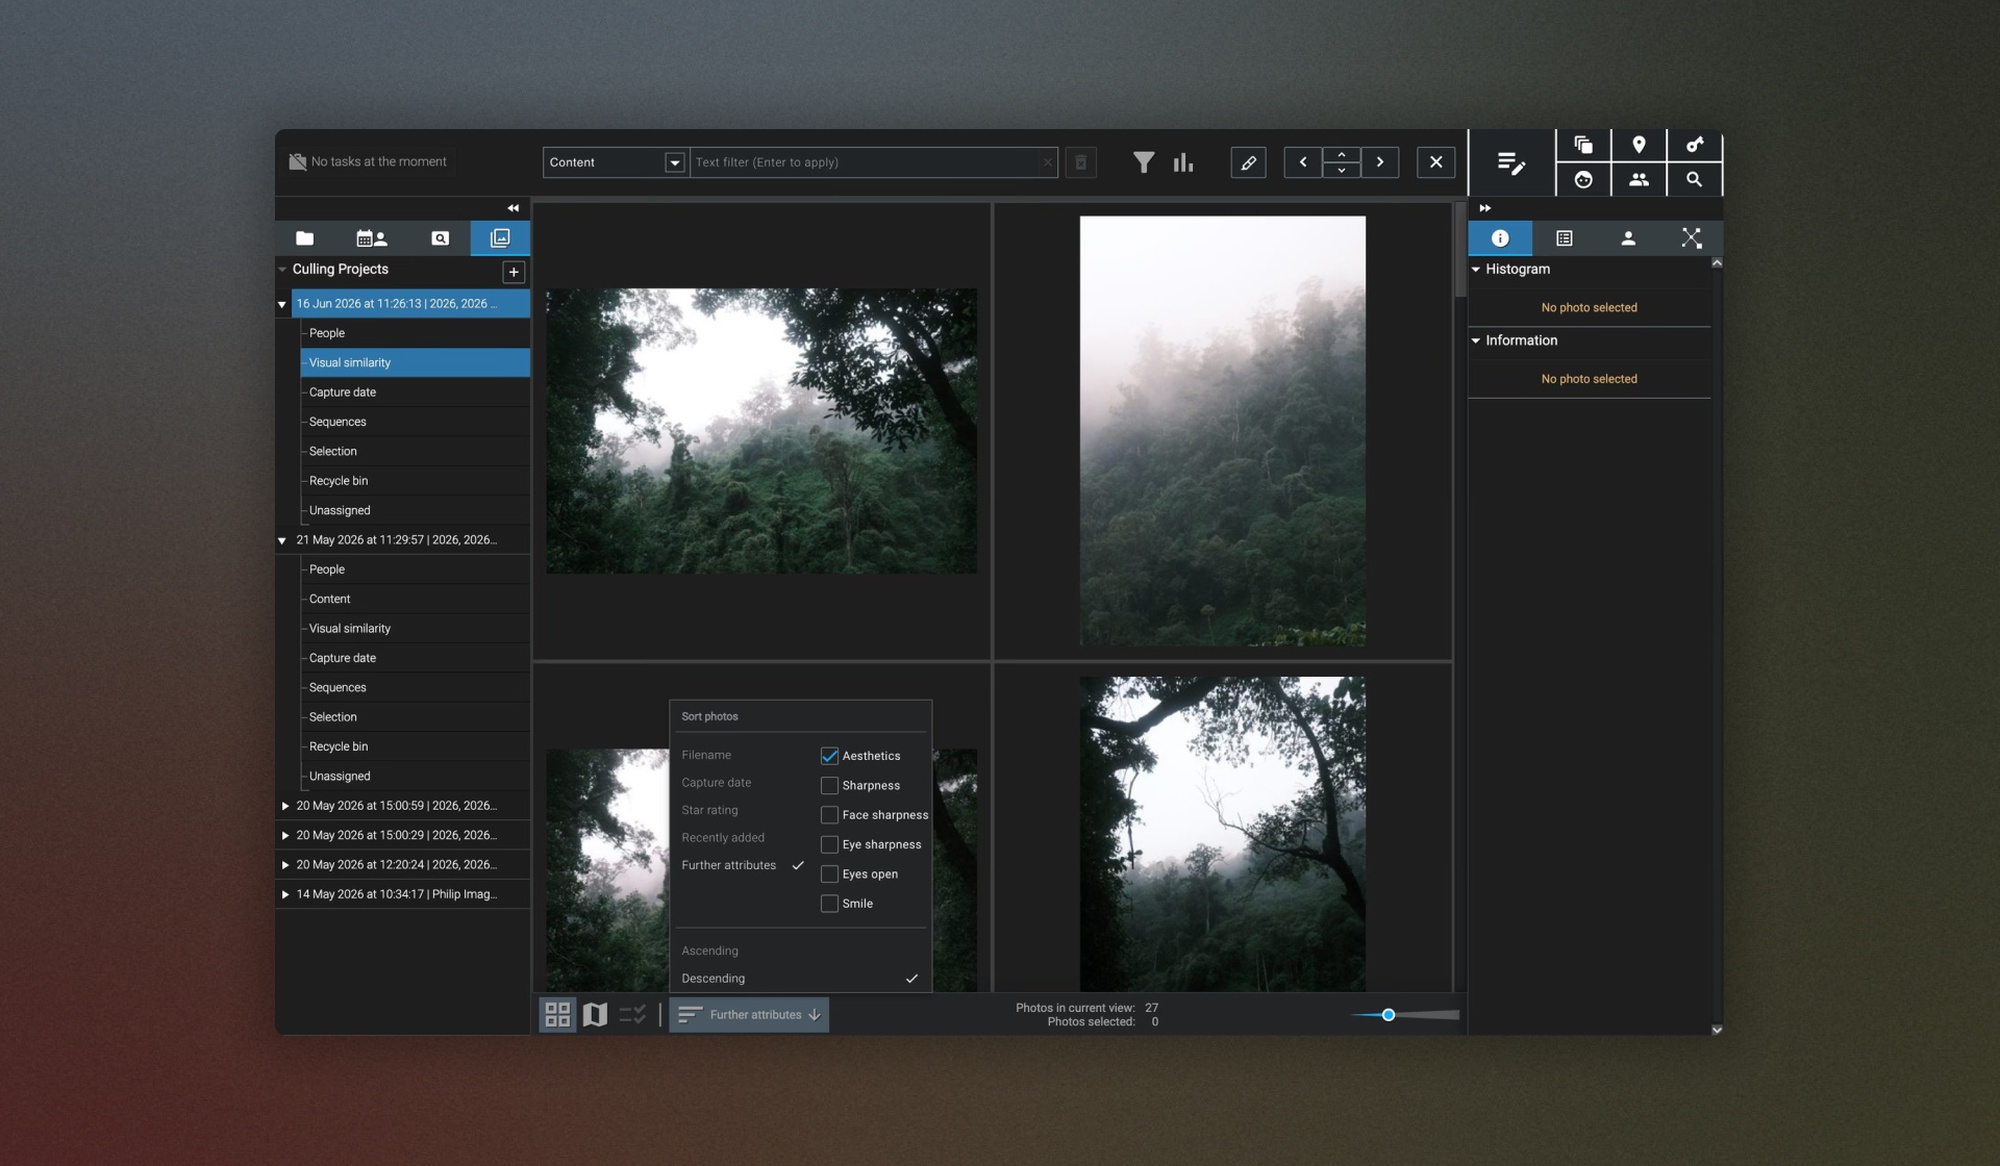
AI-powered sorting
There are also additional AI-powered sorting options for your groups, where you can have Excire Foto select the best shots from each group based on specific parameters.
By navigating to Further Attributes in the menu within a group, you can sort images in your groups based on general sharpness, face sharpness, eye sharpness, eyes open, smile, and aesthetics (as seen below).
Smart Selection
Excire Foto’s powerful AI-driven Smart Selection feature can also help flag the very best images within a group, and pick a specific number of the best images from each group, for example, pick the best 2 shots from each visually similar group based on eye sharpness or aesthetics.
You can access Smart Selection by navigating to the Manage Profiles option in the Culling Project panel and selecting Smart Selection. When Excire picks images, it adds a flag, star rating, or colour label to the photos; it does not make changes to your images.
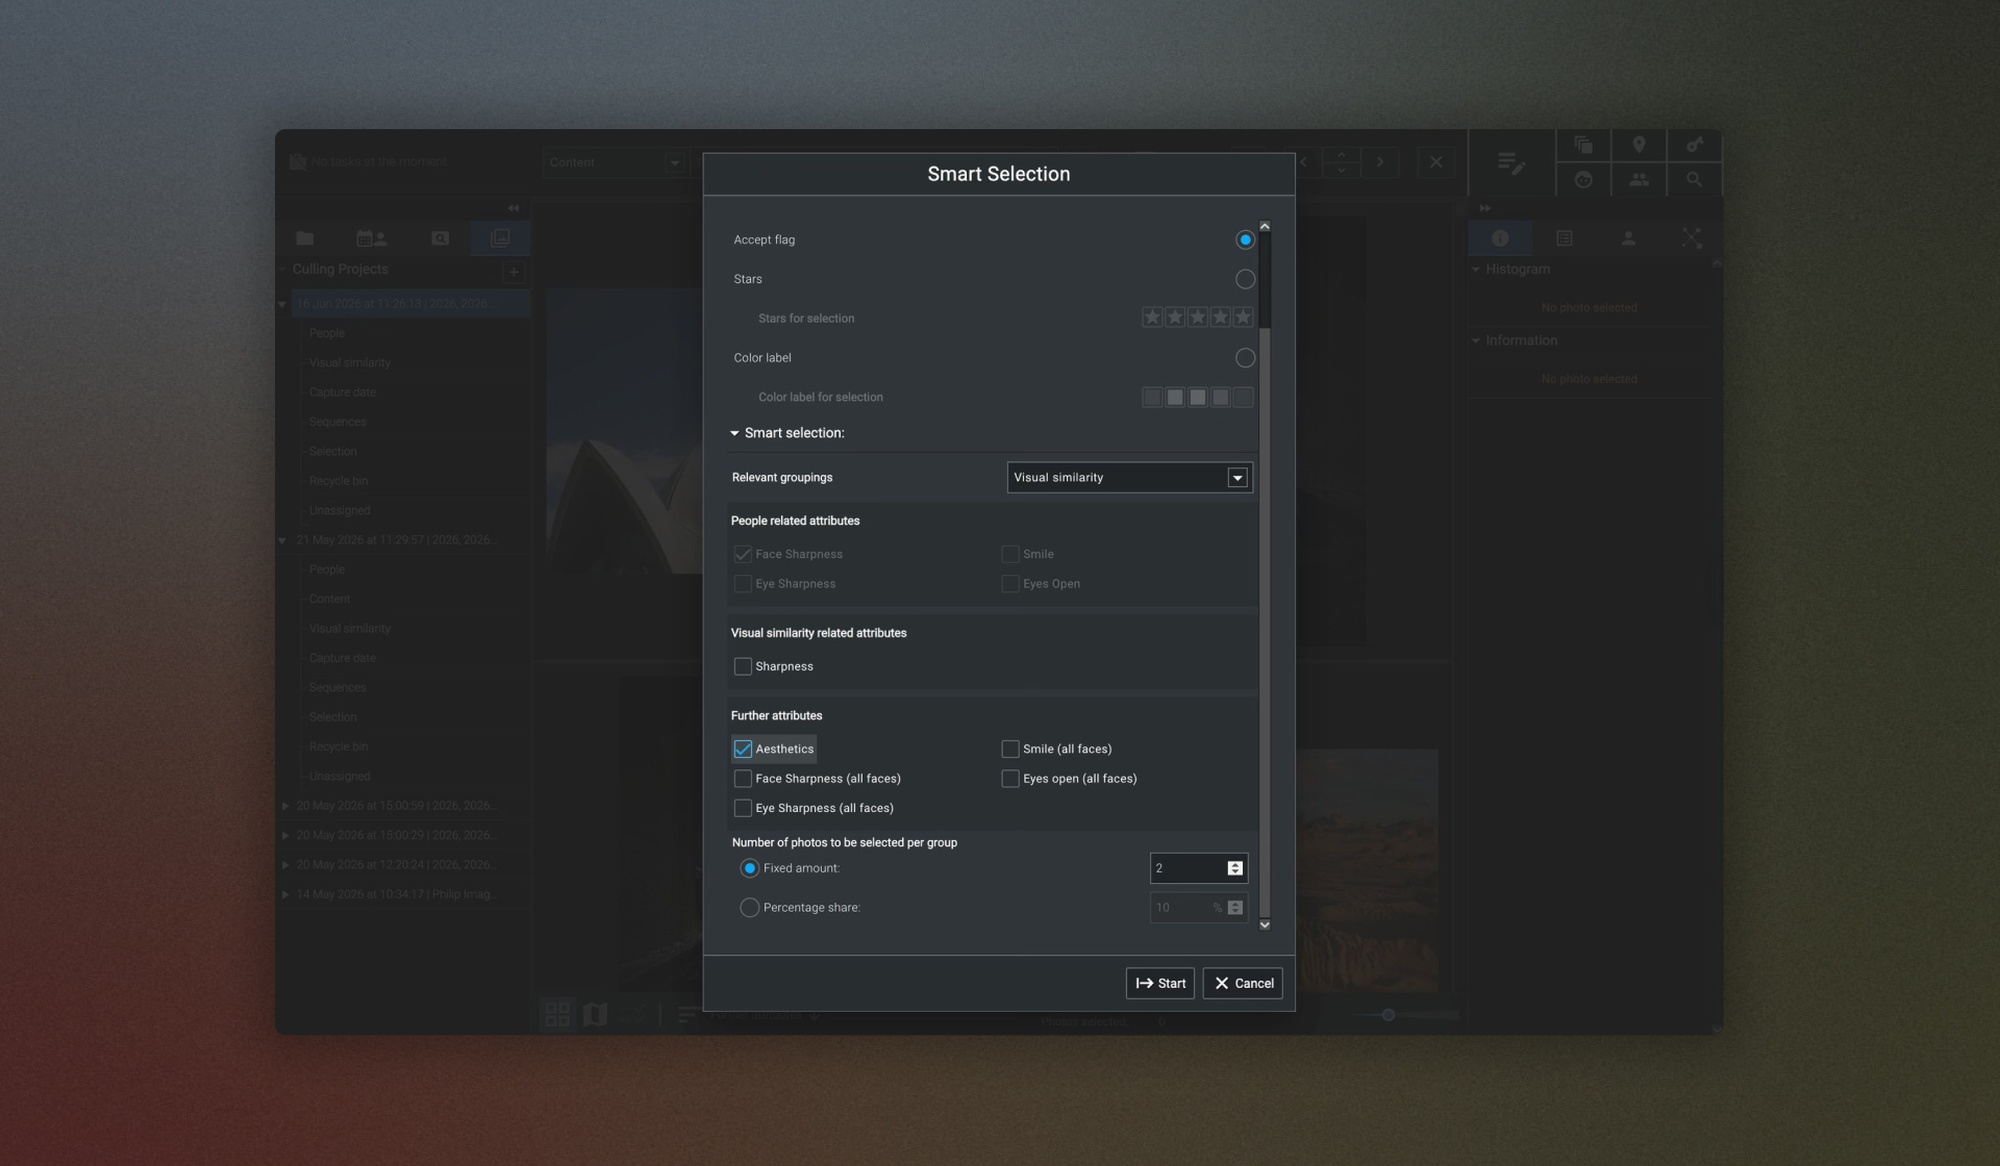

Smart Selection is entirely optional for sorting, and you also don't have to let AI do any of the selection. But for those photographers who want to fully automate a culling workflow to find their best images from thousands in just a few seconds, it’s an incredibly useful tool.
There’s so much you can do with these Culling Projects and sorting options; it's really intuitive, and I would encourage you to spend some time trying out all the various image culling, sorting, and selection parameters. In no time at all, you’ll work out the best settings for your project and find that you’ll have reached your very best images at record speed.
Final Thoughts
So there you have it: with this rundown of the key search and culling tools in Excire Foto, I hope you can see how it can revolutionise your post-shoot workflow and make life so much easier for you as a photographer. Especially when you’ve built up a significant collection of images over the years, or you’re needing to find the best images from a shoot and get them over to your customers, and quickly.
Excire’s powerful AI-led image search and culling toolbox is remarkable for its accuracy and speed, and I am genuinely impressed by it. What’s more, Excire is using AI for good in the world of photography, and I think that’s super important in today's photography vs AI landscape.
Get Excire Foto:
You can get Excire Foto 2027, the Excire Search 2026 Lightroom Plugin, or the Excire bundle here.


