


Culling a large shoot and finding your best images can take hours. I put Excire Search 2026 in Lightroom to the test to see if its AI tools could speed things up. Here’s how it works...

How I Used Excire Search to Cull My Photos and Cut My Editing Time in Lightroom
As a photographer, I often find myself short on time for image editing, especially with travel and shoots filling up the calendar, not to mention everything else in life. Many of you reading this will feel the same.
Finding the time to organise and pick out your best images from a large shoot or a trip away can be an exhaustive, even daunting, task. But there is a solution, and this is where, for me, Excire Foto and Excire Search (for Lightroom) come in.
On a recent trip to the Czech Republic, I took many images (as I usually do). This time, though, instead of spending hours each evening going through them one by one, I used Excire Search - the Lightroom plugin version of Excire Foto - to take care of some of the heavy lifting.
By bringing Excire Search into my workflow to cull and sort images from the trip, I was able to quickly and efficiently find my strongest shots.
Read on to see how I used Excire Search, and how you can do the same on your next shoot. If you’d like a more detailed overview of Excire Foto and how it works for photographers, you can read our in-depth feature on Excire Foto here.
What Are Excire Foto 2027 and Excire Search 2026?
Excire Foto 2027 and Excire Search 2026 (Lightroom plugin) are AI-led image search, culling and organisation software designed to help photographers navigate large image libraries.
Using a mix of keyword and content-based search, they make it much easier to cull and search specific photos within a big collection, and you can also use Excire Foto and Excire Search to cull your photo library by identifying your strongest images and grouping them, while filtering out blurry, underexposed, or overexposed images, images featuring people with eyes closed, or simply photos that are not as visually strong.
In short, it uses AI to help you quickly surface your best photos and cut out the rest.
How Does Excire Search 2026 Work in Lightroom?
As mentioned, Excire Search 2026 is the Lightroom plugin version of Excire Foto. It’s what I used for my Czech Republic images, and the focus of this guide. Setup is straightforward, and I had it installed and up and running in minutes.
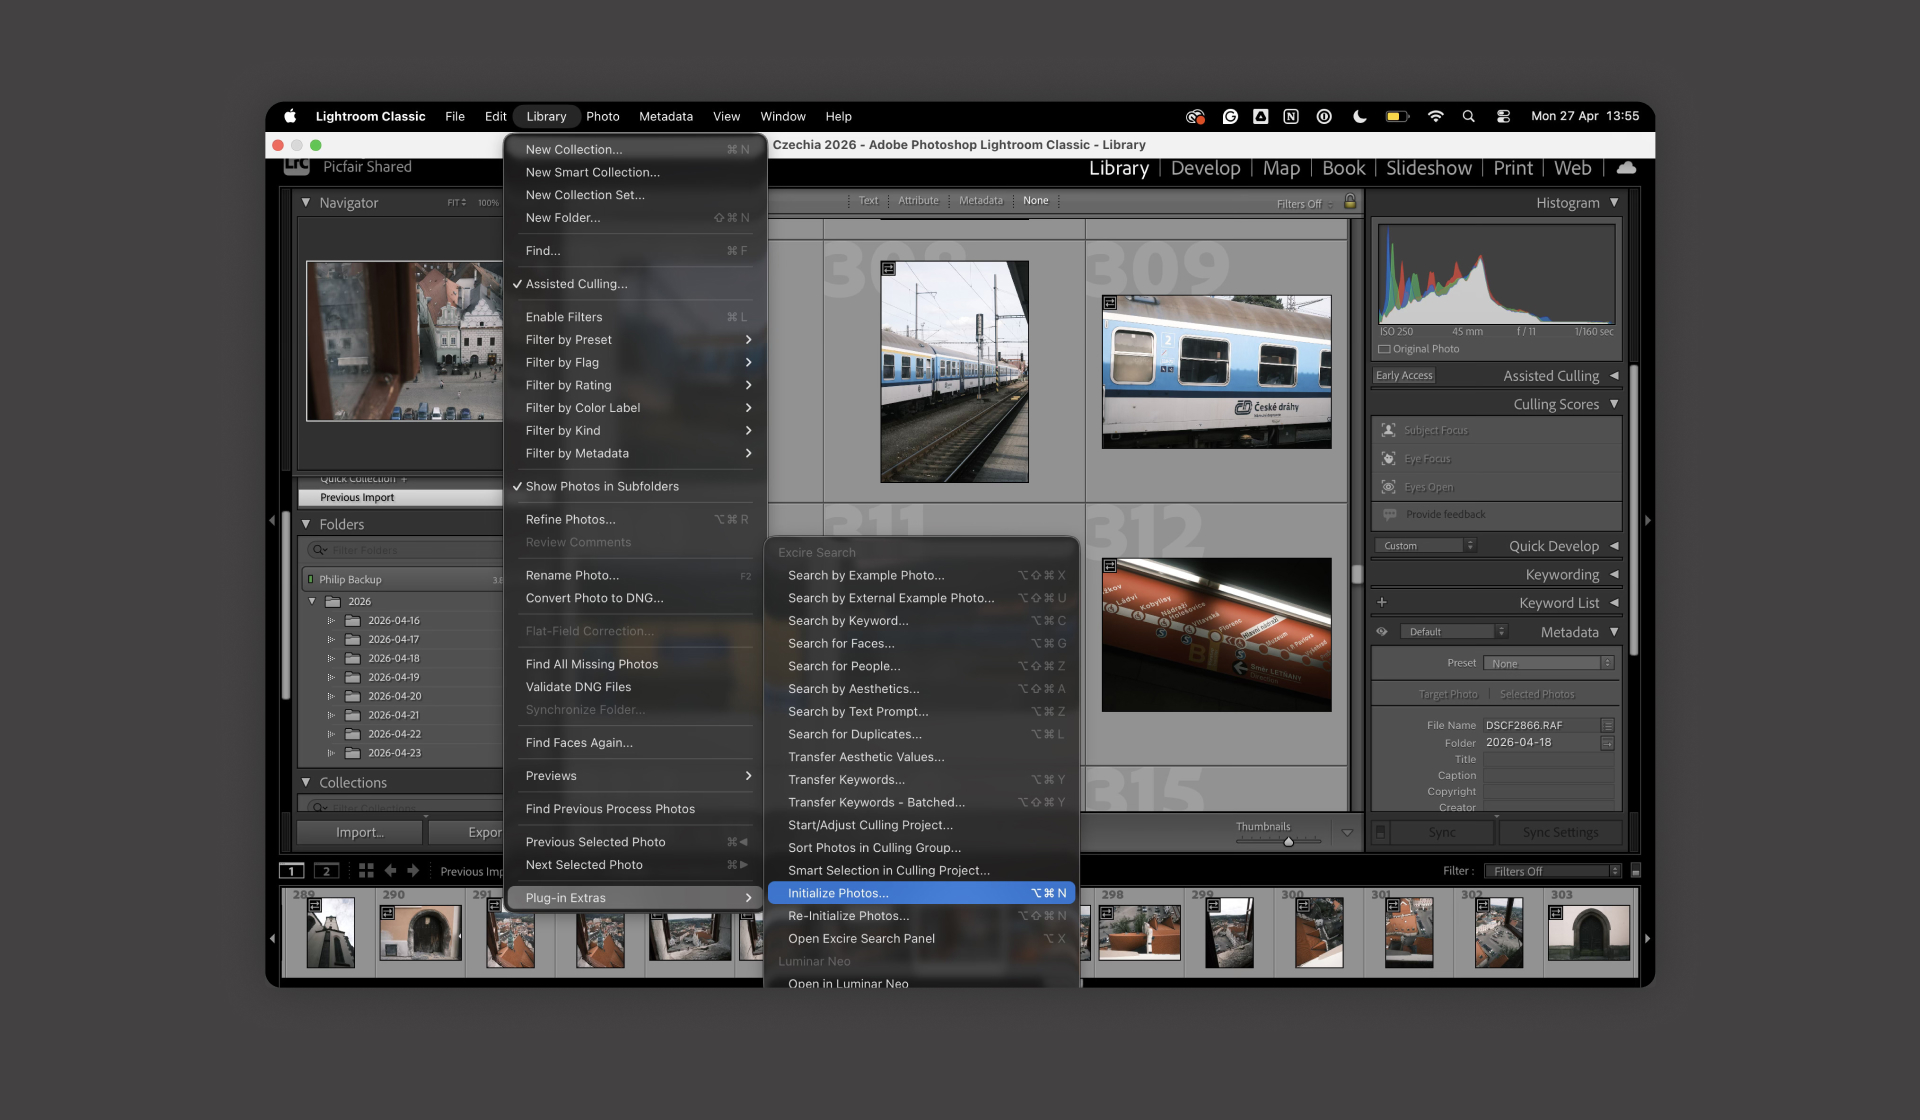
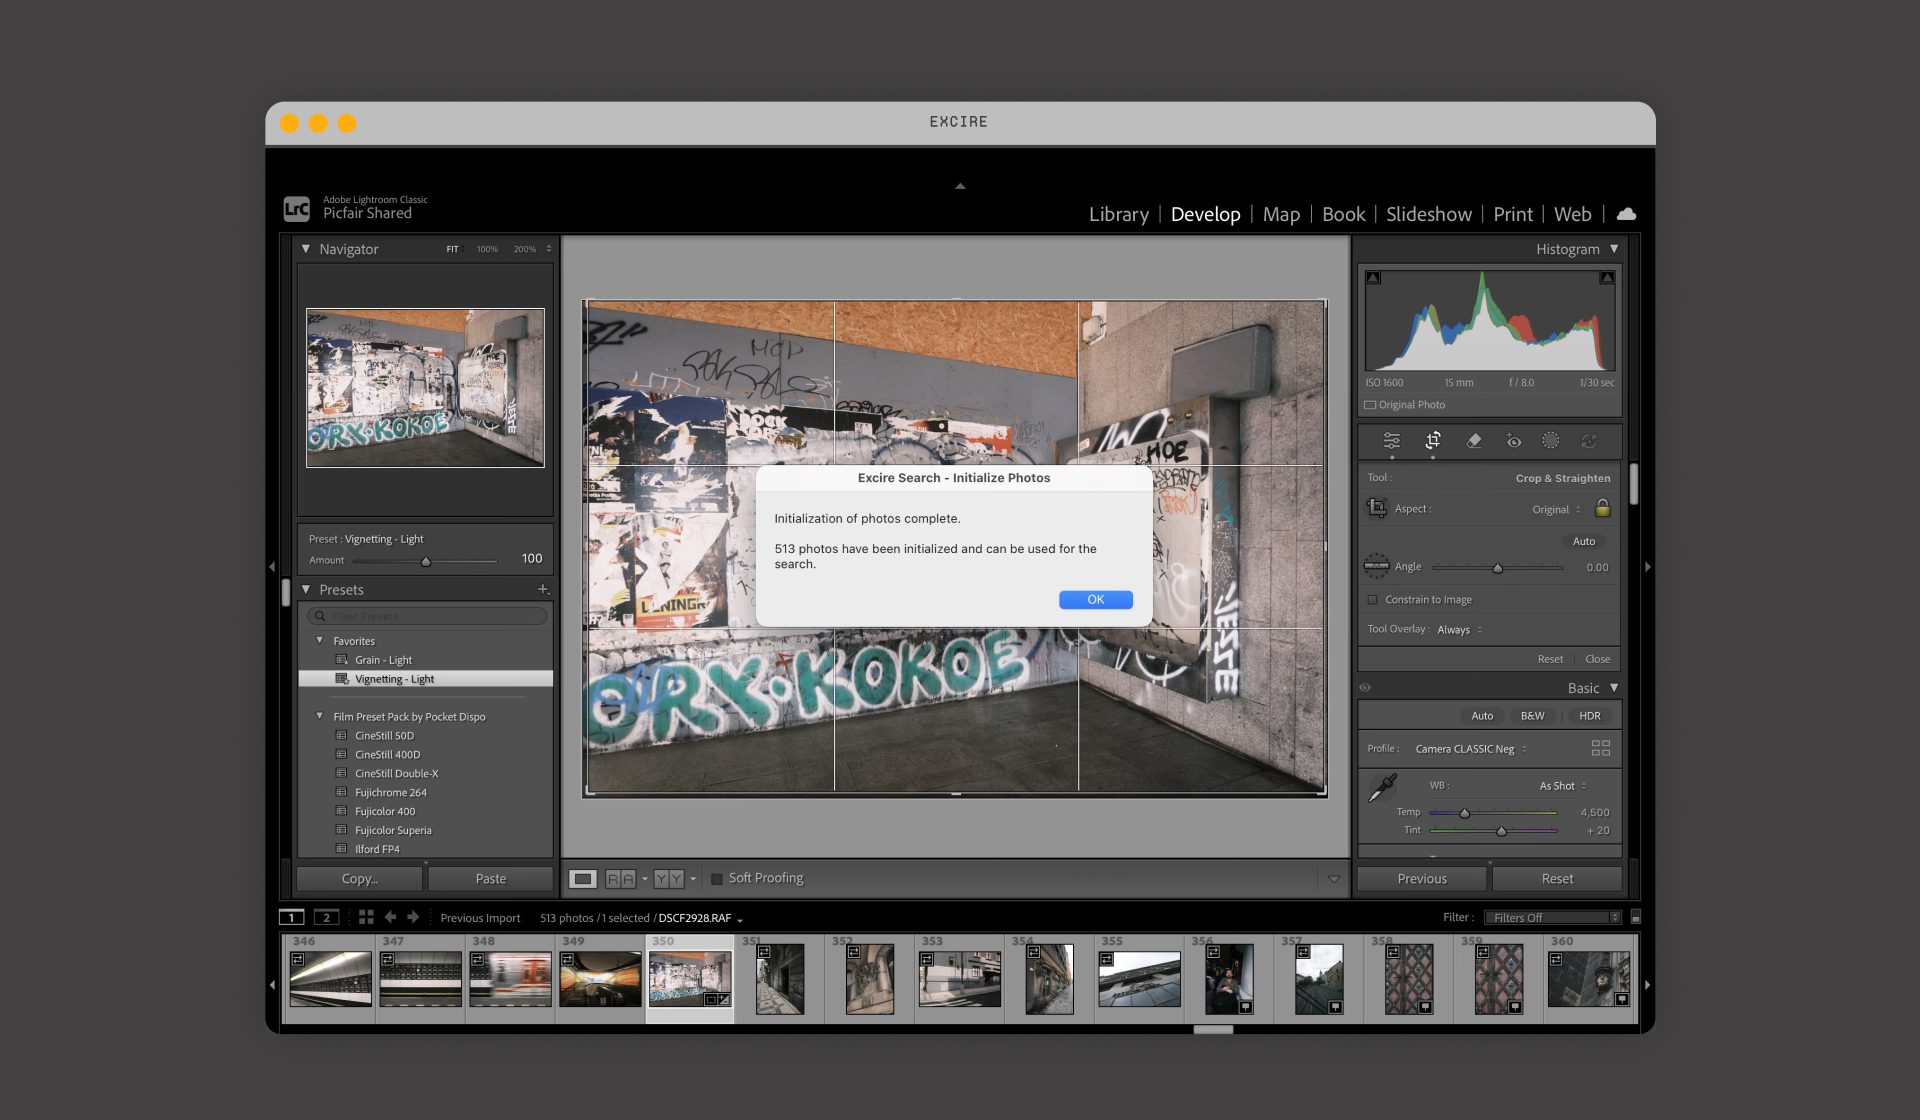
Before you start, you’ll need to initialise your images so Excire Search can work with them. It is a simple step: head to Library > Plugin Extras > Initialize Photos.
Once that’s done, you can start searching your images directly within Lightroom. Using the Excire Search panel, you can run AI-led searches to find specific images in your Catalog, or create a new Culling Project to help filter out the ones you don’t need.
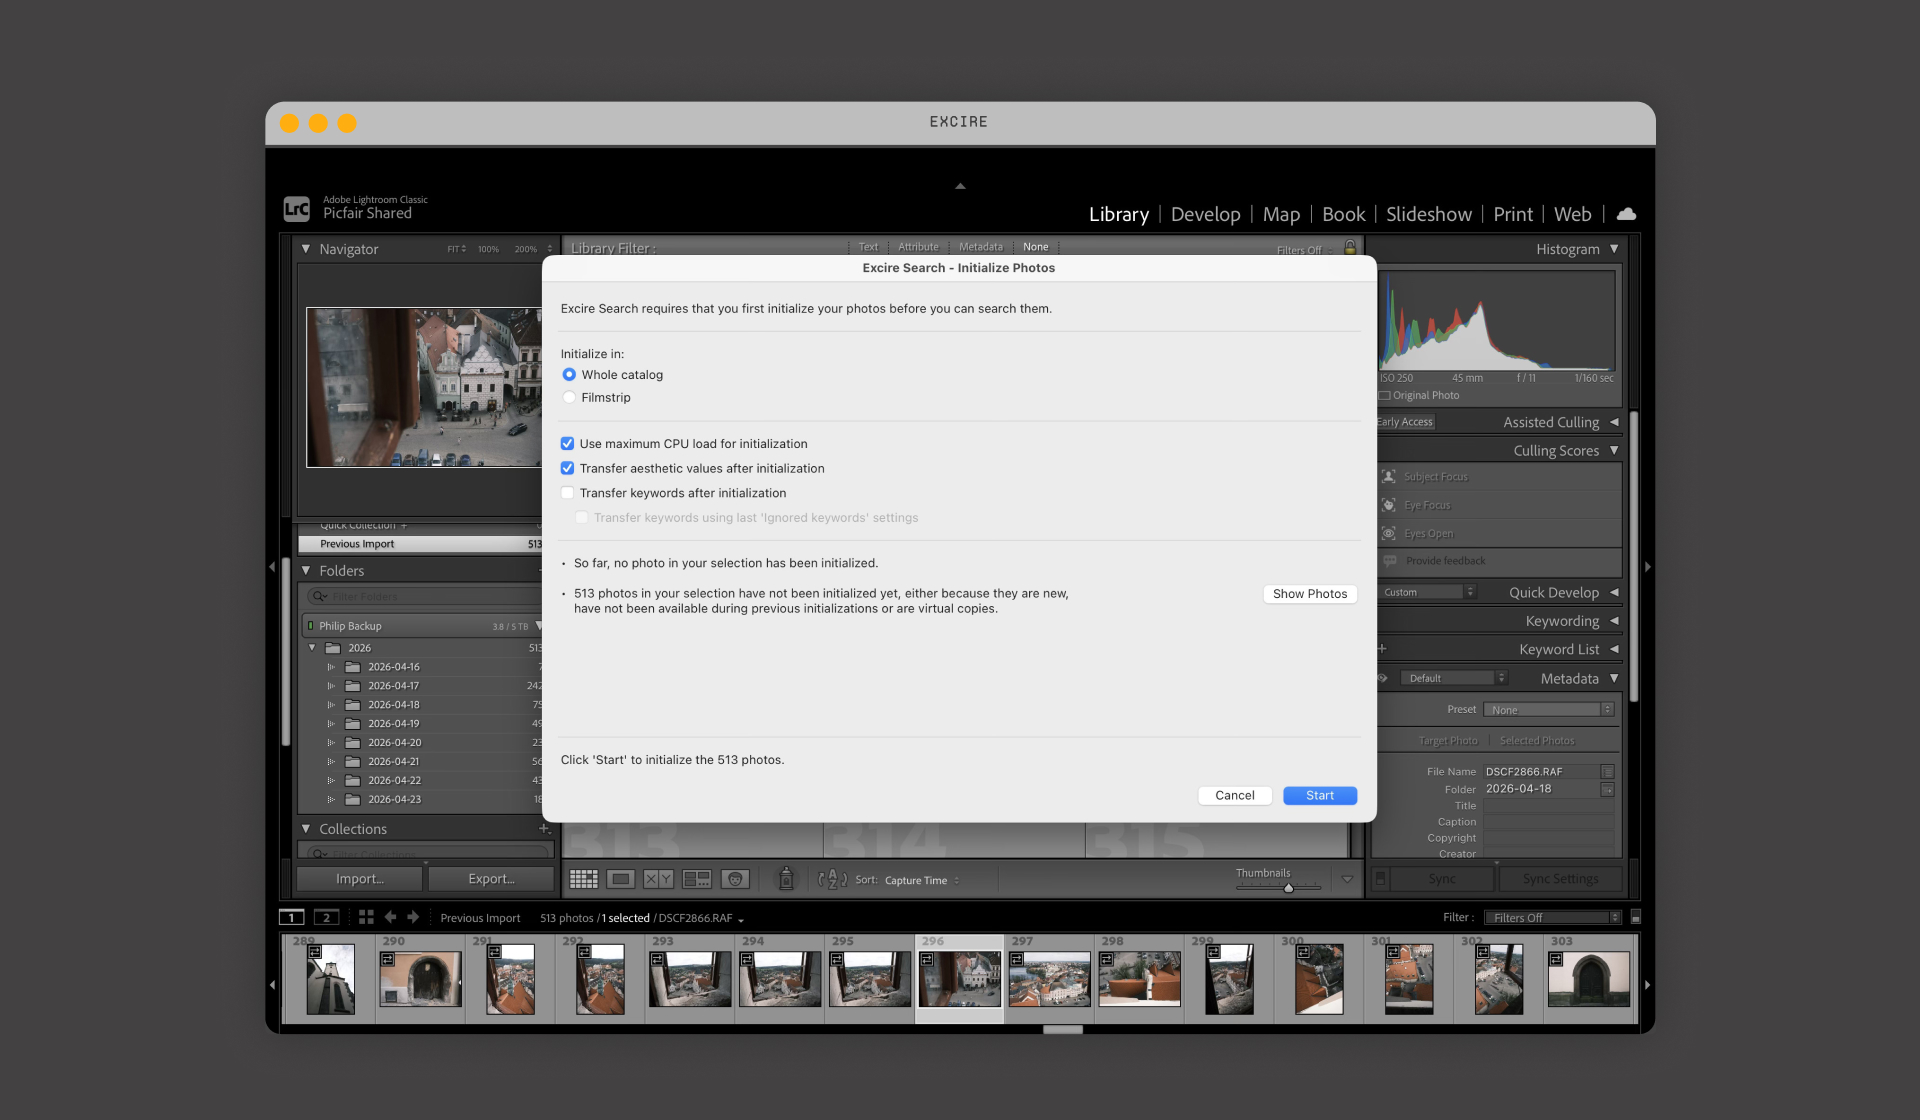
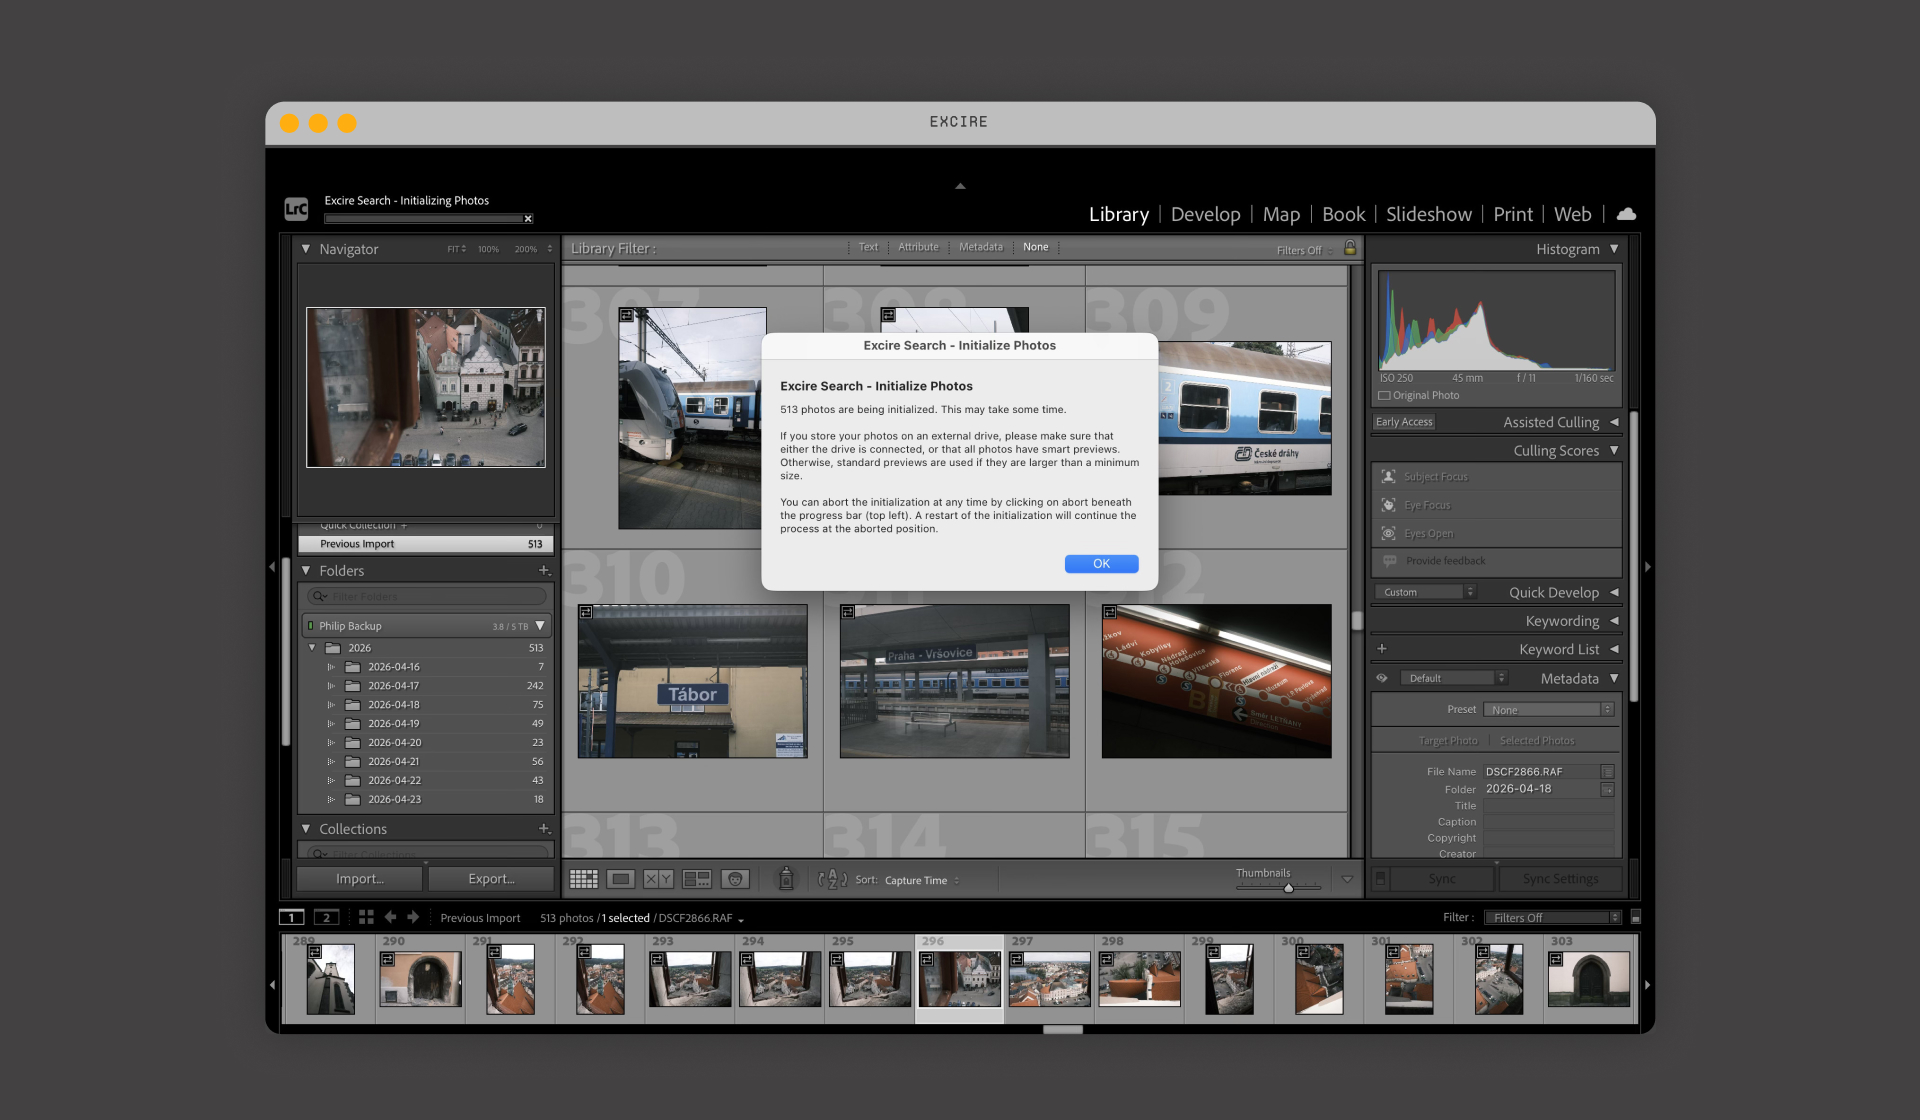
Initializing Images
You can leave the initialisation running in the background while you carry on with other tasks in Lightroom. If you have a large library, it may take some time to complete, so for particularly big Catalogs (10,000+ images), it’s worth letting it run overnight.
How I Used an Excire Search 2026 Culling Project to Find My Best Shots
By creating a Culling Project, you can remove images with common issues such as blur, overexposure, or underexposure, and then group your photos into different content sets. It makes it much quicker to work through a shoot and pull out the images worth keeping for your edit.
Here’s how I set up my Culling Project:
Creating a Culling Project
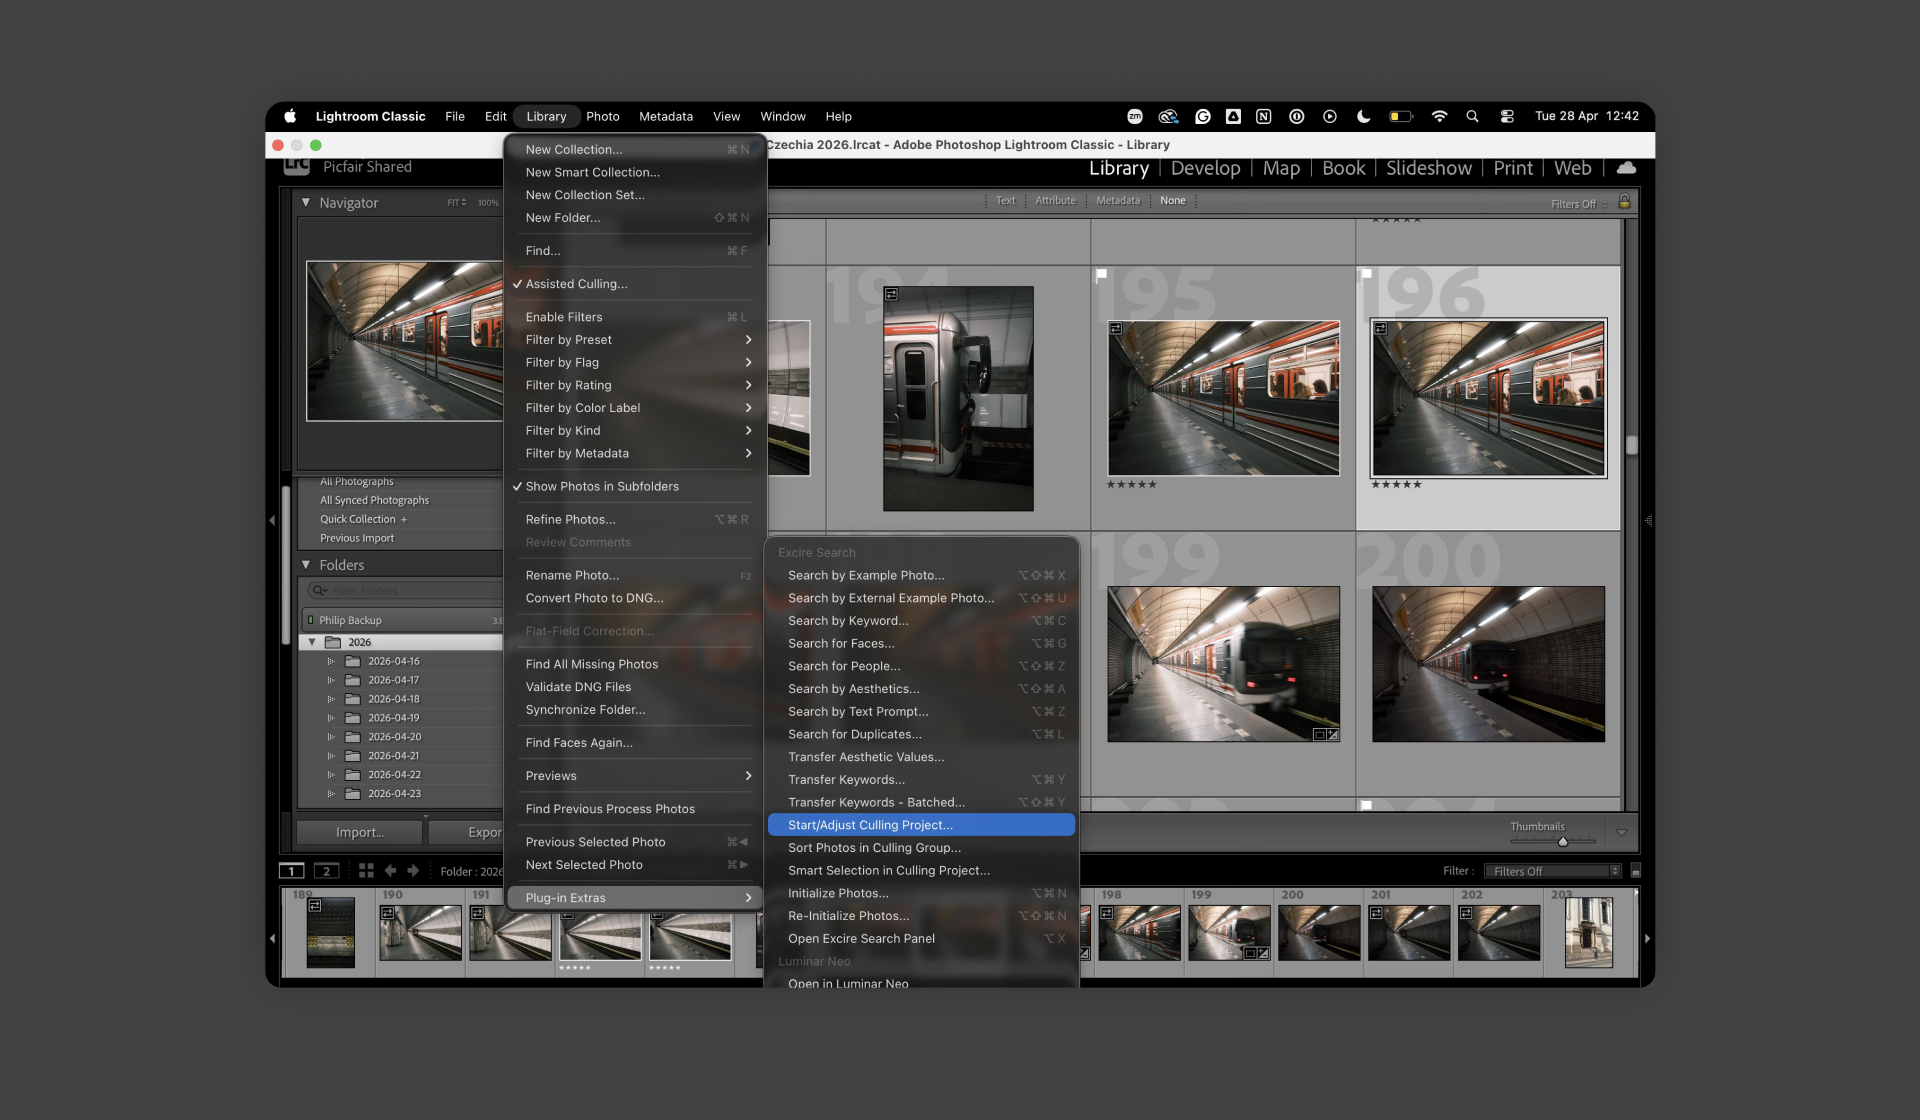
Once I had initialized my images, I created a new Culling Project by going to Library > Plugin Extras > Start/ Adjust Culling Project. You can also go directly to the Excire Search Panel and select Start/ Adjust Culling Project.
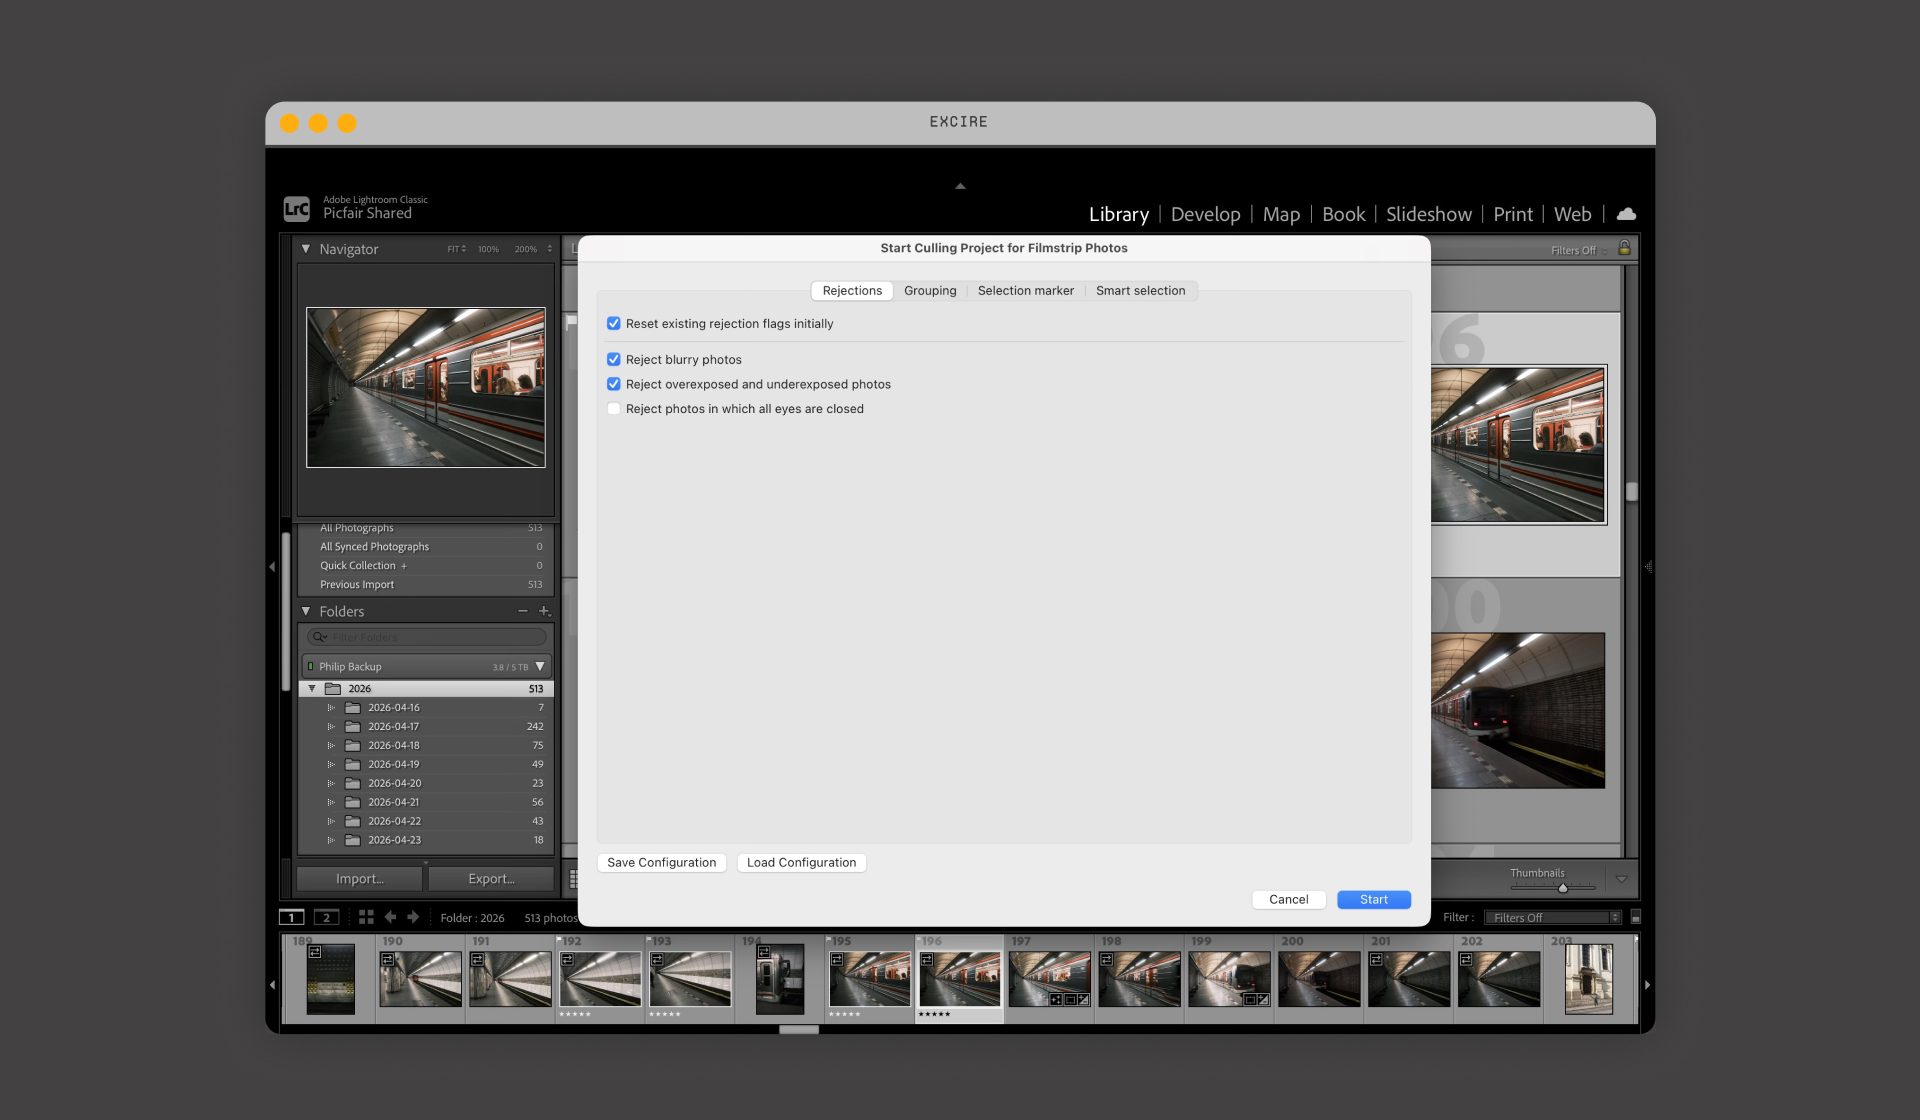
First, I set it to reject blurry, underexposed, and overexposed images automatically.
Next, I refined it to suit my own shooting style. I often photograph specific subjects that help tell the story of a place, such as statues, architecture, facades, and railways. Using Excire’s culling tools, I was able to group these subject types directly within the project.
There are plenty of options to choose from depending on the type of photography you do, as Excire’s AI can detect a wide range of subjects within your images.
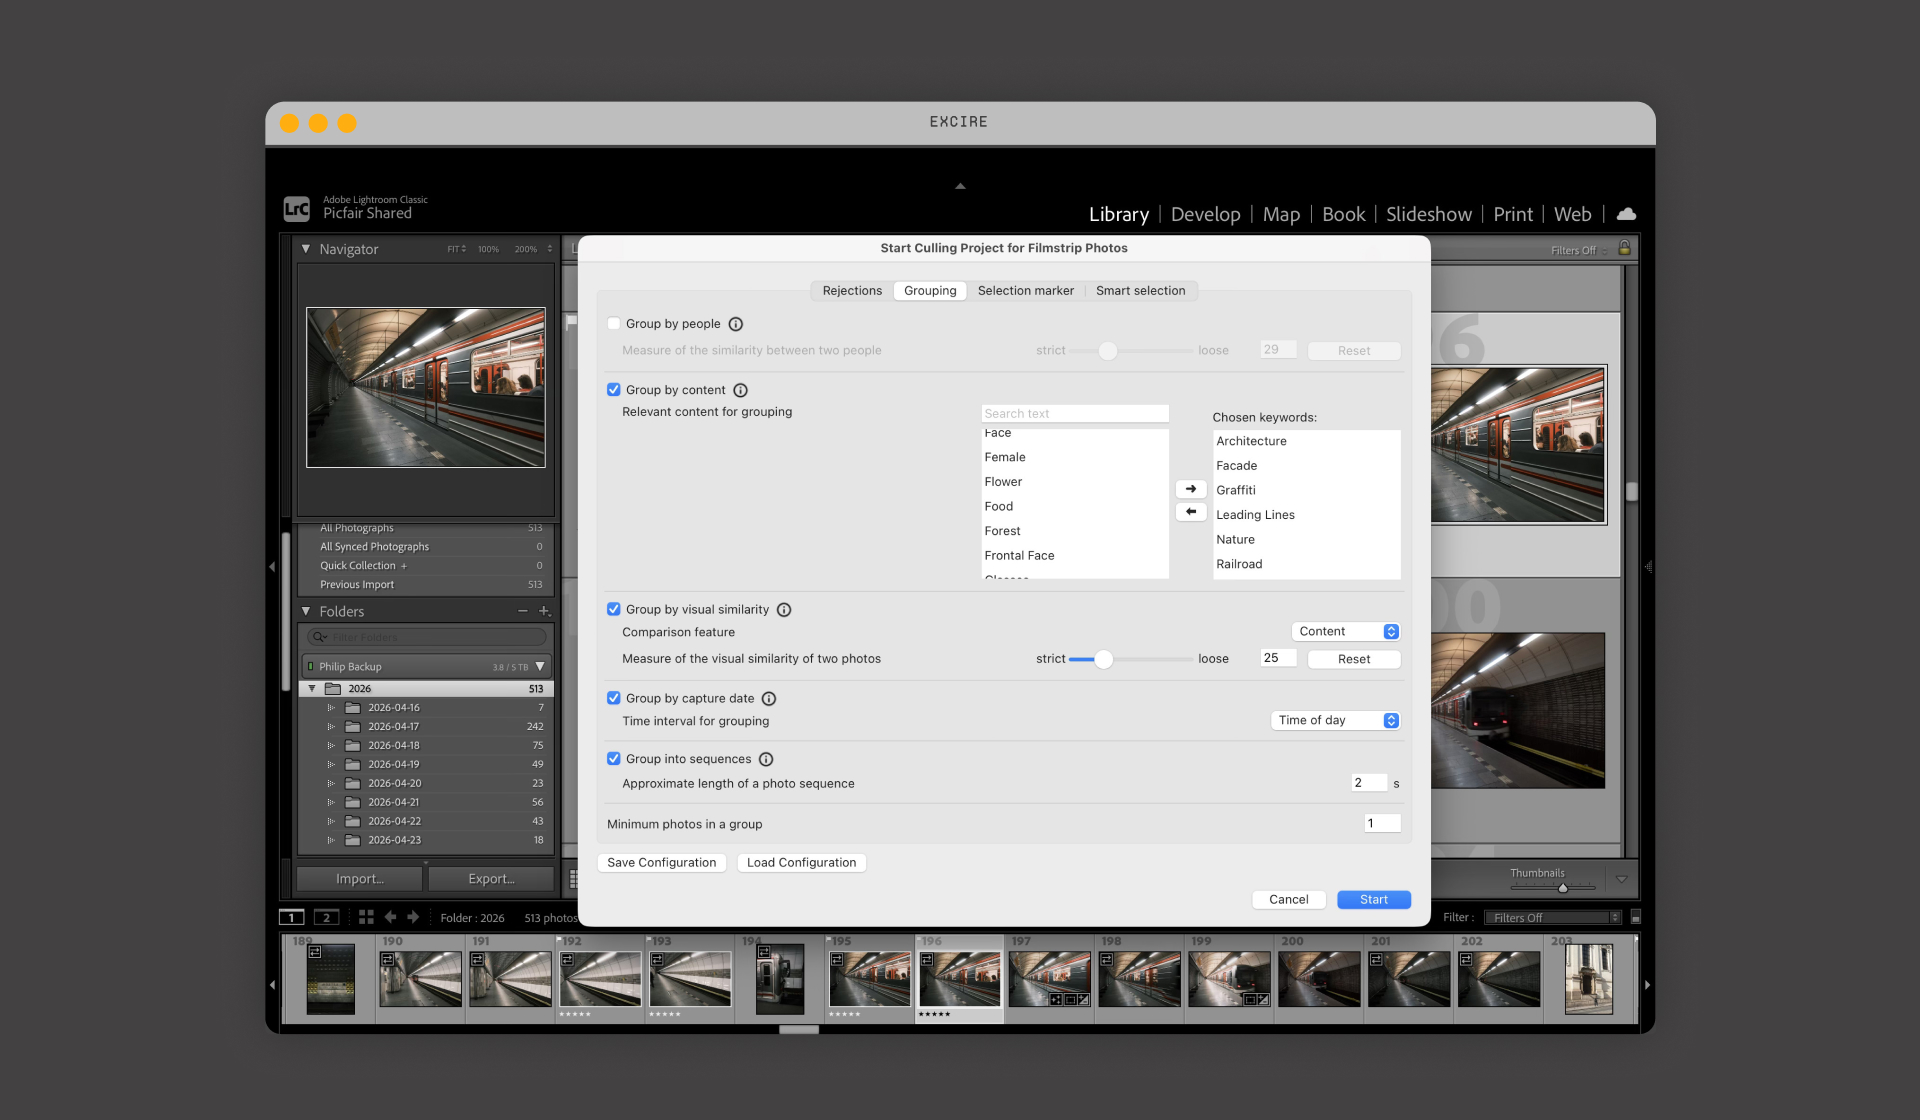
You can also filter by visual similarity, which is particularly useful, and there are several dedicated options for portrait photography.
I also selected the Flag photos option as the Selection marker, but you need to enable Smart Selection in the next tab for this to take effect.
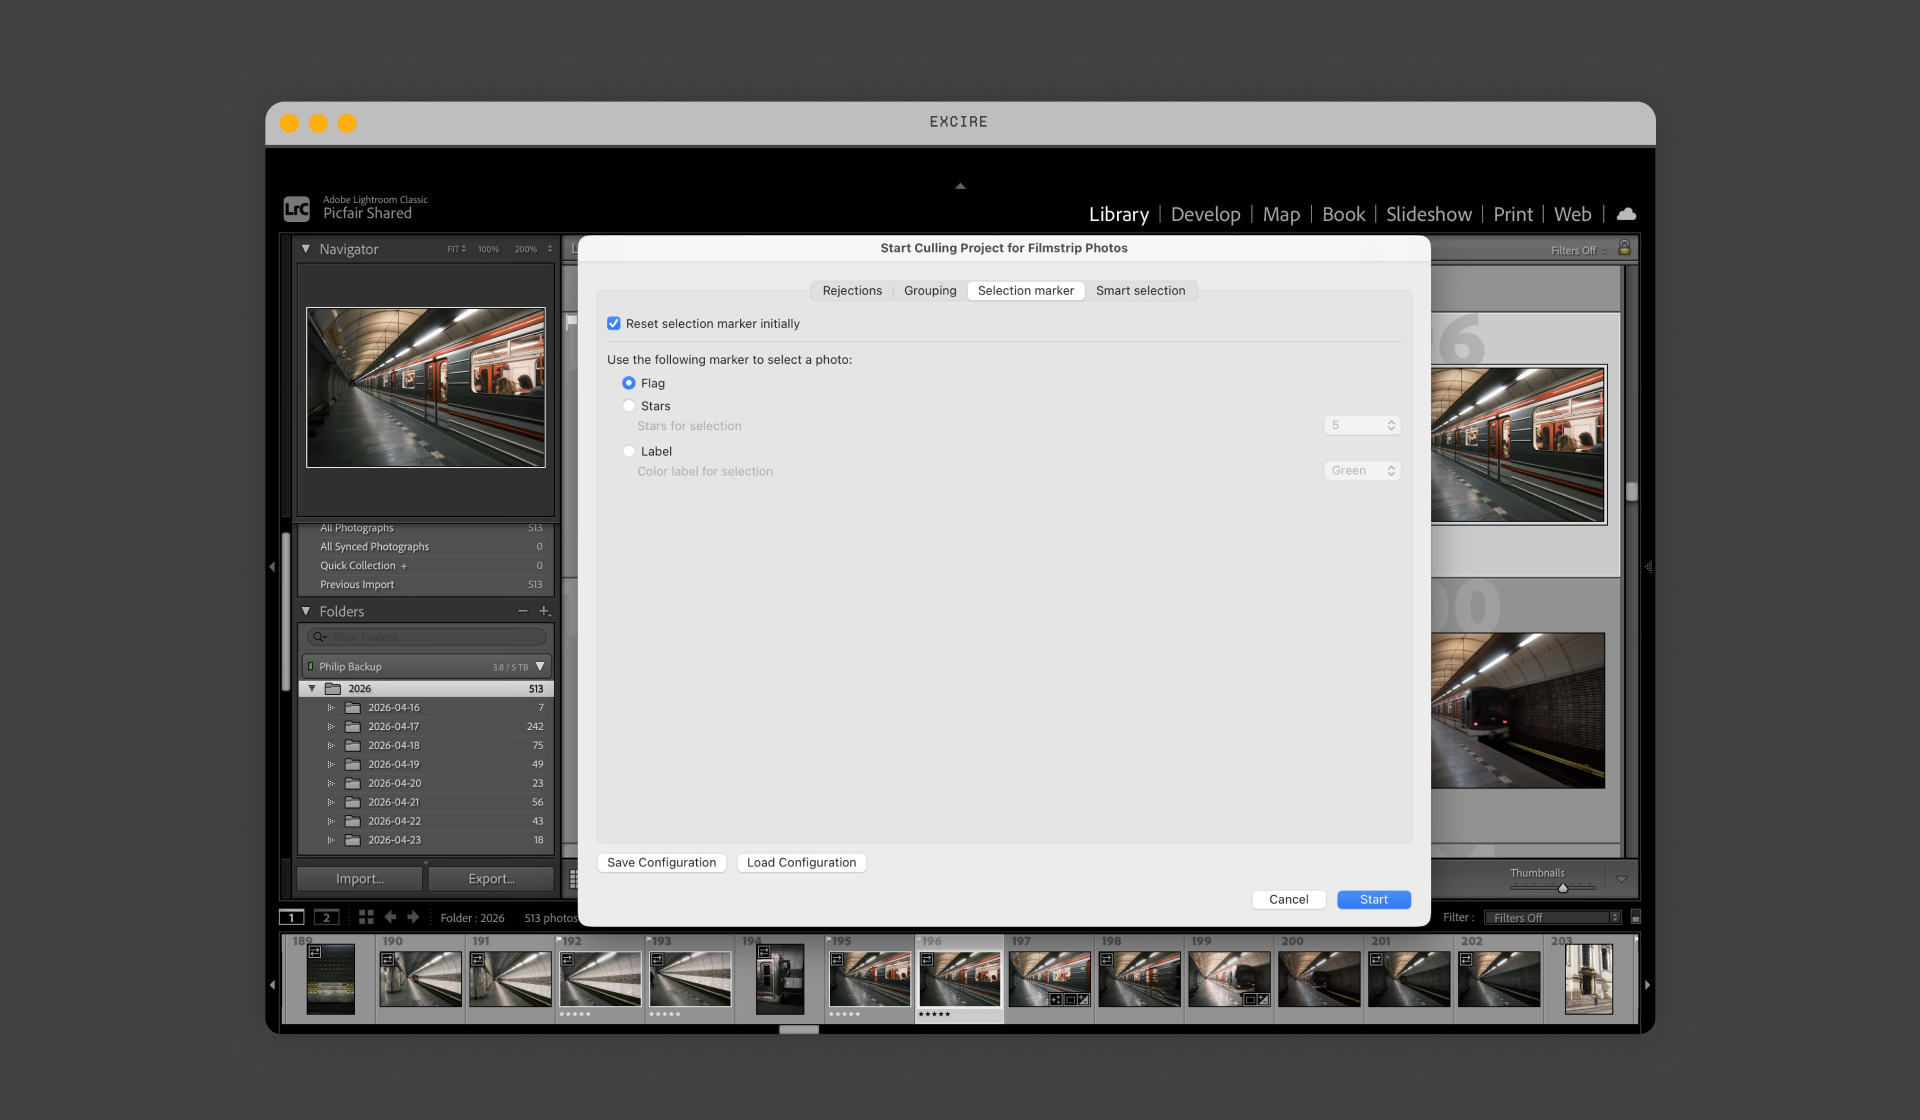
Additional smart selection tools are available for a more detailed cull.

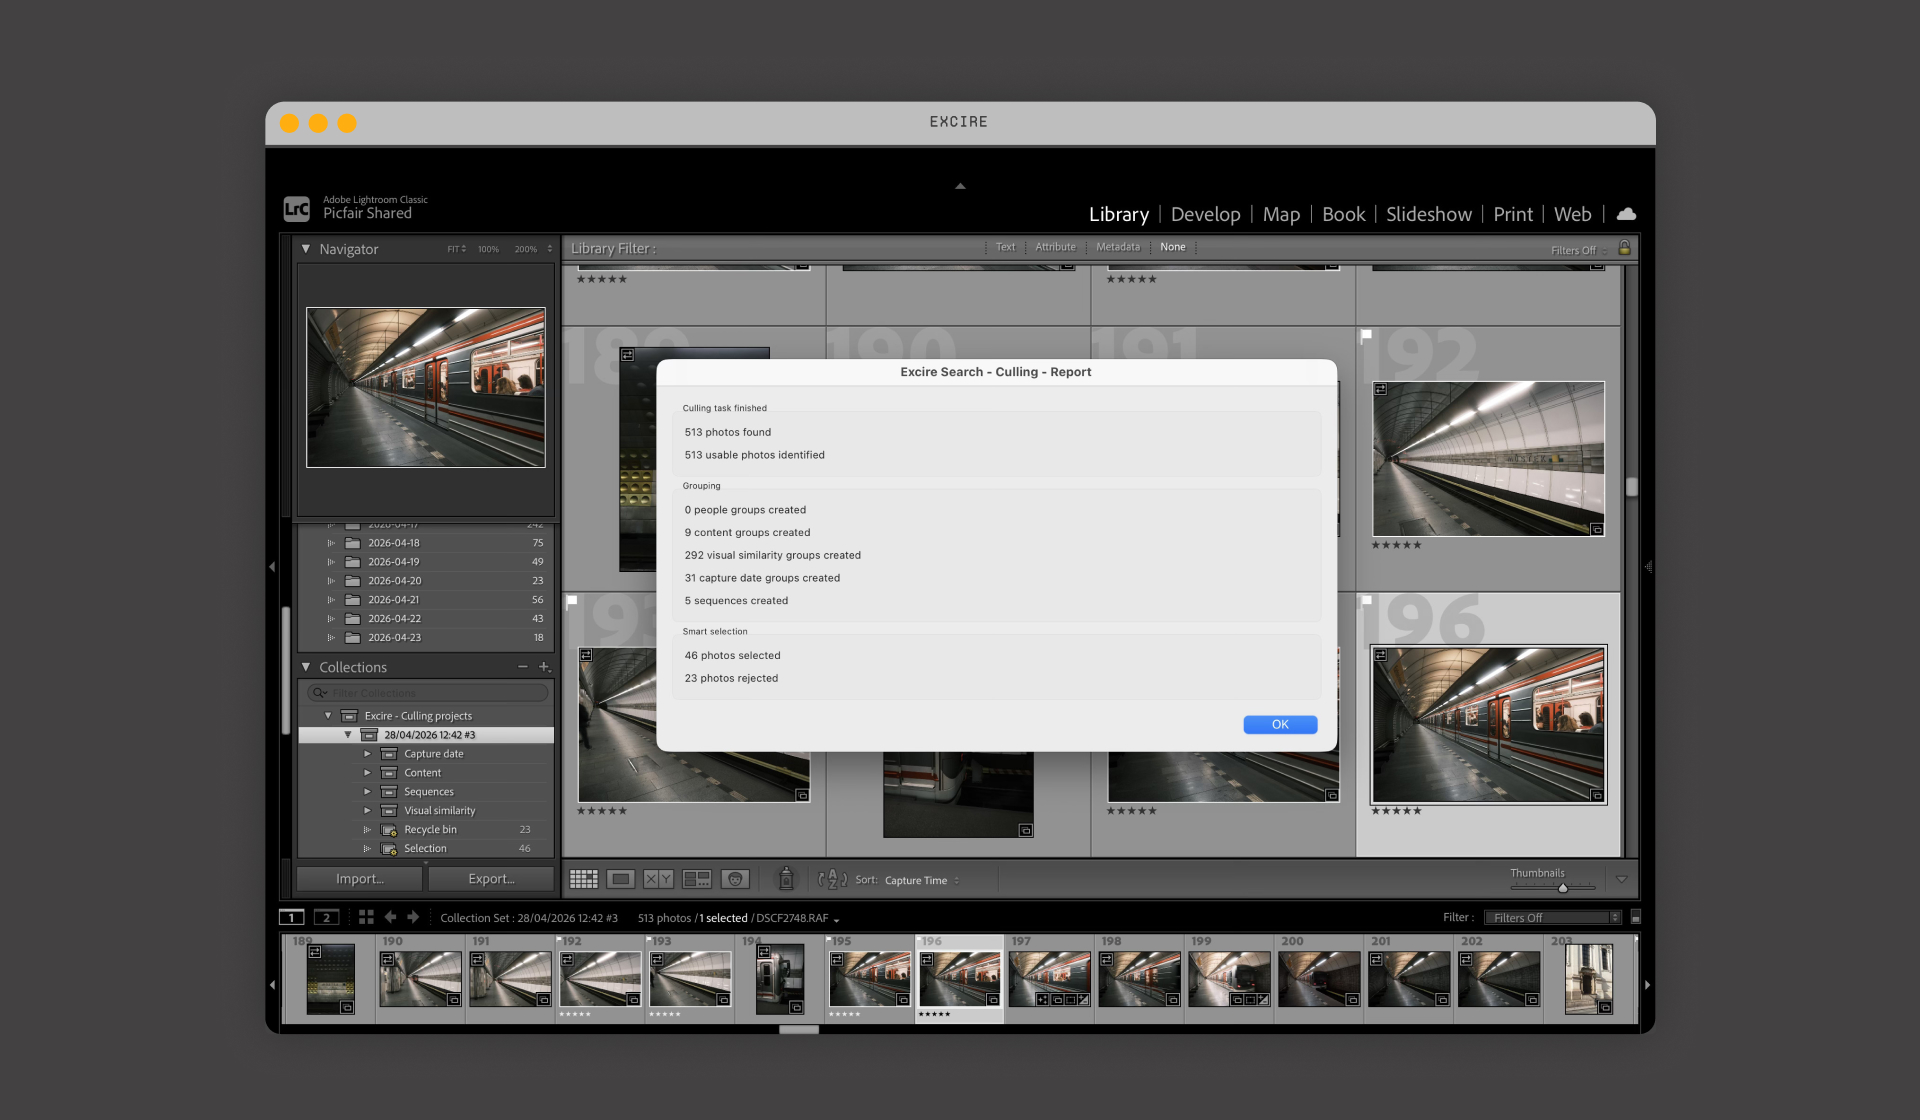
Once I had set all the parameters for my workflow, I clicked Start to run the Culling Project, which completed surprisingly quickly.
When the analysis finished, it created a new collection in my Lightroom Catalog under Excire - Culling projects. Excire Search then organised my images from the filmstrip into folders according to the criteria I set in the panel. These included Content, Visual Similarity, and Sequences (images captured one after another), with further sub-folders helping to refine the selection even more.
The Results, And My Thoughts
Overall, I was surprised and very impressed!
I was particularly impressed by how, from the get-go, the AI tools managed to group my images into a Collection in no time whatsoever; it literally took less than 30 seconds, and it unearthed some great images I would have otherwise overlooked.
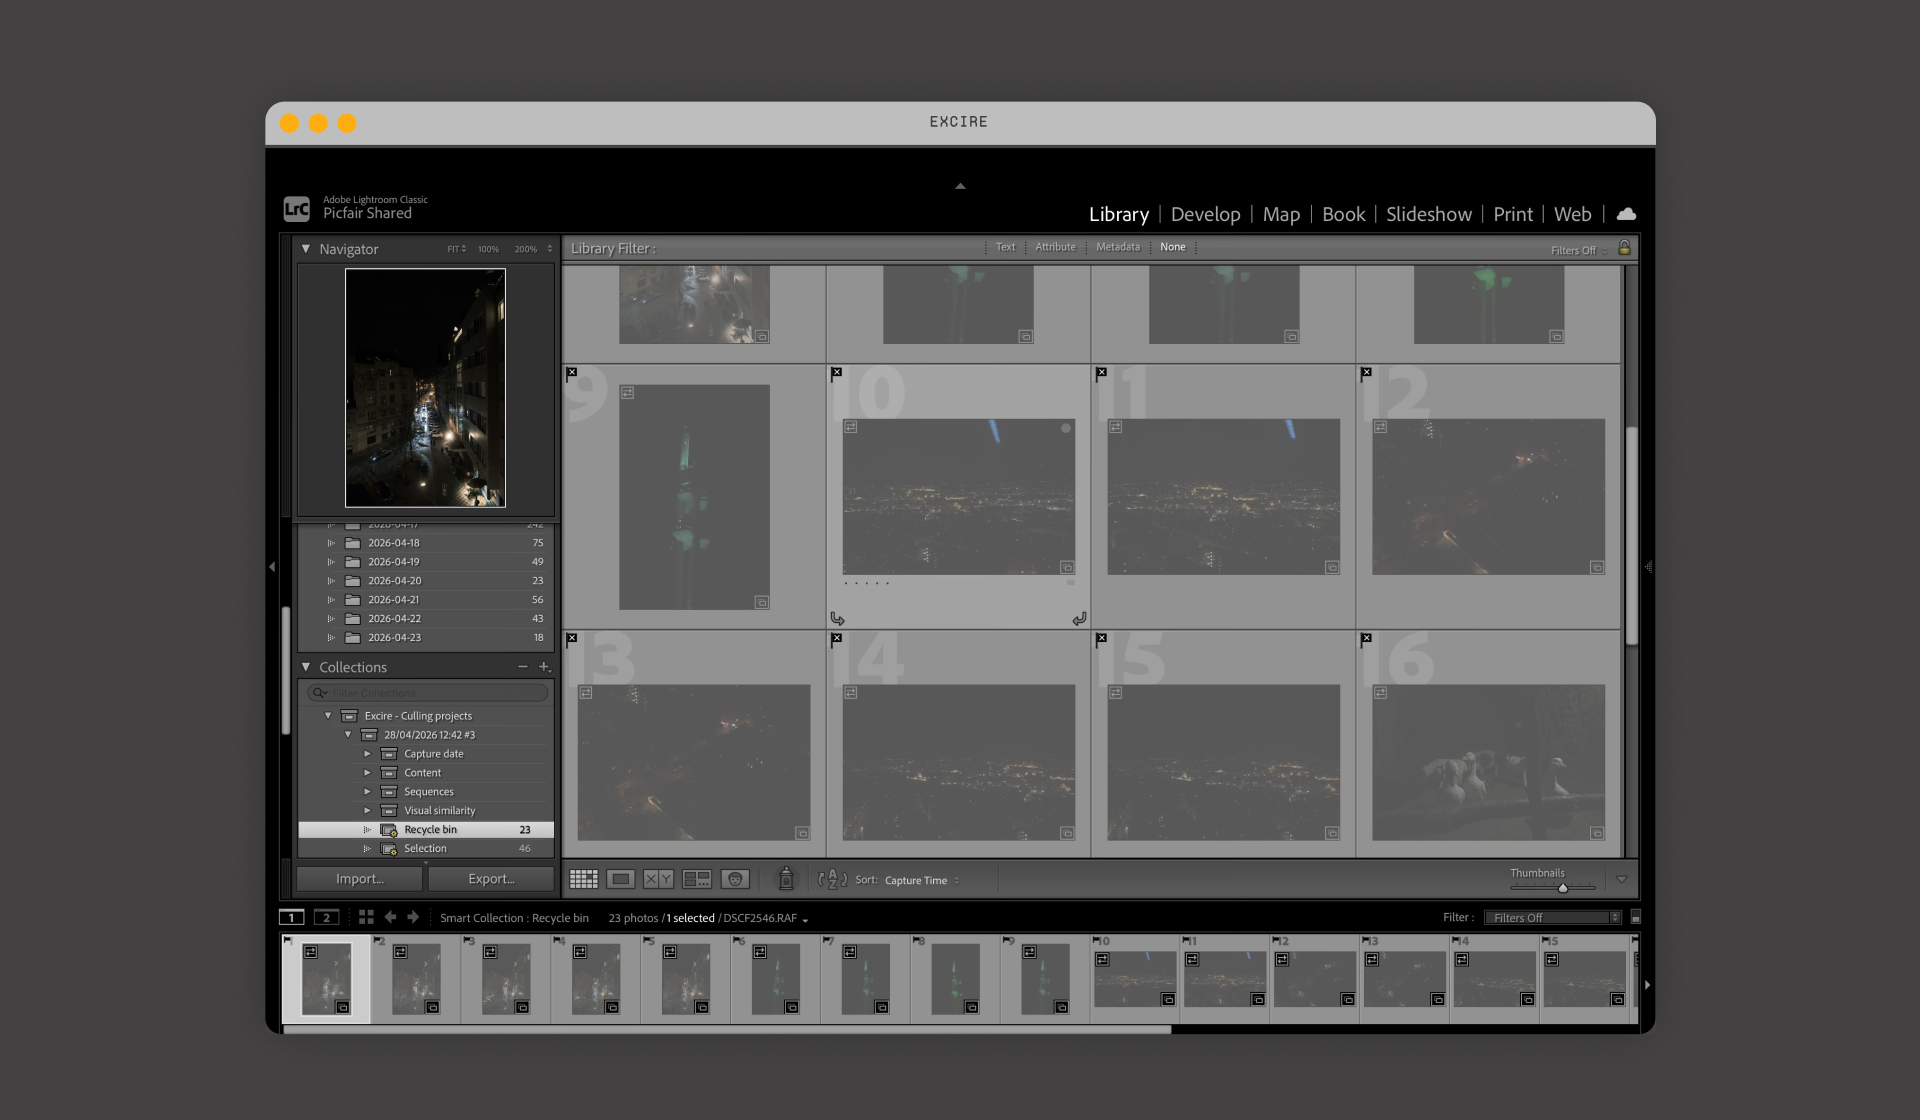
Rejected Images
The Culling Project’s AI tools were very accurate at identifying underexposed images in my set, which had a fair few. These were placed in the Recycle Bin within the Collection for me (it’s worth noting that Excire Search never actually deletes your images automatically). This alone removed a significant step from my workflow.
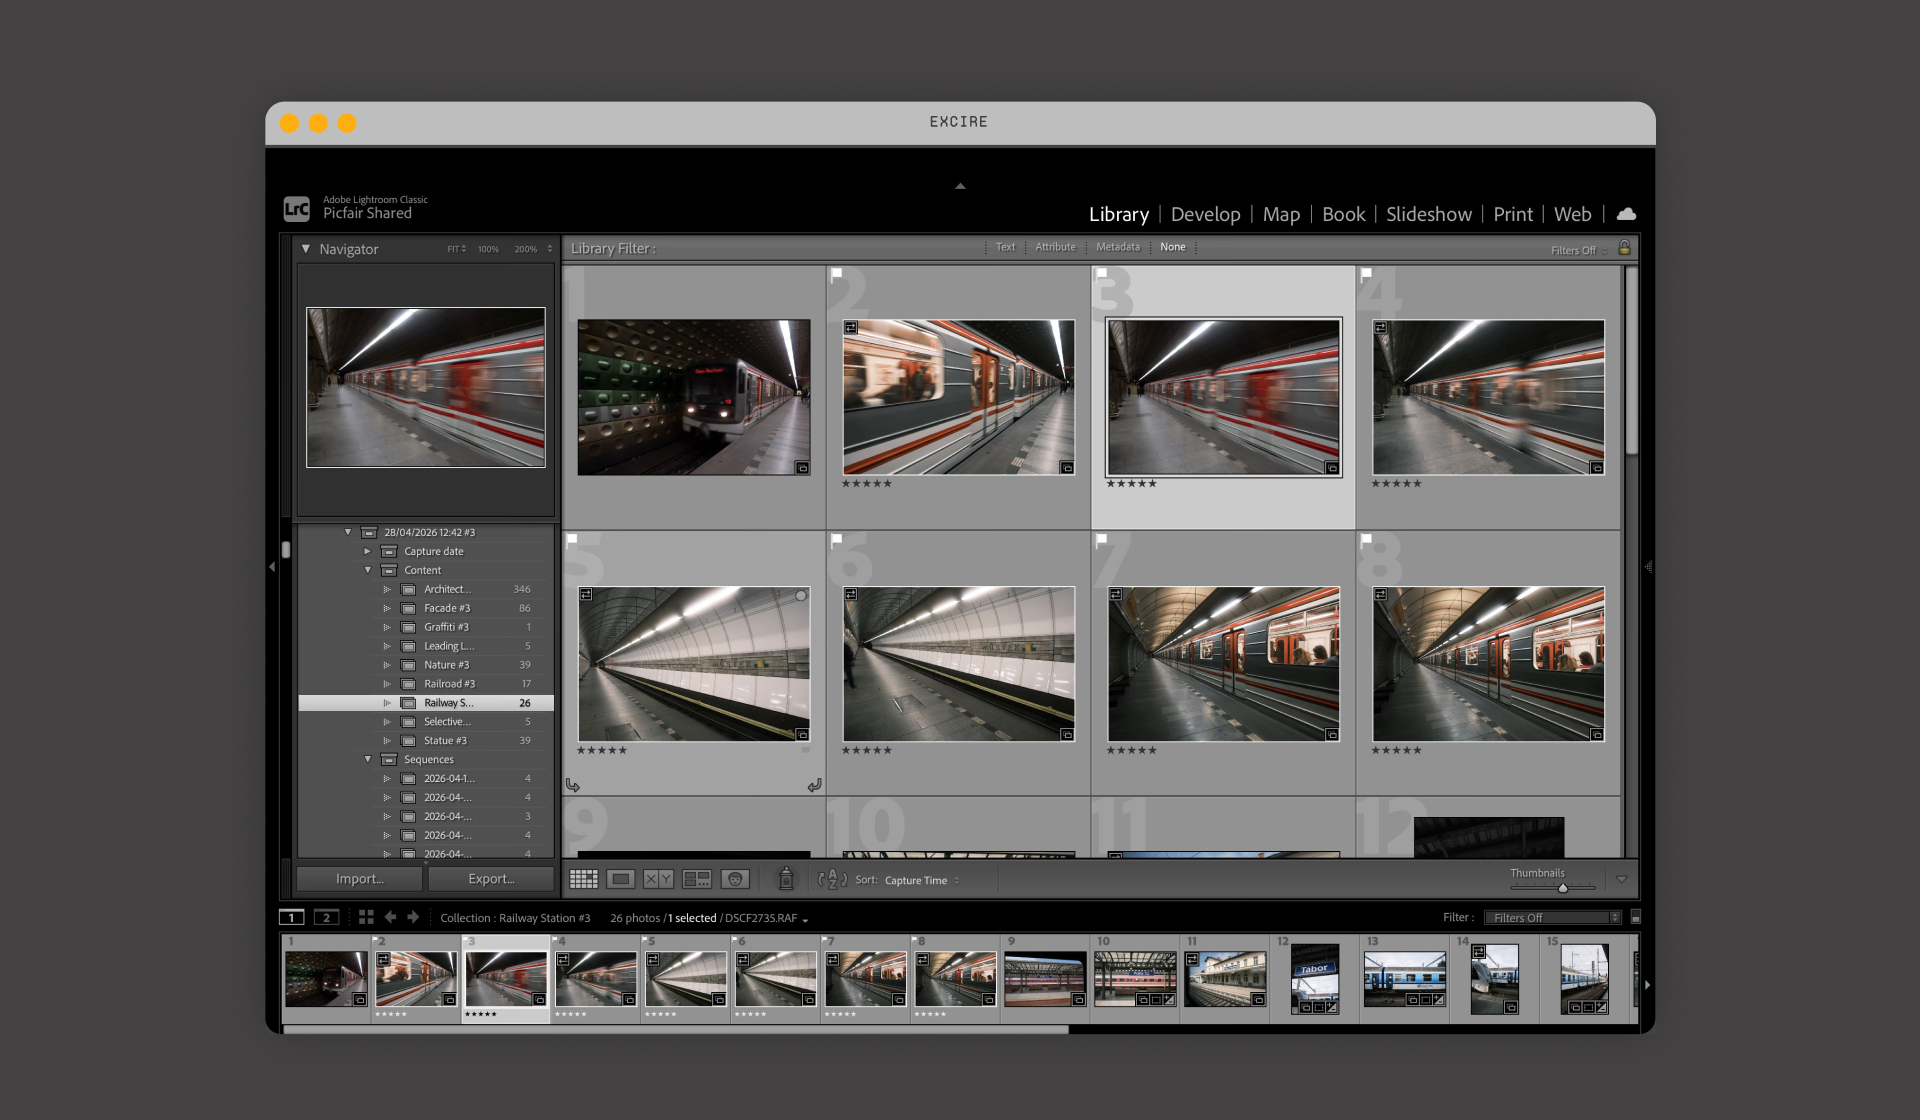
Images Grouped by Content
I was also impressed by how many different images it pulled into the Content folders based on the themes and subjects I shoot.
Excire Search correctly identified the categories I had selected during setup, such as statues, architecture, and railways. Making it much quicker to scan through the images and pick out the ones I wanted for my final edit.
As part of my workflow, I rate images I want to keep with 5 stars and flag anything I don’t like as rejected (X). From there, I move through the set quickly. The culling project really helped speed this up by removing a lot of the manual sorting work.
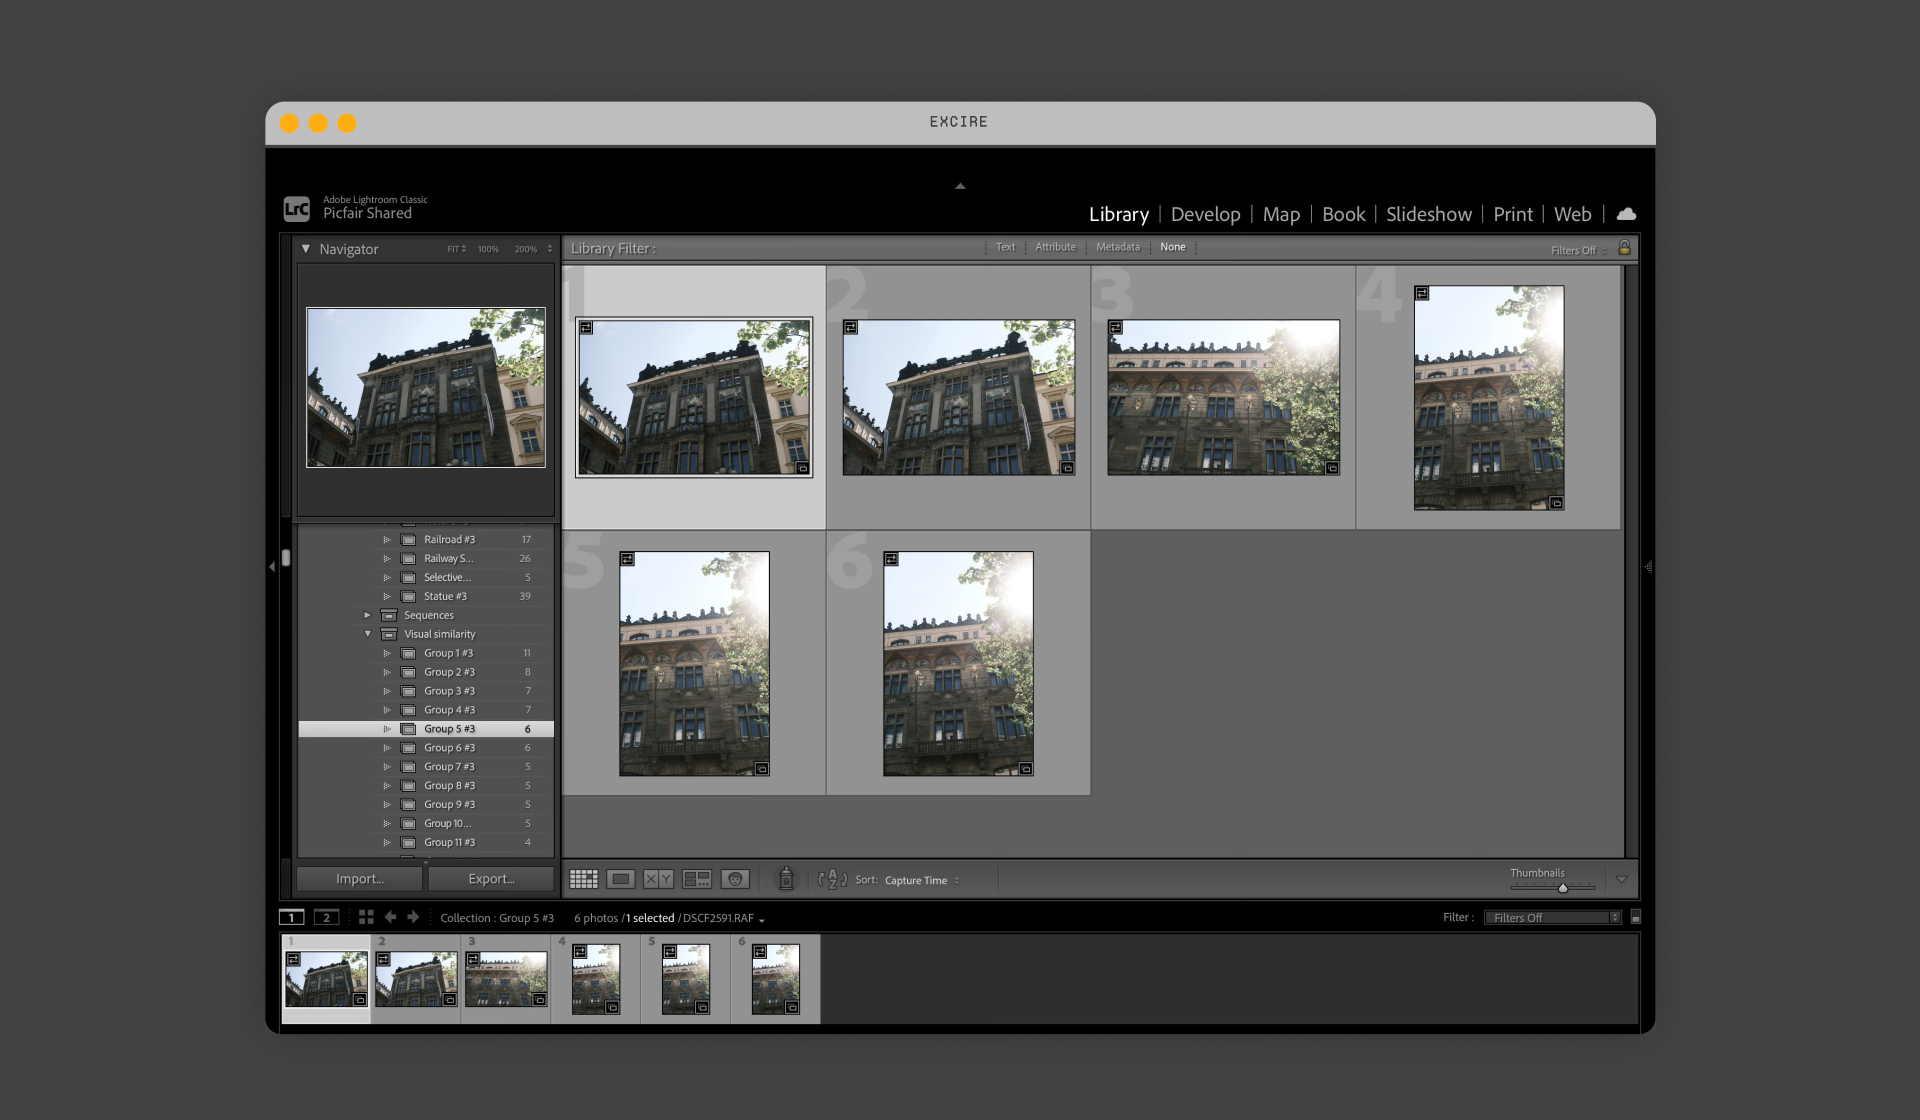
Images Grouped by Visual Similariities
The “Visual similarity” grouping was also particularly useful for comparing images from the same subject or sequence and making a quick choice on the best image.
Excire’s Selection of Image Highlights
What was interesting, too, was how the Culling Project auto-selected my images based on aesthetics and placed them in the Selection sub-folder with a Flag (as selected in the Selection marker tab). While I wouldn’t naturally select all of these, it was interesting to see what had been picked up and made me consider them.

Some of My Favourite Images Highlighted by The Excire Culling Project:
Below are some of my favourite images selected by the Excire Search Culling Project that I would have otherwise overlooked! The final versions of these images have also been treated with my usual edits: Fujifilm Classic Negative Film Simulation, clarity and contrast enhancements, dust removal, and colour balance adjustments.


Searching for Images in Lightroom Using Excire Search 2026
As well as using the Culling Project tools for finding images, you can also use the intuitive AI-driven Excire Search tools to find images within your Catalog.
You can access them via Library > Plugin Extras > Open Excire Search Panel.
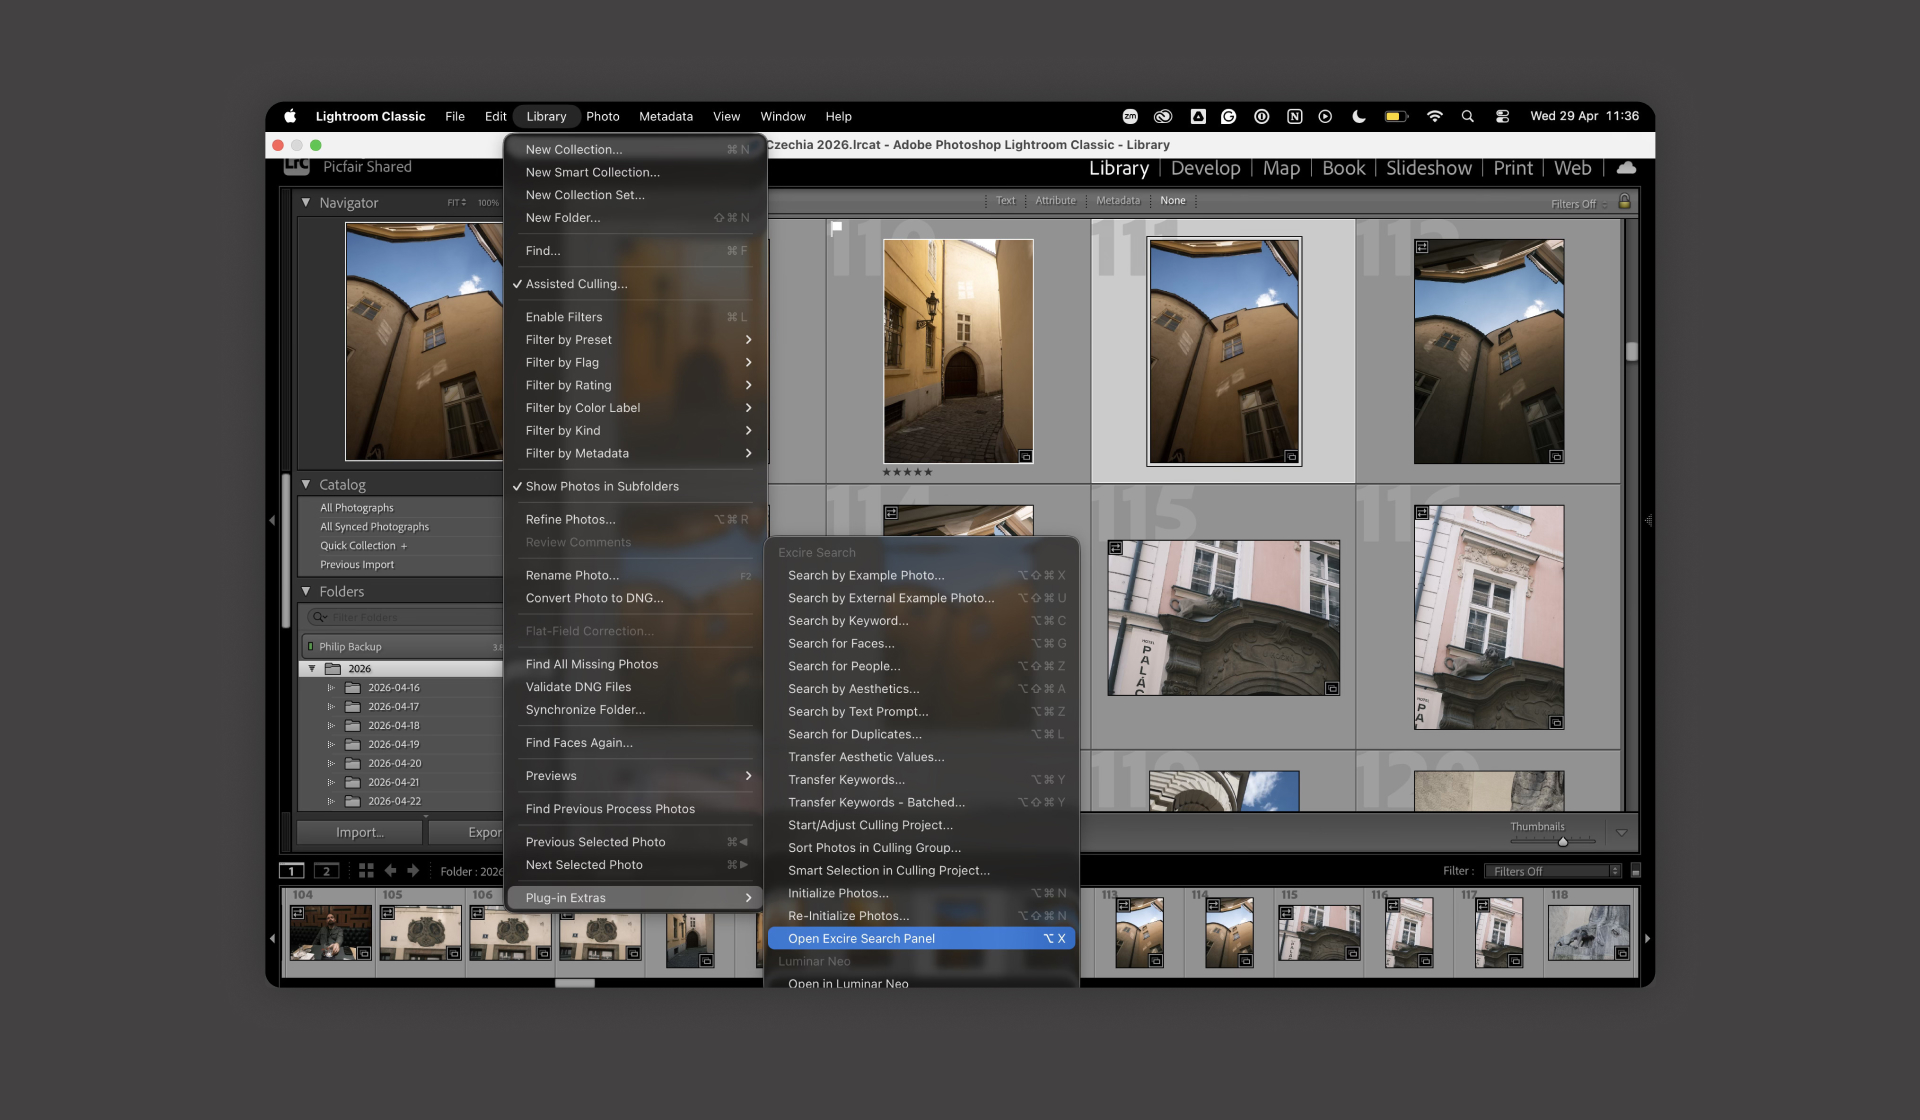
These tools are particularly useful when working with large Catalogs, especially when you need to find very specific images. There are several search options available, including text prompts, keywords, faces, duplicates, and even searching by example image.
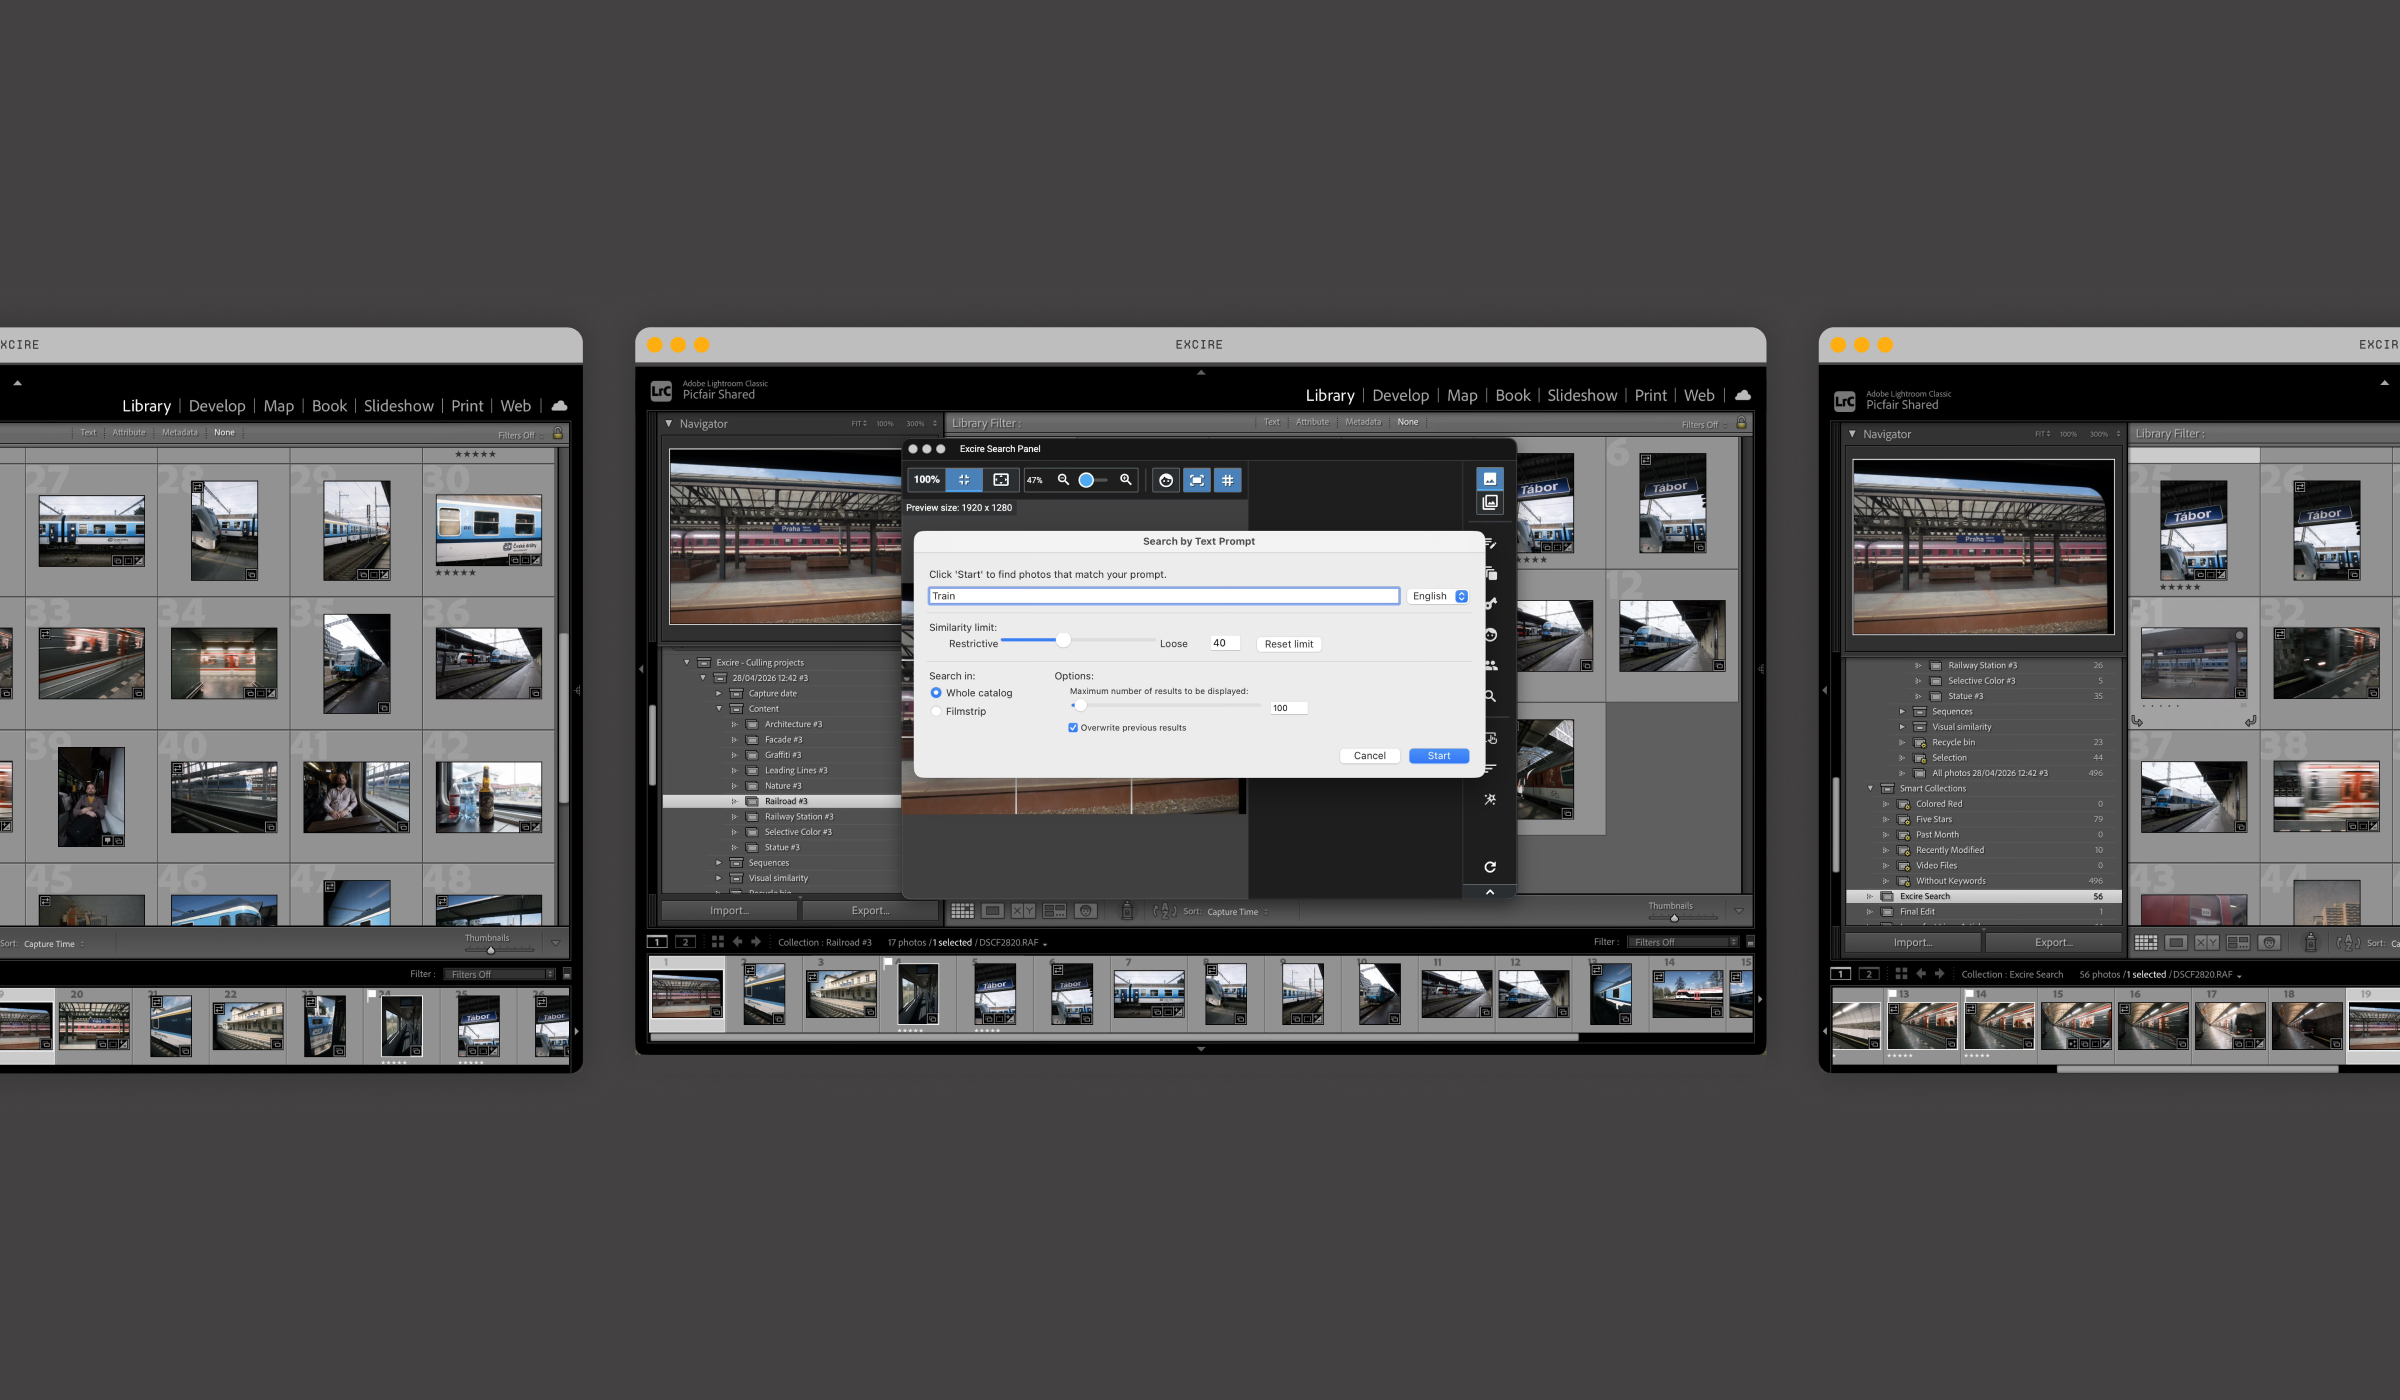
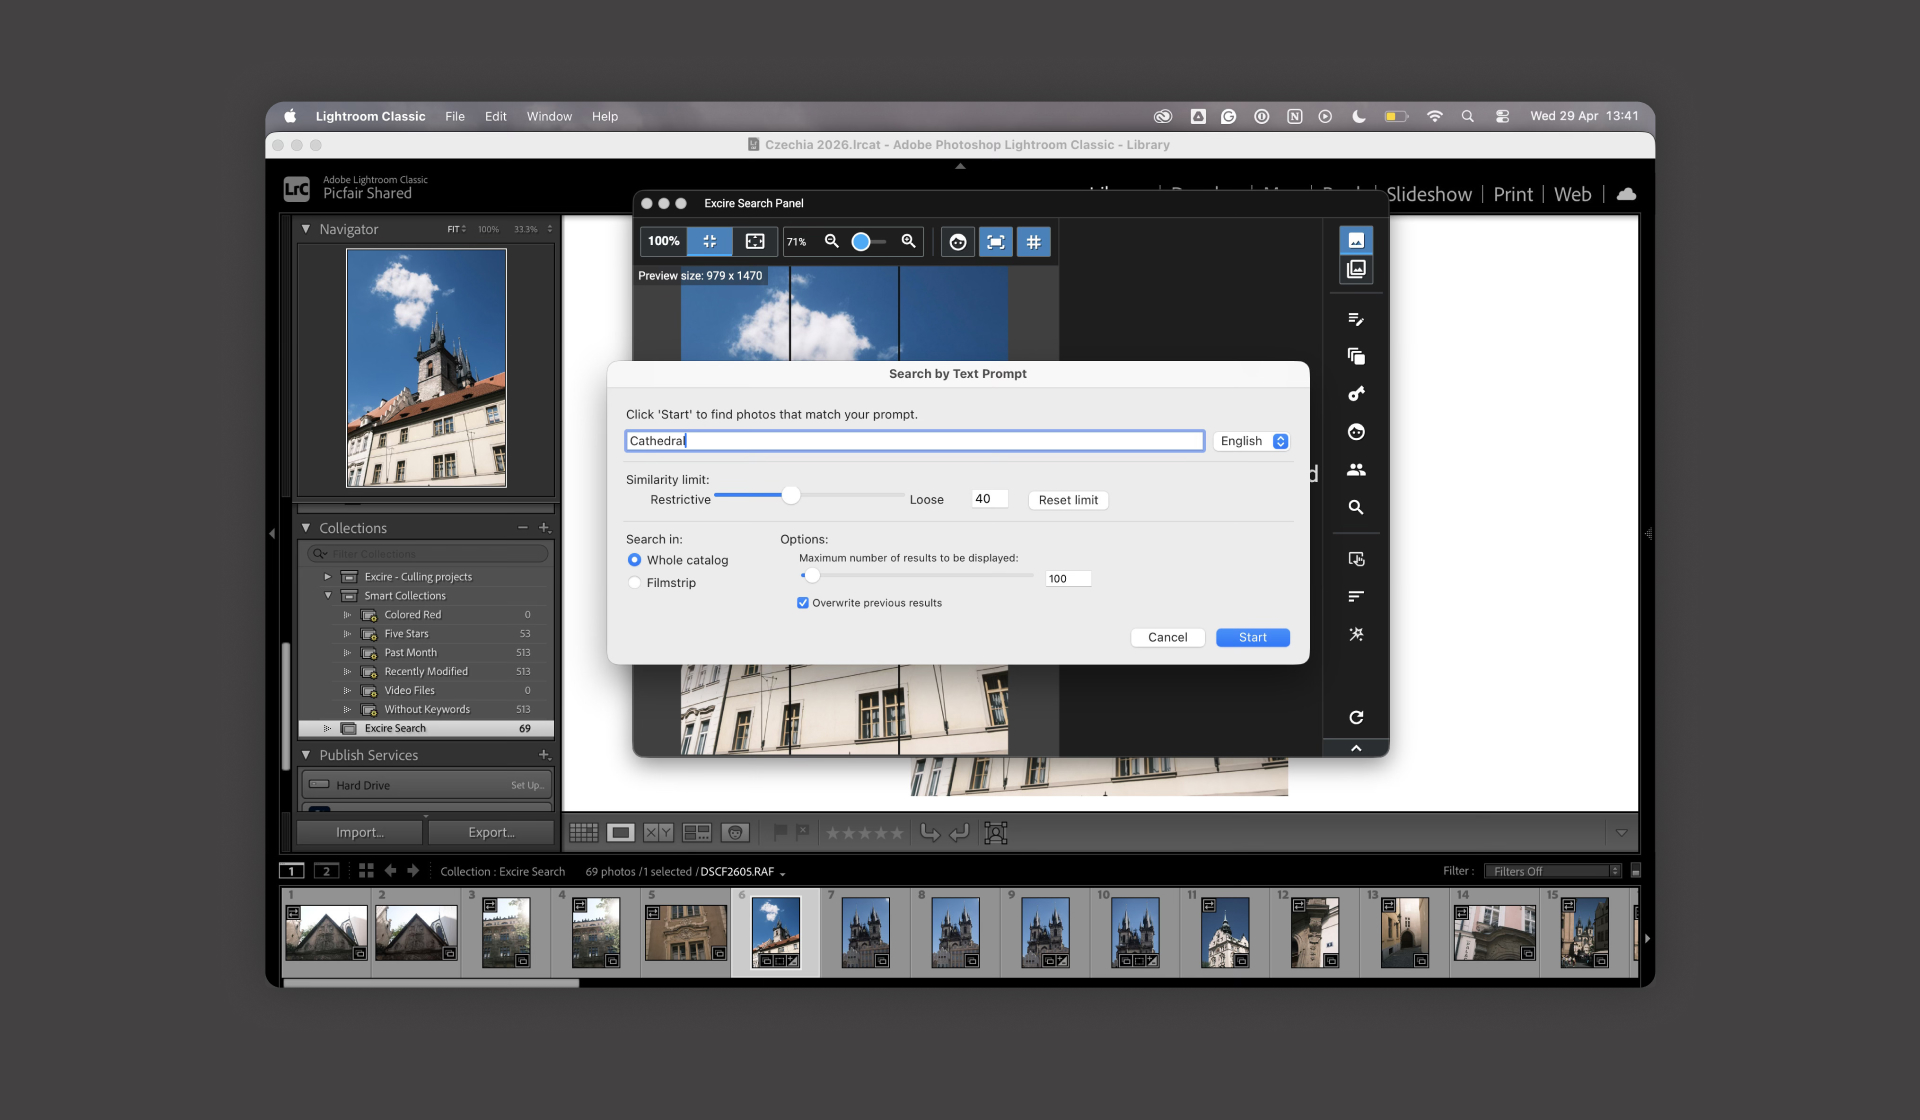
When I searched for “cathedral” using the text prompt search, Excire quickly pulled relevant images from my Catalog and placed them into a folder within my collections. While this feature is arguably most powerful when used on large libraries spanning multiple shoots, dates, and subjects, what stood out for me was how quickly and accurately it returned results.
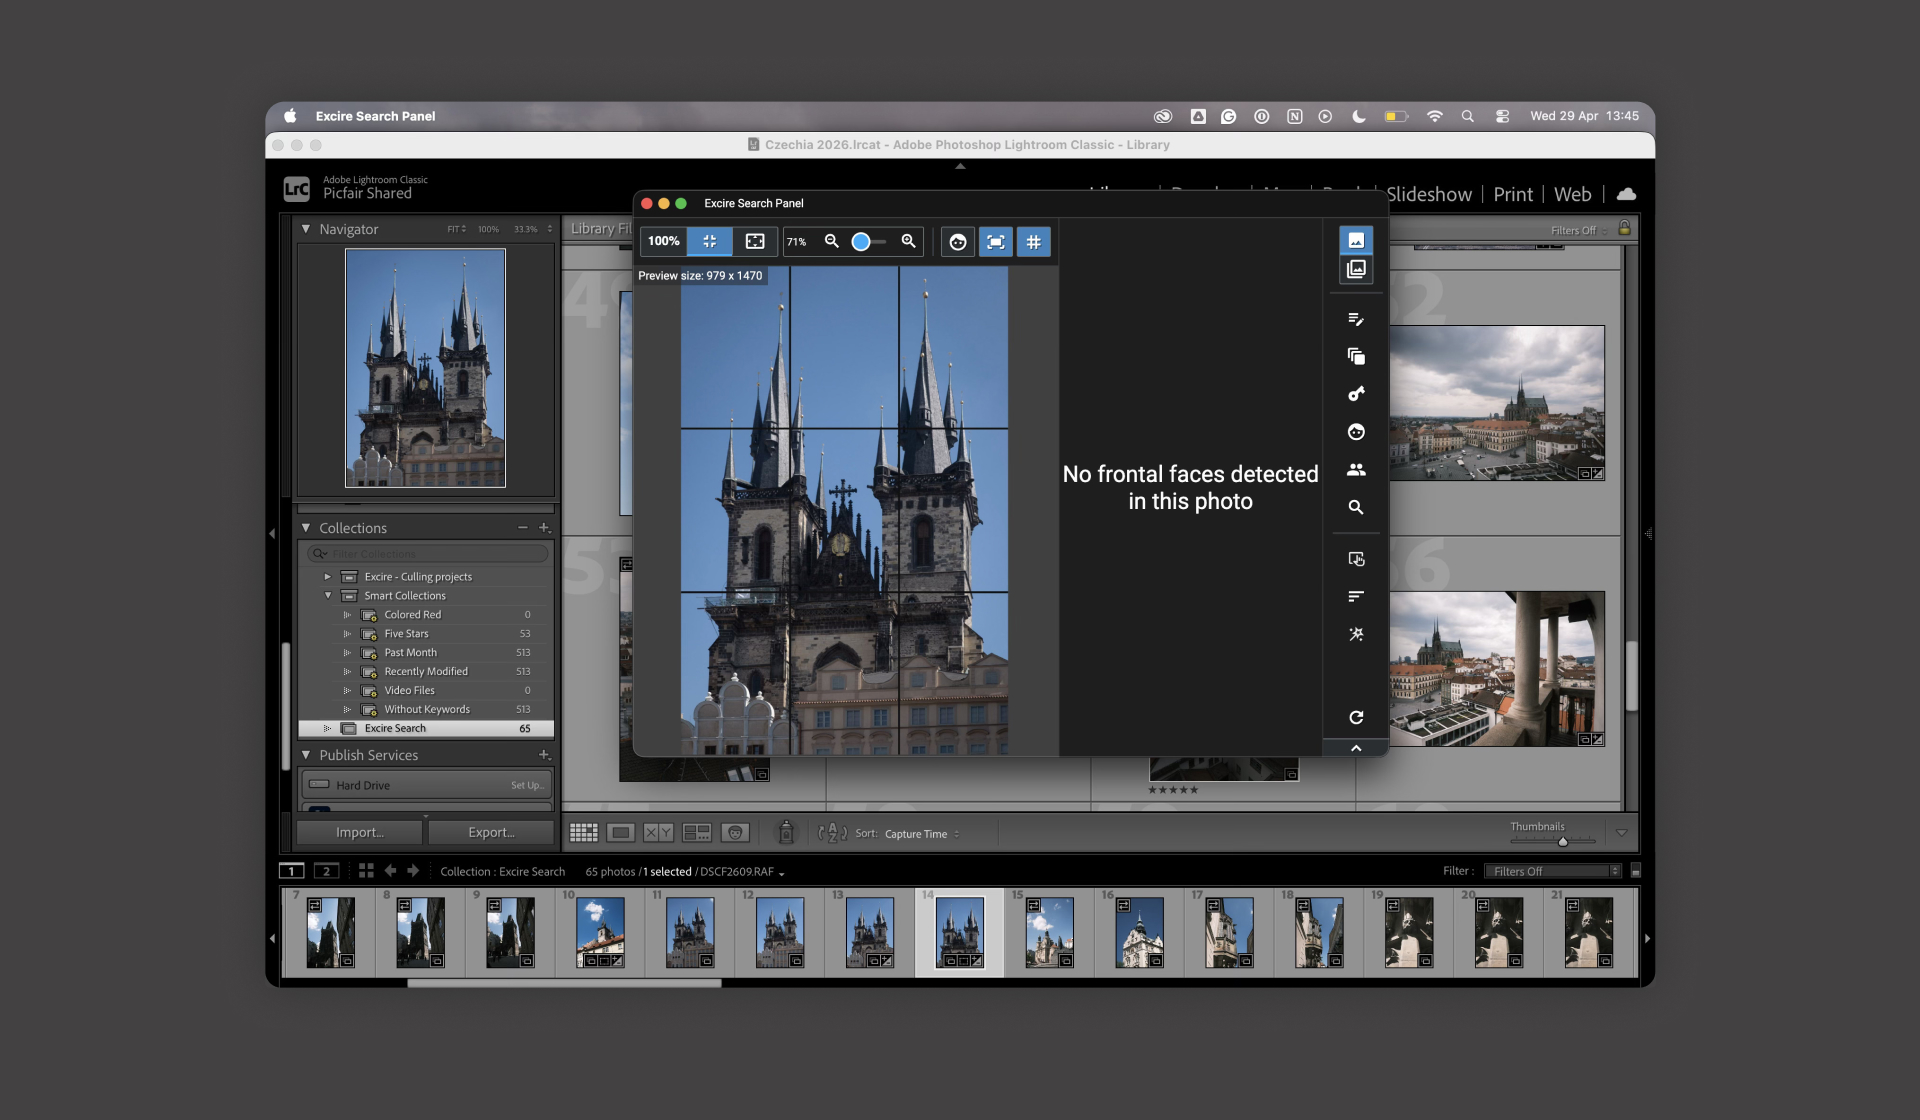
You can also use the expanded Excire Search panel to view all of your Culling Projects, and you can use the Group View to see all of your different culling groups. Previews in the Excire Search panel will also indicate face sharpness automatically, which is great when you’re culling a photo project with people in it.

What Photographers Would Benefit From Excire And Excire Search In Particular?
As mentioned, given the range of detailed culling and selection options, I think photographers who shoot regularly would benefit the most. This is especially true for portrait, sports, event, and wedding photographers. Excire’s ability to identify specific details, such as subjects with eyes closed, makes it particularly useful in these scenarios.
While I didn’t use these features extensively for this series, as I don’t typically shoot portraits, it’s easy to see how much of a time-saver this would be for photographers who do. In particular, event photographers who need to quickly organise large volumes of images and pick out the best ones would benefit hugely.
That said, even on a smaller project like a travel series, I was impressed by how much time the tool saved. Grouping and rejecting images automatically made it far easier to work through the set and find the shots I wanted for my final edit.
With the Excire Search panel, photographers with large Lightroom Catalogs will also see a big advantage. The AI-led search makes it easy to find very specific images using keywords or descriptions, without manually digging through thousands of files.
Final Thoughts
The Excire Search 2026 Lightroom Plugin, particularly the Culling Project tools, really helped me work through my Czech Republic travel images much more quickly. And while this was a smaller selection of images, I can clearly see how valuable and time-saving using this plugin would be, it would be for any photographer with a large Lightroom Catalog spanning years, covering a wide range of subjects, or for photographers shooting portraits, events, sports, or weddings and so on.
Using the search and culling options can yield significant time savings when finding particular photos. There’s a huge number of options in the culling and search settings, with plenty of parameters to fine-tune, and I think photographers would find them really helpful when sorting images and finding their keepers!
I could have spent more time refining the culling and search options for my own set of images, but for a first run, I was very happy with the results.
Of course, while Excire Search does a lot of the heavy lifting when it comes to sorting and selecting images, you’re always in control. You won’t agree with every choice it makes, but it gives you a strong starting point and speeds up the entire process.
You can get Excire Search and Excire Foto here.


