


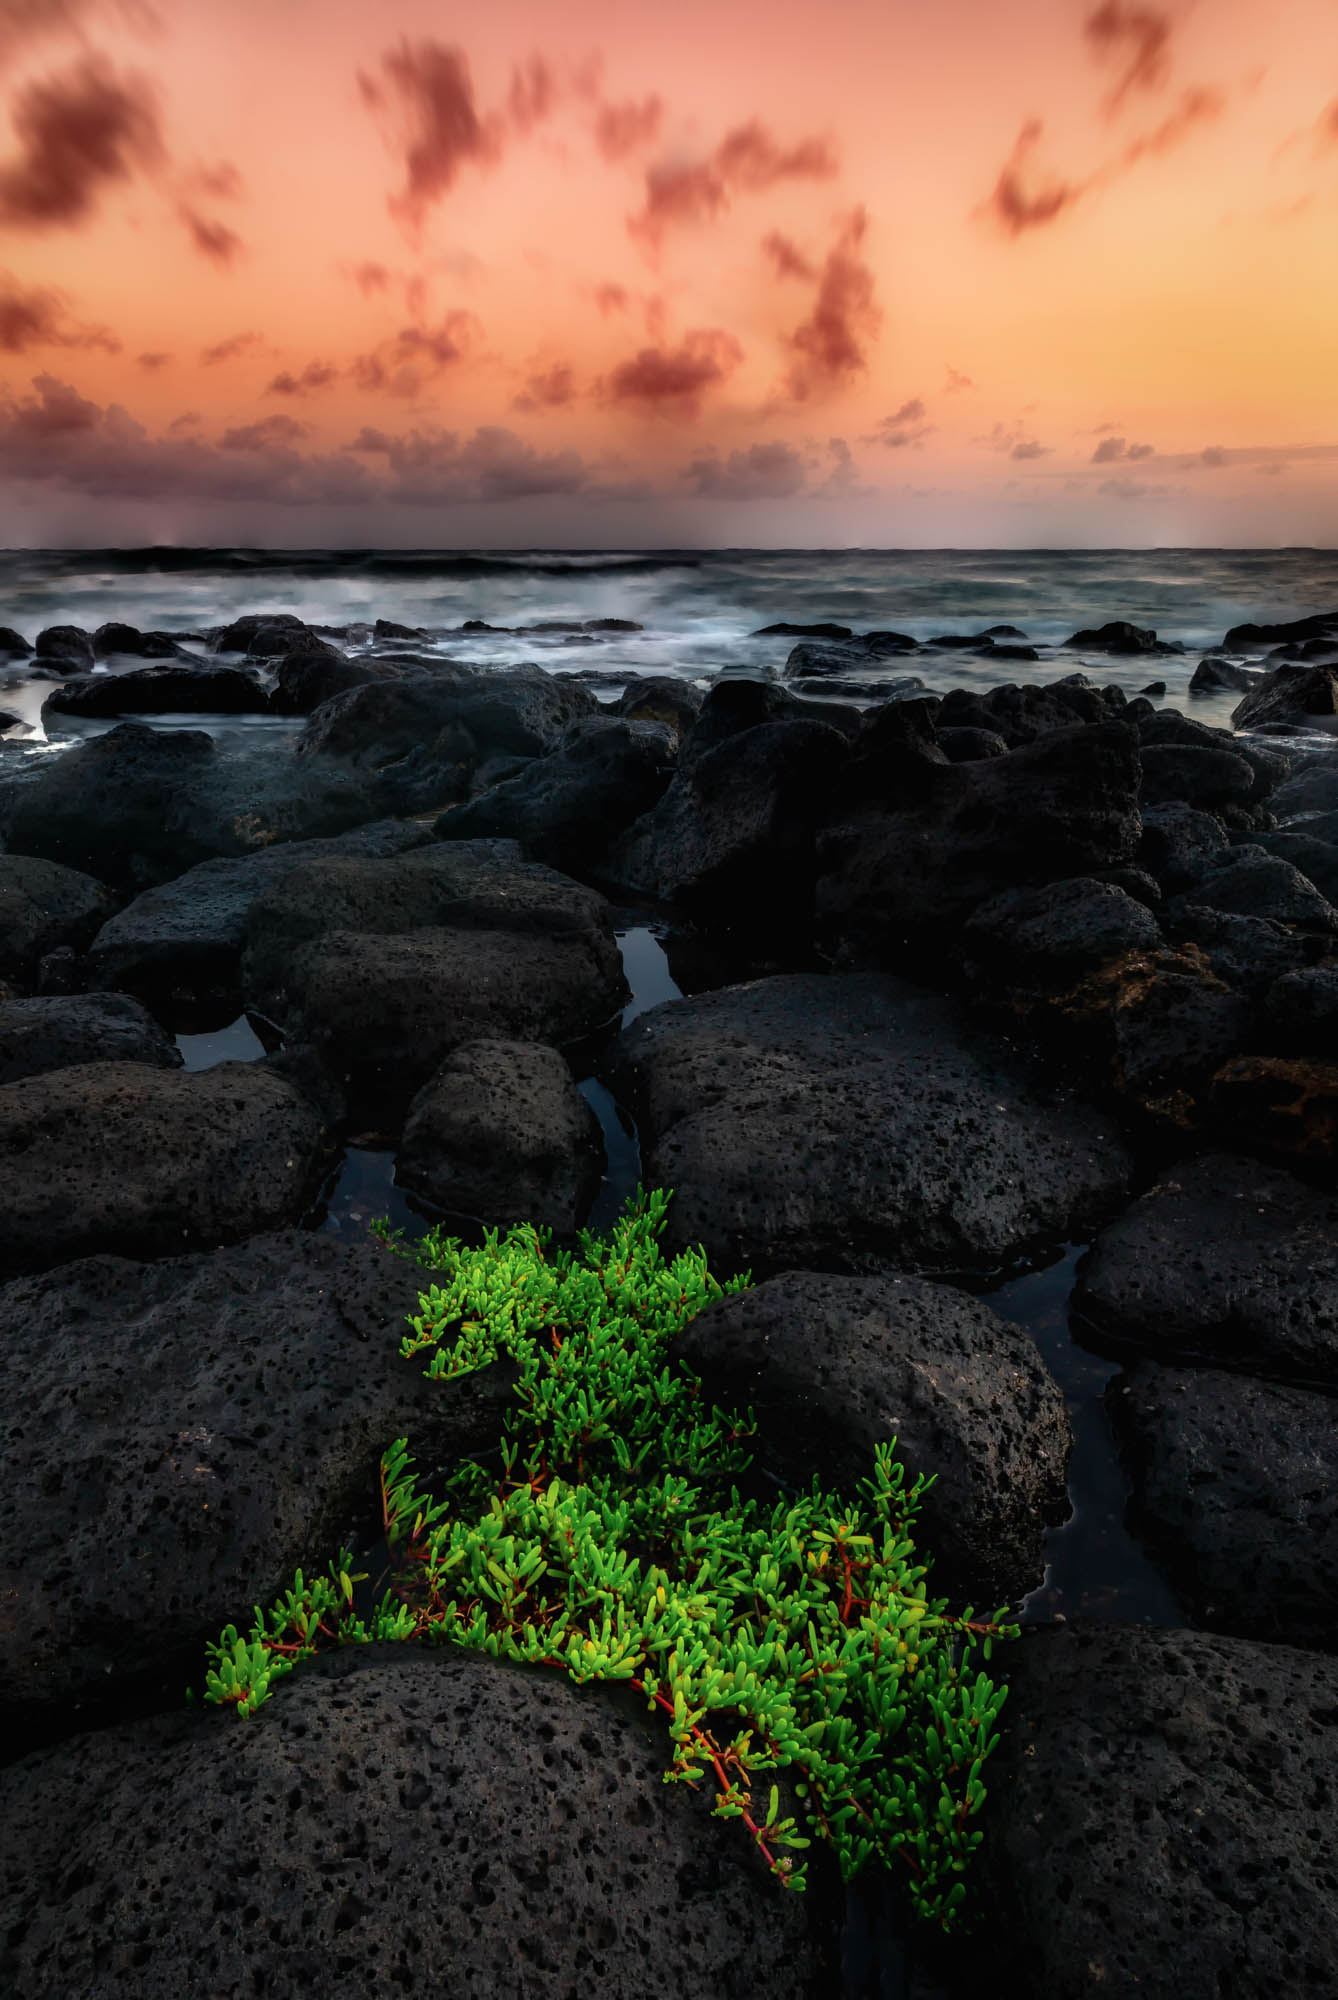
Enhance colours, boost details and add to the drama in your outdoor photos with these simple editing tricks

The natural world is the reason many of us own cameras, but once you’ve captured a beautiful scene, what next? From boosting skies to enhancing colours, fixing distortion and maximising the detail, here are 10 ways to enhance your landscapes in Lightroom...
1 Use the Landscape Profile
Lightroom Profiles offer handy starting points for your editing, especially the Adobe Raw set. This includes an Adobe Landscape profile - a dedicated profile for outdoor shots that enhances blues in skies, gives stronger greens in foliage and pulls extra detail out of the midtones. It’s only available for raw files so you need to shoot in raw format - which is a must for landscapes as it gives you extra dynamic range with greater detail in the shadows and highlights.
Editor's Tip:
Learn how to apply profiles to your images in Lightroom with our video tutorial here.
2 Try Auto
Serious photographers wouldn’t be caught dead using auto settings on their photos would they? Lightroom’s Auto button could change that mindset. Most auto buttons simply apply a tone-balancing algorithm, but Lightroom Auto is instead powered by machine learning, which means the tool recognises the content of the image and calls upon a huge database of similar professionally edited photos in order to determine the correct tonal changes. It works very well for boosting landscapes, and even if it doesn’t get the job done it’s still a speedy way to kick-start further edits.
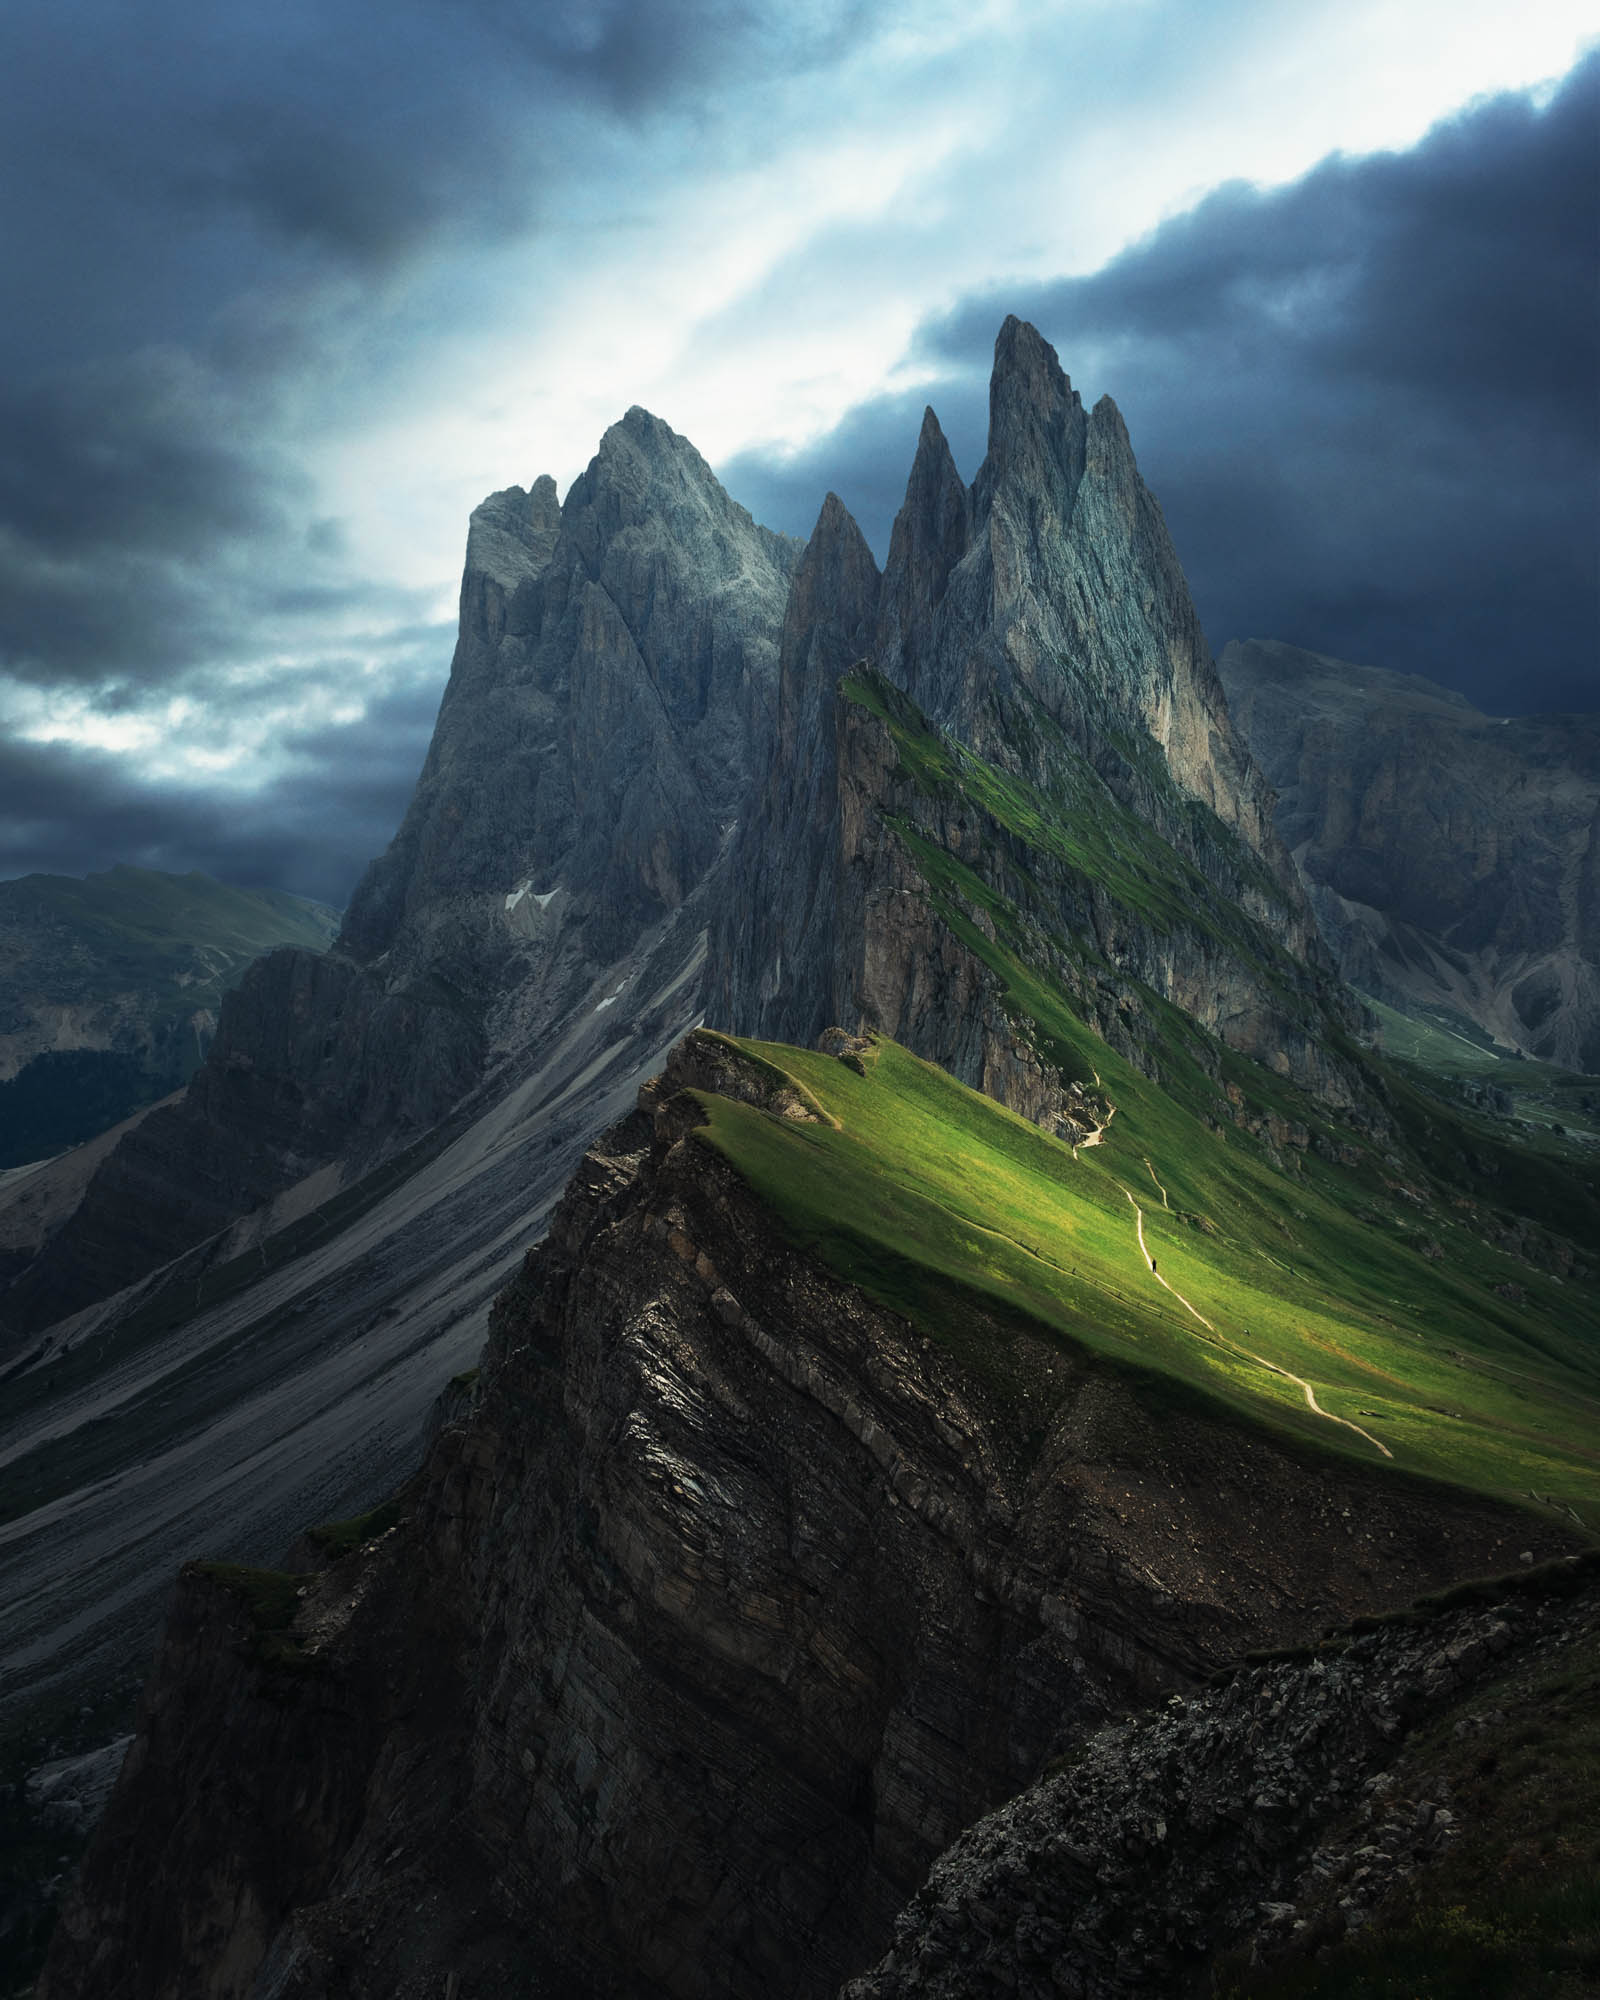
3 Add two grads
Skies will often be in need of a boost as they tend to come out lighter than the land below. The Graduated Filter is the ideal sky-boosting tool. Simply drag down from the sky towards the land (hold Shift to keep the transition horizontal) then lower Exposure to darken the sky.
Try increasing contrast or Clarity to pull extra detail out of clouds, or reduce the Highlights slider. Increase Saturation to boost colours in the sky, and drop Temperature to make the blues more intense. Sometimes a second grad can help too by darkening the very top of the sky. If the effect darkens parts of the land that jut up into the sky, then you can erase these areas from the mask, or simply lift Shadows to counteract the darkening effect.
Editor's tip:
Learn more about adding gradients to your images with our in-depth guide here.
4 Paint with Clarity
Surfaces like rocks, sand and foliage will often benefit from extra midtone contrast to pull out the detail. This is best applied selectively using the Adjustment Brush. Paint over the details with the brush (hit O to see where you’ve painted with the tool) then try increasing Clarity, Texture, Shadows or Contrast (or a combination of them all) to give the area an extra boost.
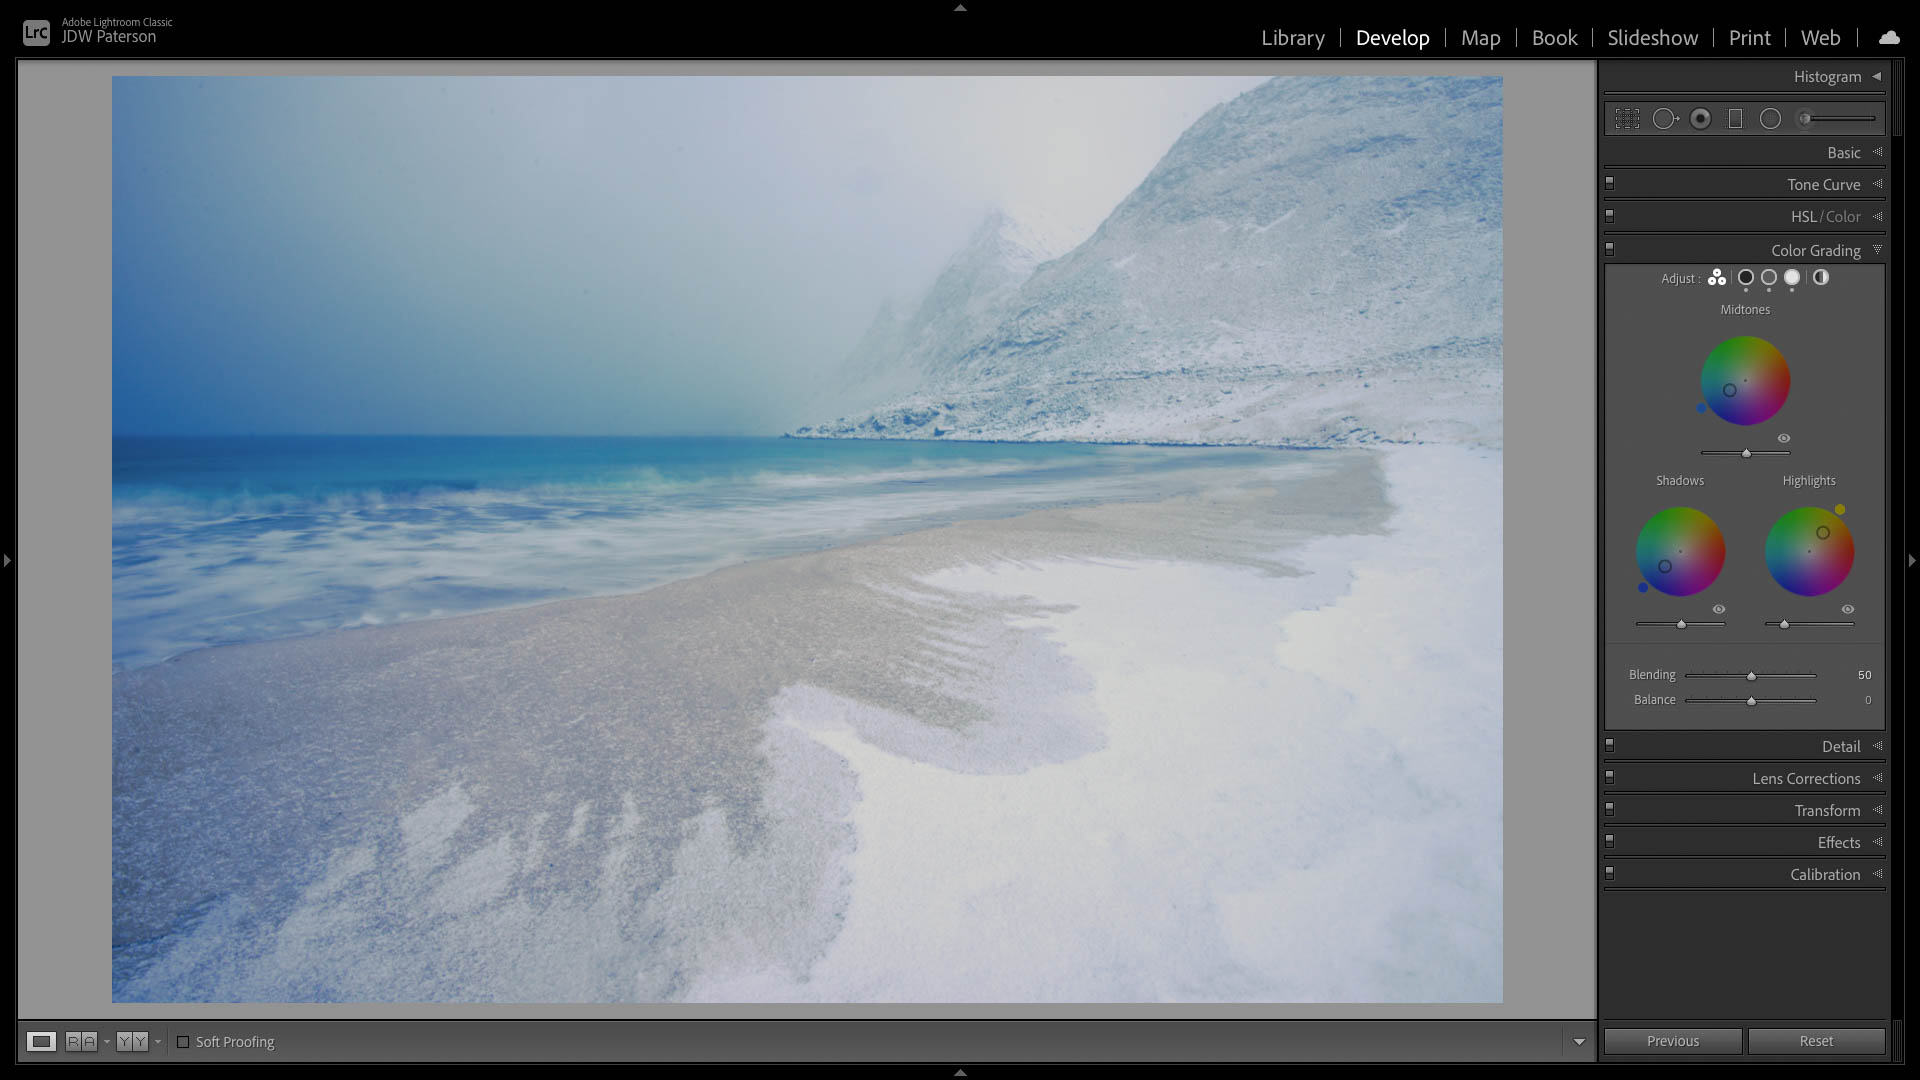
5 Color Grading
The Color Grading panel is ideal for enhancing the mood of a landscape scene. Alter the three colour wheels to tint the shadows, midtones and highlights, and then control the balance between each. You could, for example, add a cool blue tint to the shadows and a warmer yellow tint to the highlights.
6 Creative white balance
It would be a mistake to think there’s only ever one ‘correct’ white balance for a scene. The white balance controls can be used creatively to shift colours and tones warmer or cooler, depending on the look you’re going for.
Sunsets can be given an extra boost by pushing the Temperature and Tint sliders to the right to add warmth and magenta. Raw files work best for this as with raws you can change the white balance after the fact, with the same results as if you’d set it before taking the shot.
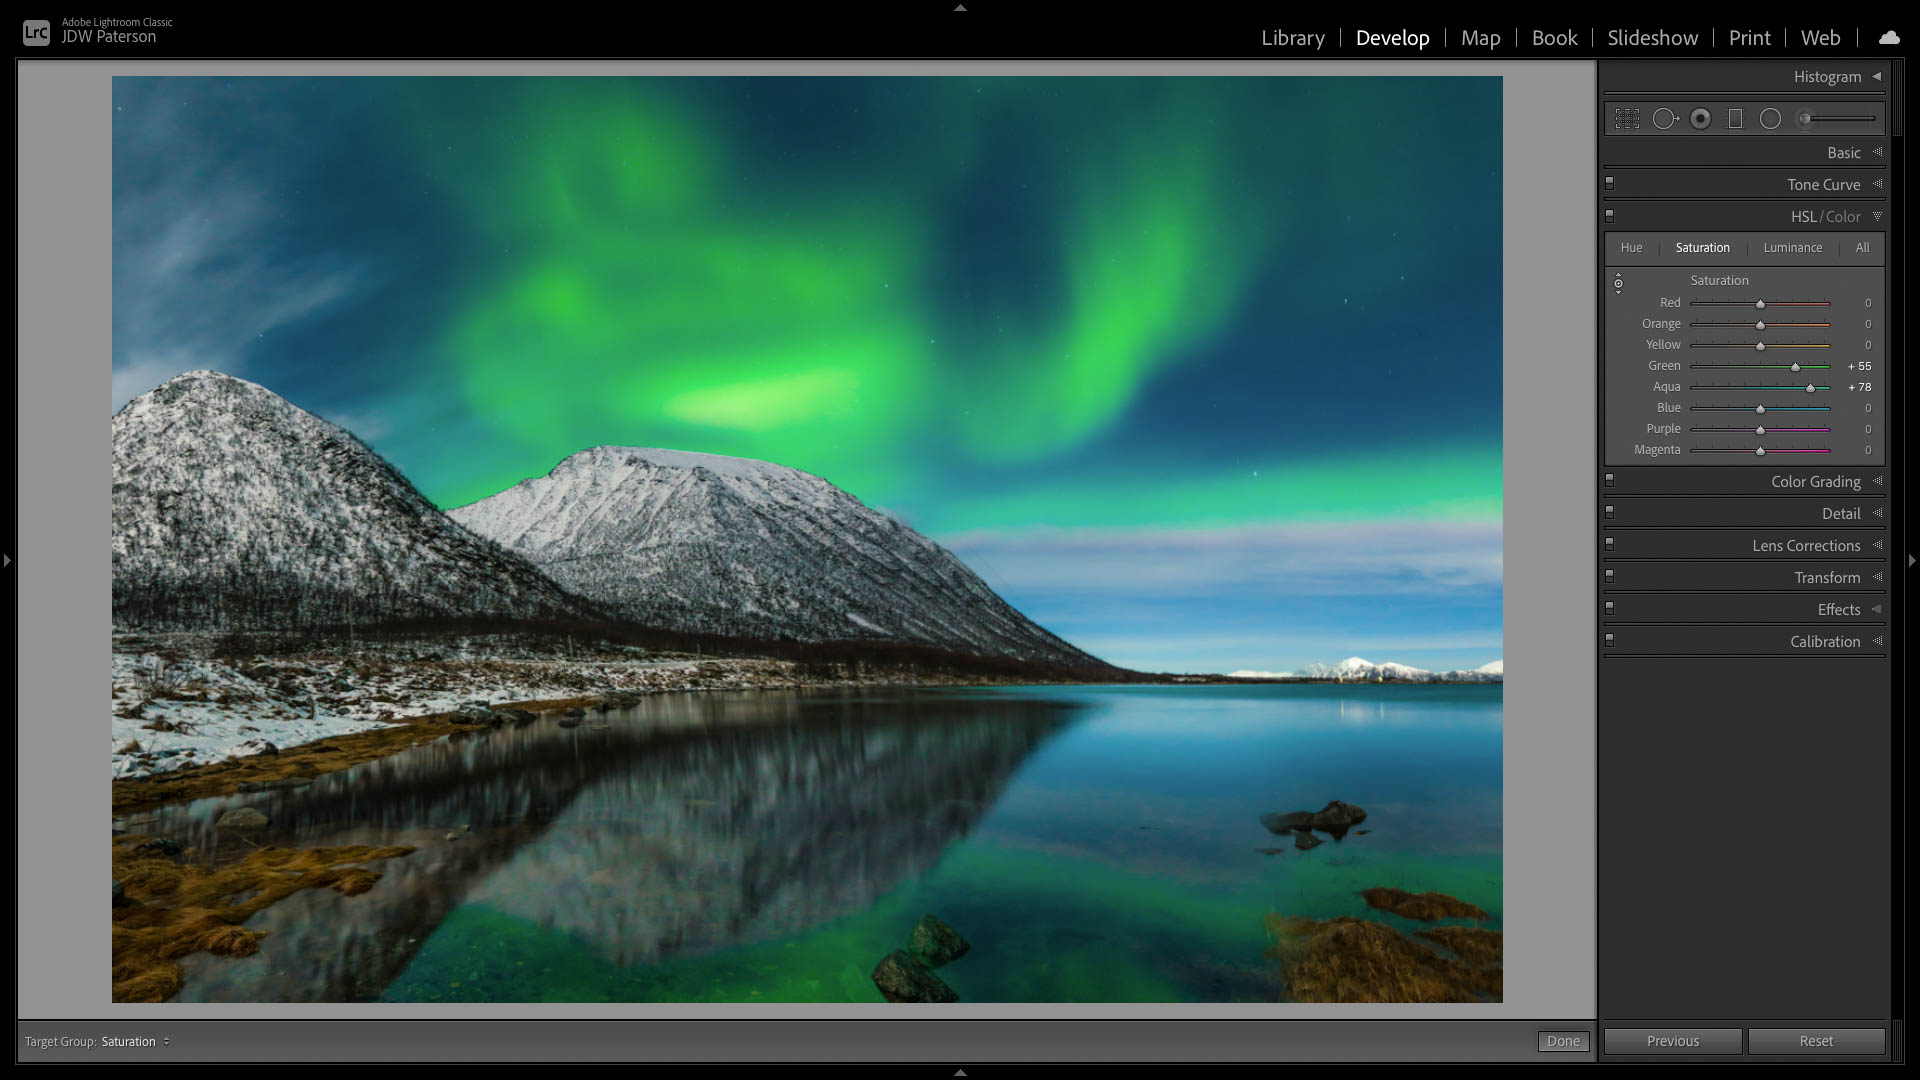
7 Boost the blues and greens
Landscapes are often dominated by certain colours, like blues in the sky (or reds at sunset) and yellows and greens in the land below. We can target and enhance these individual colours using the HSL Panel. This gives us a handy target tool that allows us to drag left or right over colours in the image. This way, we can target eight individual colour ranges and increase or decrease the saturation, luminosity or hue of each. As such, we have on-image control over the intensity of different colours in the image, simply by dragging over them.
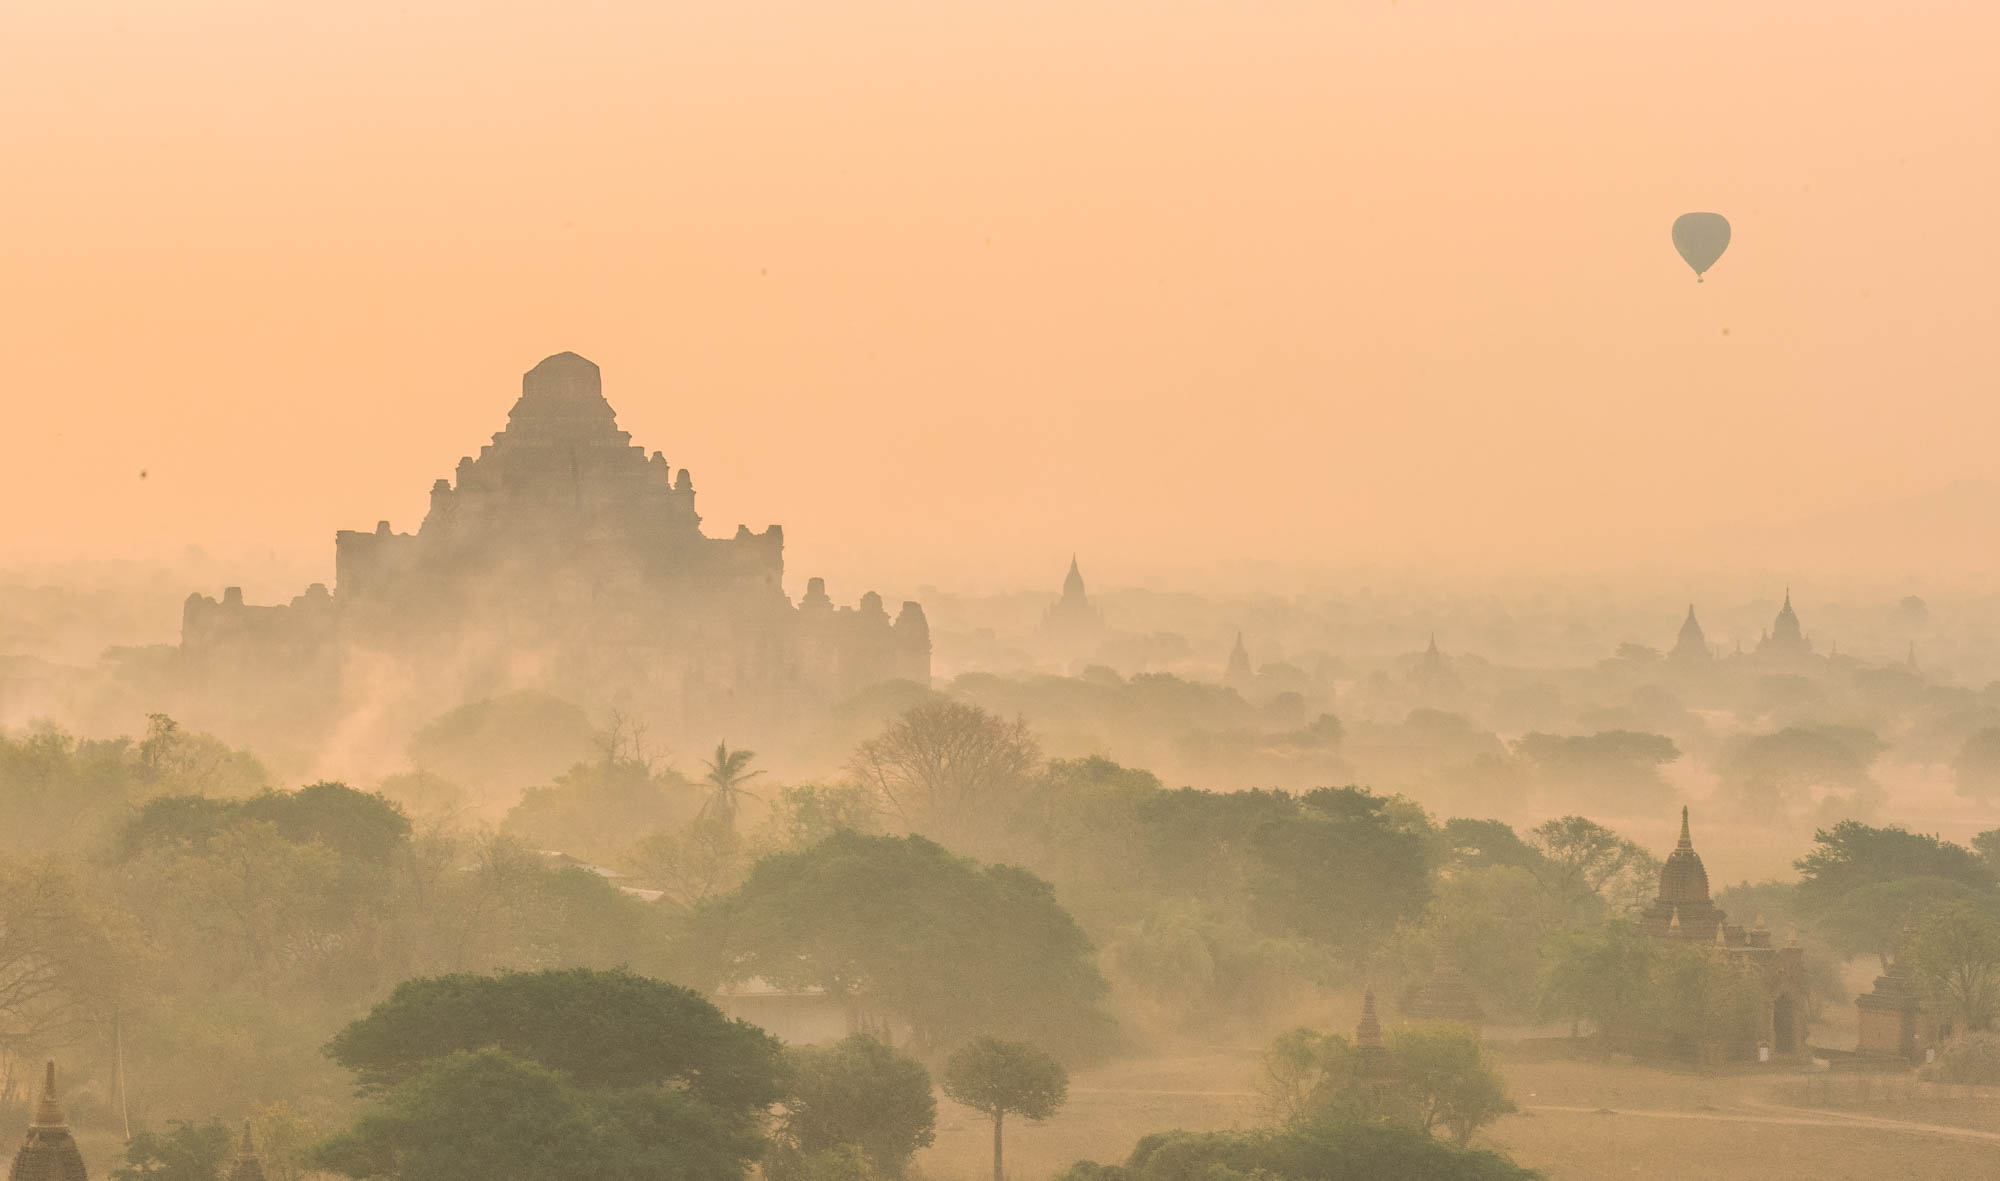
8 Cut through the haze
The Dehaze setting can work wonders on hazy photos by pulling detail out of the scene. However, it can sometimes result in overly deep shadows, so you may need to give the shadows a lift to compensate. You can also use negative Dehaze, which adds extra haziness for a softer, misty look. Keep in mind that Dehaze can also be applied selectively with the local adjustment tools like the Adjustment Brush and Graduated Filter. Used like this it can be very effective on cloud formations.
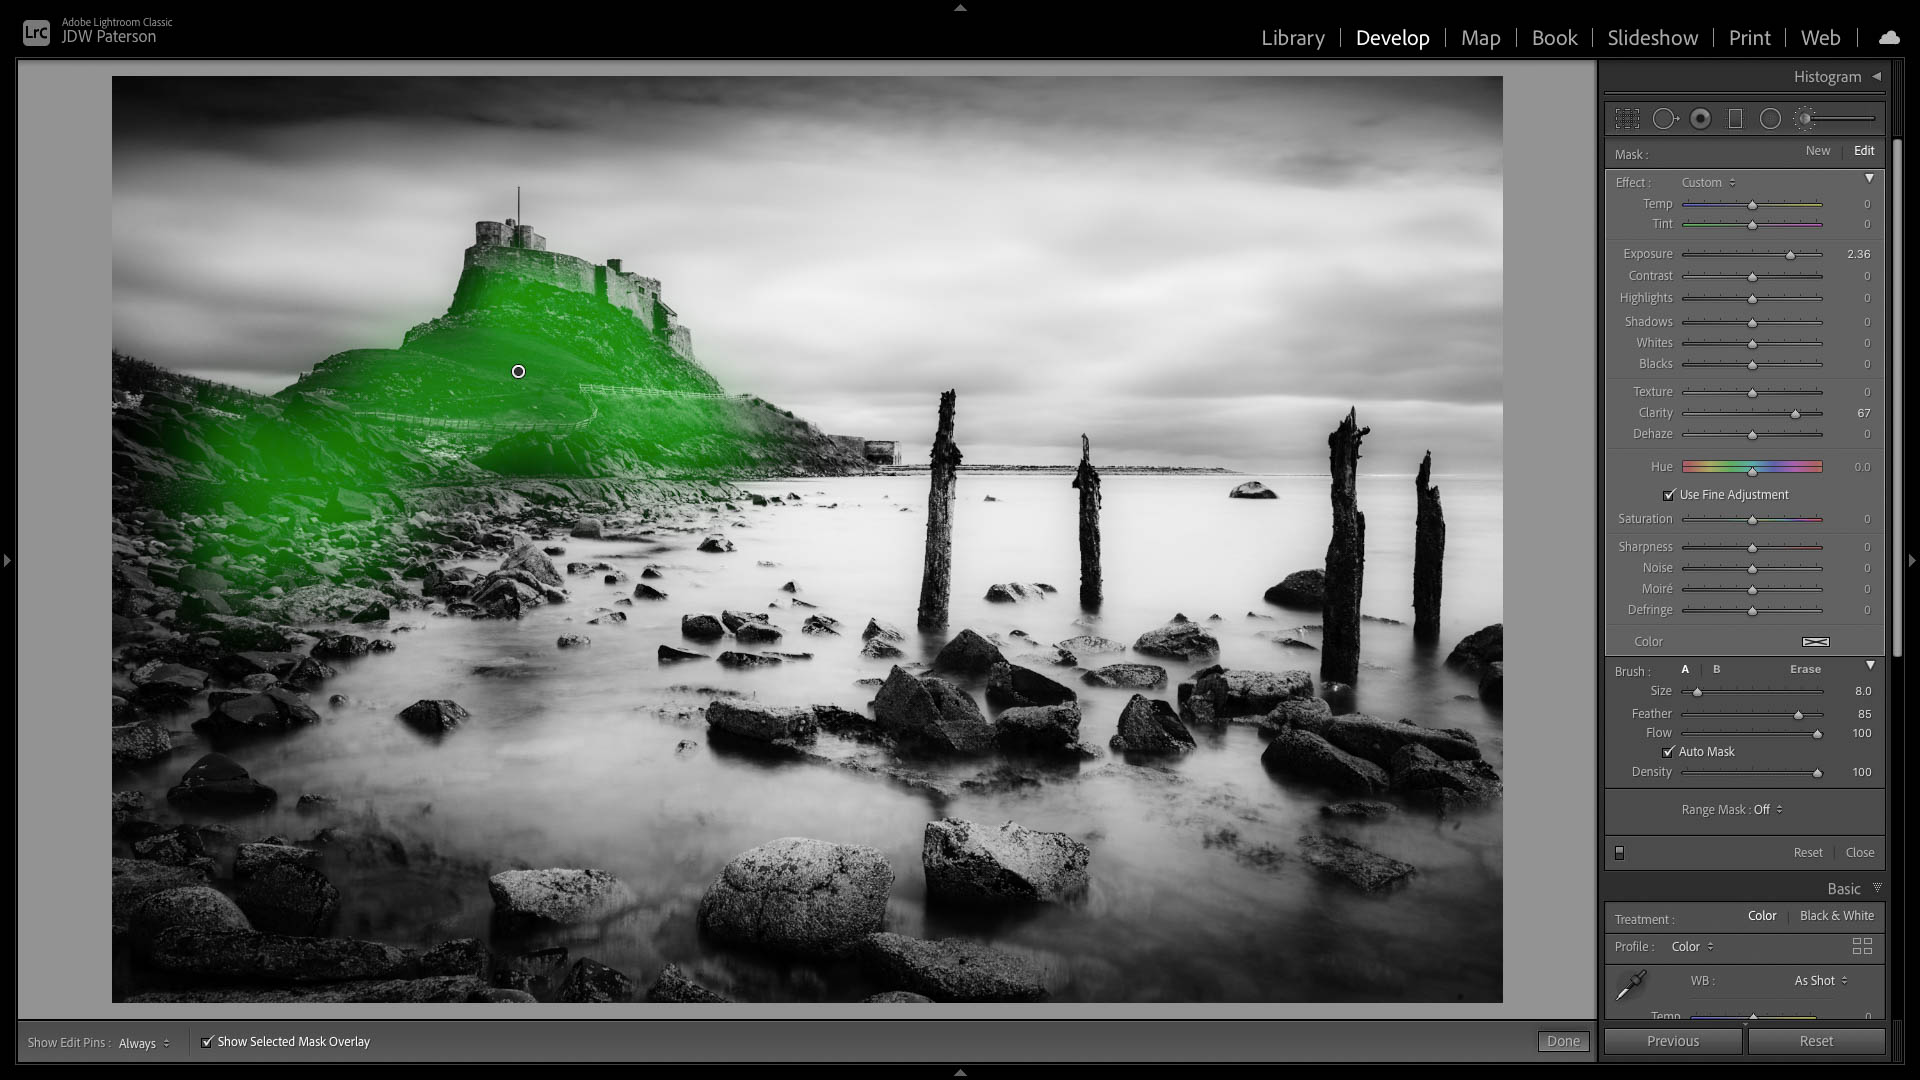
9 Target and enhance specific colours with the Adjustment Brush
Sometimes a landscape scene will feature a subject or burst of colour that you really want to pop. The Adjustment Brush can let you target and enhance specific areas with ease. All you need to do is paint over the area then adjust the sliders to enhance it. If it’s a complex object then you can use the tools within the brush to aid your painting. The Auto-Mask setting makes the brush seek out similar colours to the point first clicked on, which can help the brush snap to the edges of the object. Then there’s the Range Mask settings, which let you zero in on specific colours or target the highlights or shadows within the painted area.
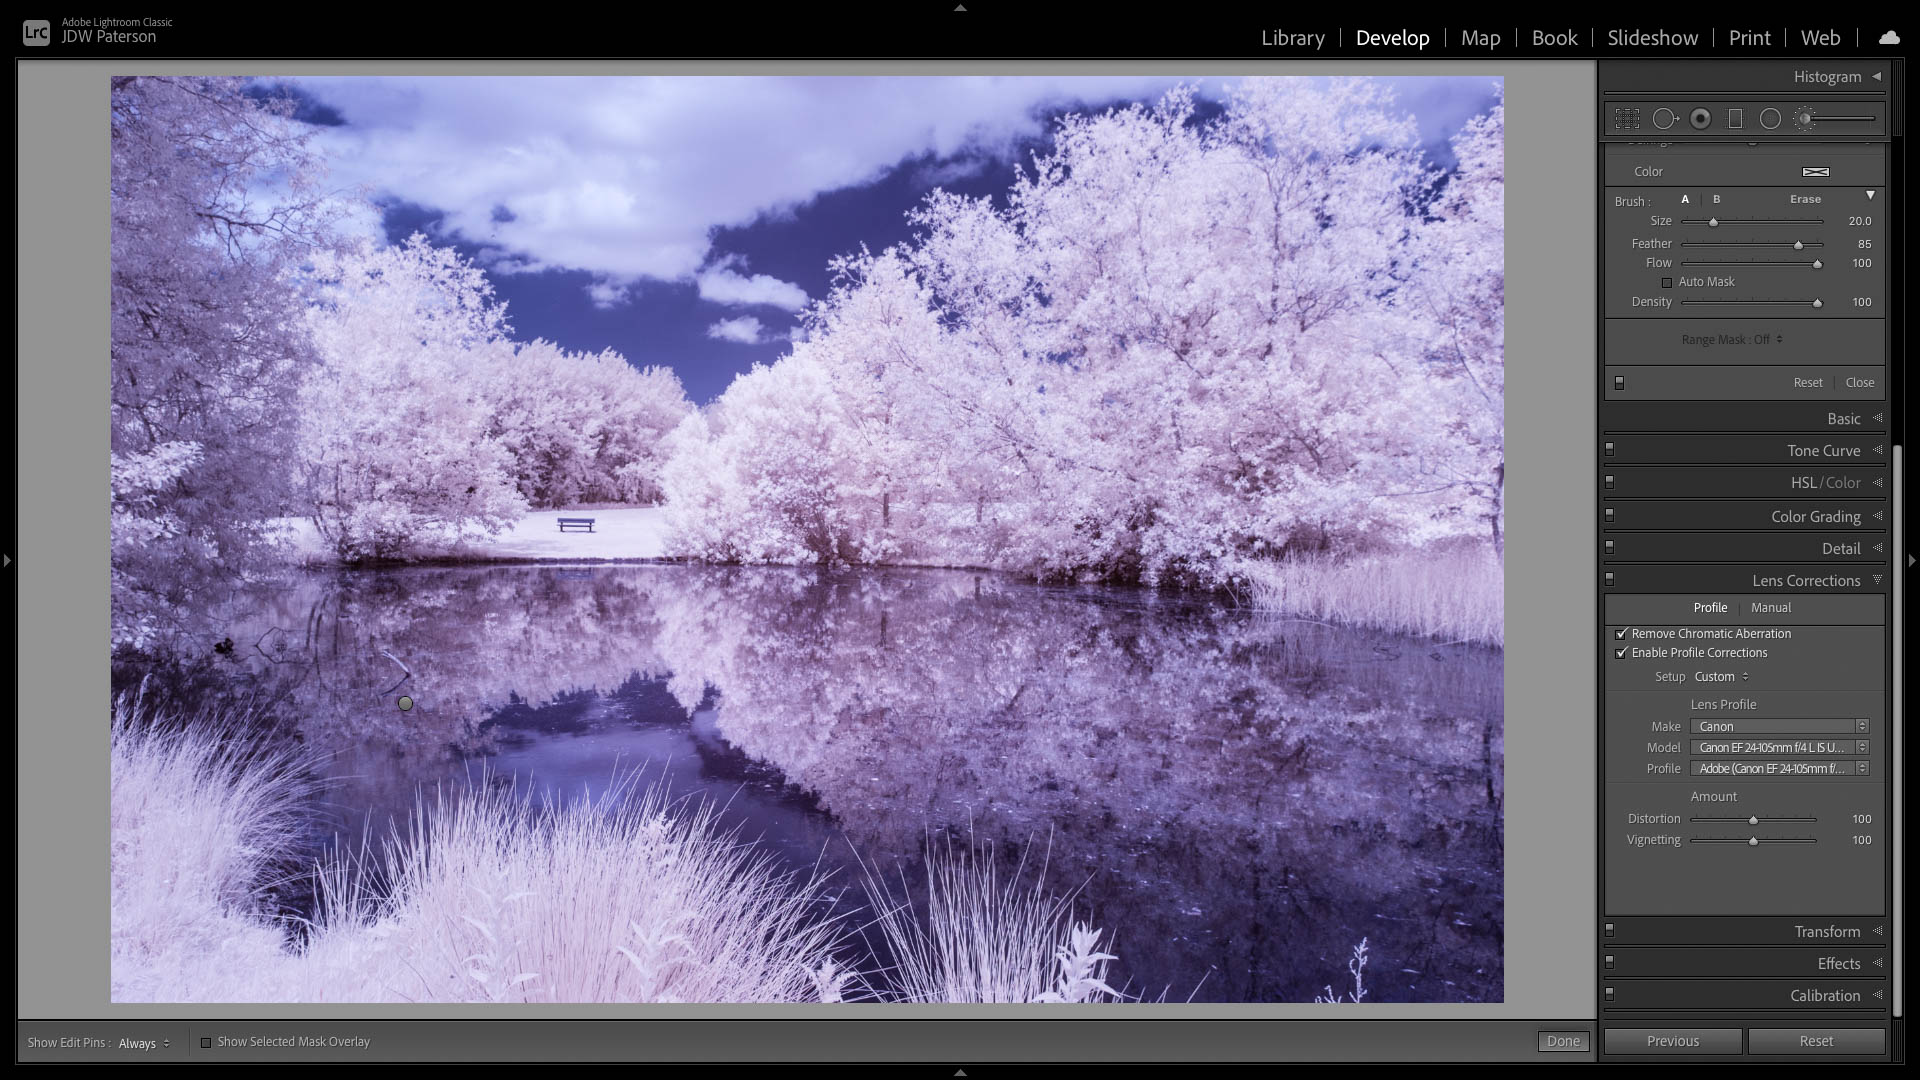
10 Set automatic lens correction
Lens correction is a must for landscape scenes, and you can set it up very easily by checking Remove Chromatic Aberration and Enable Profile Corrections in the Lens Correction Panel. In fact, it’s worth setting this up so that it’s automatically applied to every landscape photo you import into Lightroom, as this saves time doing it on individual photos. You can do this by creating a preset, then applying the preset when you first import the photos (there’s an option to add presets in the Import dialog). You might also want to include the Adobe Landscape Profile within the preset so that it’s automatically applied too.
Video tutorial
A few simple colour adjustments can make your photos look far more vibrant and eye-catching, and there are several ways you can change the colours according to your aesthetic preference. Here's our tutorial on how you can boost the colours in your photos in Lightroom:
All screenshots from James Paterson

James has been a professional photographer and award-winning journalist for the past 15 years. He is editor of Practical Photoshop magazine and contributes to leading photography publications worldwide.
View all articles

