


Find out why dynamic range matters to your photography, learn how to control it, and discover how it can be expanded for higher quality images

Modern cameras are capable of amazing things but they do have their limits, and one important consideration is dynamic range. Here we’ll explore the essential skills you need to control, manipulate and expand your dynamic range. This can ultimately lead to better quality images, less exposure errors and a higher level of detail in your photos.
What is dynamic range?
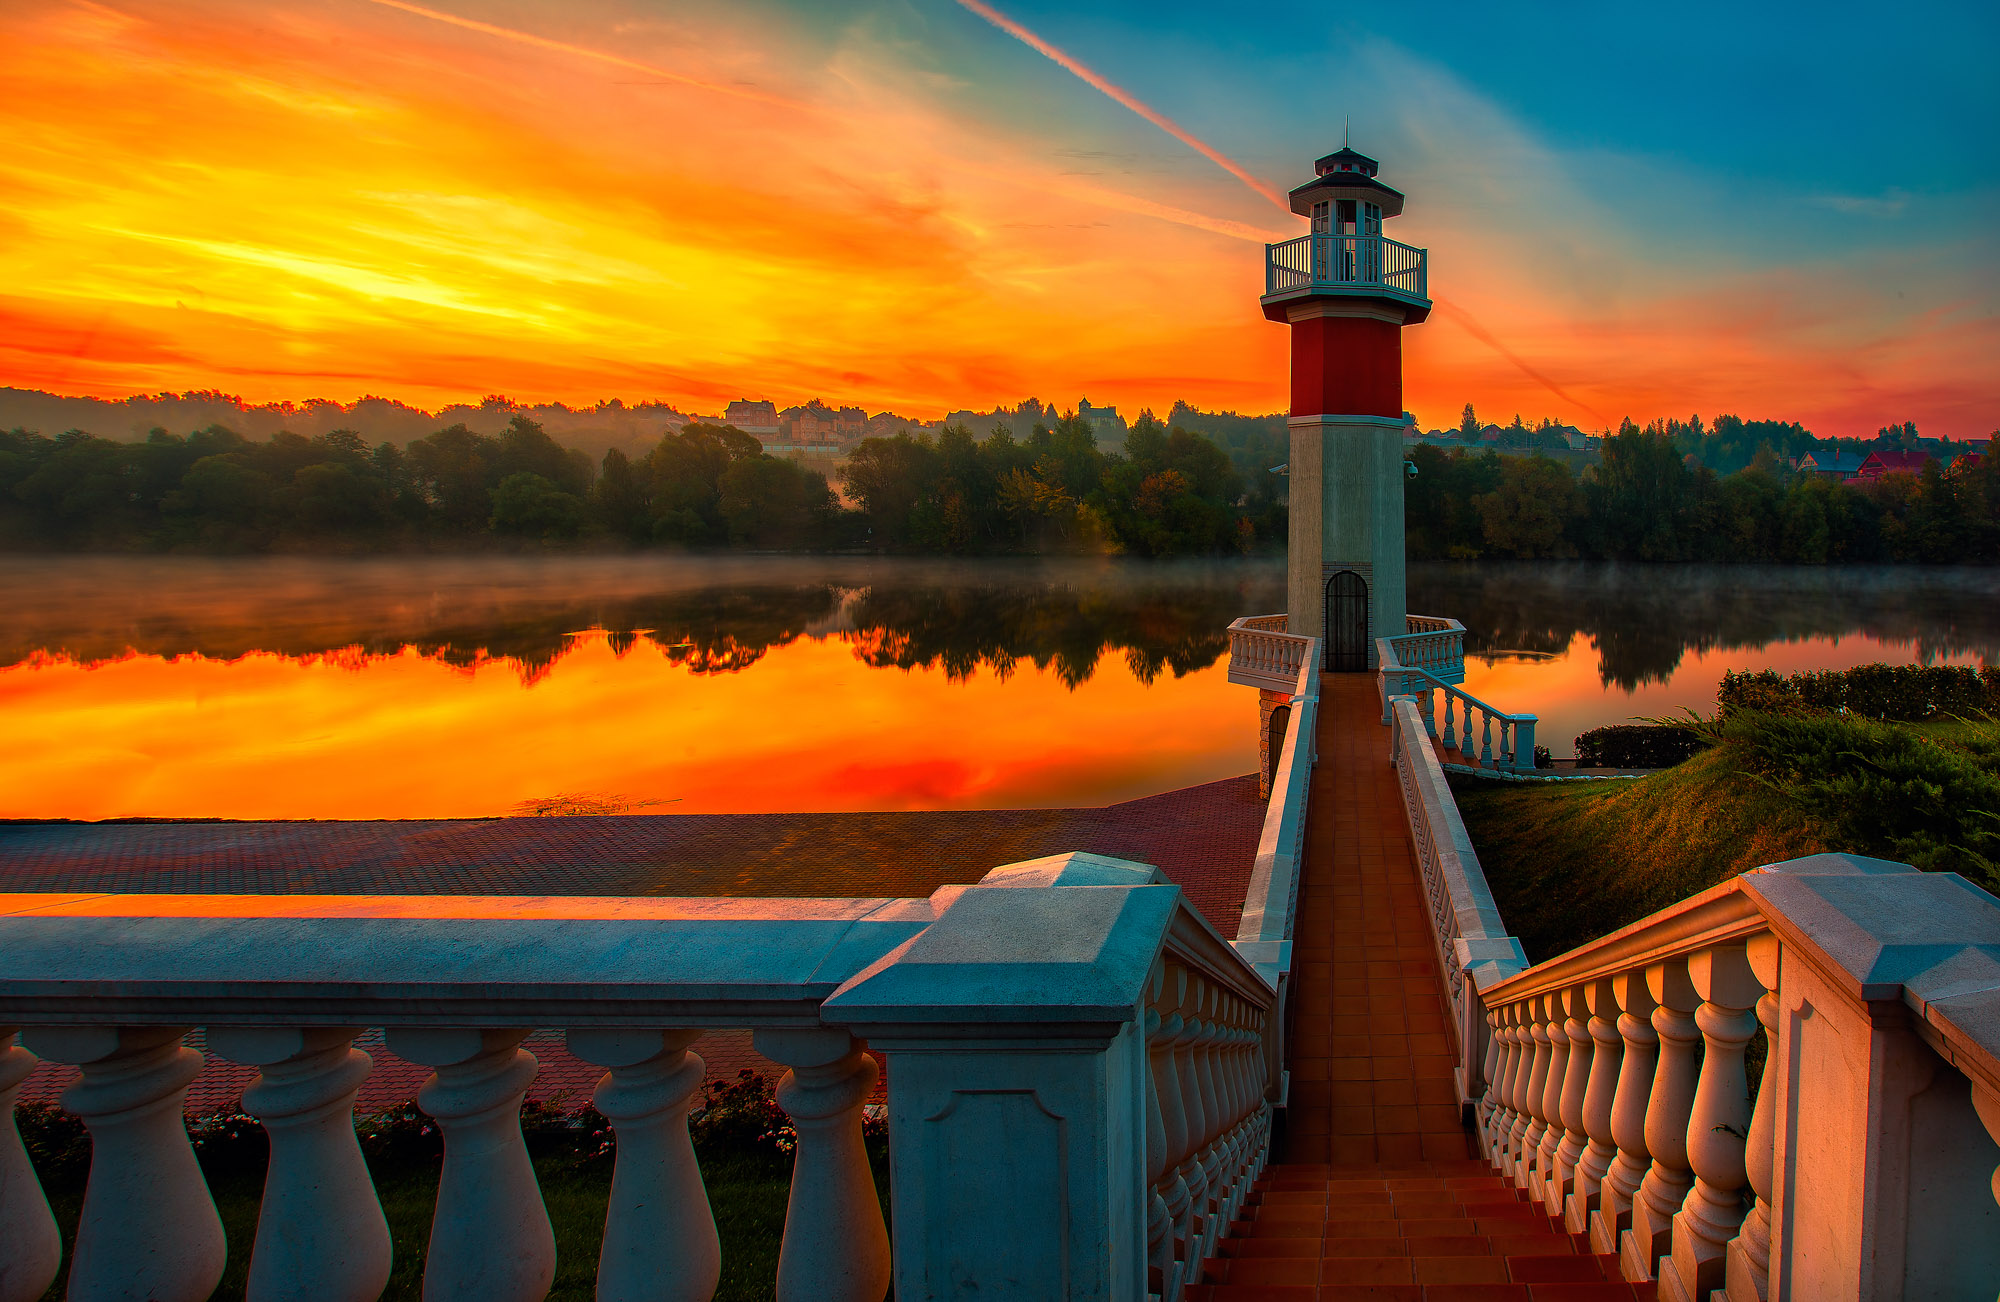
The term dynamic range is used in all sorts of disciplines. It can describe the difference between the loudest and quietest noise an instrument makes or the peaks and falls in a fluctuating electric current. In photographic terms, it is used to describe the difference between the lightest and darkest points in a scene. Take, for example, a landscape scene. A point in the sky may be the brightest part, while a deep shadow under a tree in the foreground could be the darkest.
Why dynamic range matters
As photographers we usually want to record as much detail as possible in the scene, so our dynamic range needs to be wide enough to capture detail in both the brightest and darkest areas. If not, these areas will be clipped to pure black or pure white and completely lack detail, which is typically something to avoid. We can measure dynamic range in stops of light. Camera performance varies, but a good one will typically be capable of capturing around 14 stops.
A range of issues
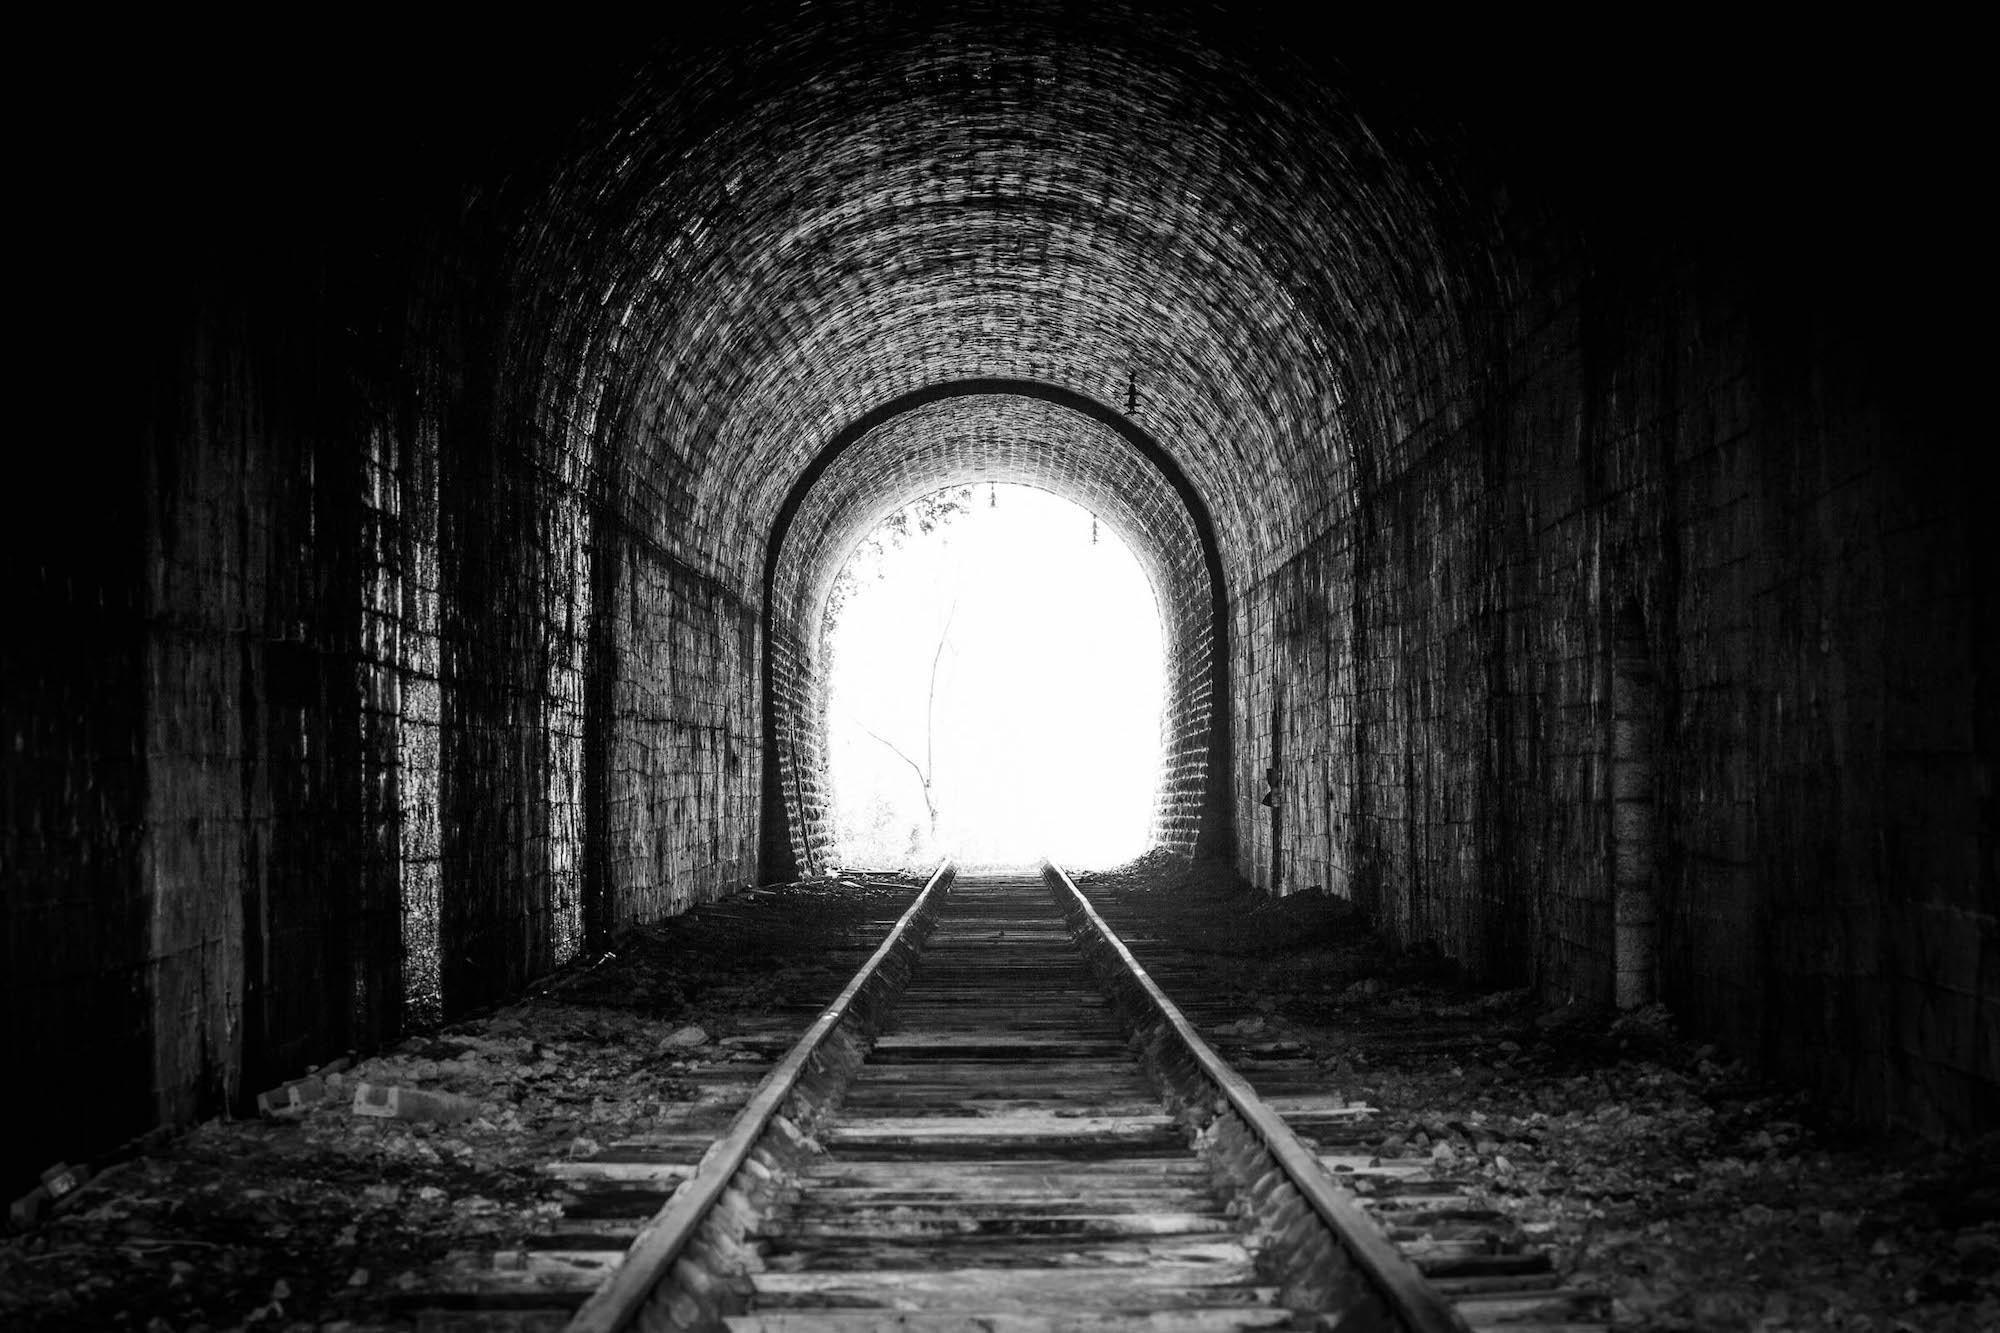
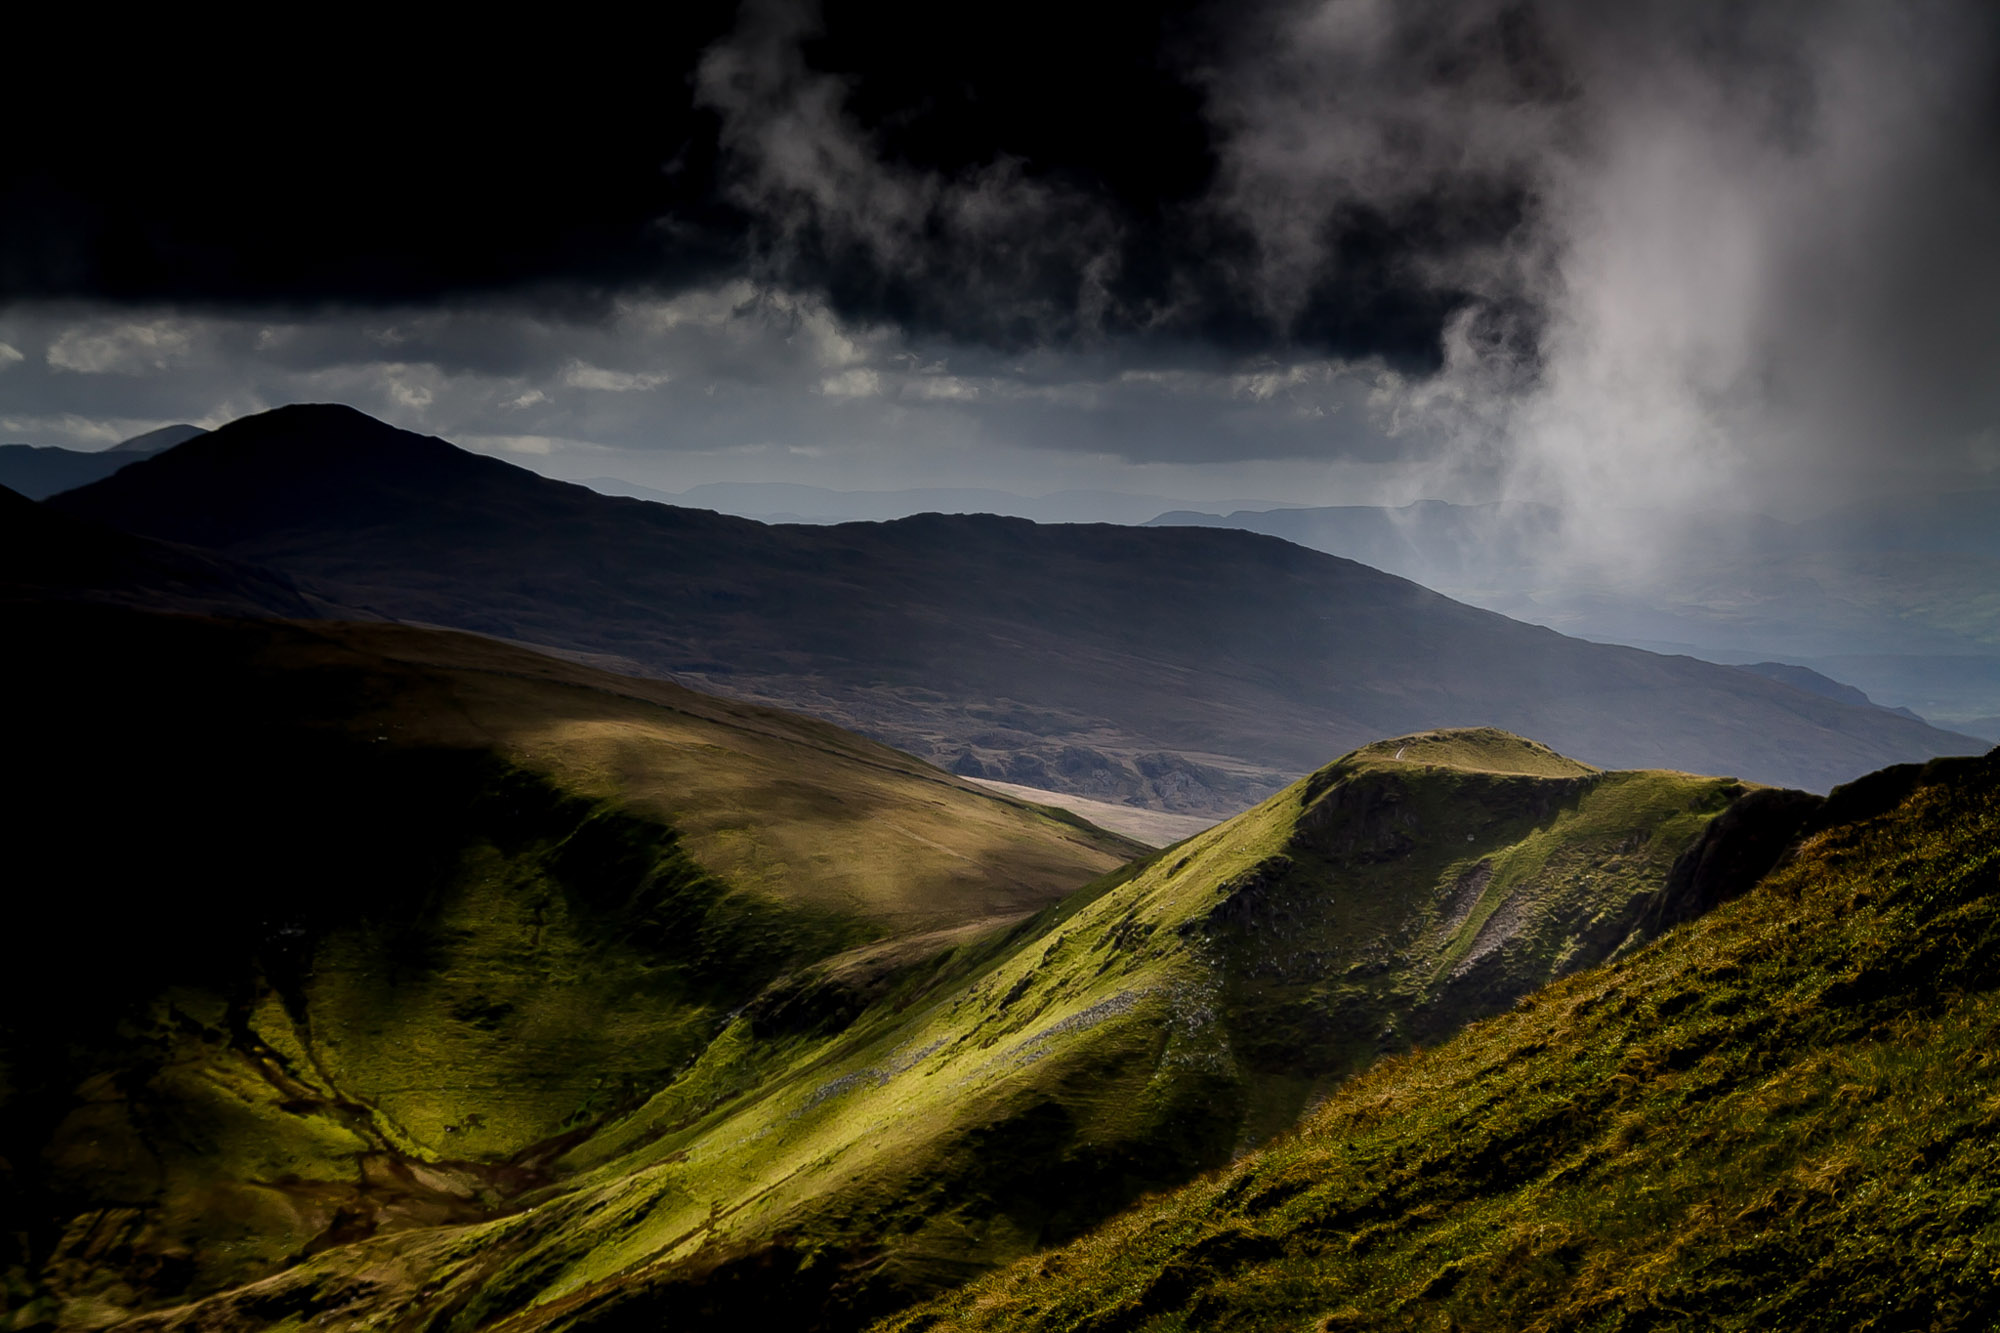
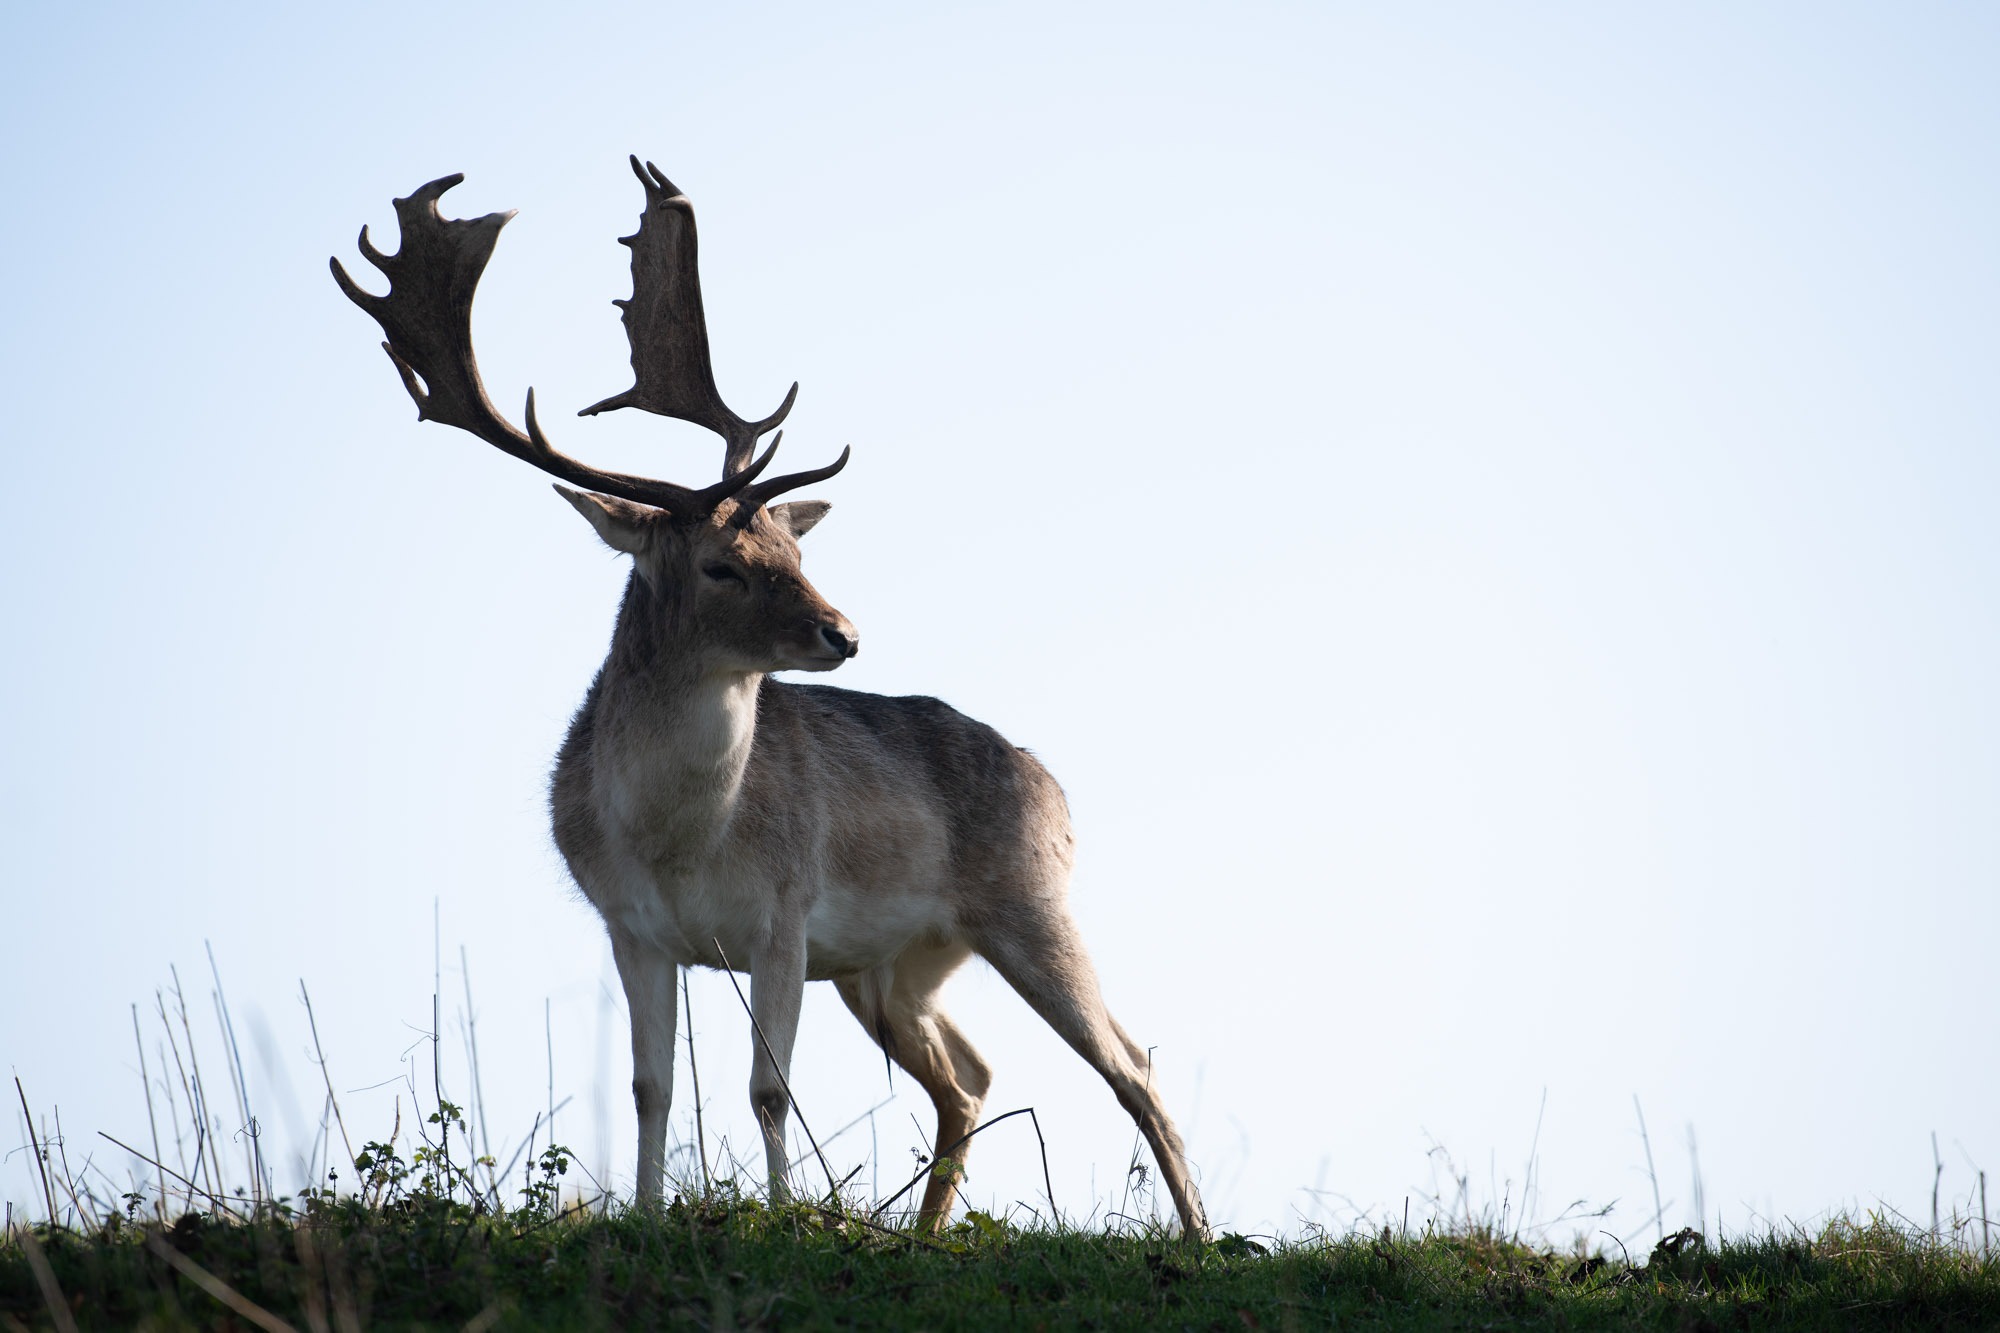
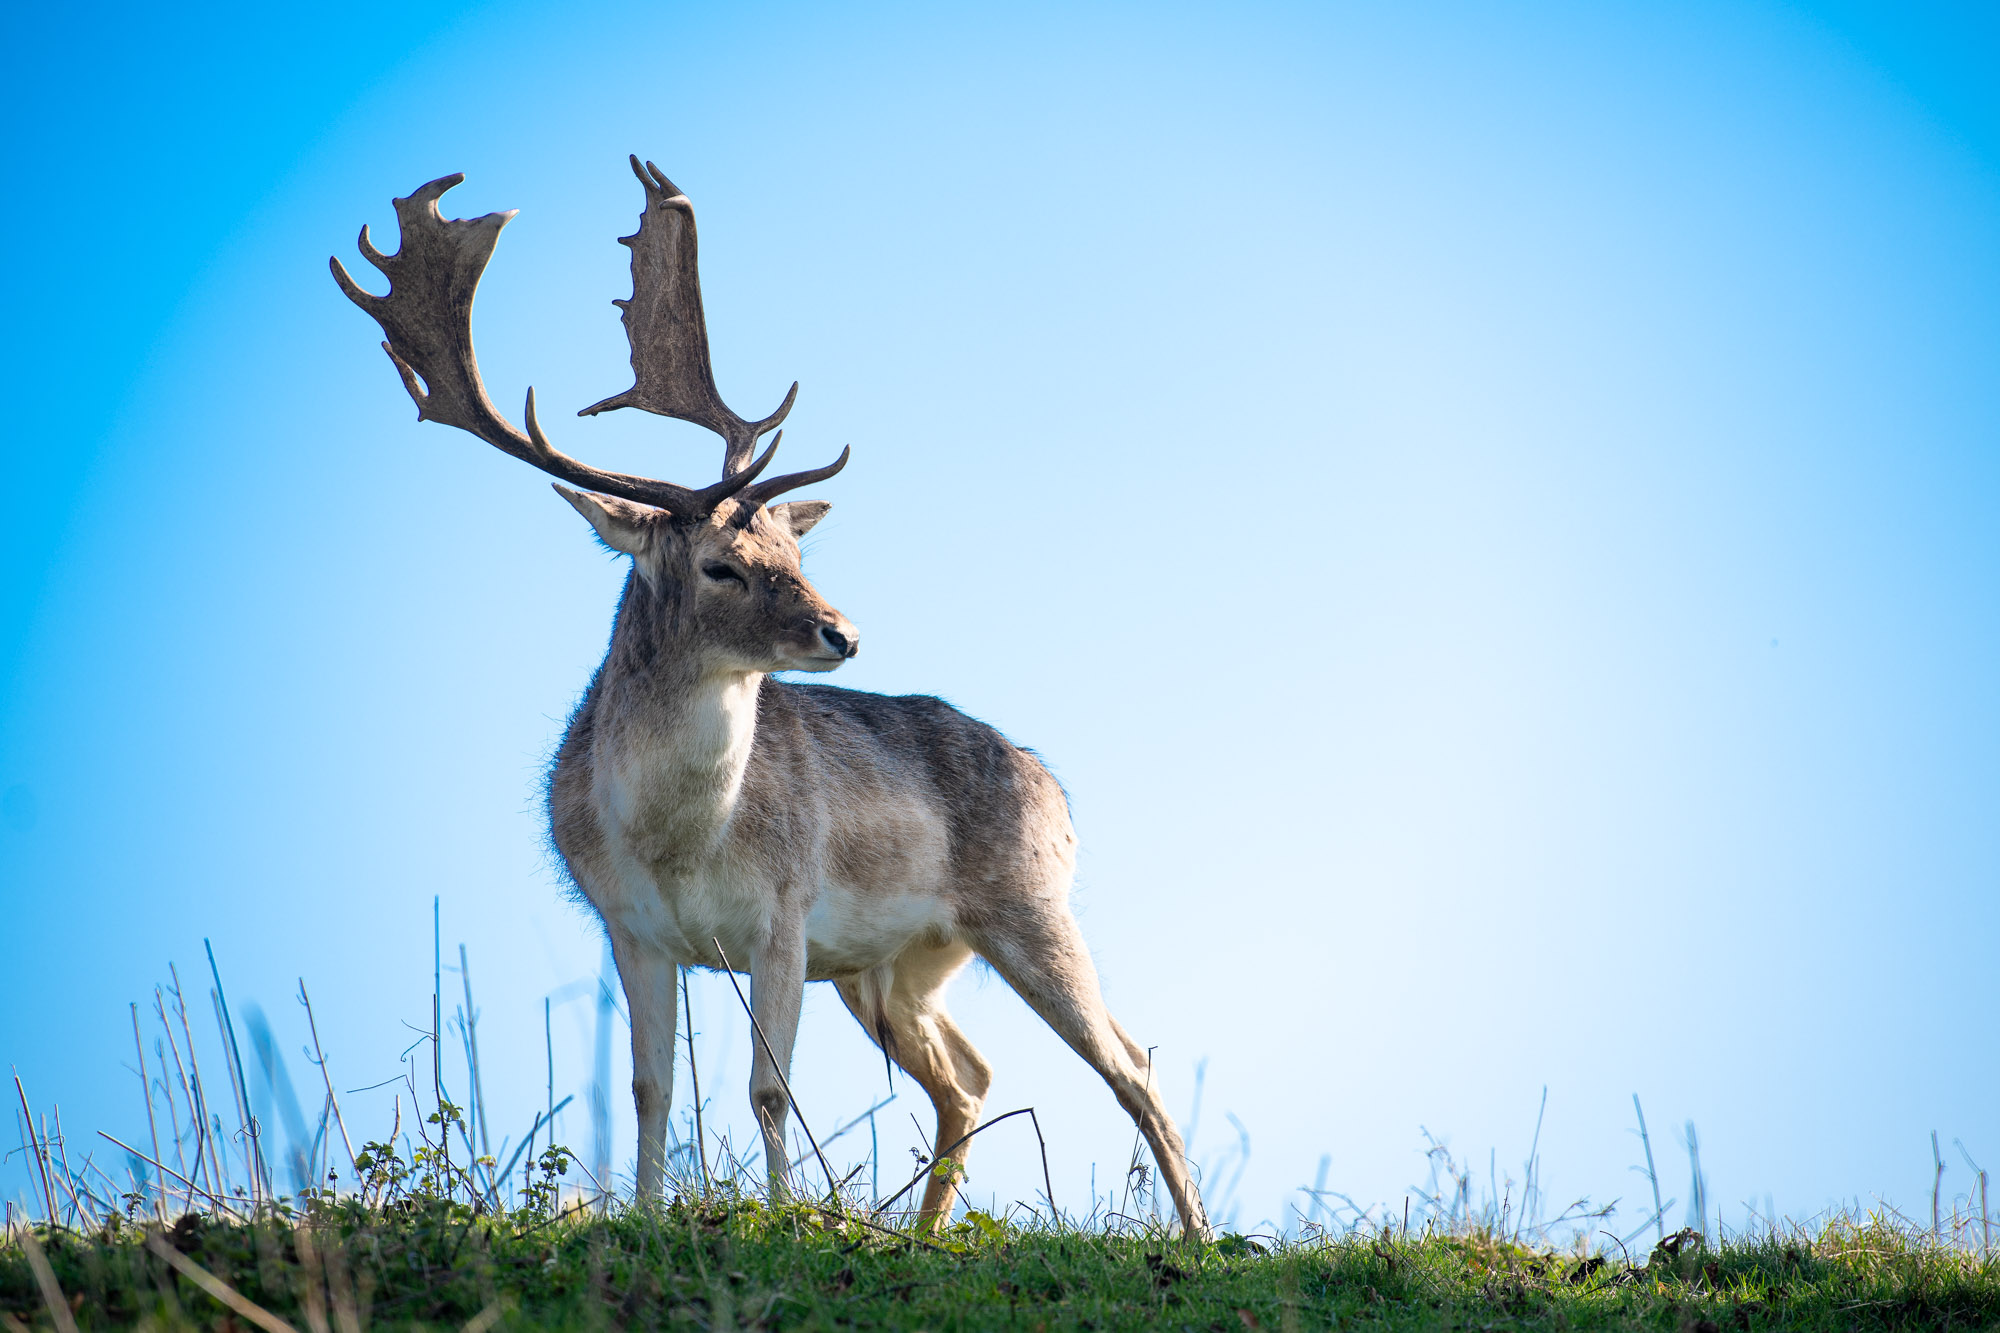
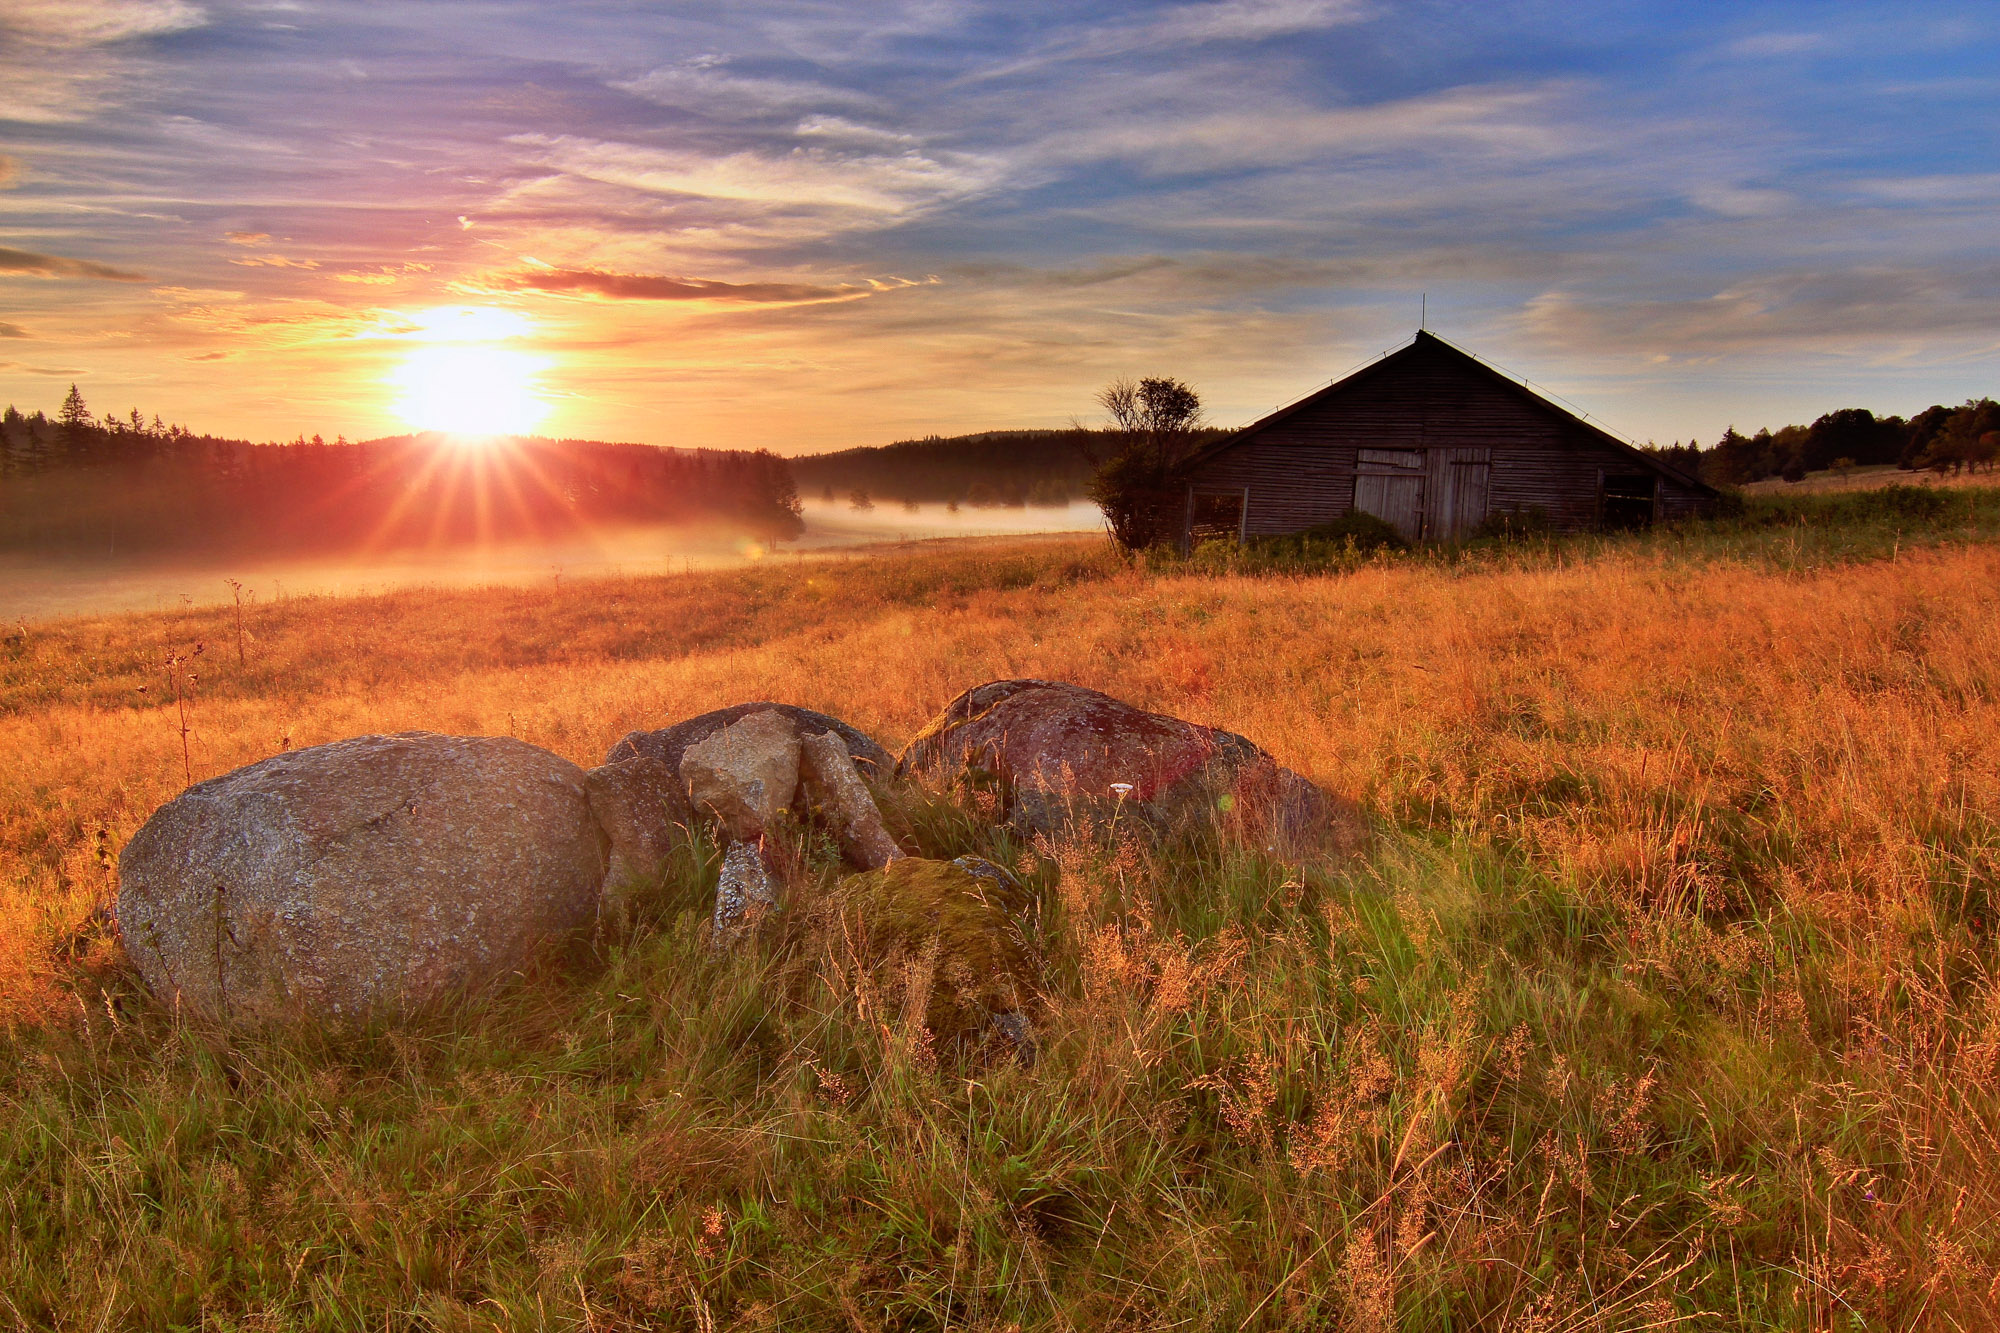
Dynamic range becomes an issue when presented with high-contrast scenes, like a sunset, a backlit portrait, or an interior scene with windows. If the difference between the lightest and darkest point is too great then you might be able to shift the balance by lifting the shadows - perhaps by bouncing light with a reflector or using a flash.
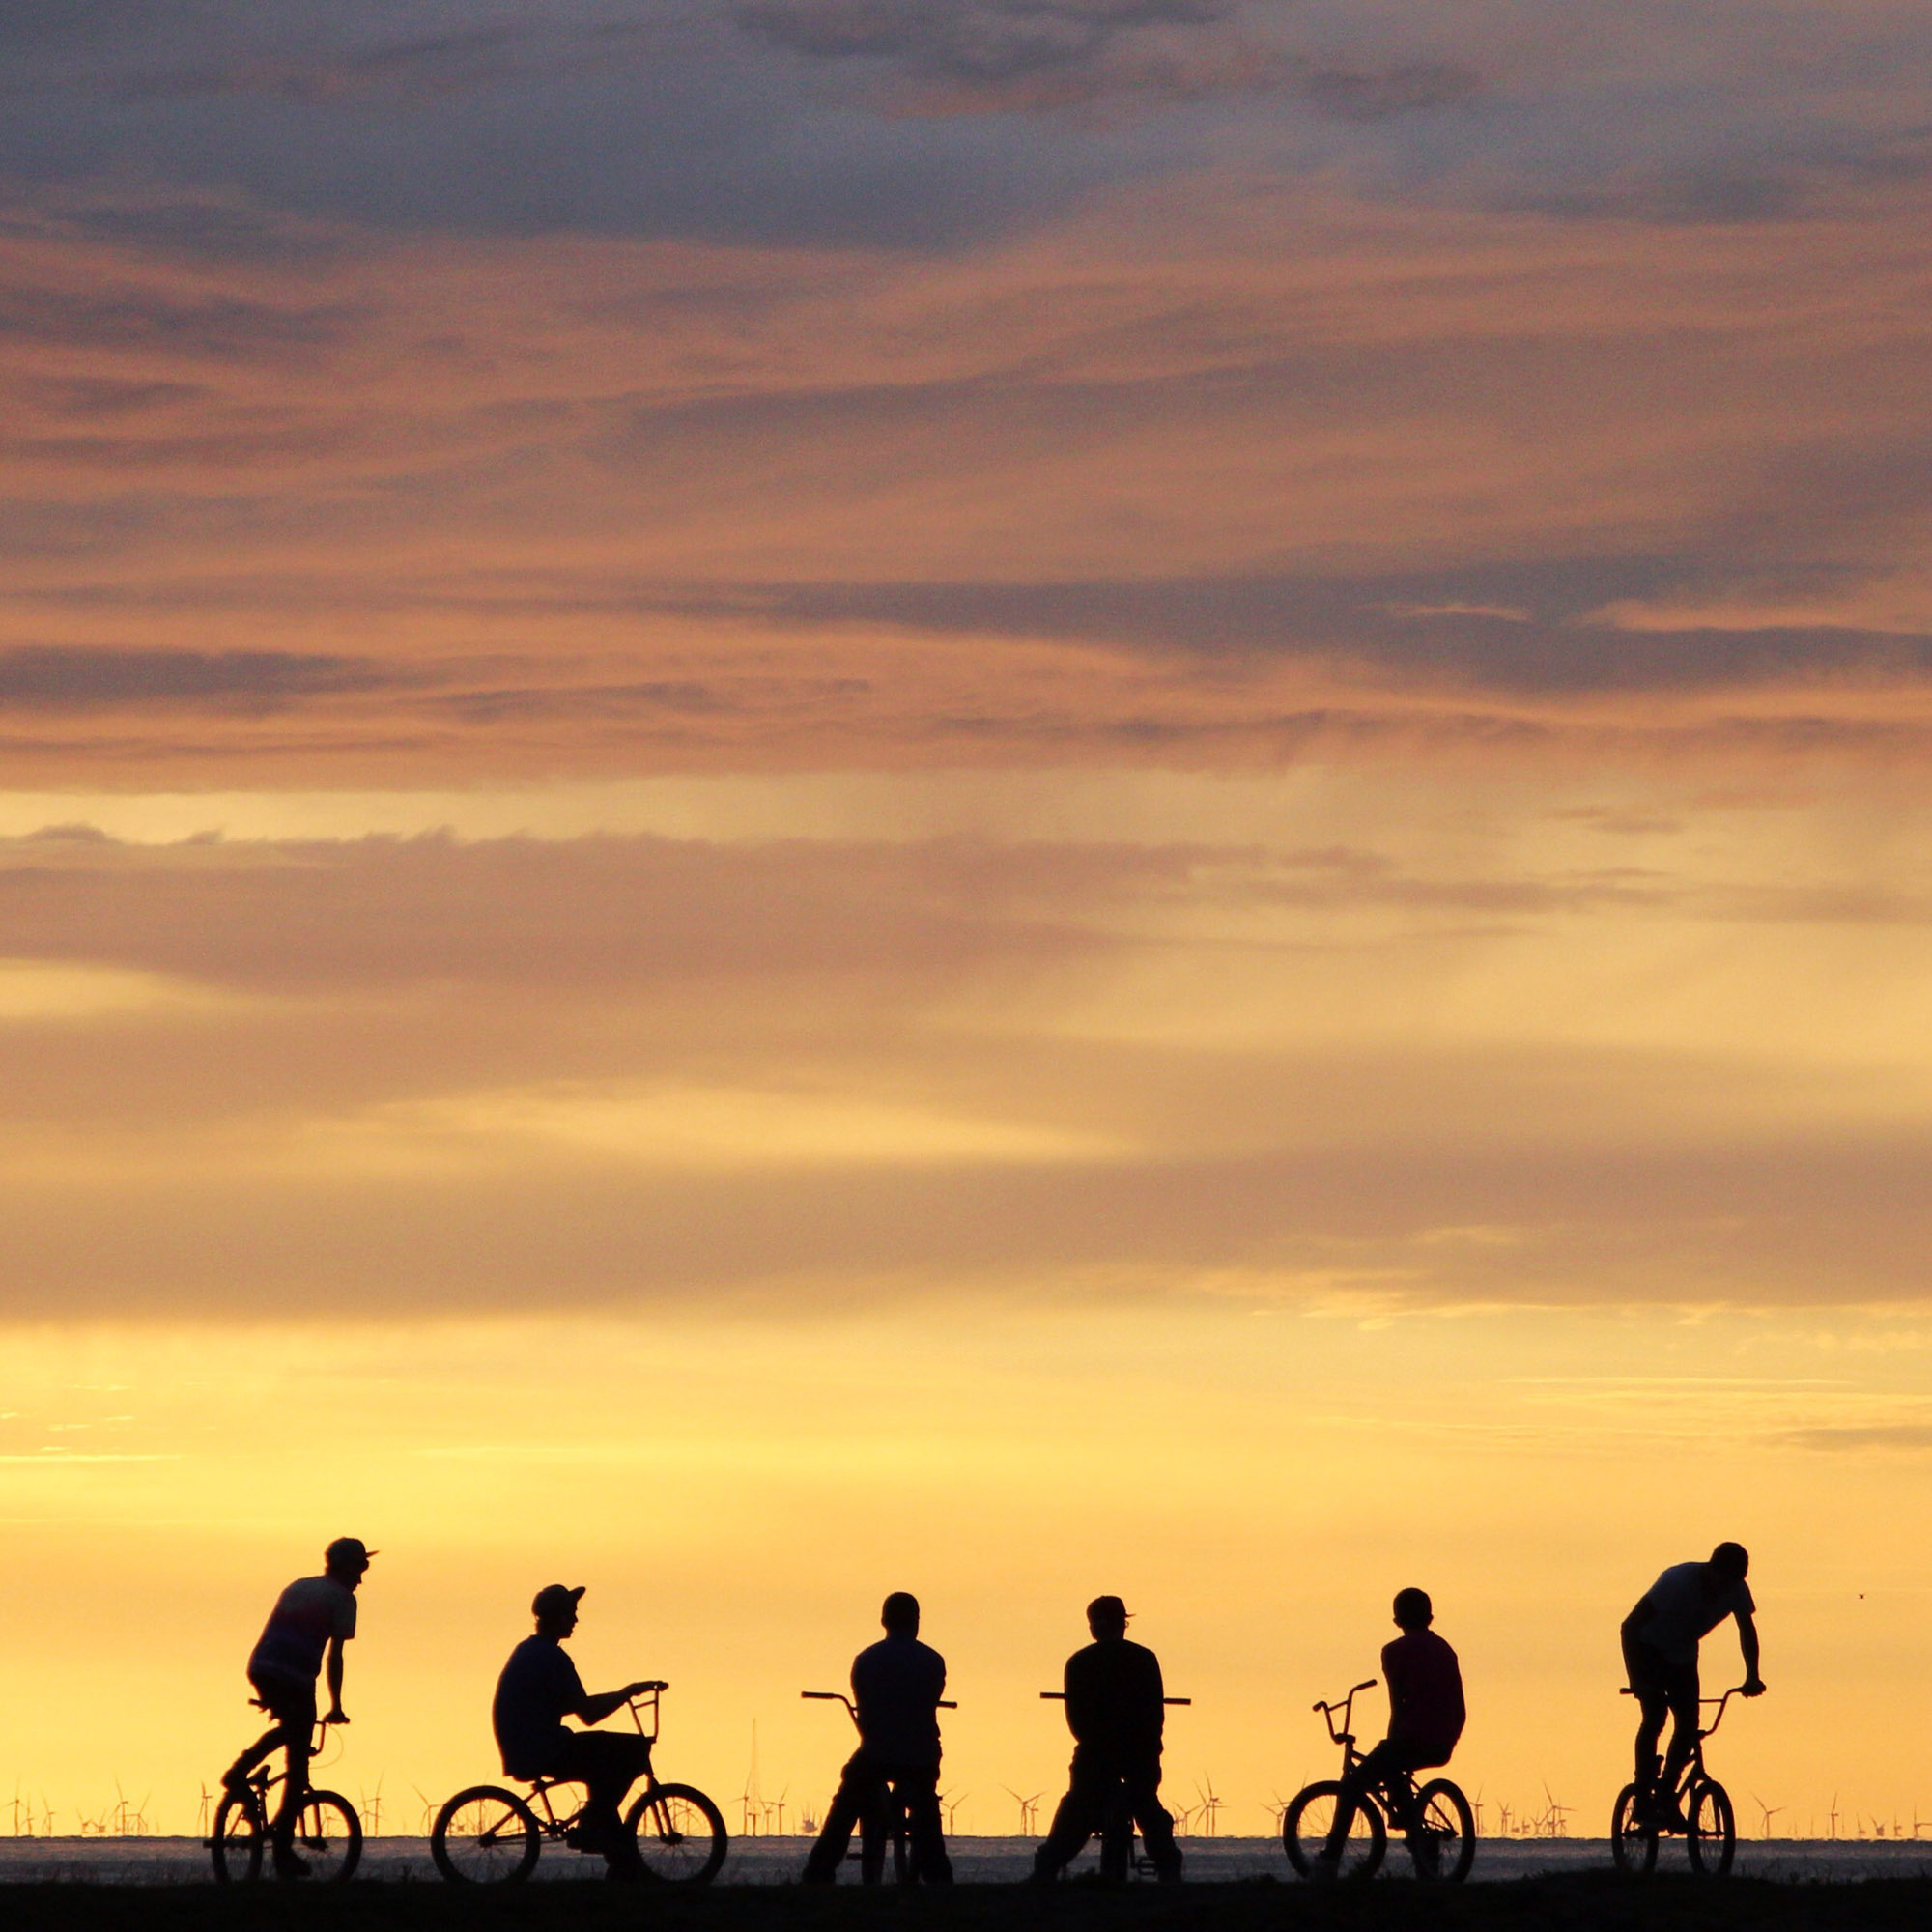
But if this isn’t possible, then you’ll need to choose whether highlight or shadow detail is more important. When shooting a sunset scene this might mean capturing foreground details as silhouettes rather than attempting to record detail in the shadows. When shooting an interior it might mean exposing for the indoor light so that the windows are blown out.

Pushing the limits
The good news for those worried about dynamic range is that modern cameras continue to get better and better. However, some cameras have greater dynamic range than others. High-end cameras with larger sensors tend to capture greater detail at either end of the dynamic range.
This is because larger sensors have deeper photosites which are capable of gathering more light before maxing out (for the same reason, larger sensors tend to perform better in low light). Most cameras will feature a dynamic range optimisation mode. Nikon calls it Active D-lighting, while Sony has Dynamic Range Optimization and Canon has Auto Lighting Optimiser. These modes utilise in-camera software to pull detail out of highlights and shadows. As such, they are useful for producing a more detailed image straight-off-the-bat.
Shoot raw
Shooting in your camera’s raw format is the right option if you want the maximum dynamic range to work with. A Raw is usually a 12 or 14-bit file (depending on the camera), which translates as 4096 - 16,384 levels of luminosity per colour channel. By contrast a jpeg is an 8-bit file, which holds just 256 levels of luminosity.
The higher bit-depth in a raw file translates to greater dynamic range, and it is invaluable if you need to rescue under or overexposed details. It’s also vital when it comes to editing your images, as raws withstand heavier edits while jpegs quickly start to display banding in areas of tonal gradation after editing contrast and colours.
Bracket your exposures
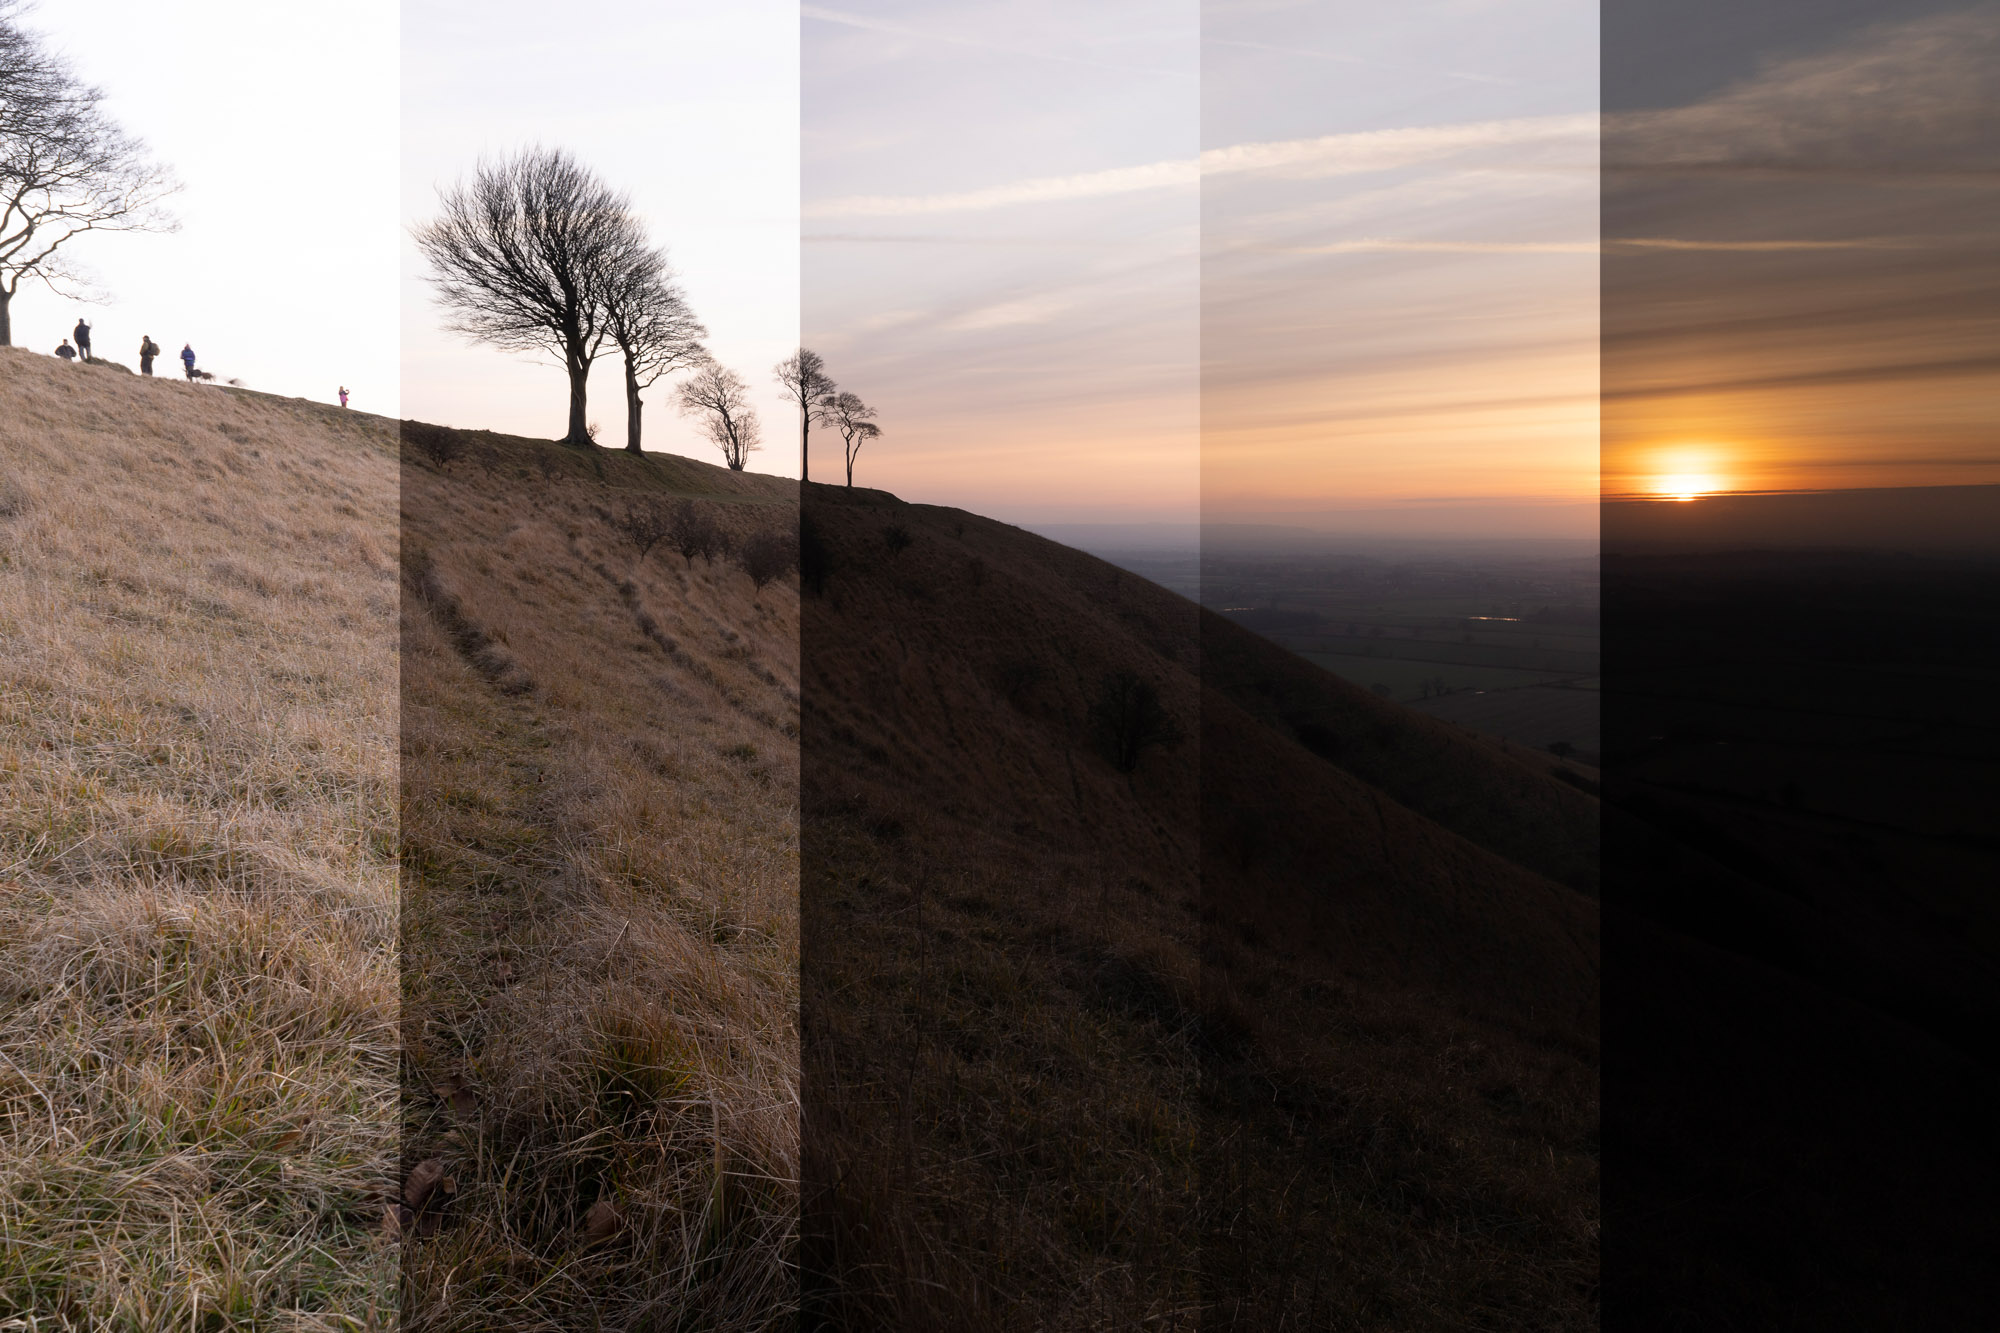
If you’re concerned about the dynamic range when capturing a high contrast scene then try bracketing your shots. This means taking a series of frames while the camera varies the exposure. It gives you a safety net as you can pick the right exposure afterwards. Of course, it also gives you the option to merge the set of photos into an HDR afterwards (as long as the frames are in alignment). As well as bracketing, you can also make use of your camera’s exposure compensation feature to control the brightness of the scene.
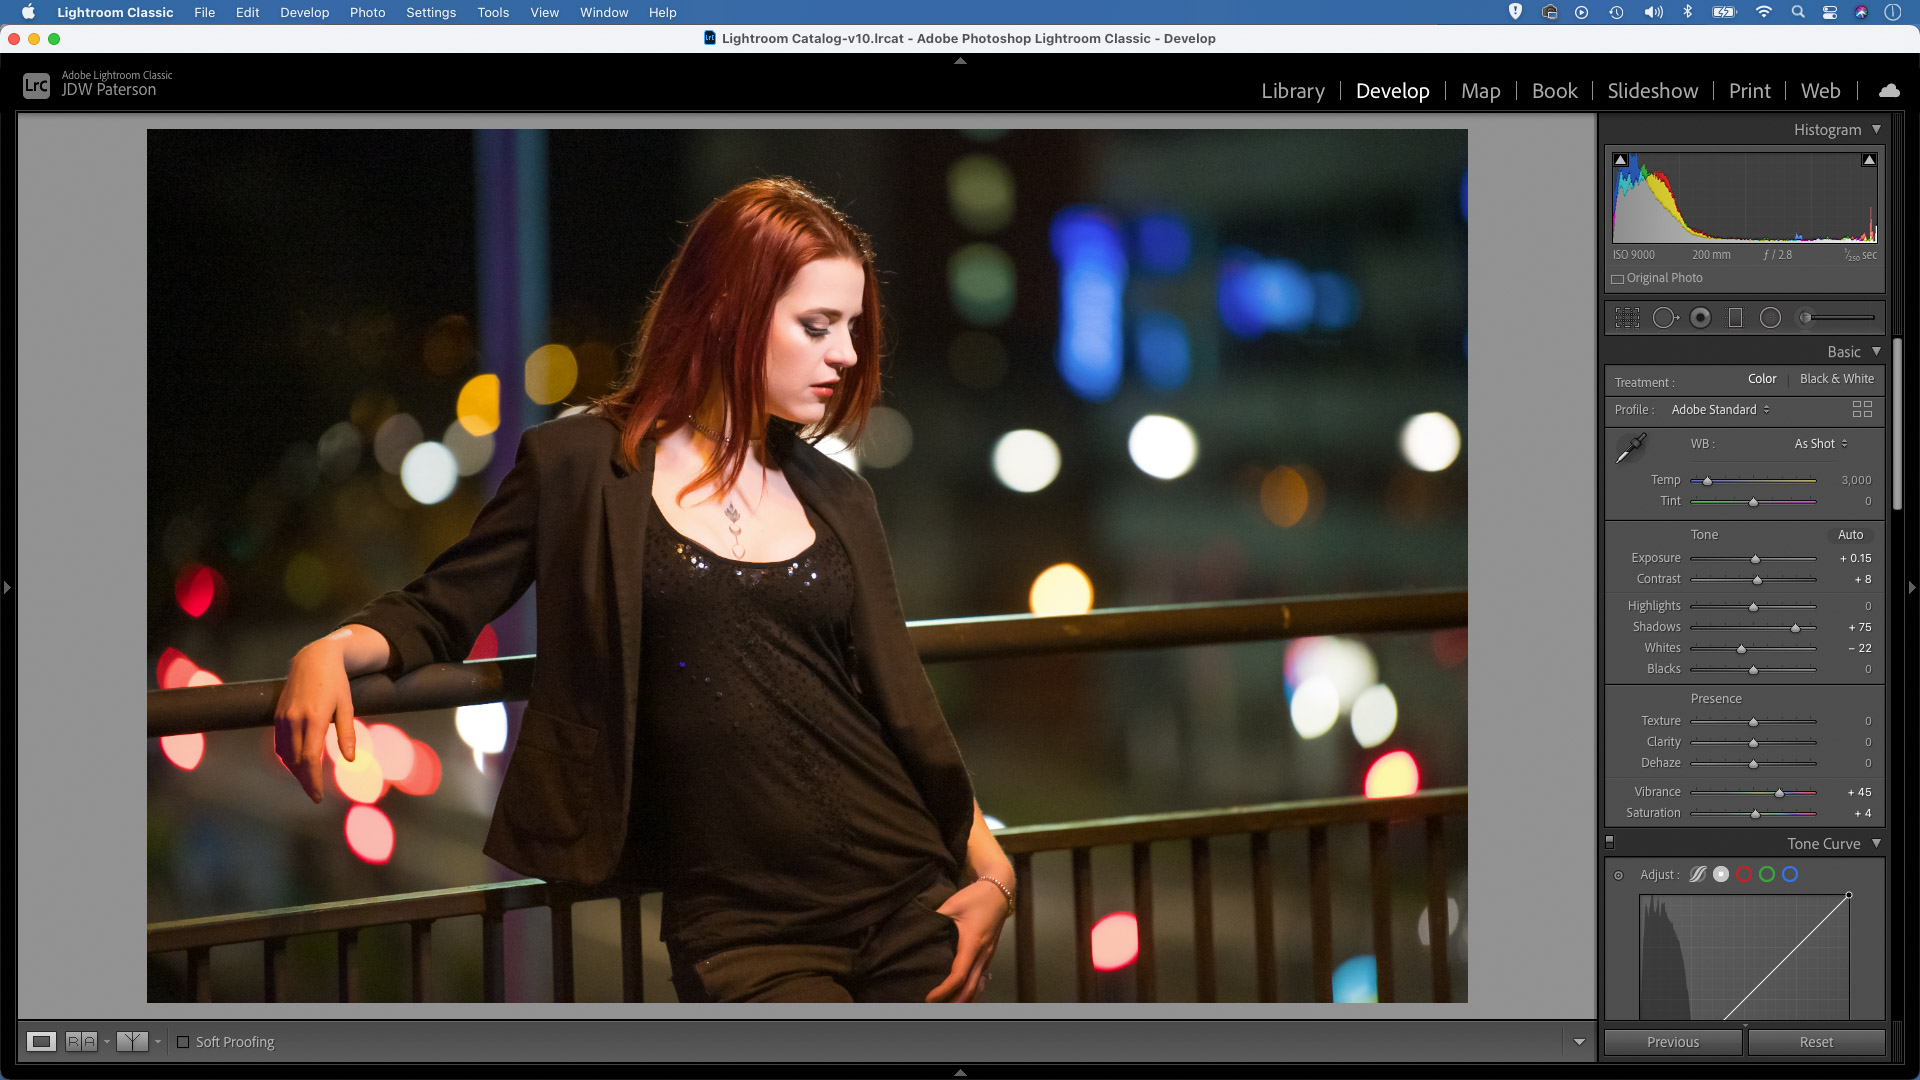
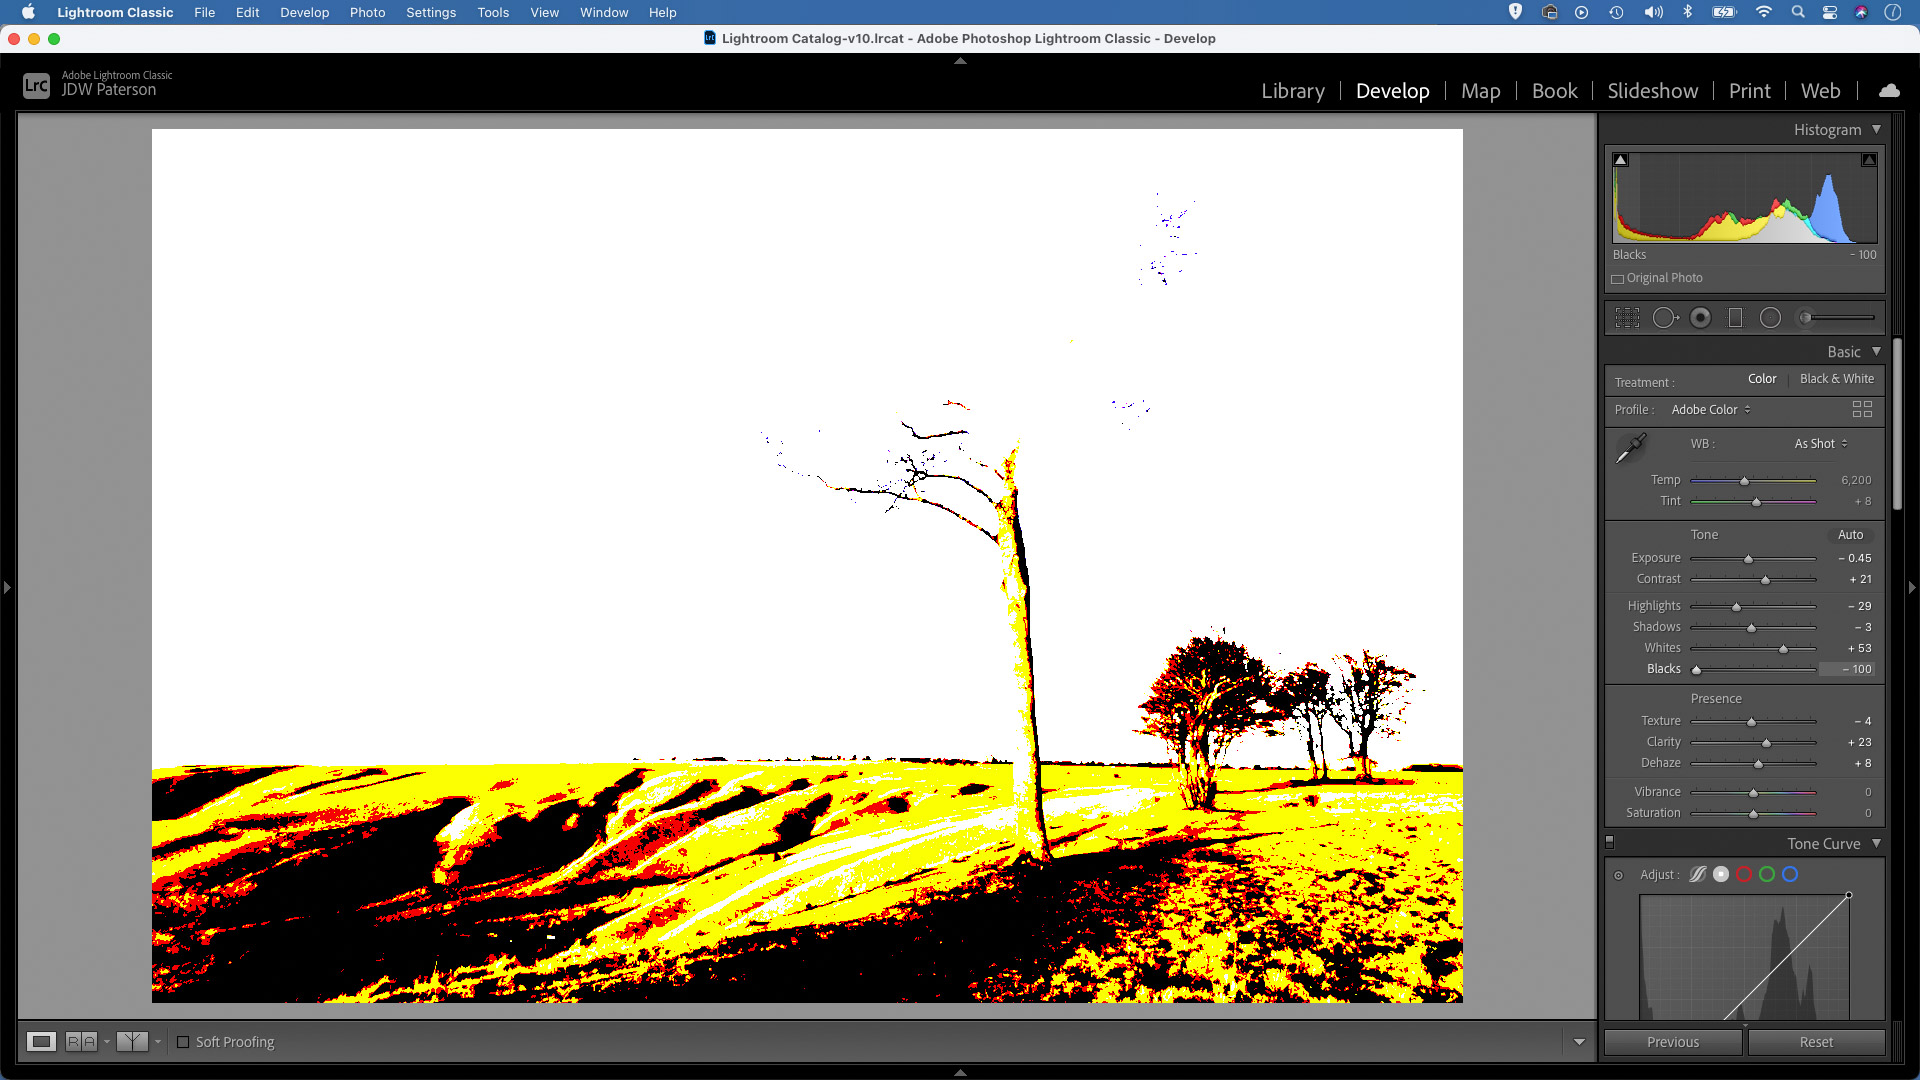
Check the histogram
A histogram gives you a graphical representation of all the tones in your scene, from the shadows on the left to the highlights on the right. The peaks on the graph show where most pixels sit on the tonal range. So in a bright scene the graph will be bunched to the right, while in a low key dark scene the peaks will clump to the left. Keeping an eye on the histogram while taking your shot is a great way to check your dynamic range and guard against clipped pixels.
Expose to the right
One way to ensure maximum quality from your photos is to use the ‘expose to the right’ technique. This involves adjusting your exposure to ensure that the maximum amount of light hits your camera’s sensor without pushing it so far that details become clipped to pure white.
The ‘to the right’ part of the term refers to the way the histogram will be bunched to the right and the image will often look overly bright as a result. The image can then be adjusted afterwards to correct the brightness. The reason for doing this is to ensure the least amount of image noise, which is more present in shadows than highlights. So by overexposing shadows then correcting them afterwards, less noise will be present.
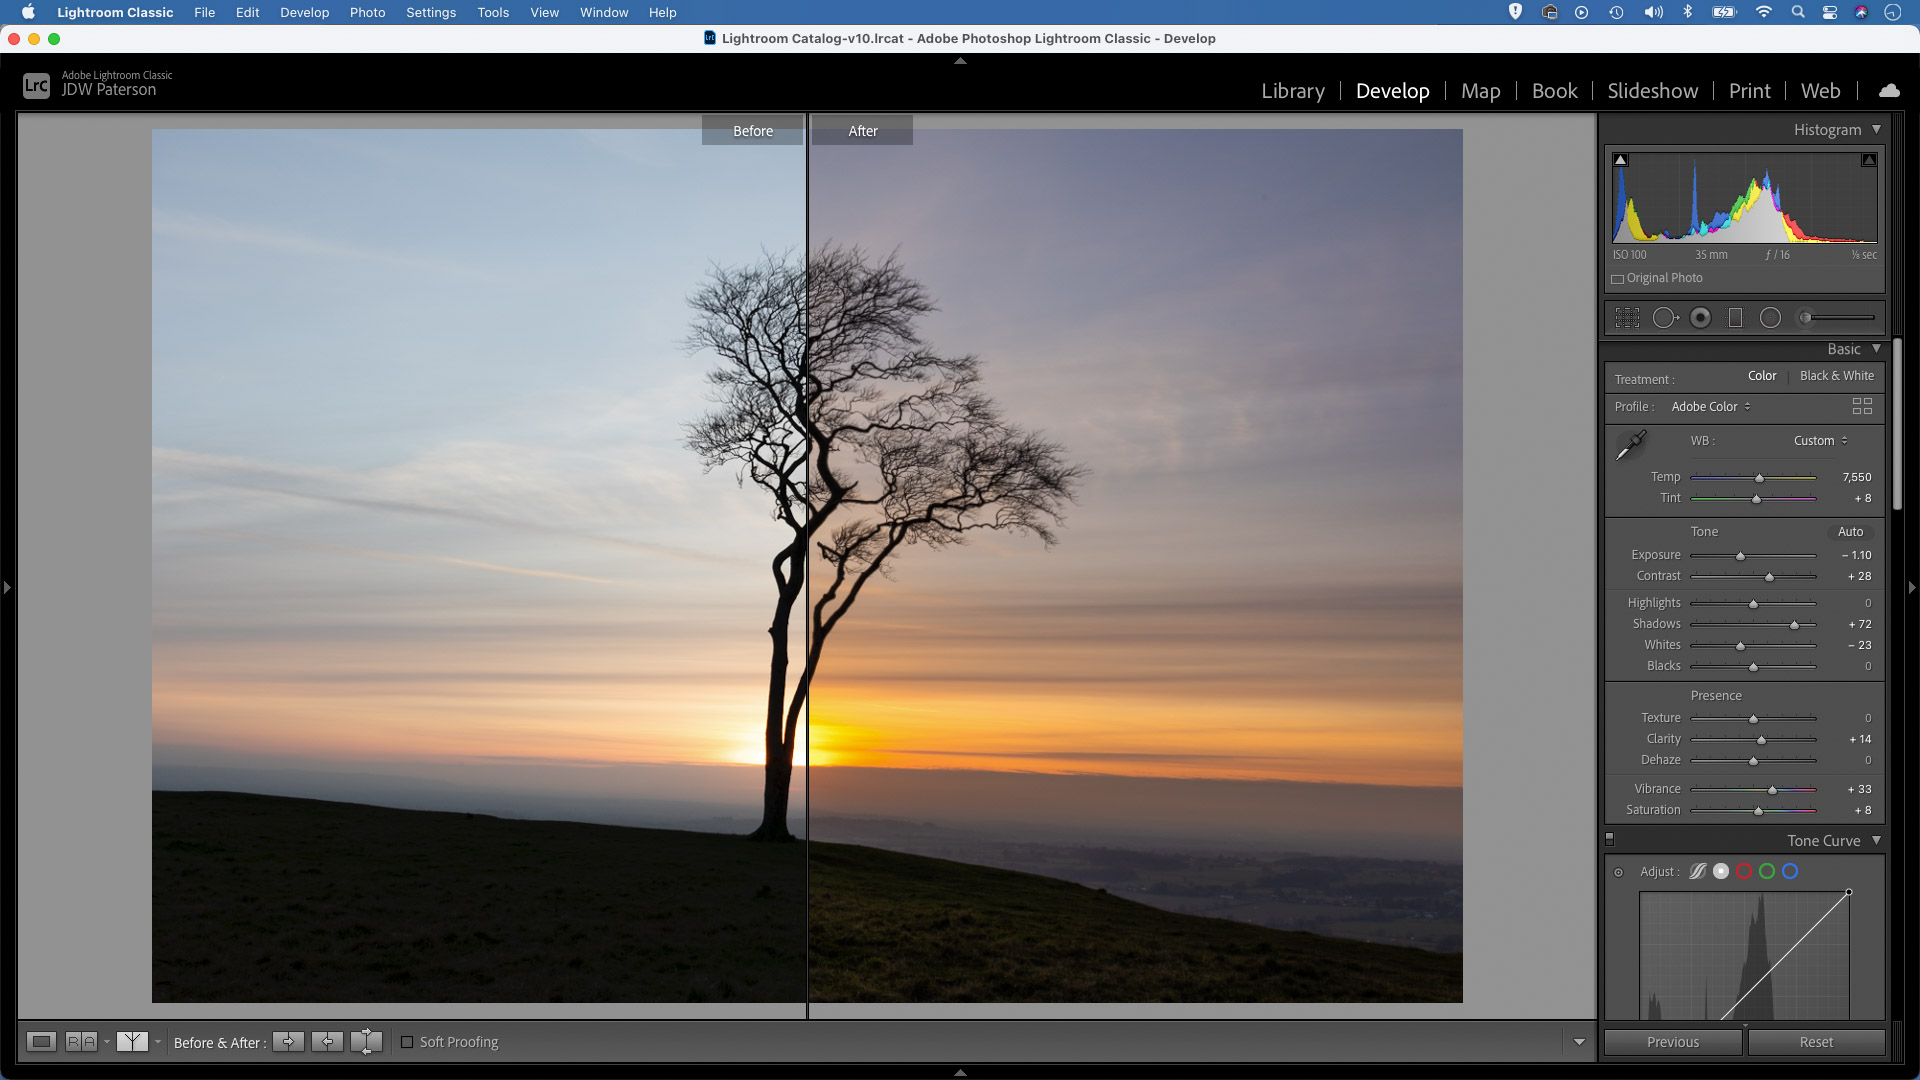
Set black and white points
There are lots of ways you can expand and control the dynamic range when editing your photos. By setting white and black points, you can ensure you’re making full use of the tonal range from black to white. In general, it’s best to set white and black points to a point just before pixels begin to clip.
The Shadows and Highlights sliders in Lightroom are also useful for teasing detail out of the tonal extremes, although it can often be more effective to use the Adjustment Brush or Graduated Filter and selectively target areas to lighten or darken them.
Create HDRs
HDR stands for high dynamic range, and it’s a useful way to expand the dynamic range beyond the capabilities of your camera, especially when presented with high-contrast scenes where it may be difficult to capture detail in both the highlights and shadows.
To make HDRs you simply shoot a set of bracketed exposures, ideally using a tripod to keep them in alignment. Then you can merge the set. Dedicated HDR software like Photomatix Pro is ideal, but you can also merge in Lightroom or Photoshop.
To make HDRs in Lightroom highlight the set of images, right-click and choose Photomerge > HDR, then use the tonal tools to control shadow and highlight detail.
All images by James Paterson unless otherwise stated

James has been a professional photographer and award-winning journalist for the past 15 years. He is editor of Practical Photoshop magazine and contributes to leading photography publications worldwide.
View all articles

