


This guide will introduce you to how gradients work and where you should apply them to selectively boost your shot and get more balanced image

One of the biggest challenges for any photographer shooting outdoors is the range of variables in light, contrast and colour in any given scene.
This is particularly applicable where, for example, there is an area of highlights (such as sky) alongside a darker area. The range of light and dark in compositions typical for outdoor photography can make it difficult to apply the best settings for a balanced exposure.
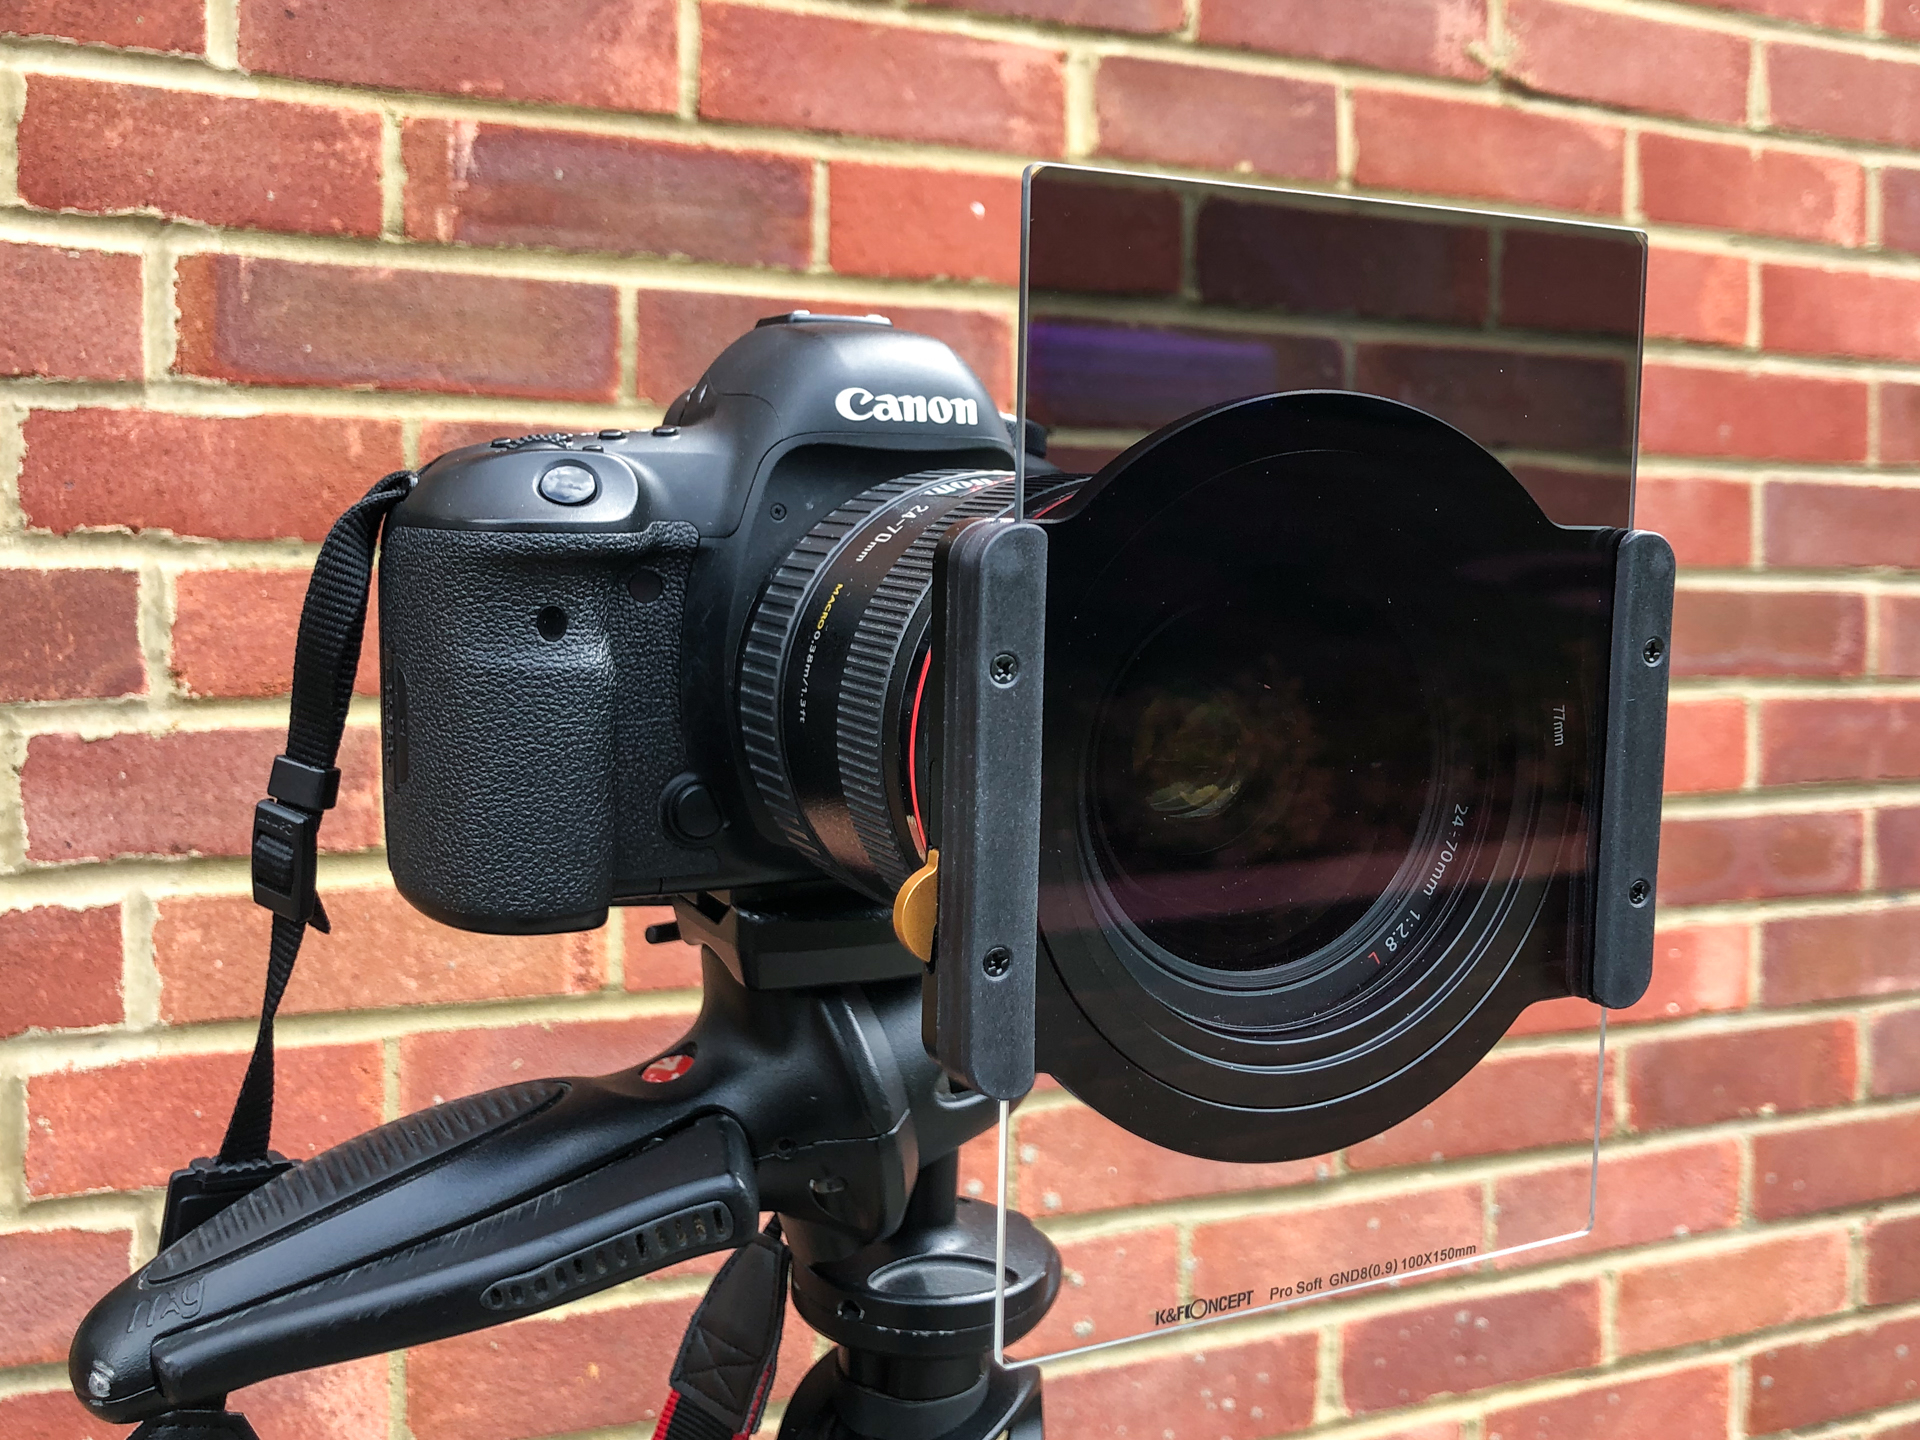
To combat some of these issues out in the field, filters can be placed in front of the lens to help balance the light across the composition. However investing in a range of photographic filters is expensive. Thankfully, editing software like Lightroom and Photoshop makes it easy to replicate the effects of physical filters in the form of gradients. And this guide will show you what you can use gradients for in post-production to enhance your images.
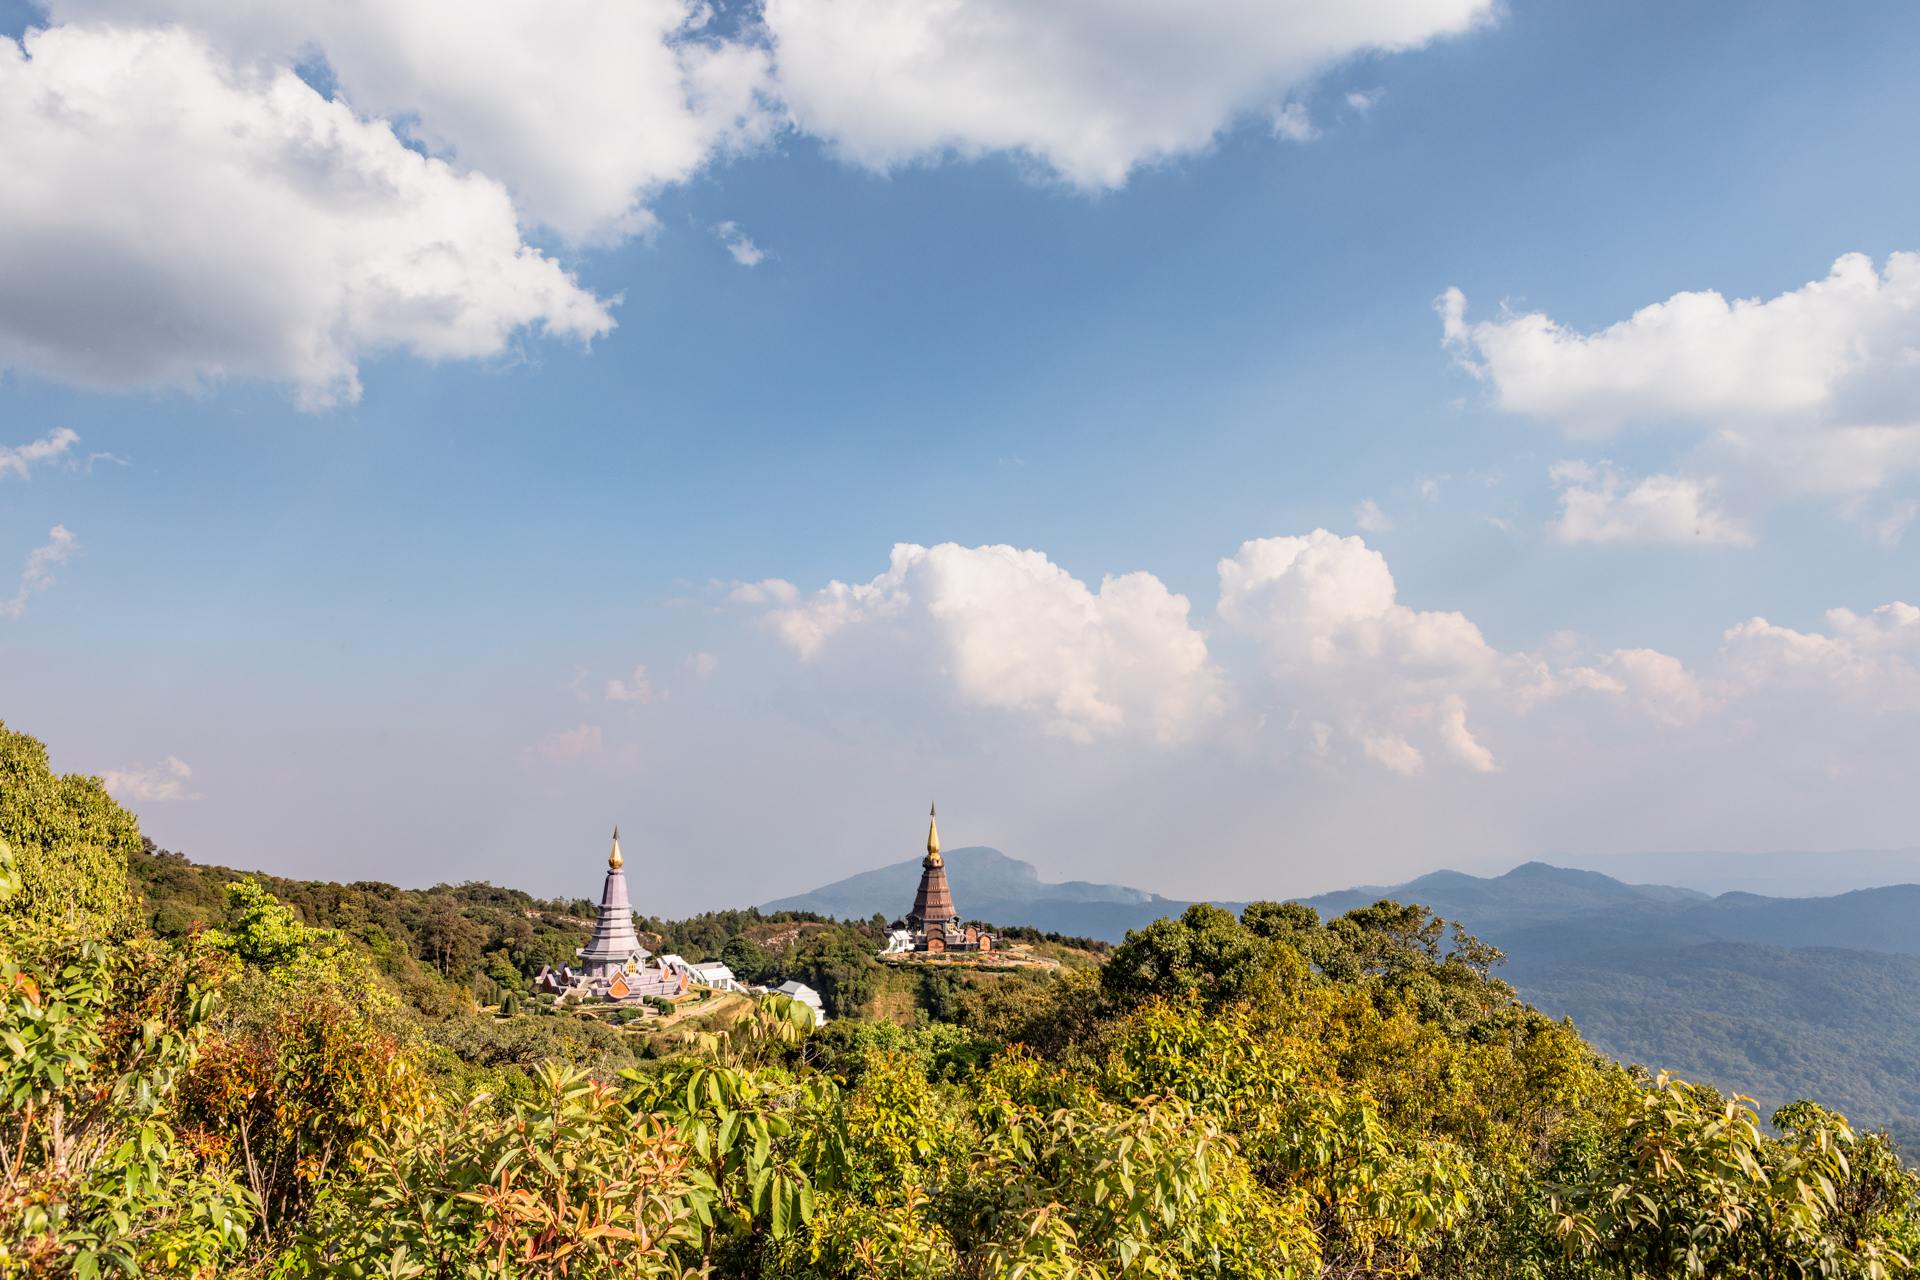
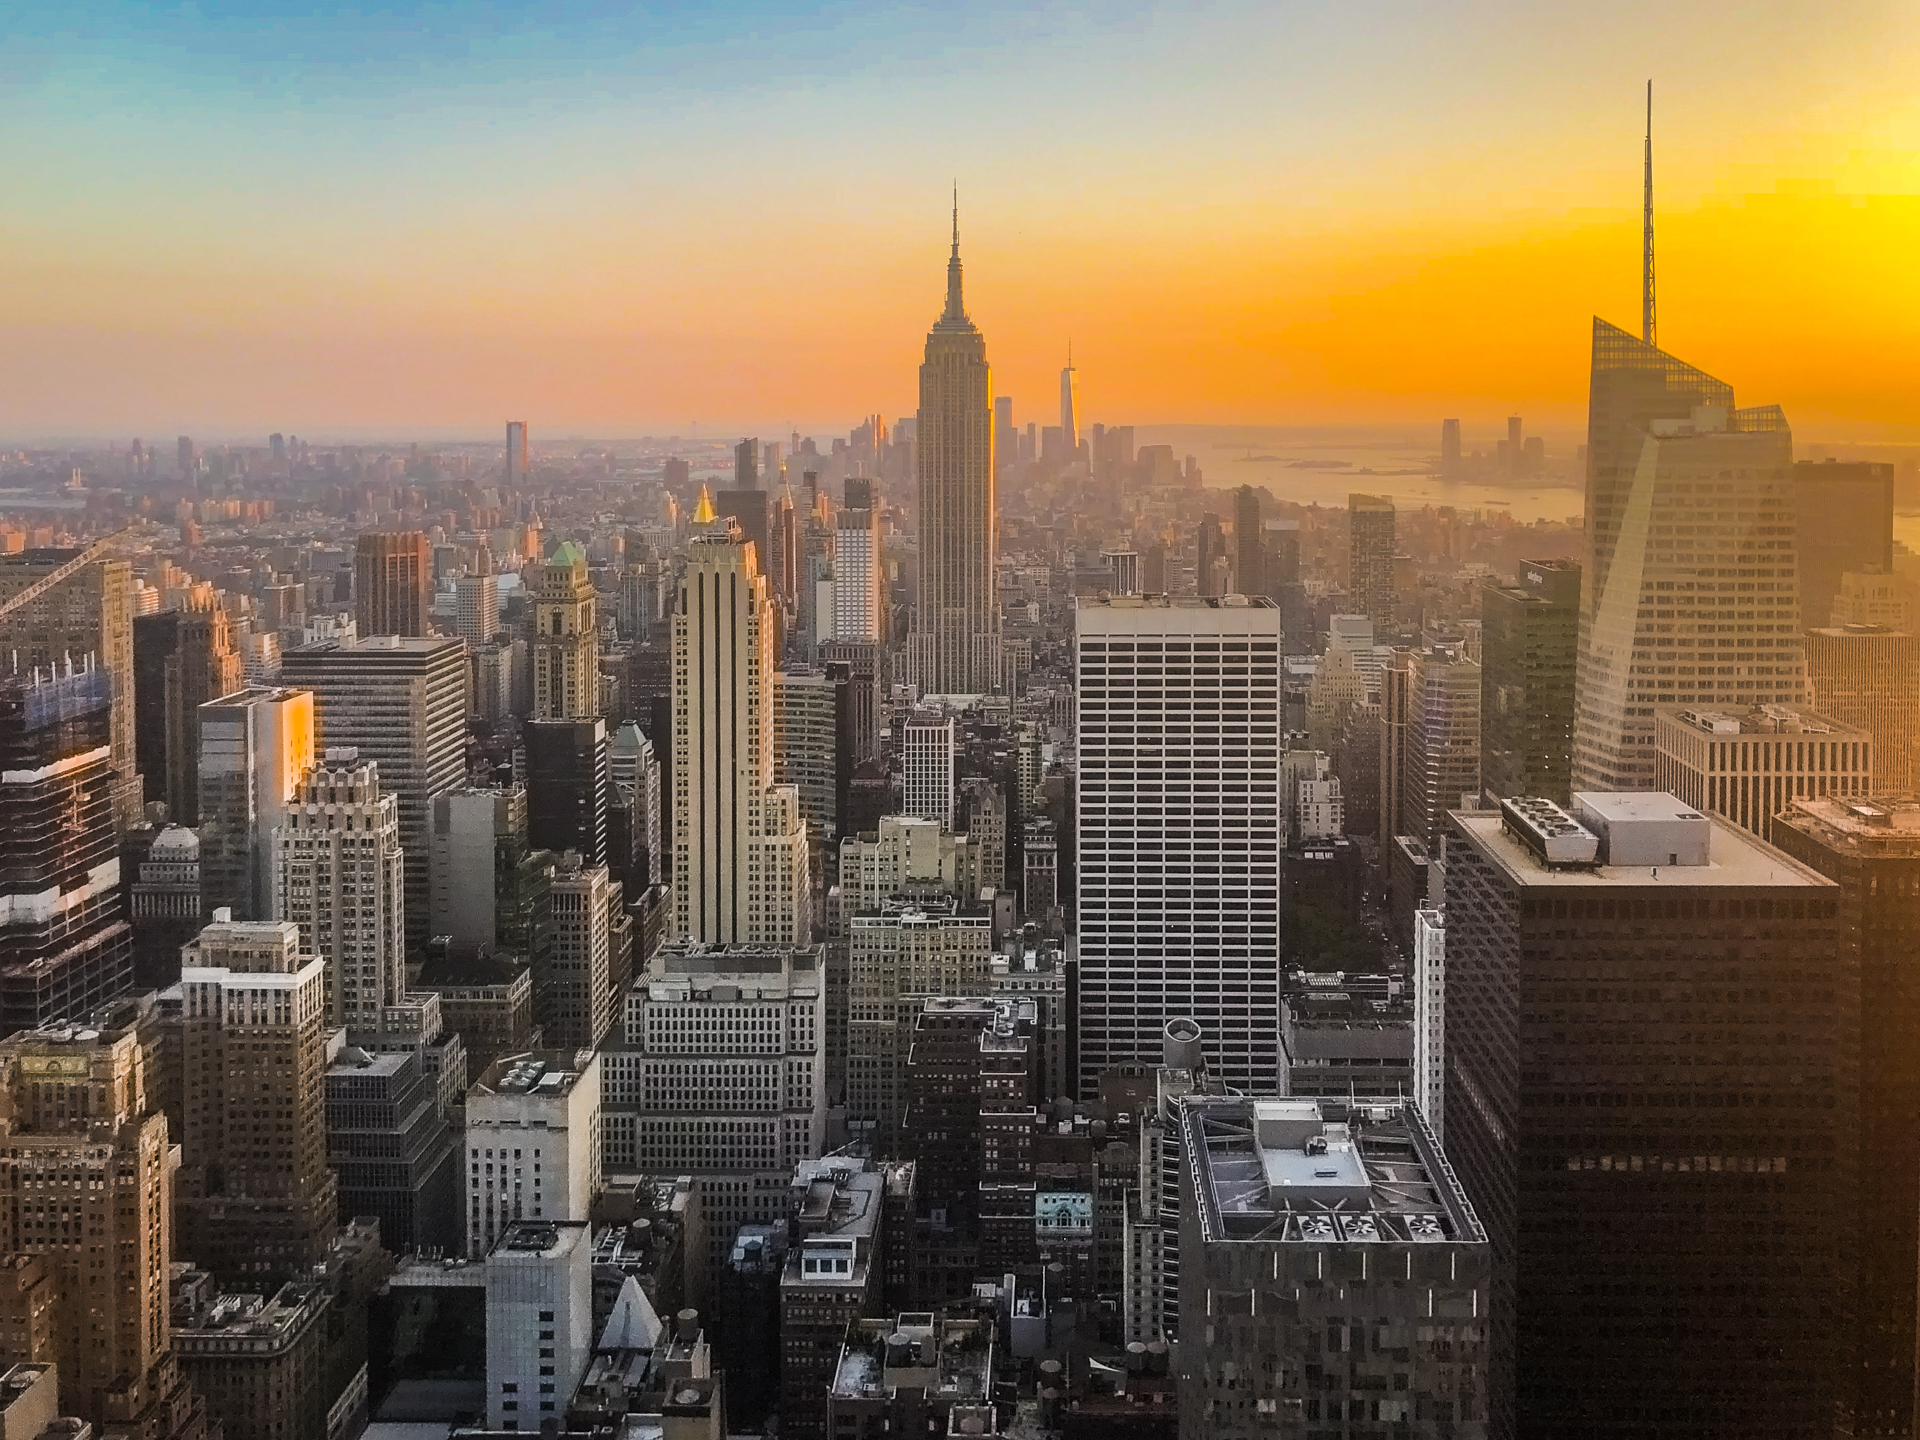
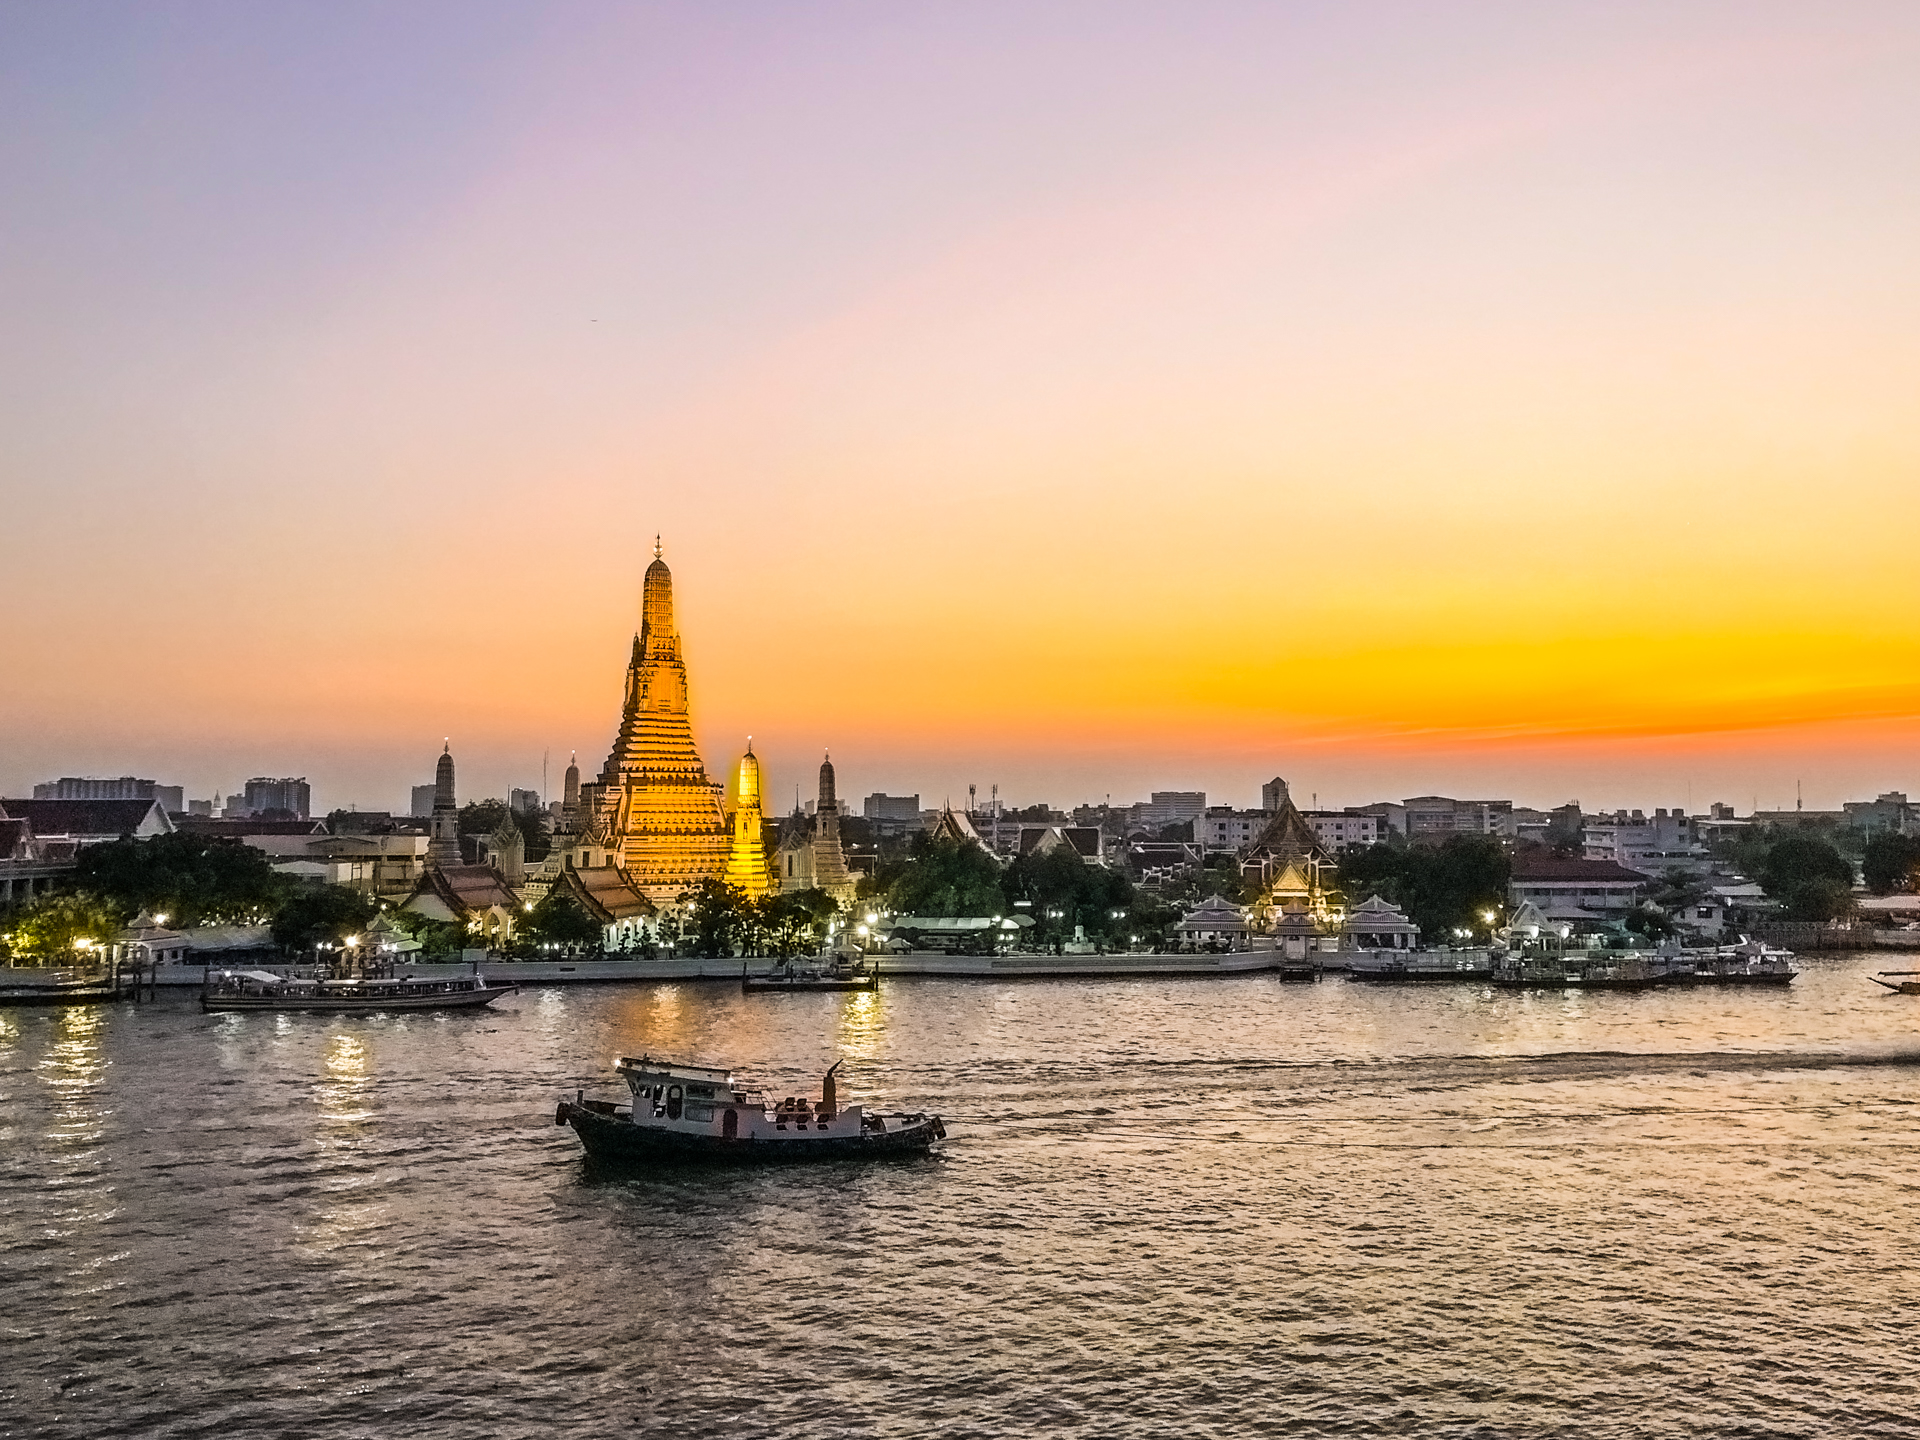
Below is an example of how you can transform an image using a gradient. Notice how the sky is more vivid in the second version? This is because a gradient has been applied to that part of the image.

What are gradients and how do they work?
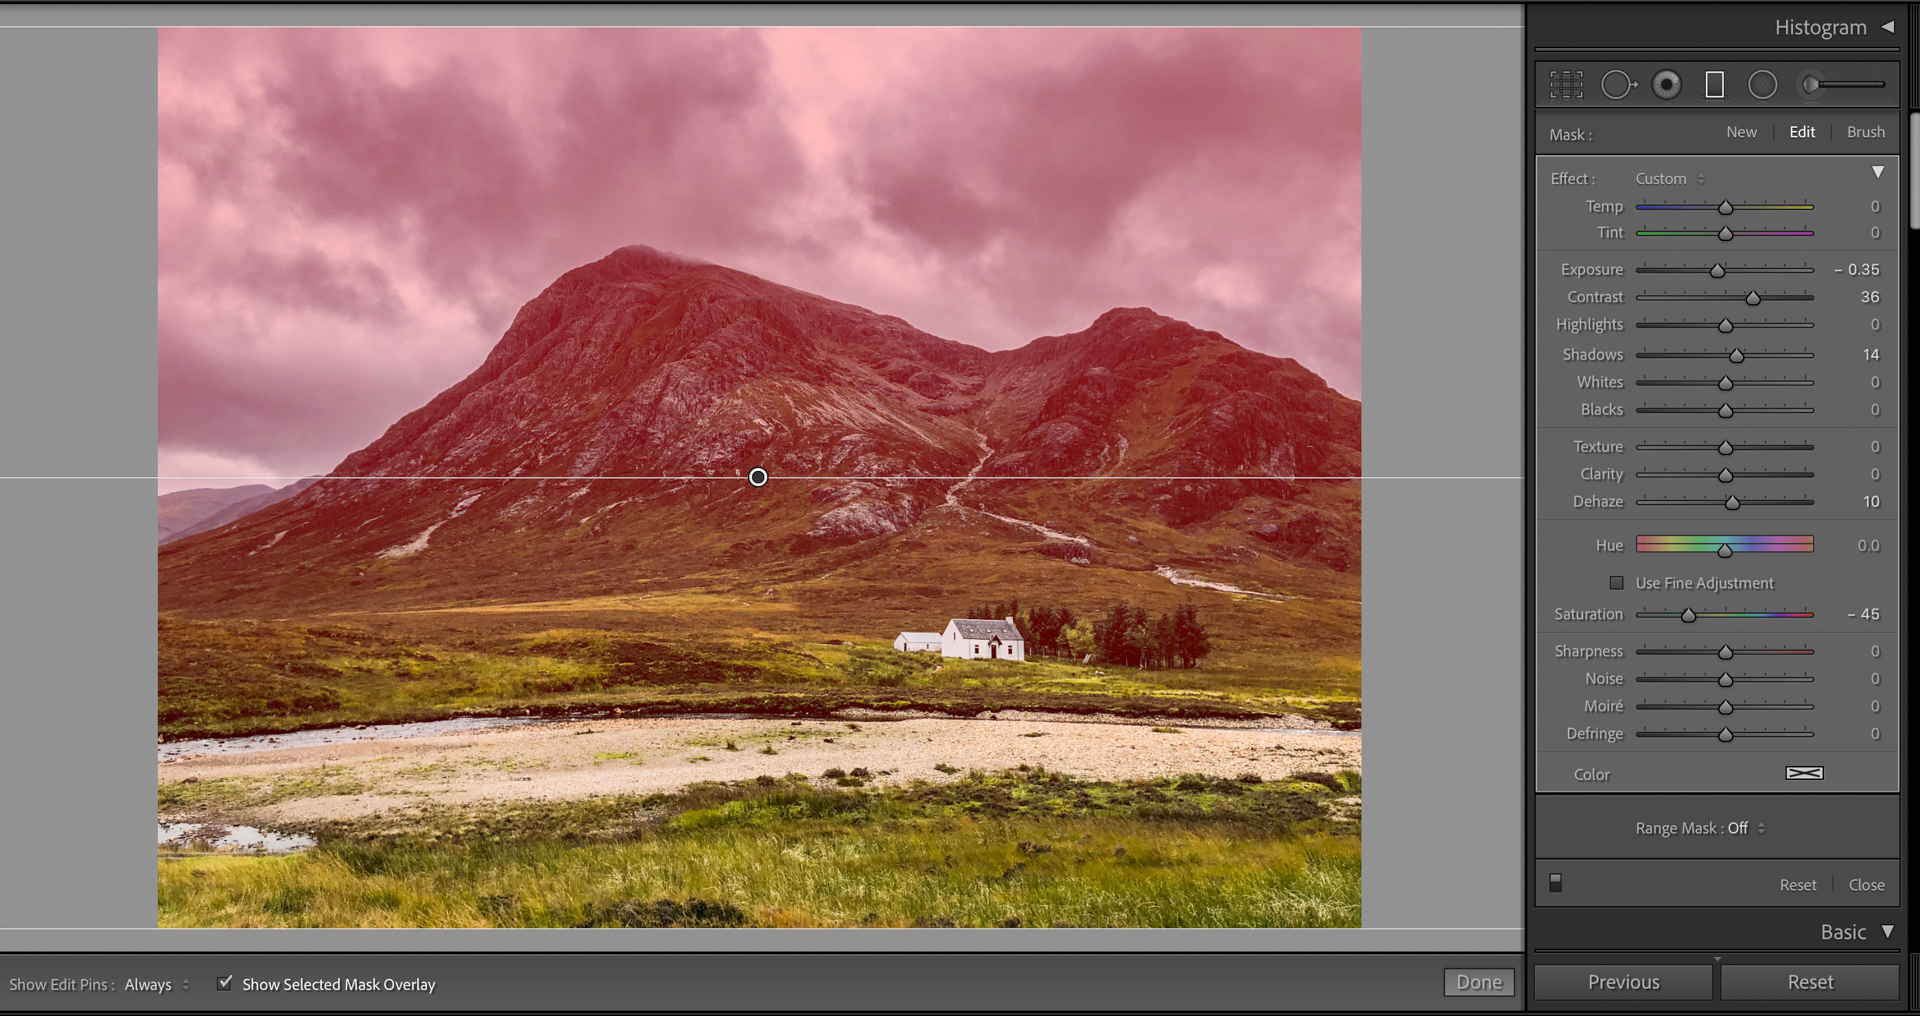
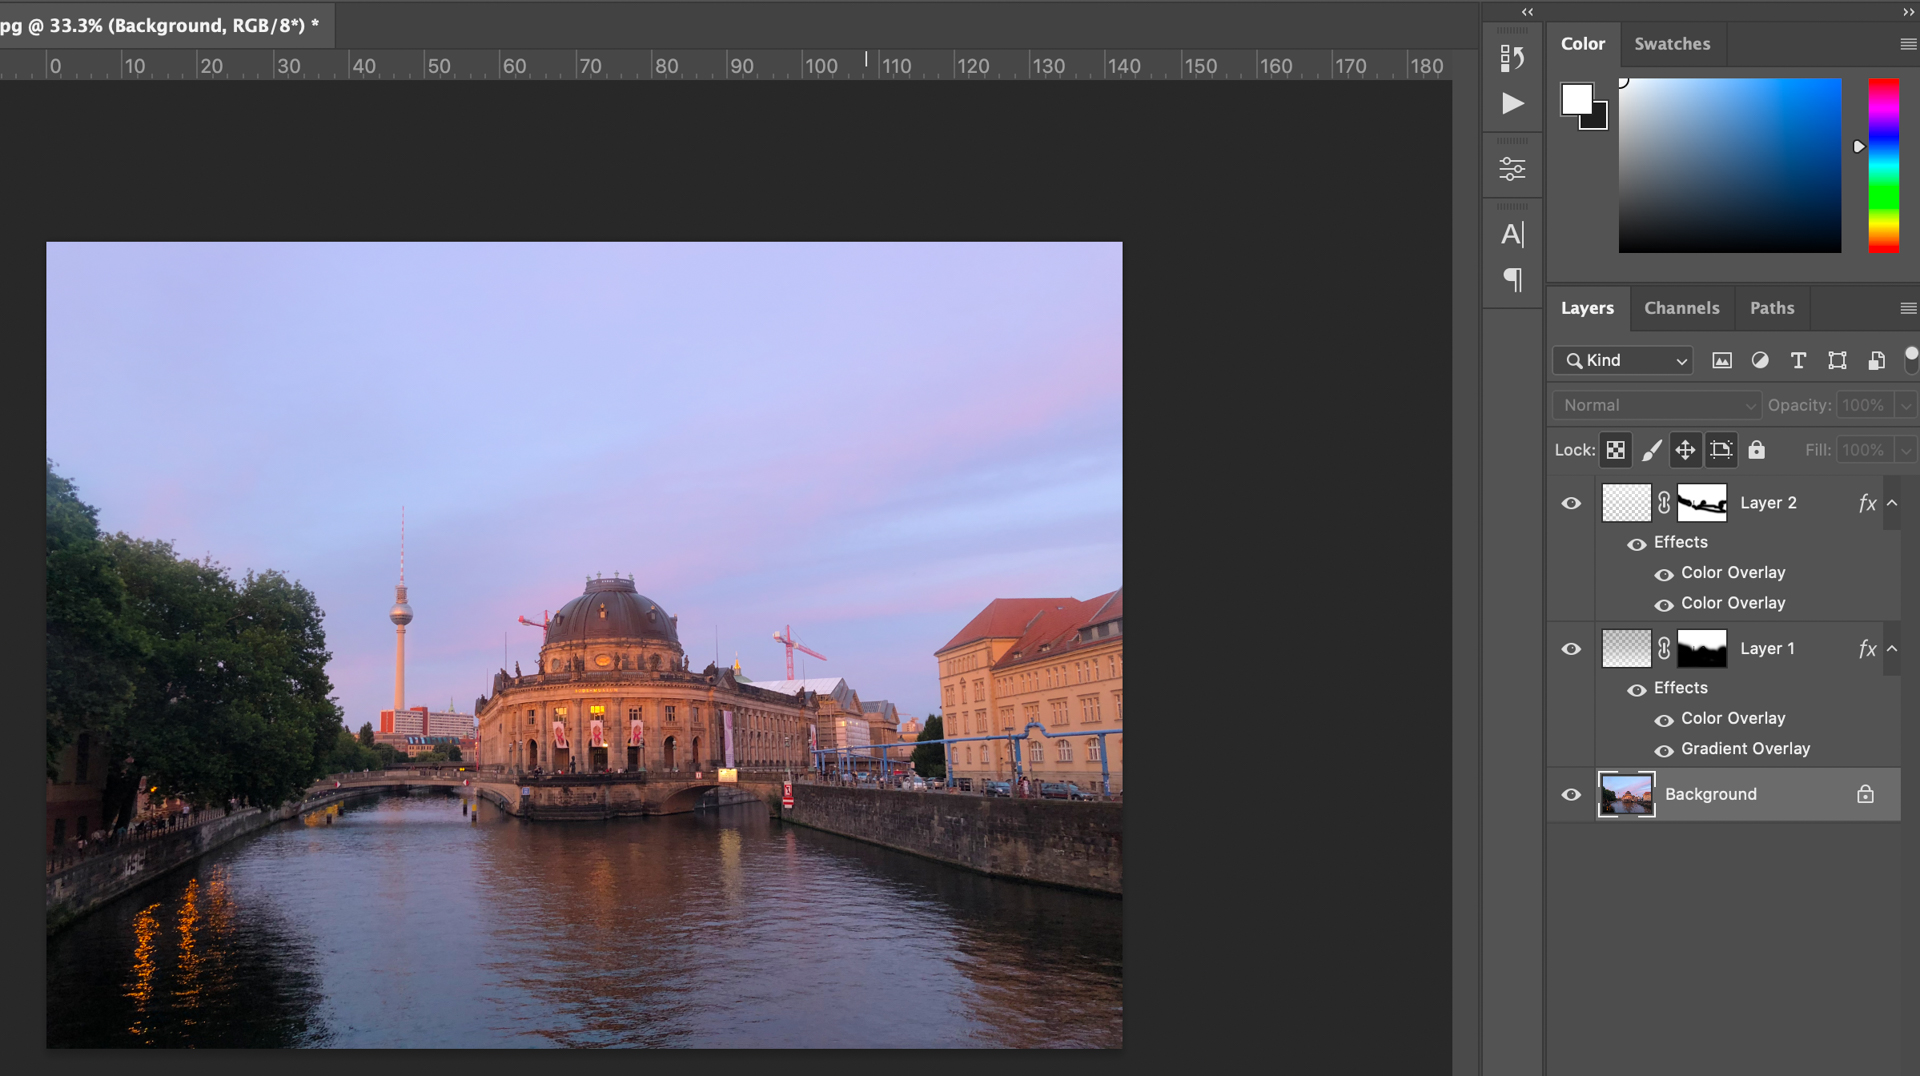
A gradient is simply a tool that allows you to apply an edit to an area of your image without it affecting other areas of the shot. It also creates a gradual transition, so the edit blends with the rest of the image.
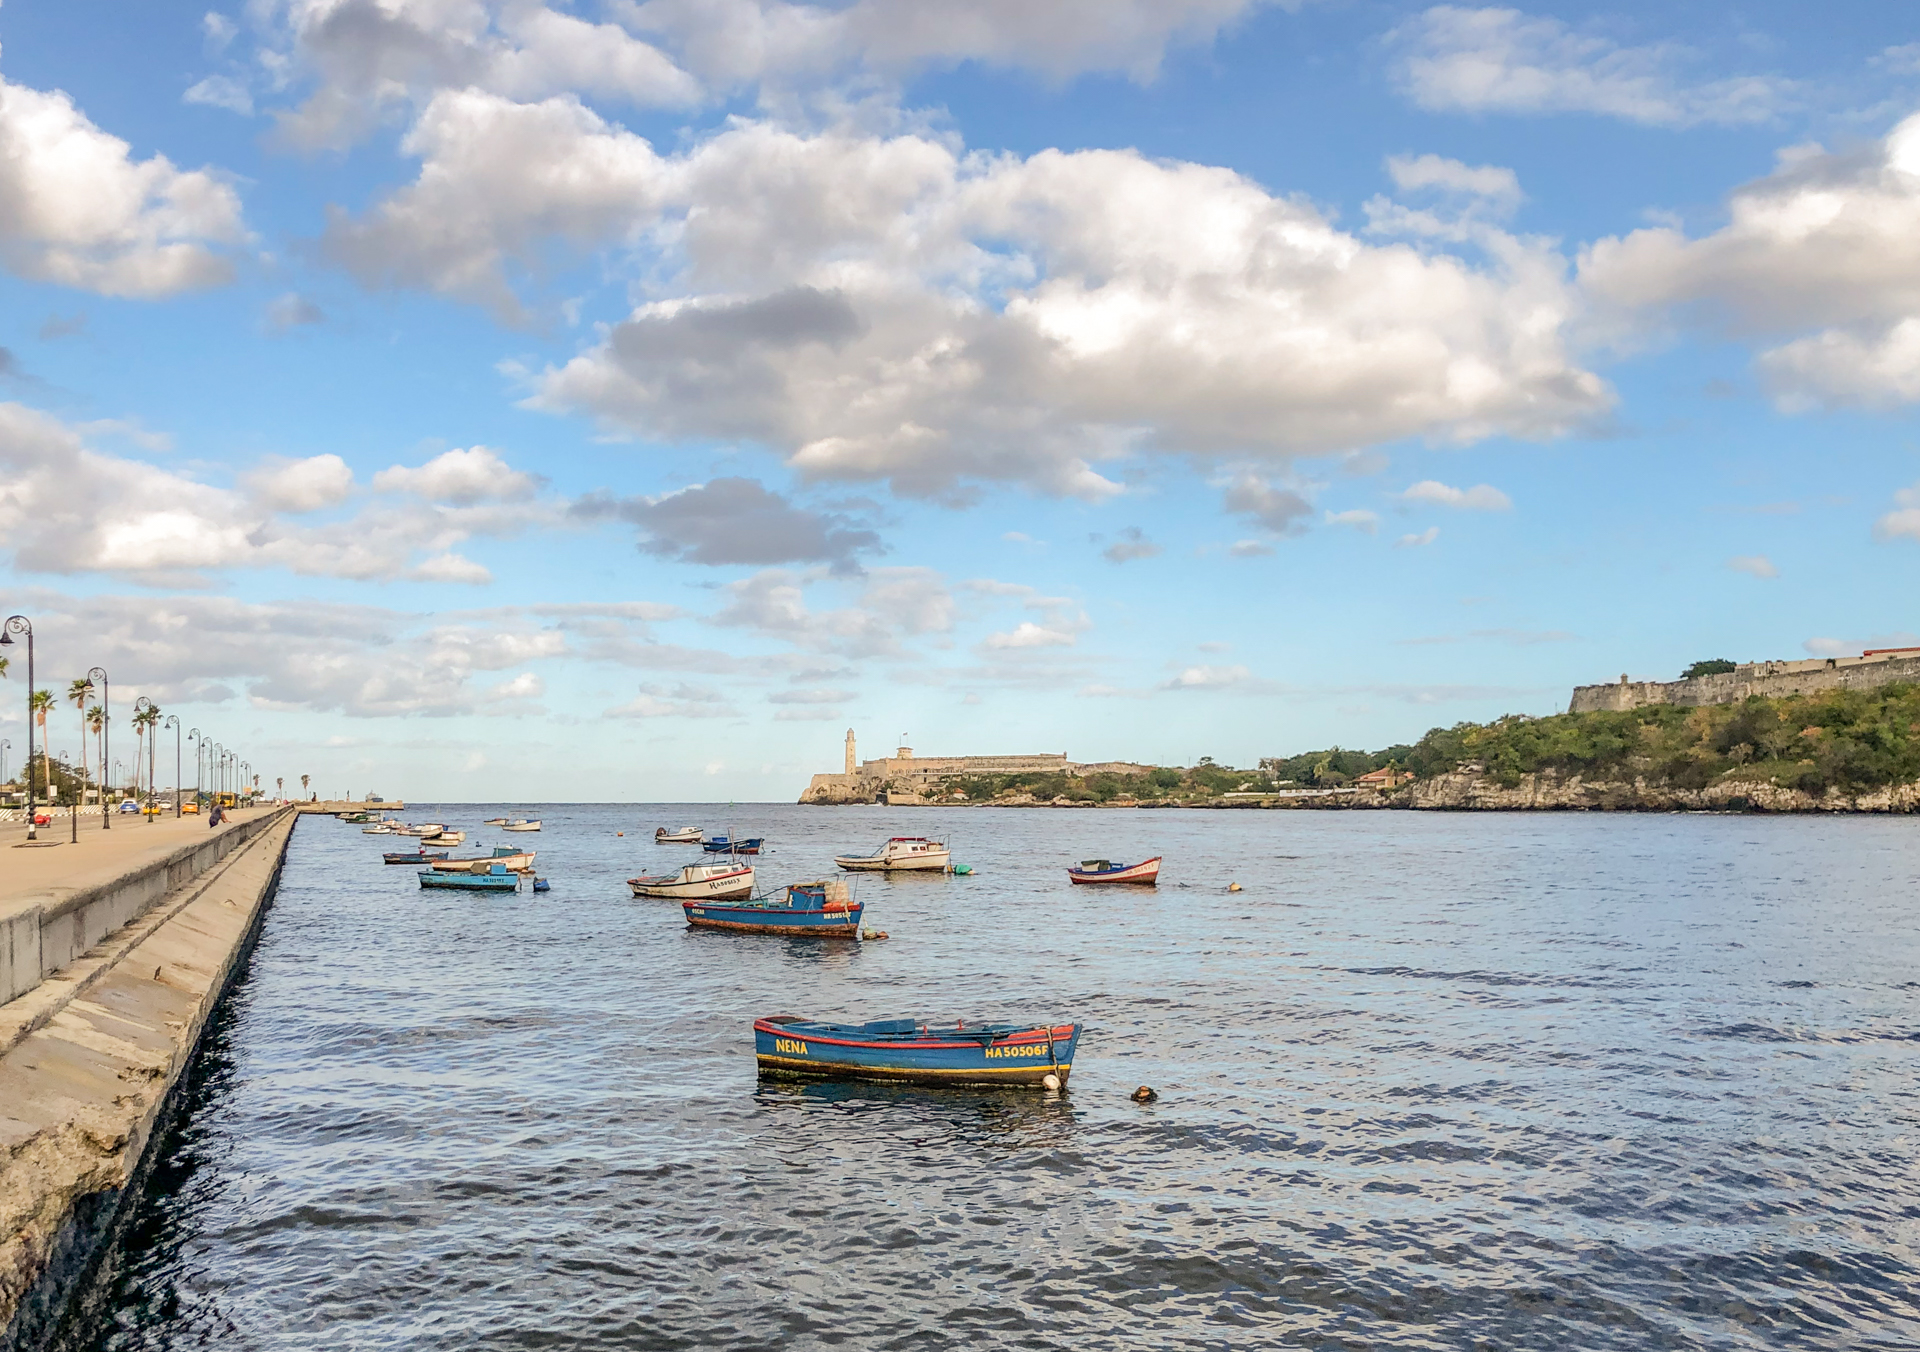
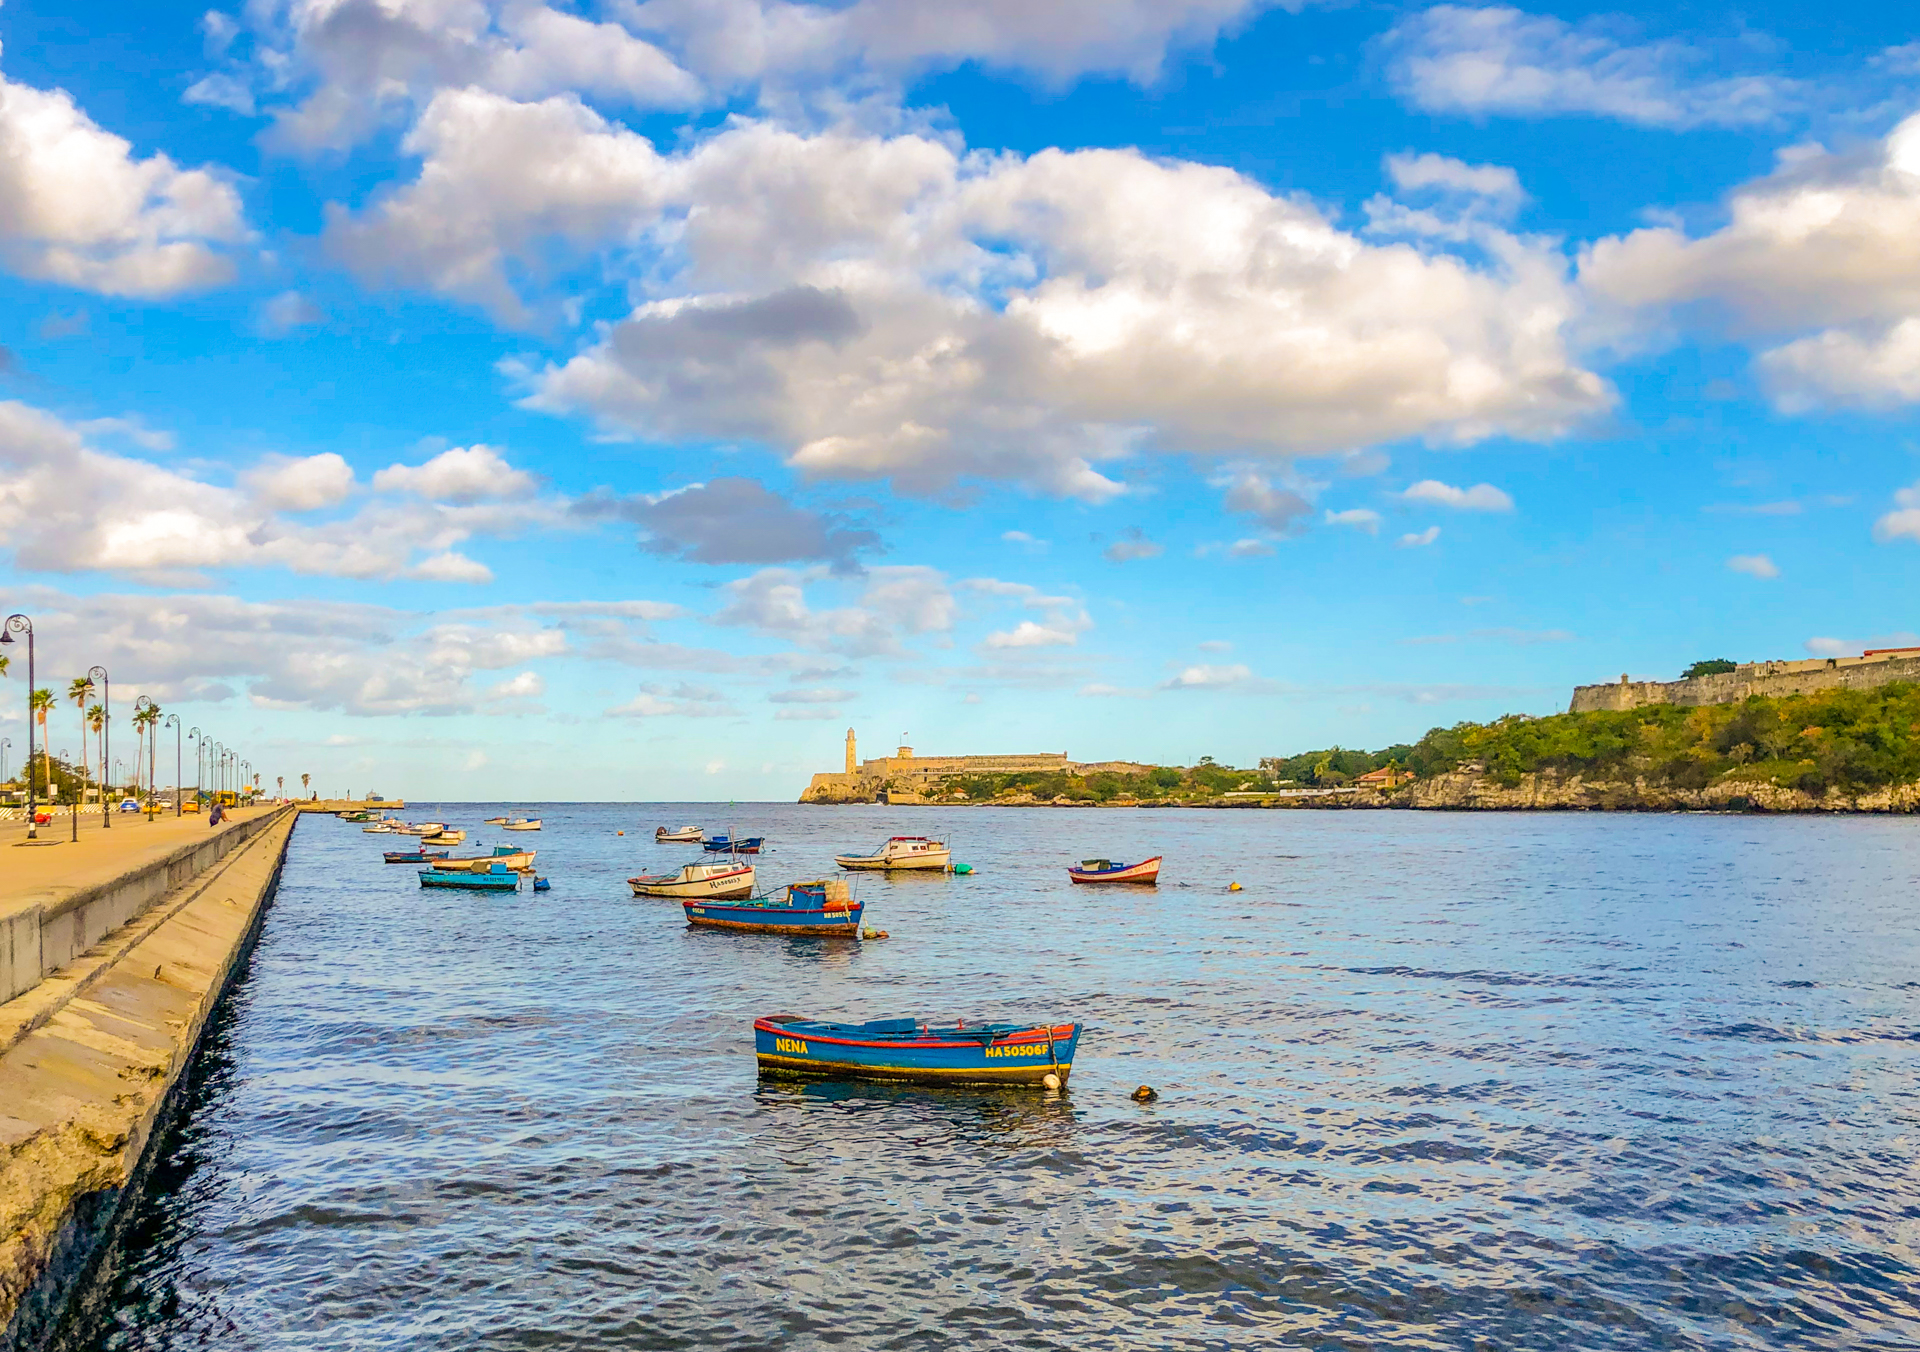
To get an idea of what this looks like, see below:

If you have even seen or used a Graduated Neutral Density (GND) filter - it’s the same principle in editing software. GND filters are used to balance light - they make an image darker on one end and lighter on the other. But you can also apply the same technique with coloured filters. For example, if you want to intensify orange or blue colours in a sky, a coloured GND filter can be used.
In editing software gradients work much the same way, but give you far more flexibility than actual filters on a camera. And also allow the use of multiple gradient layers to fine-tune your image. This is much simpler versus stacking filters in front of your lens - which can result in colour casts, especially if you use cheaper or low-quality filters.

Where to find the gradient tool?
Shortcuts:
Lightroom Classic: Hit the M key to bring up the gradient tool in the Develop module
Photoshop: Hit the G key to bring up the gradient tool
Luminar: The G key will activate the gradient tool
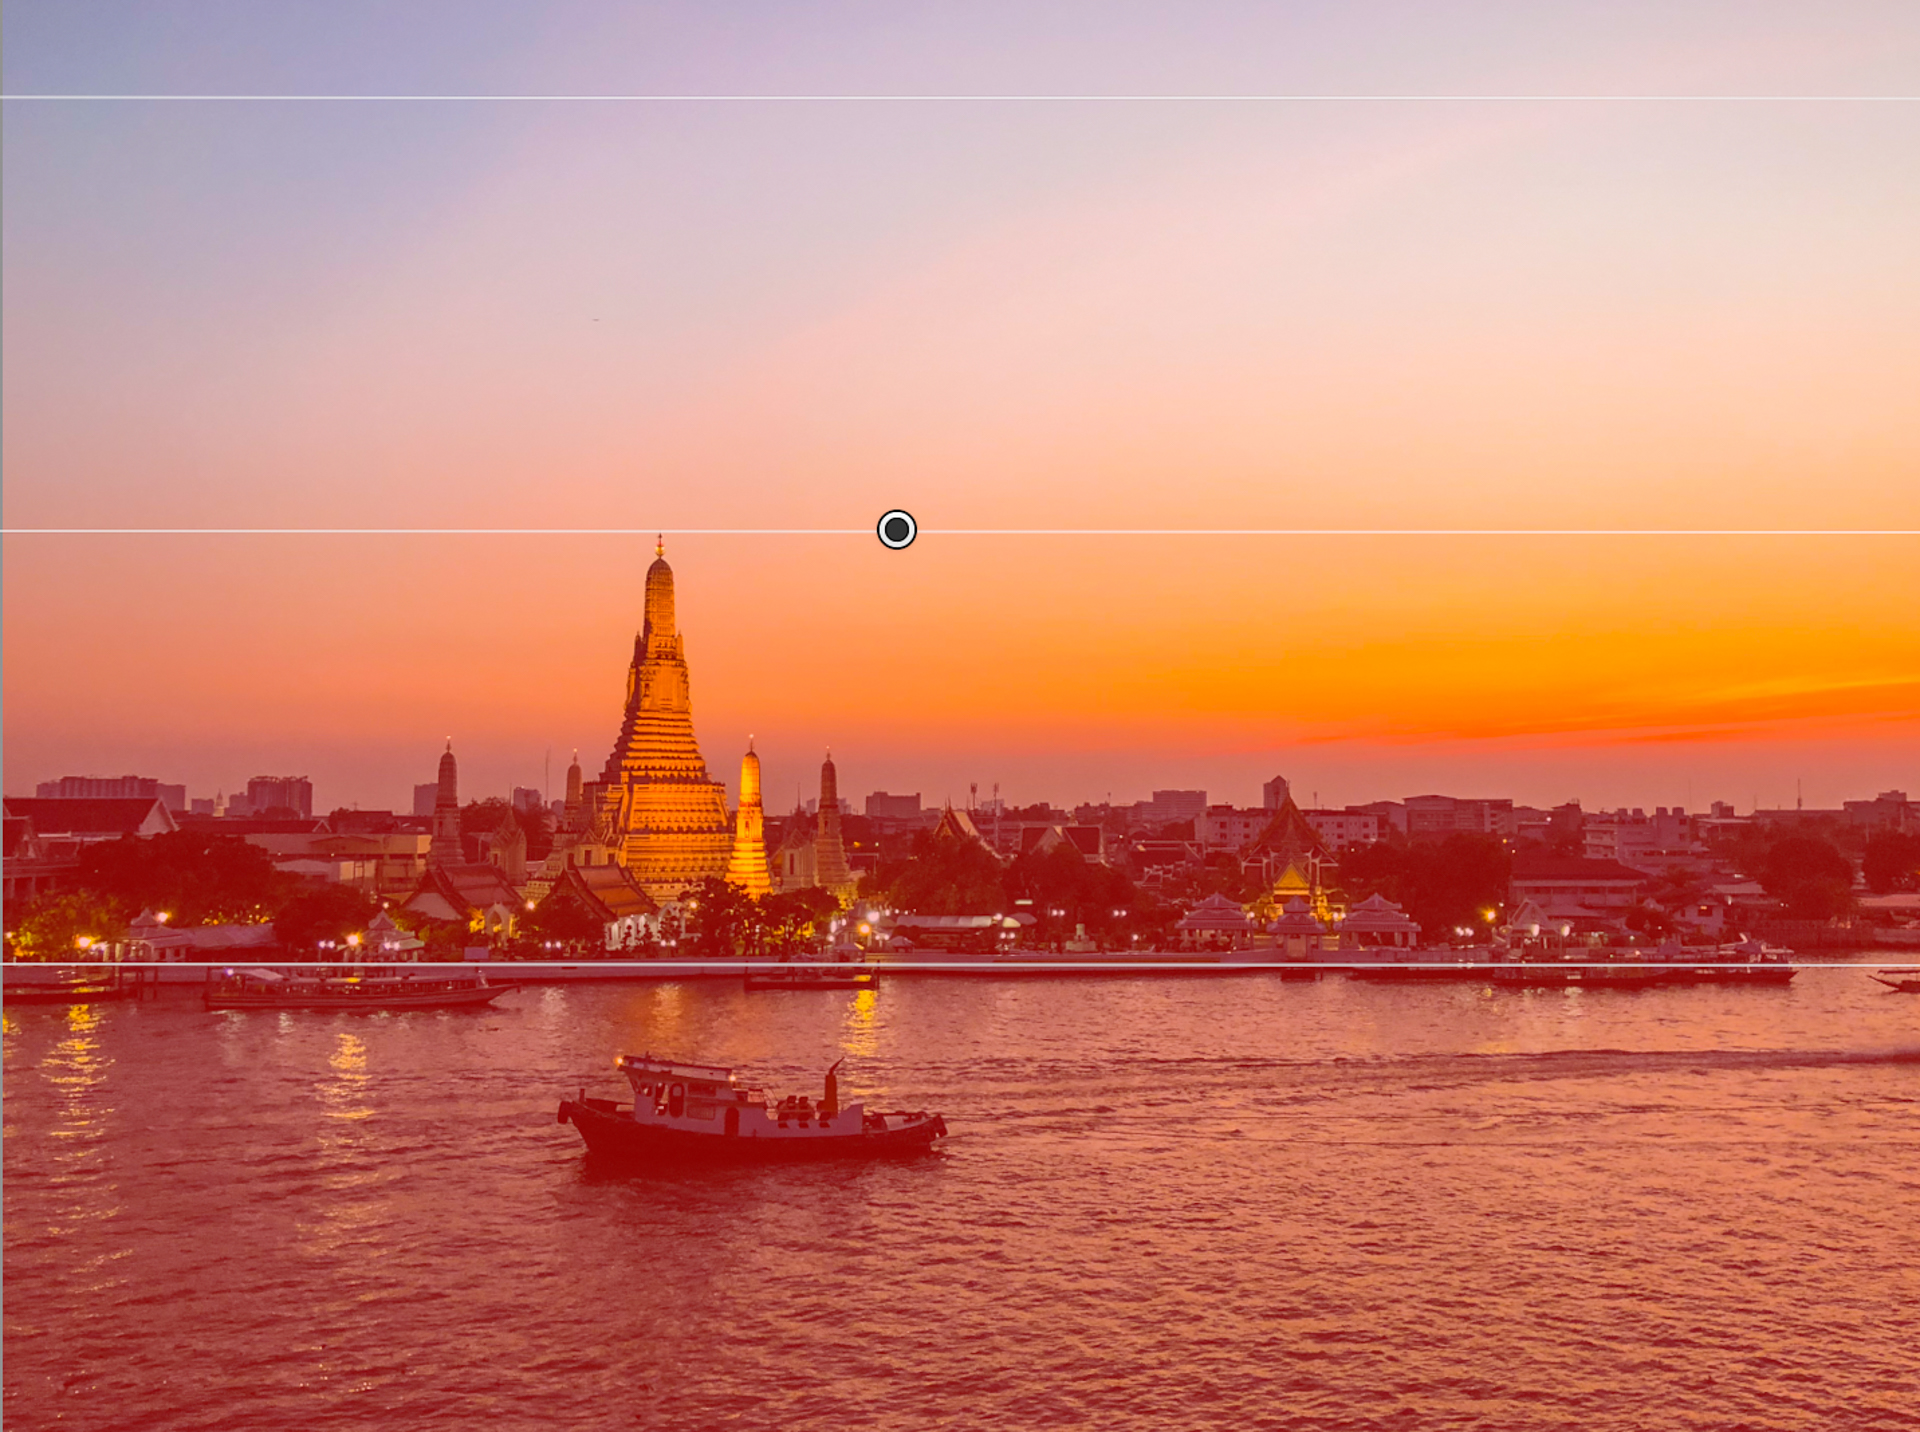
Once you've got the gradient tool open, you can drag and draw a gradient across your image to where you want. And once you've got it into position, you can begin to make adjustments.
How to use gradients on your images
Whether you use Lightroom, Photoshop, Luminar or other editing software, gradients allow you to fine-tune your image in different ways. Below are some of the most common ways that you can use gradients to enhance your images.
Exposure
The most common way to use gradients in post-production is as a substitute for using Graduated Neutral Density filters.
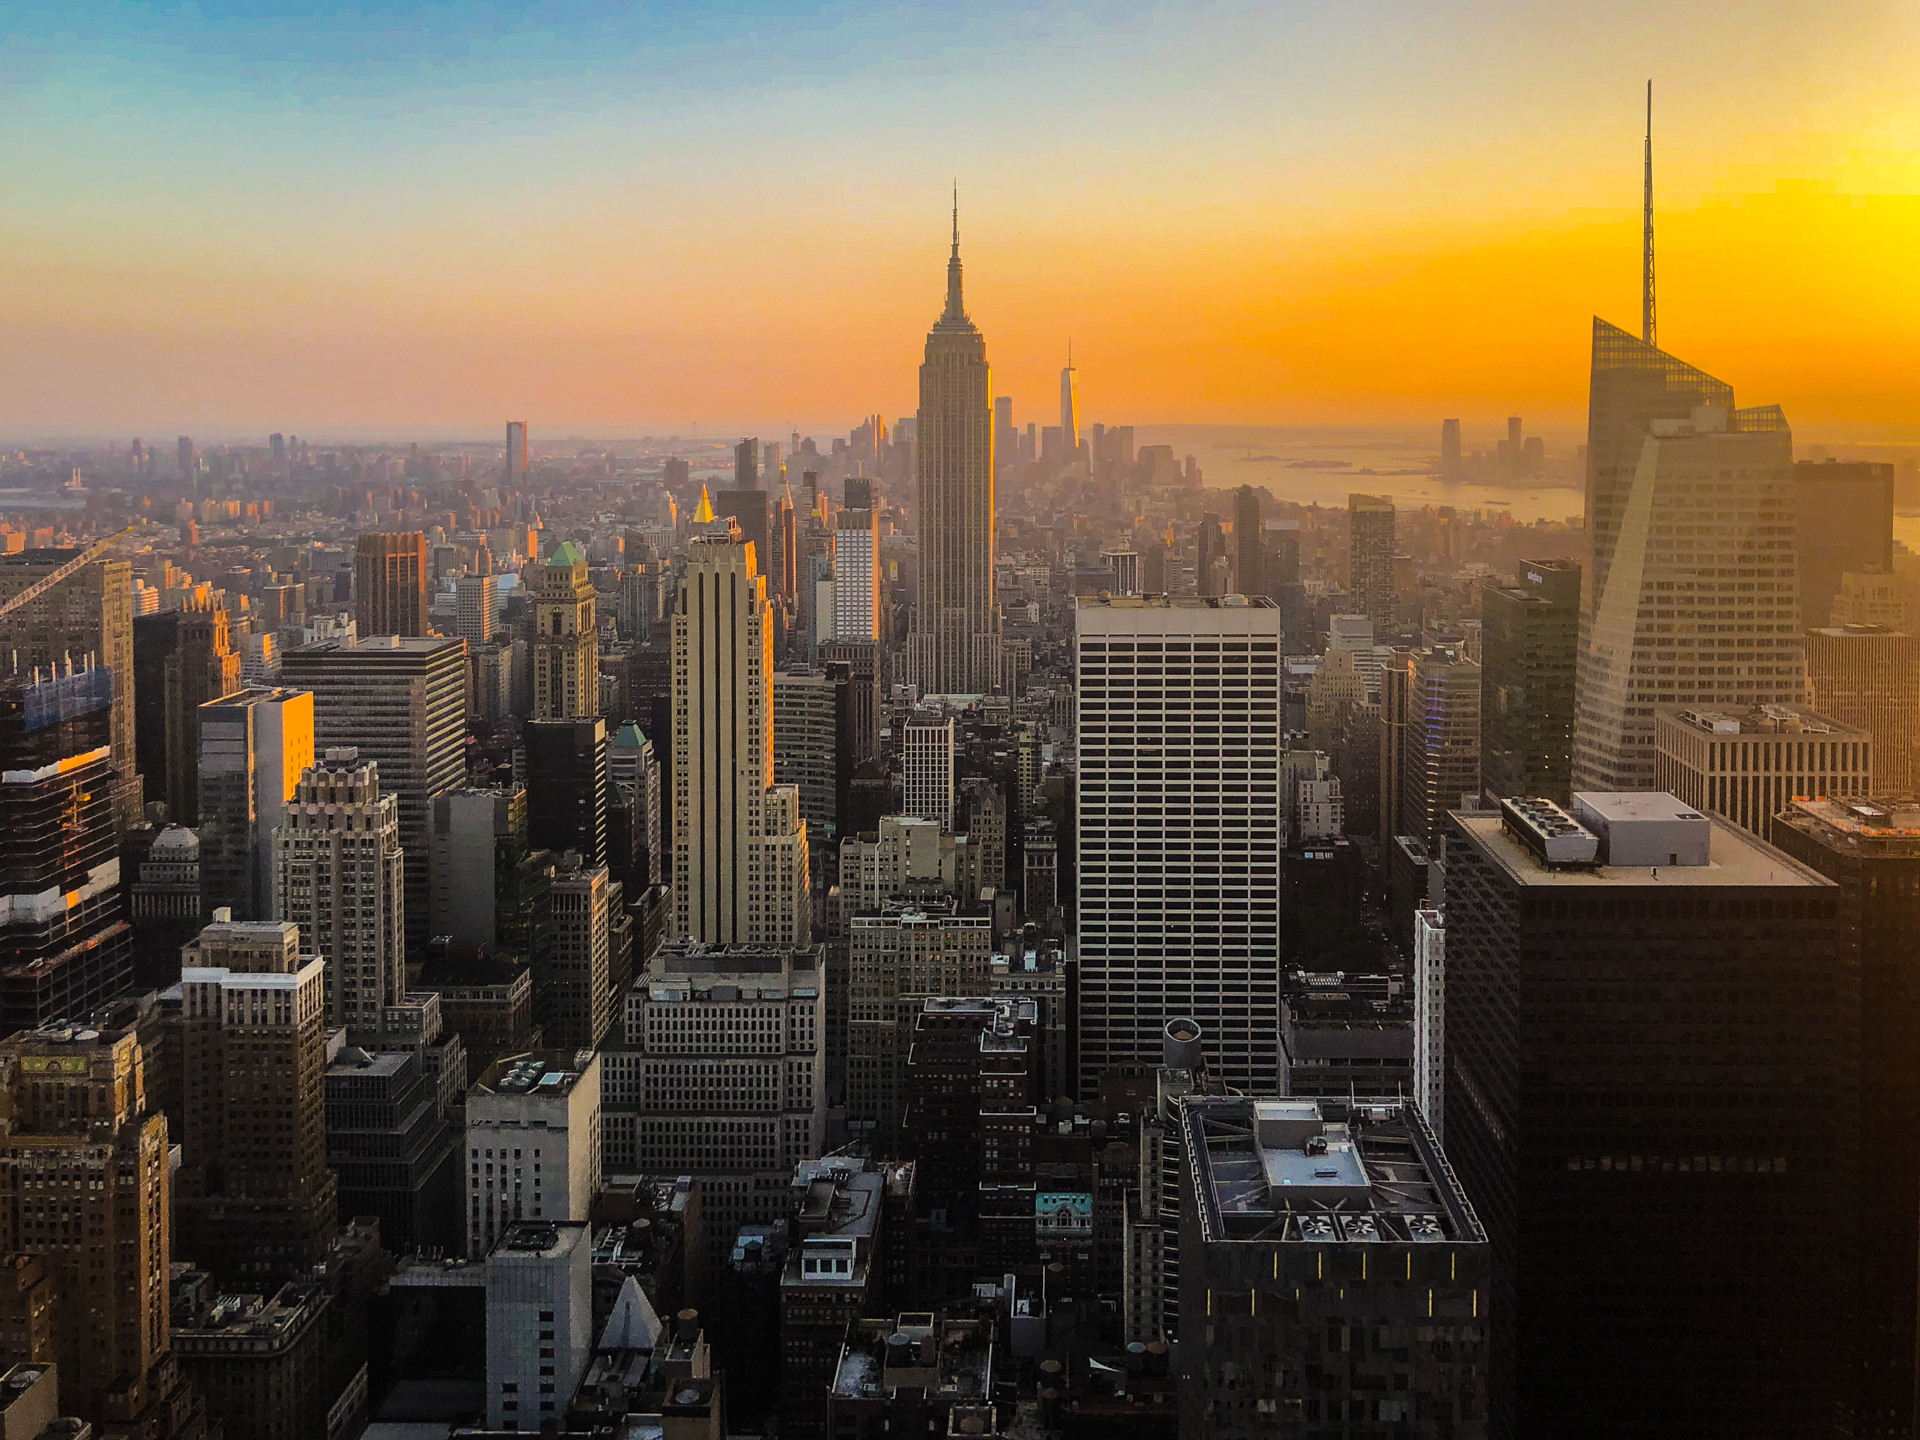
An issue that often occurs when taking images while the sun is low in the sky (such as the early morning or late afternoon) is the unequal balance of light across the scene. You will usually find that the sky is bright, and the foreground is dark. So, if the sky is exposed, the blacks or shadows will be clipped, and if you expose for the foreground, then your highlights or whites will be clipped. Clipping occurs in parts of your image which are pure white or pure black, as a result of over or under exposure, and results in no pixel detail whatsoever.
Using gradients will help ensure that you can get a balanced exposure across the image. You can darken the top of the gradient so it fades to clear at the bottom. This balances out the contrast of brightness in an image. You can also flip the gradient the other way and have it dark at the bottom and fade to the top (something that can be useful when photographing reflective surfaces like water).
You can even position the gradient from the side for times when you have bright sidelight coming into the shot.
Colour
Gradients can also be used to enhance saturation, vibrancy and to tweak the colours in the image. For example, you may want to boost the saturation of the blue sea in the foreground but keep the colours in the sky muted, and gradients are ideal for this purpose.
Gradients can be extended to altering white balance as well. There are times when the overall white balance of the image won’t give the best results. For example, on an overcast day, you may find that the overall white balance of your image makes the clouds appear too blue or with a hint of magenta. You can also use the gradient tool to fix this issue by adding warmth or cool tones to the sky.
Sharpness
Another useful way of using gradients tools is to sharpen or blur part of the image. For example, if you find that your sky has a lot of noise (grain) in it, by using the gradient tool and reducing the clarity on the top half you can reduce the noise in the sky without affecting the rest of the image.
The example below shows how a gradient has been applied from the bottom of the image to the top to increase the sharpness in the bottom half the image (omitting the sky).
You can also use the clarity or sharpness functions with gradient tools for more creative purposes.
For example, blur out most of the image apart from a strip across one part and you suddenly replicate the effect that you would get if you used a tilt-shift lens where it looks like you are photographing miniature models. See the example below:

Stack different filters on top of each other
All these methods above can solve photographic issues and enhance the look of your photos. But, arguably, the biggest benefit of using gradients in editing software rather than in the field is the ability to stack as many as you like on top of each other.
You can think of each gradient like a layer (in fact if you use Photoshop you should create a different layer for each gradient). And by using multiple gradients, you can further fine-tune your image.
Note:
You can also stack many physical filters in front of the lens as you want, but that means owning lots of filters and connectors. Also each additional piece of glass that you add in front of your lens is going to detract from the image quality, especially if you use cheaper plastic filters rather than good quality filters like NiSi or Lee.
The great thing about using gradients in post-production, rather than filters out in the field, is that there will not be any issues with colour casts and everything is reversible. So, if you do not like the look of something you added you can simply delete it and return to the previous step. That isn’t to say you shouldn’t use filters but rather think of gradients as another editing tool in your arsenal.
Once you learn how to master tools such as gradients, and with some practice, you'll see a notable improvement in your photos.

Kav is a full-time photographer and author of 400+ articles. He is also a judge on the Wanderlust Magazine Photography of the Year competition and leads small group photo tours around the world.
View all articles

