


Discover the visual potential of keeping the camera within a low height range to capture interesting and dynamic viewpoints

Shooting landscapes, seascapes and cityscapes with the tripod set at standing height is sometimes a necessity, but rarely the only option. Exploring viewpoint is an essential task for all types of photography, but arguably more so for outdoor photography where the height of the camera alongside its angle in relation to the focal point can drastically alter the look and feel of the final image.
Shooting from low positions ranging from just a few centimetres off the ground up to the average minimum tripod height of 50cm is a narrow yet compositionally interesting height range. This not only provides a viewpoint that focuses on interesting textures, lines and patterns, it can also be a way to maximise reflections in puddles and to create powerful compositions where the foreground pulls and guides the viewer towards the focal point in the scene.
In this article, we’re going to take a look at the results of shooting with the camera at heights ranging from 5-50cm. Plus we’ll provide a selection of tips to help you achieve visual success when shooting landscapes, seascapes and cityscapes from low angles…
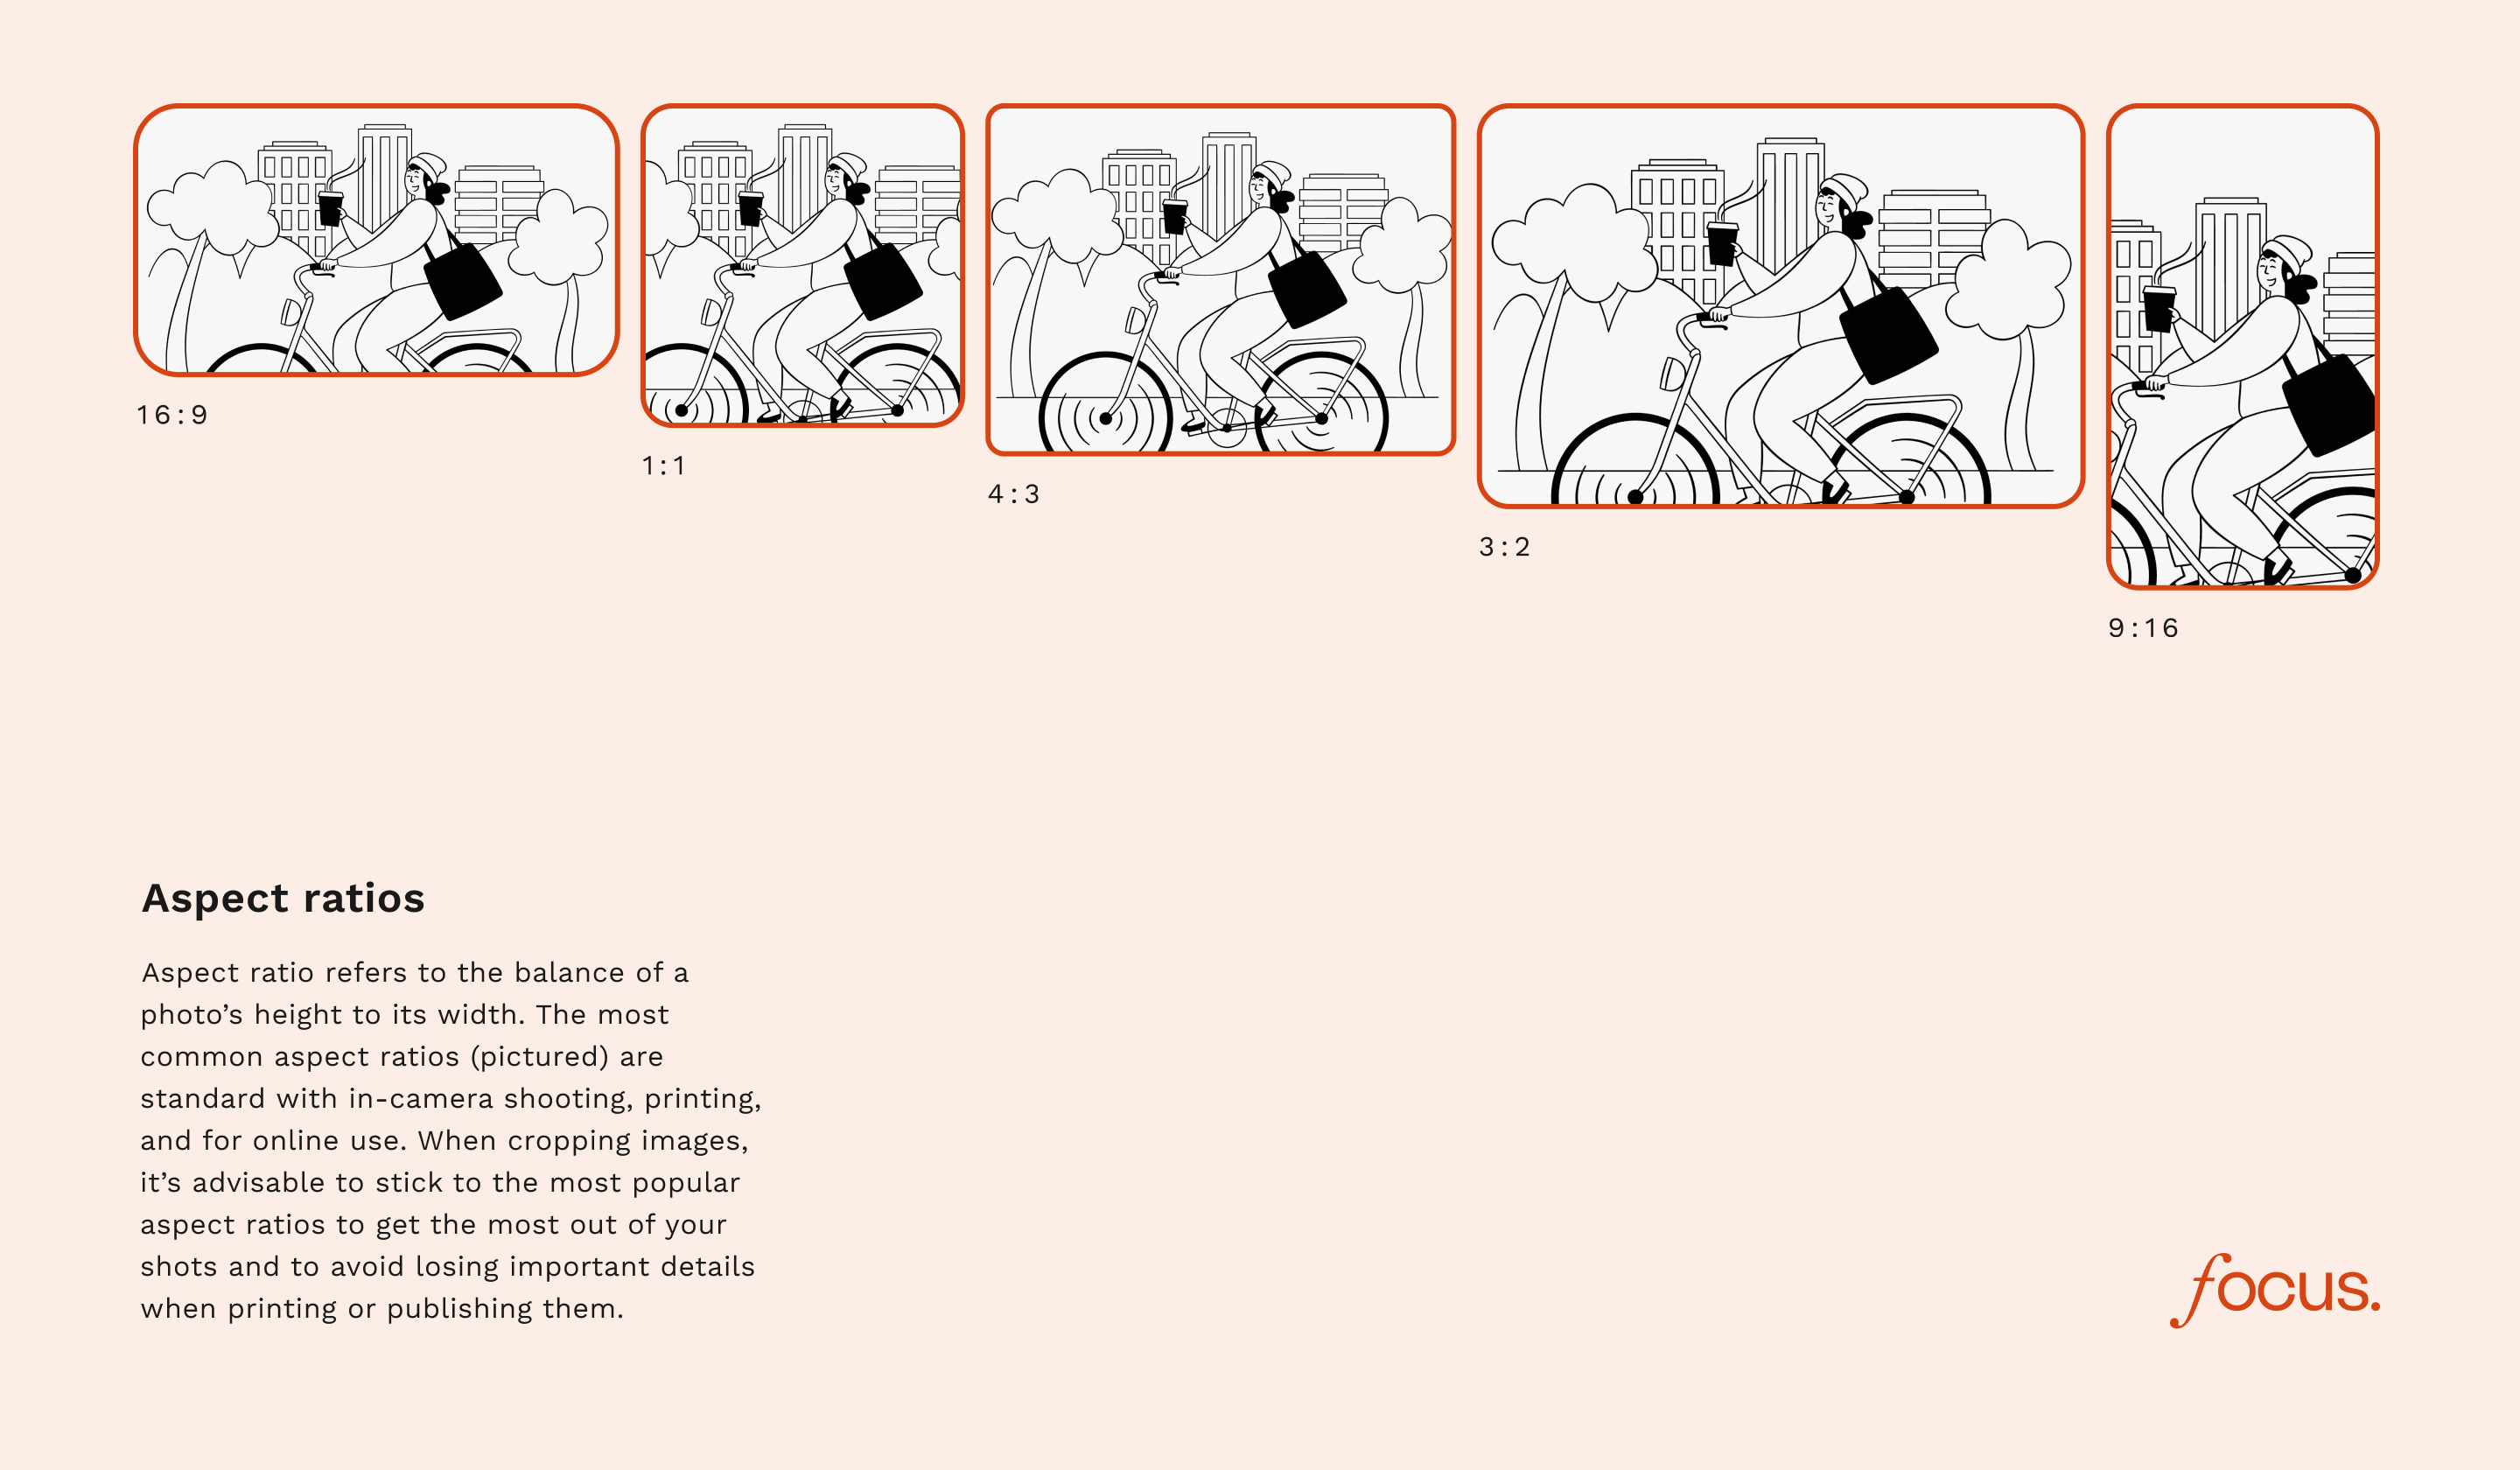
Height ranges
5cm above the ground
This image was taken with the camera just 5cm off the ground to emphasise the drain in the centre of the path and create a strong lead-in line. For cityscape images, tilting the camera back like this creates converging verticals which are in many cases undesirable, but this combined with the low angle has created a much more interesting image than if the camera was positioned any higher.

Editor's Note:
Learn how to get the best black and white look for your shots with our guide on black and white conversions here.
10cm above the ground
This location is all about the cracked mudflats so a low angle was essential to highlight the interesting details and textures in the scene. For this shot, the centre column of the tripod was inserted into the legs upside down and the camera was roughly 10cm off the ground and facing downwards slightly. For this image to work, focus stacking was used to ensure the whole scene is sharp.

20cm above the ground
The camera was around 20cm above the rocks in the foreground, with the tripod set to its minimum height in deeper water in front of the rocks. This helped to emphasise the foreground interest and to add a sense of depth in this scene which is less than 3m from front to back, while the use of a wide-angle lens also helped to create the illusion of the scene being deeper than it really is.

This waterfall image was also captured with a 10 stop ND Filter to allow a long exposure, with the camera placed at a low angle to incorporate the mossy rocks as foreground interest
Editor's note:
Learn the long exposure technique with our beginner's guide here.
50cm above the ground
Not all landscape shots need to be taken with the camera secured to a tripod, and this image was taken handheld as the sunset behind the photographer. By sitting on the bank at the edge of the water and using the LCD screen to compose, it was possible to shoot with the camera roughly 50cm above the water in the foreground to capture the reflection and capture a balanced composition.

Tips for low angle shooting success
Articulating centre column tripods
Some tripods feature an articulating centre column that can be set horizontal and at other angles while the legs are set to almost 90°. These tripods are highly versatile in many shooting situations because of how the camera can be manipulated into tricky positions while remaining fully supported. However, when it comes to being close to the ground, the lowest height you can often set the camera to for landscape photography without the camera looking down is roughly 15cm.

Insert the centre column upside down
If you own a tripod where the centre column can be removed from the legs, you can insert it upside down from the bottom so the camera can be positioned at a variety of heights from the ground, starting at just a couple of centimetres. The advantage of this method is the huge amount of flexibility you can enjoy, although you’ll be working with the camera upside down so changing settings using dials and buttons on the camera top plate can be tricky.

Author recommendation:
The Vanguard VEO 3+ 263CB Carbon Fibre Tripod - great tripod with lots of flexibility
Use mini tripods
Mini tripods are incredibly useful for a wide range of shooting situations and come in a variety of sizes with different features available. This mini tripod features an Arca Swiss tripod plate making it compatible with L brackets, allowing the camera to be positioned in both landscape and portrait formats. Plus, the legs can be pulled out to 90° to provide extremely stable support alongside a camera height around 10cm from the ground. The legs set to 45° roughly double the height.

Support with beanbags or jackets
Beanbags are most commonly used for macro and wildlife photography, providing support on the ground or a soft and stable surface that can be placed on logs or fences for instance. These can also work well for low-level landscape shooting and often weigh no more than a few hundred grams so they won’t increase the weight of your kit by much at all. Alternatively, use a bunched up jacket that can be manipulated to support the camera in a level position just a few centimetres off the ground.

See more with articulating LCD screens
Articulating LCD screens are a common feature with the majority of cameras these days and provide a comfortable way to compose shots and check camera settings when the camera is close to the ground. Also, most modern cameras rotate the LCD view if the camera is upside down, so if you use the method of inserting the tripod centre column into the legs upside down, the Live View will be rotated so that all settings and the histogram can be viewed the right way up.

Maximise comfort using wireless apps
With the camera low to the ground, the most comfortable way to focus and change settings is to connect your camera to the manufacturer smartphone app. These apps provide a Live View with access to the most common settings photographers need to change. This means that if the camera is low to the ground and/or in an awkward position to view the LCD screen, you can adjust settings and trigger the shutter remotely from the app while standing comfortably

A reminder of the basics:
.jpg)

James is a freelance photographer and journalist producing content for photography magazines and websites and is a former deputy editor of Practical Photography magazine. He’s also the author of The Digital Darkroom: The Definitive Guide to Photo Editing.
View all articles

