


Lightroom is one of the most powerful image editing tools out there for photographers - here's how to get started

Your photos deserve a little careful enhancement, and Lightroom is one of the best places to do it. Lightroom is one of the most powerful image editing tools out there for photographers. And its capability to make powerful adjustments to images, whilst also being easy to use, means it caters to image makers of skill levels.
These 10 top tips will get you up and running, from easy tonal tweaks to bold colour-boosting tricks and more...
1 Import your images
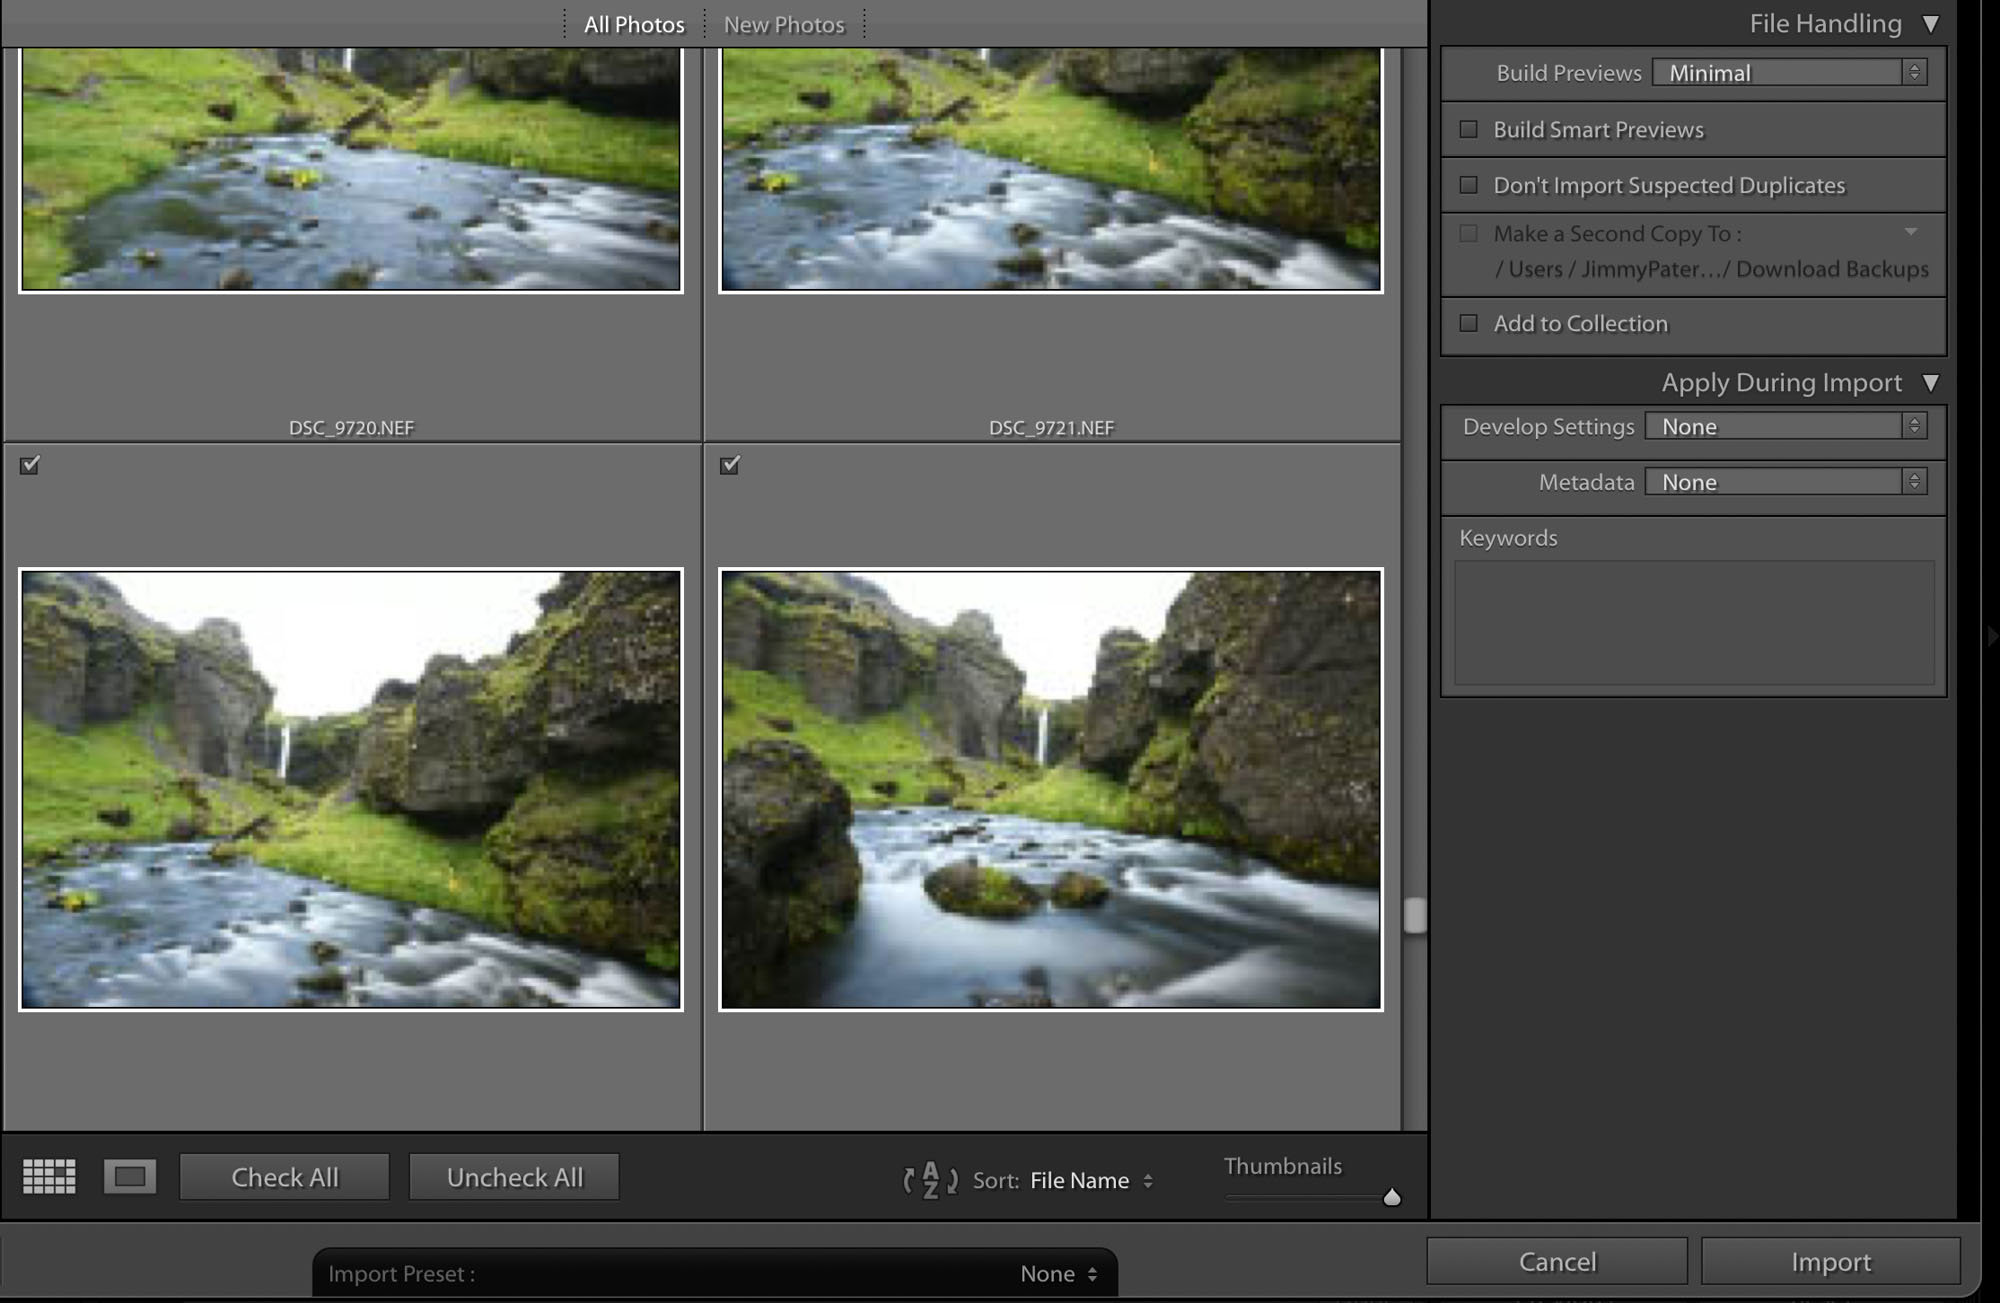
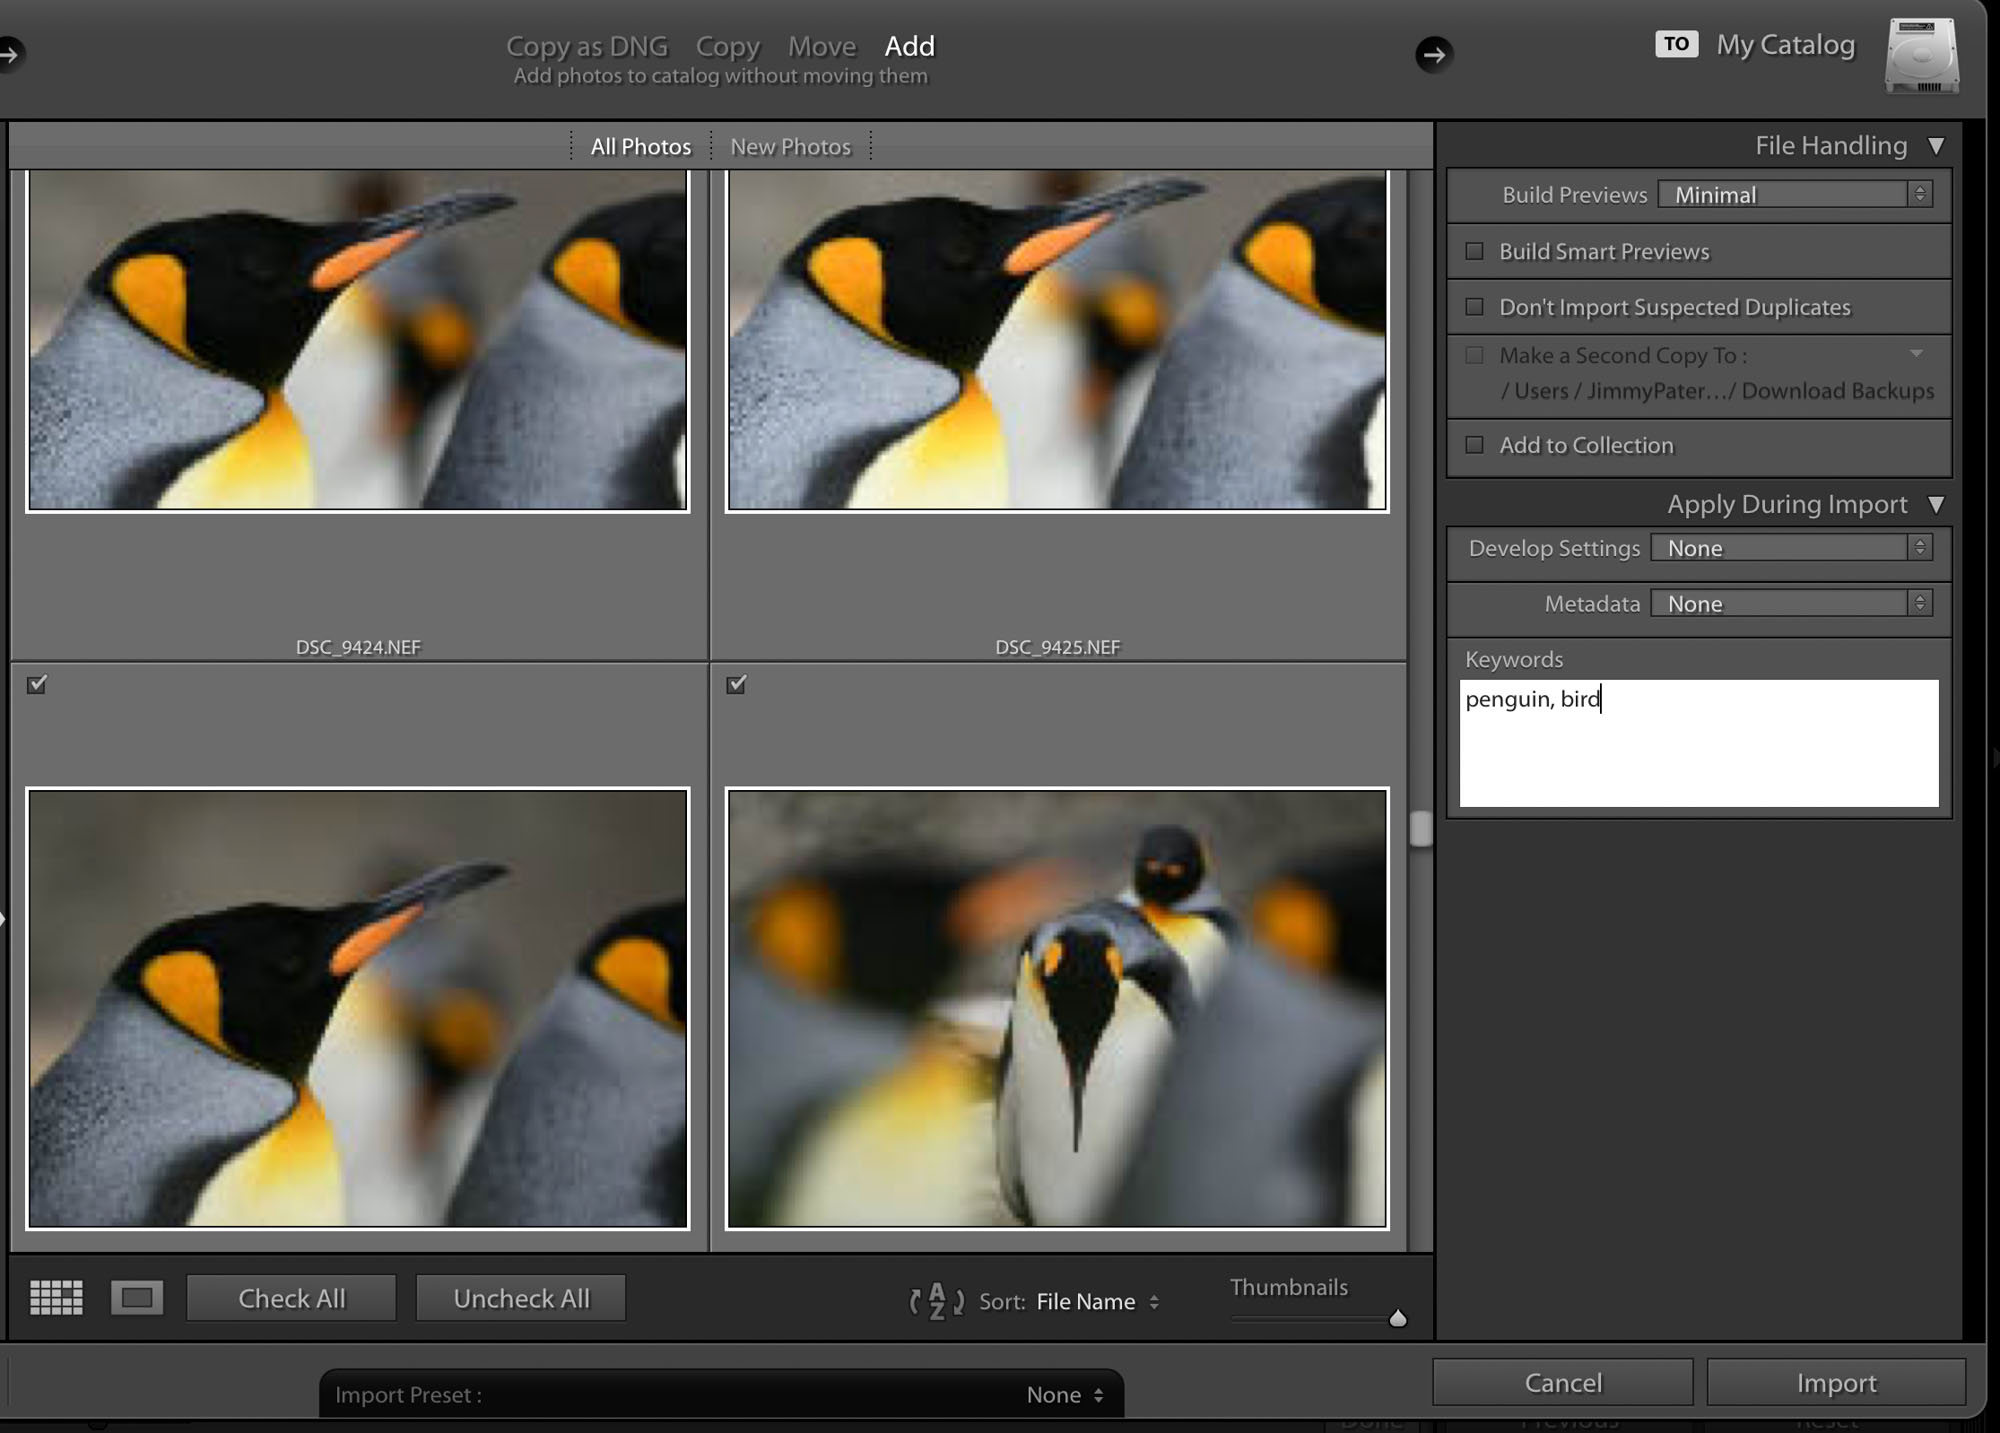
Before you can start working up your photos in Lightroom you’ll need to import them. If you’re used to a traditional open-edit-save workflow then Lightroom requires a slight shift in mindset. Rather than opening our images into the app, you instead need to tell Lightroom where our files are stored on your drive. In essence, this is what Importing is.
Once imported, the photos are logged in the Lightroom Catalog, which keeps track of where the image is on your drive and what edits have been made to it. Be careful not to move folders around on your drive as Lightroom will lose track of them. Instead, if you need to move or rename folders then this is best done within the Folder panel in Lightroom’s Library Module.
2 Choose a profile
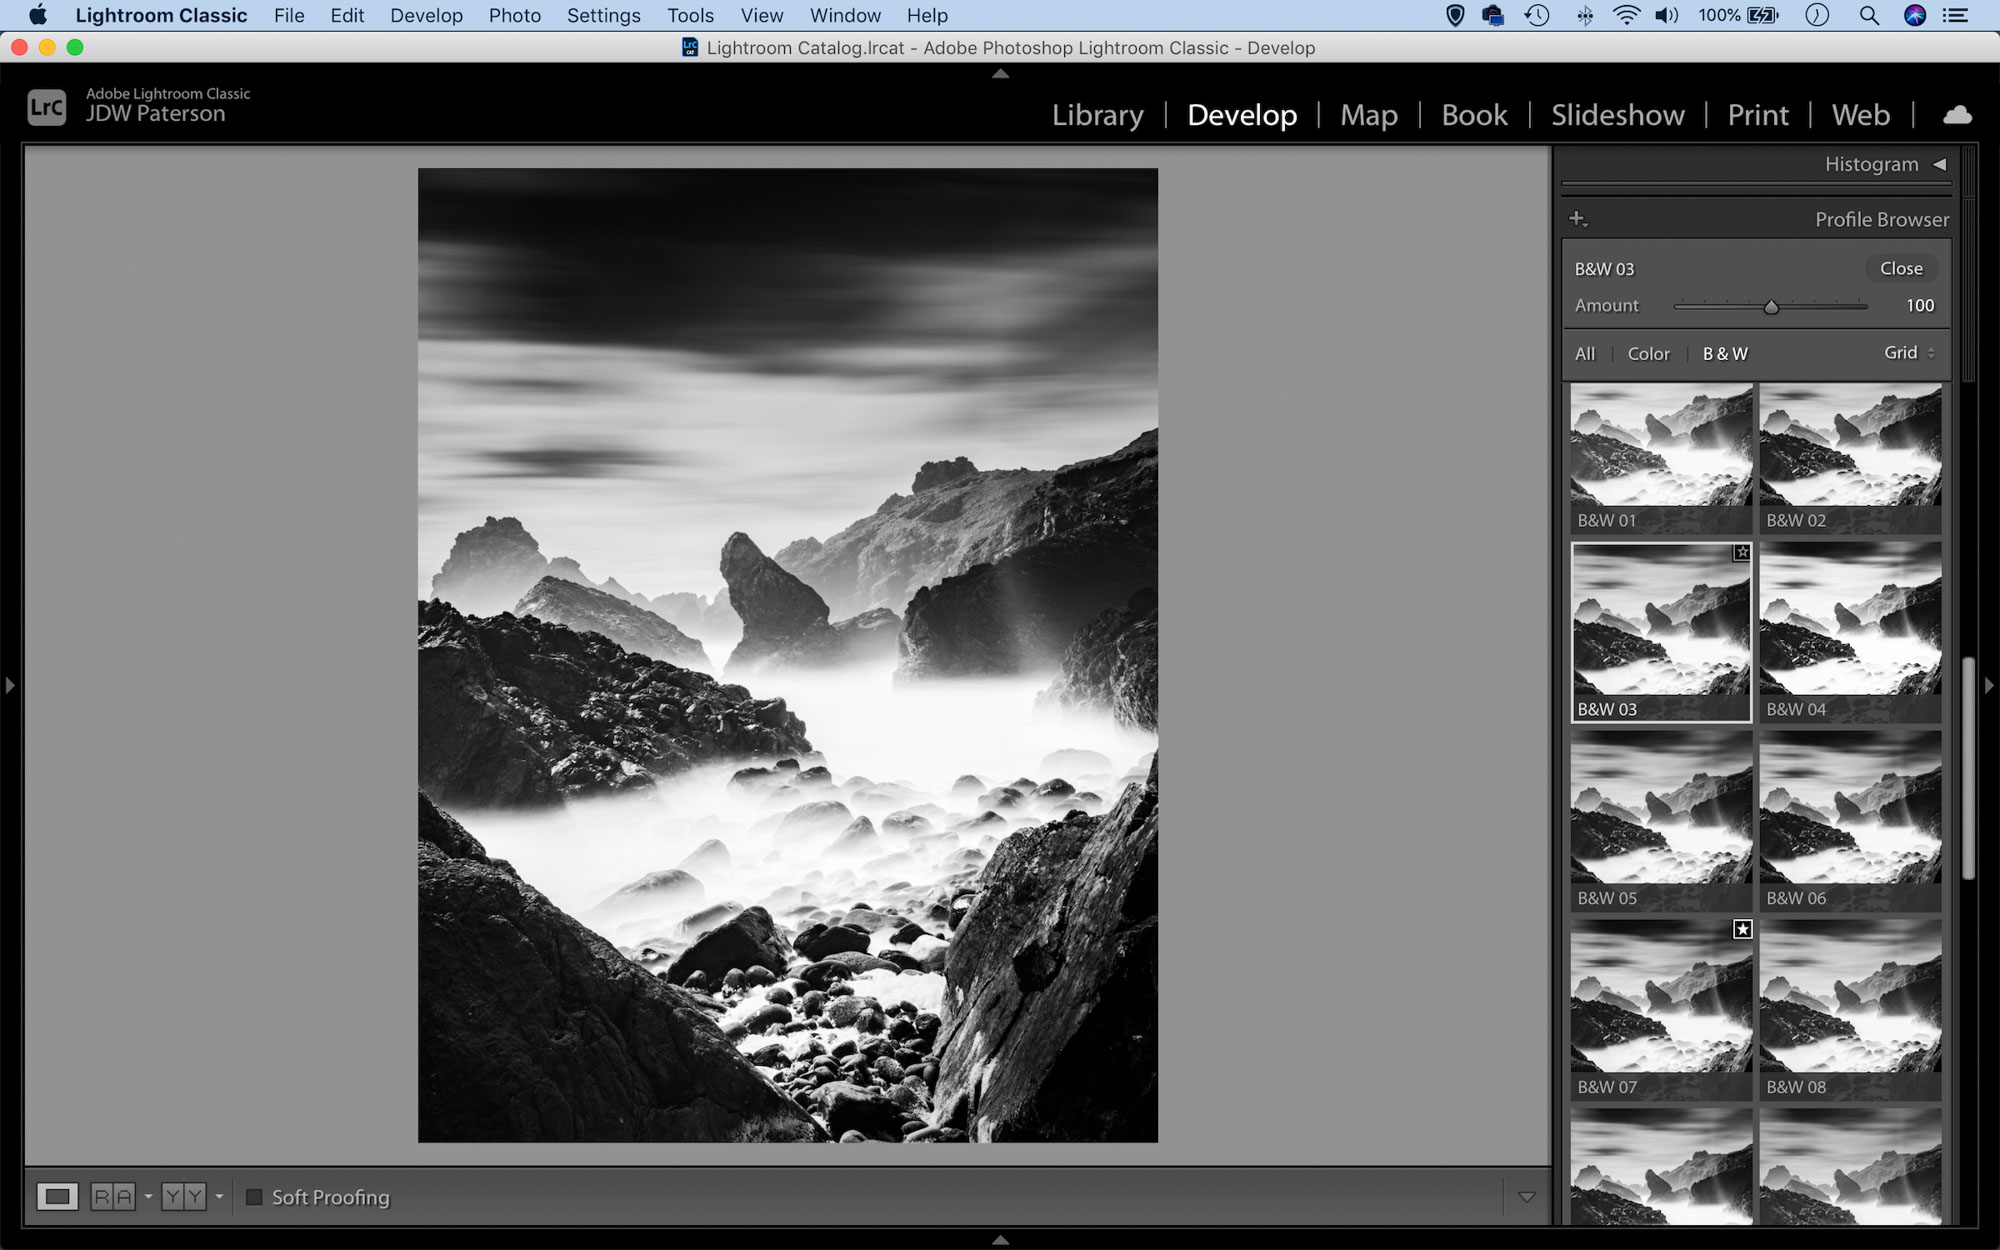
Found at the top of the Basic Panel in Lightroom’s Develop Module, Profiles are a great way to kick-start your image editing. With a single click, a Profile can give your image a specific look or provide a handy starting point for further edits. Some, like the Adobe Raw set, have been created with specific types of image in mind. The Adobe Portrait Profile, for example, renders skin tones more naturally. The Adobe Landscape Profile enhances blues and greens, so it boosts skies and foliage in outdoor scenes. This Adobe set is only available with raw files, while other sets like the Artistic and Modern Profiles can be used with jpegs, tiffs and raws.

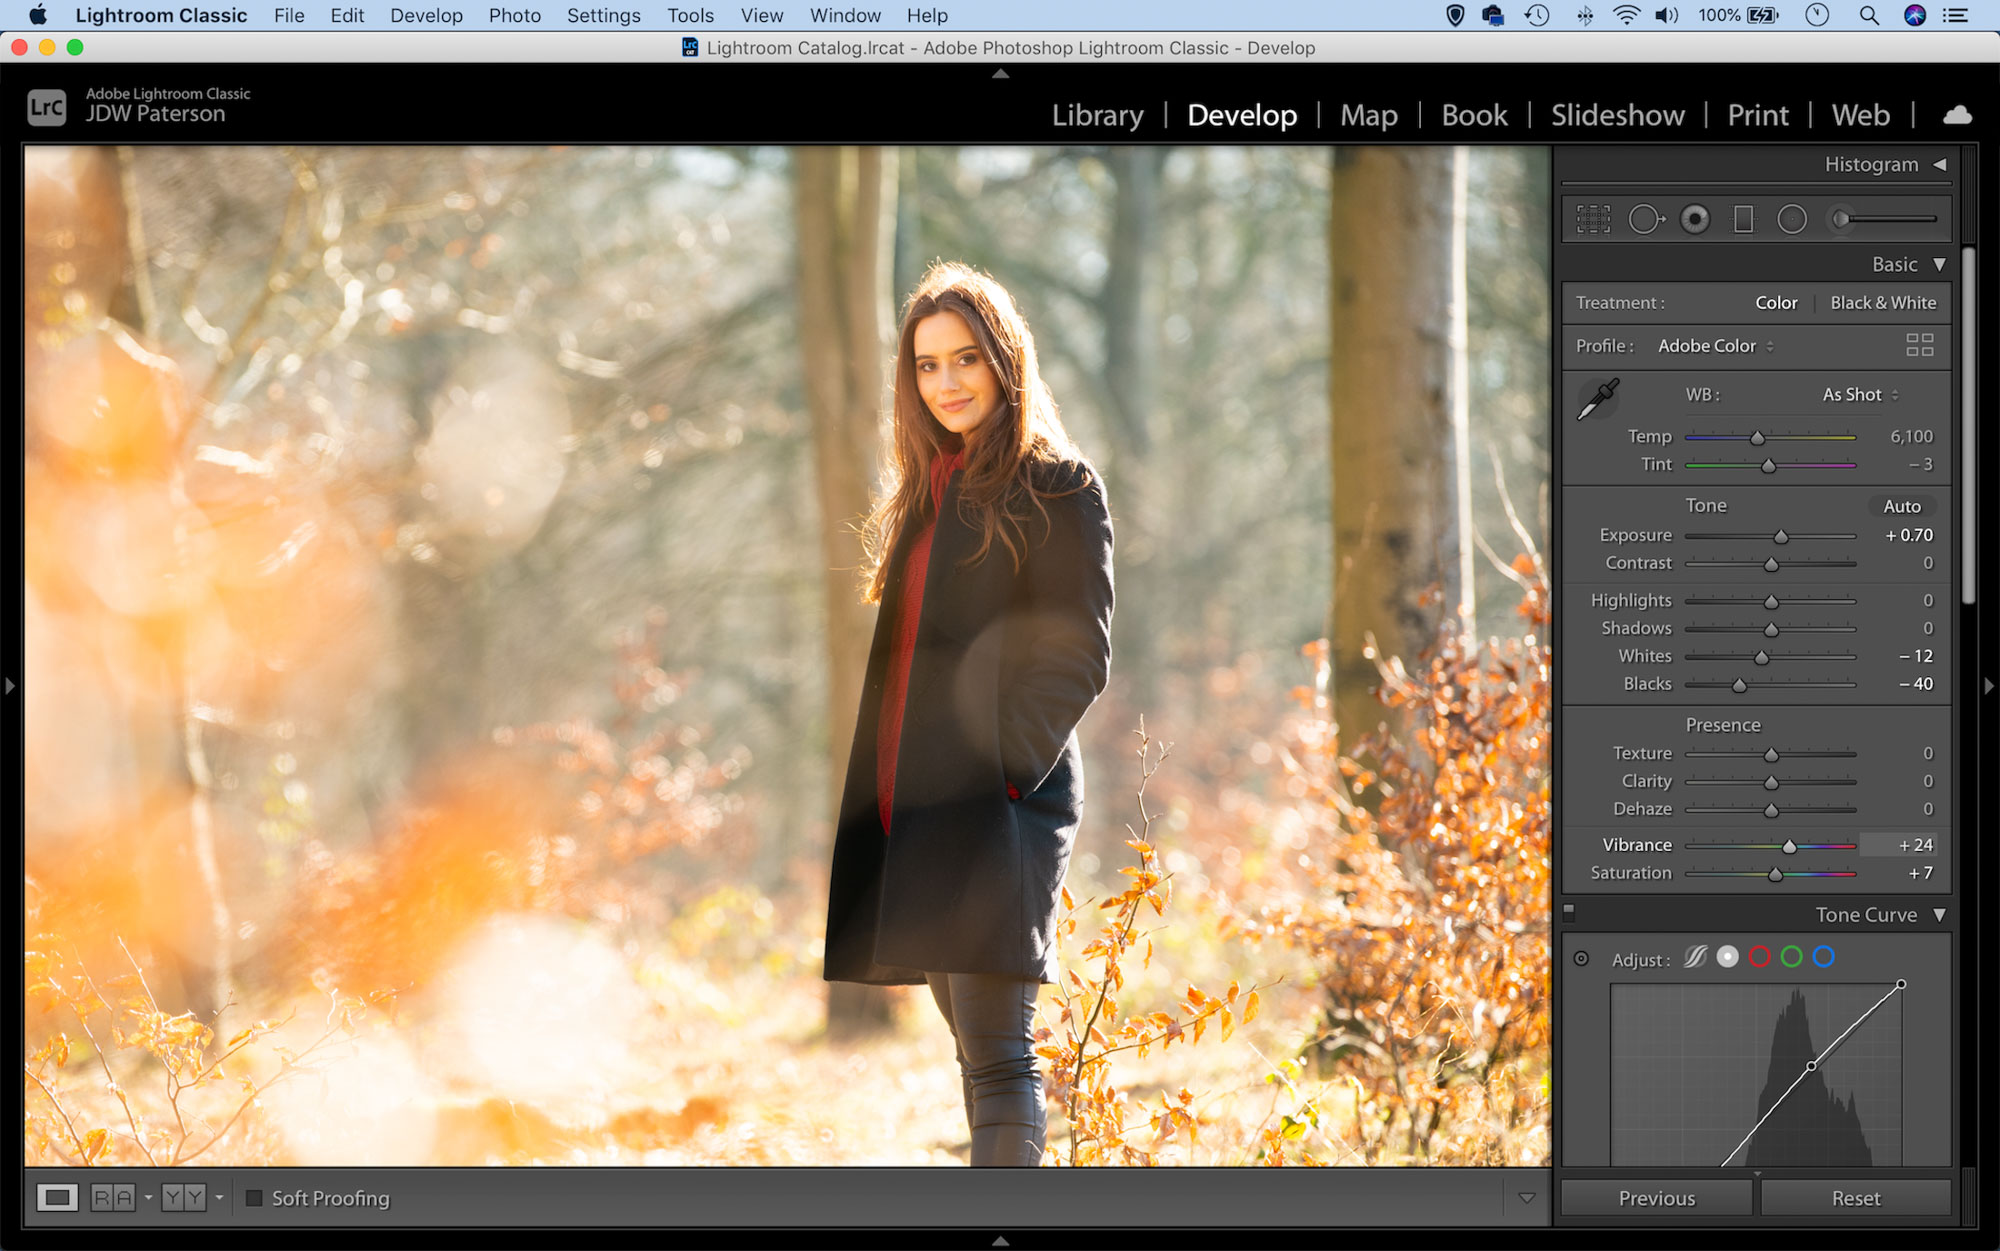
3 Enhance the tones
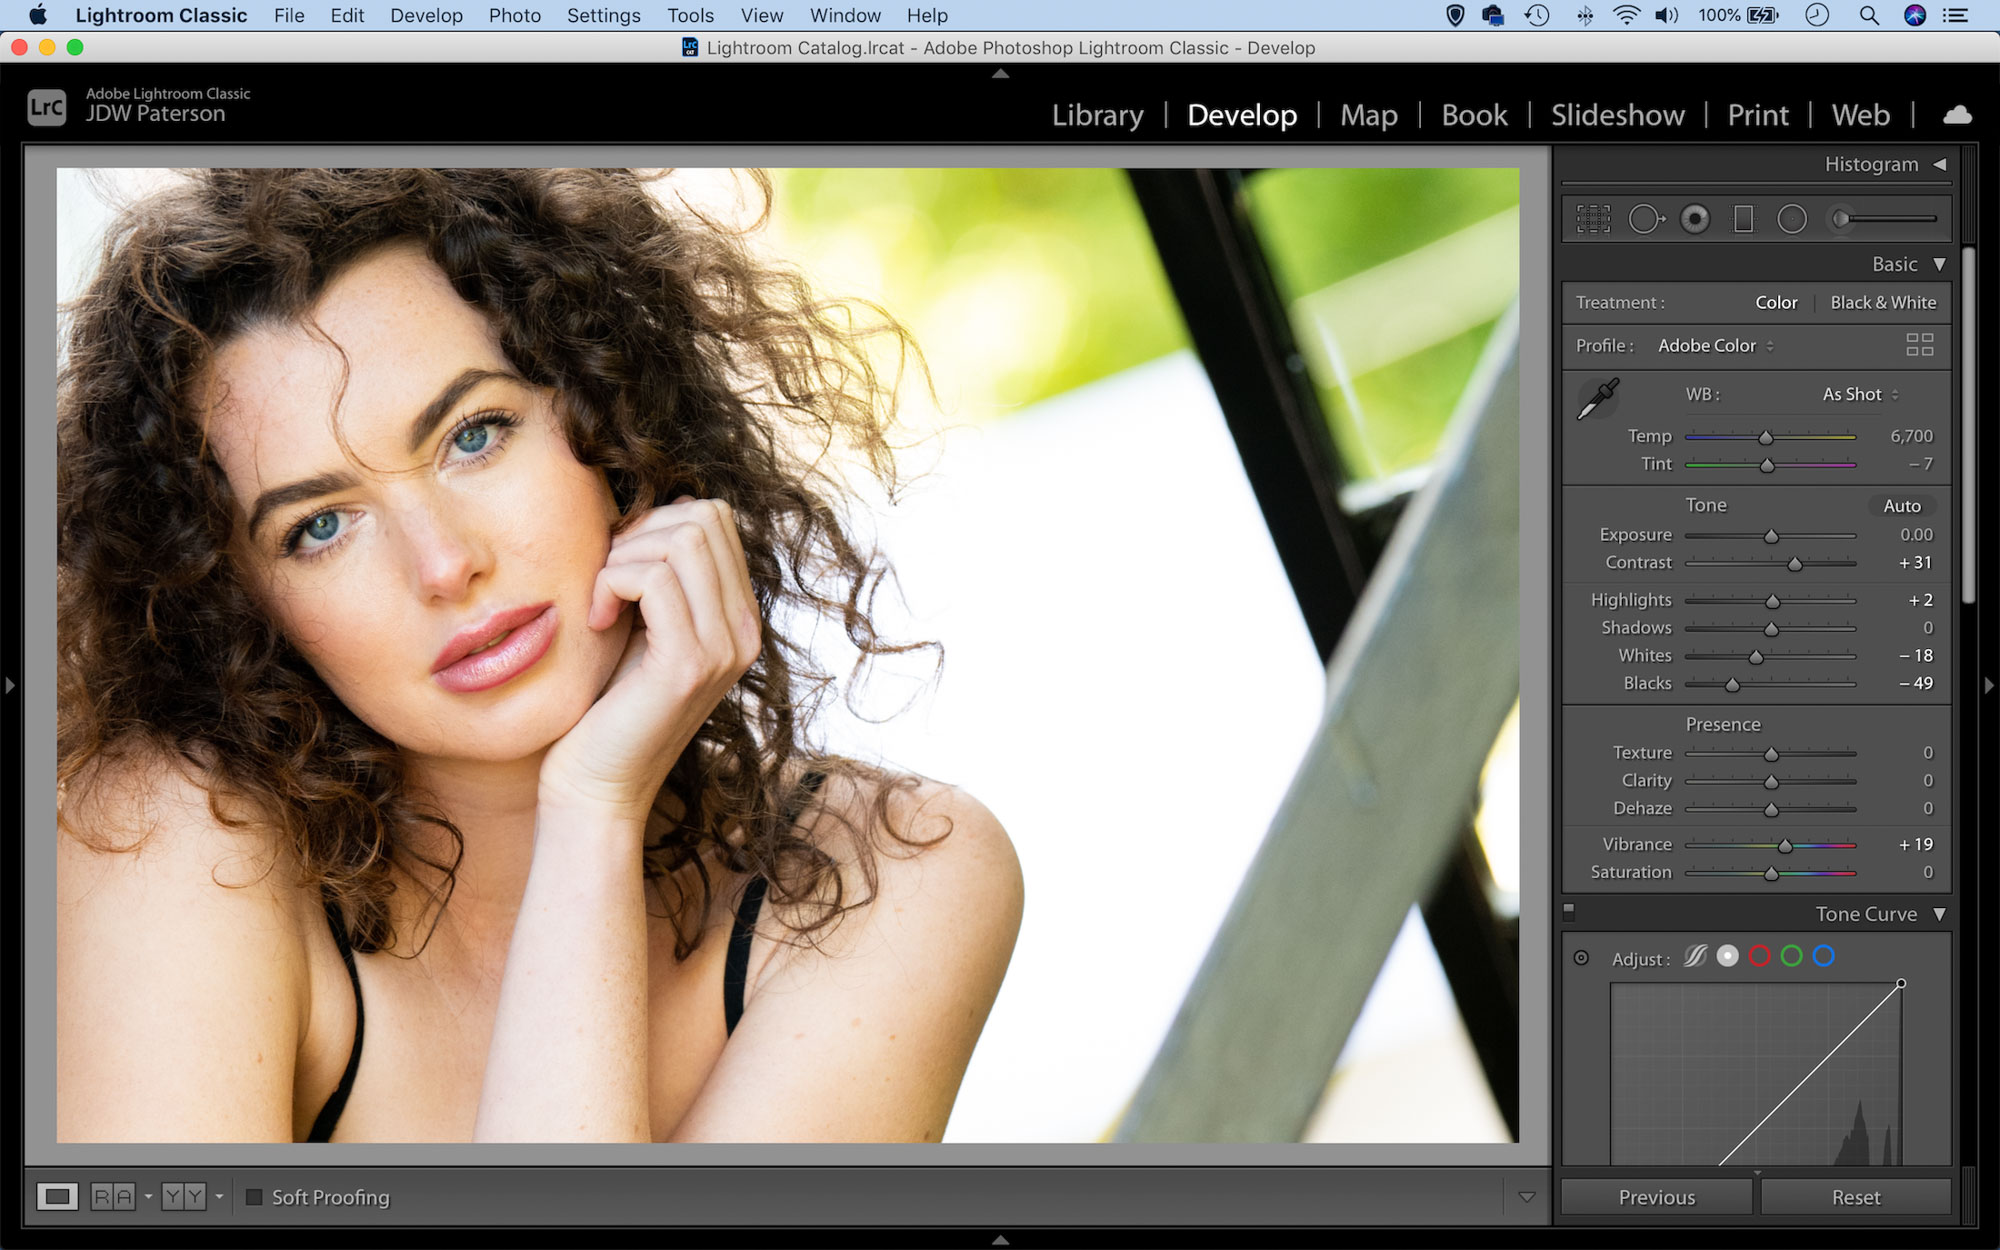
The Basic Panel in Lightroom’s Develop Module is the best place to begin enhancing tones, fixing colours and more. Start at the top of the sliders and work your way down. You can hold Alt while dragging the Black and Whites sliders for a useful view that shows clipped pixels. In general we want to guard against clipping, as it means either blown highlights or detail-less shadows. So drag the Black and Whites to a point just before the pixels begin to clip. This ensures your image has a full range of tones from dark to light.
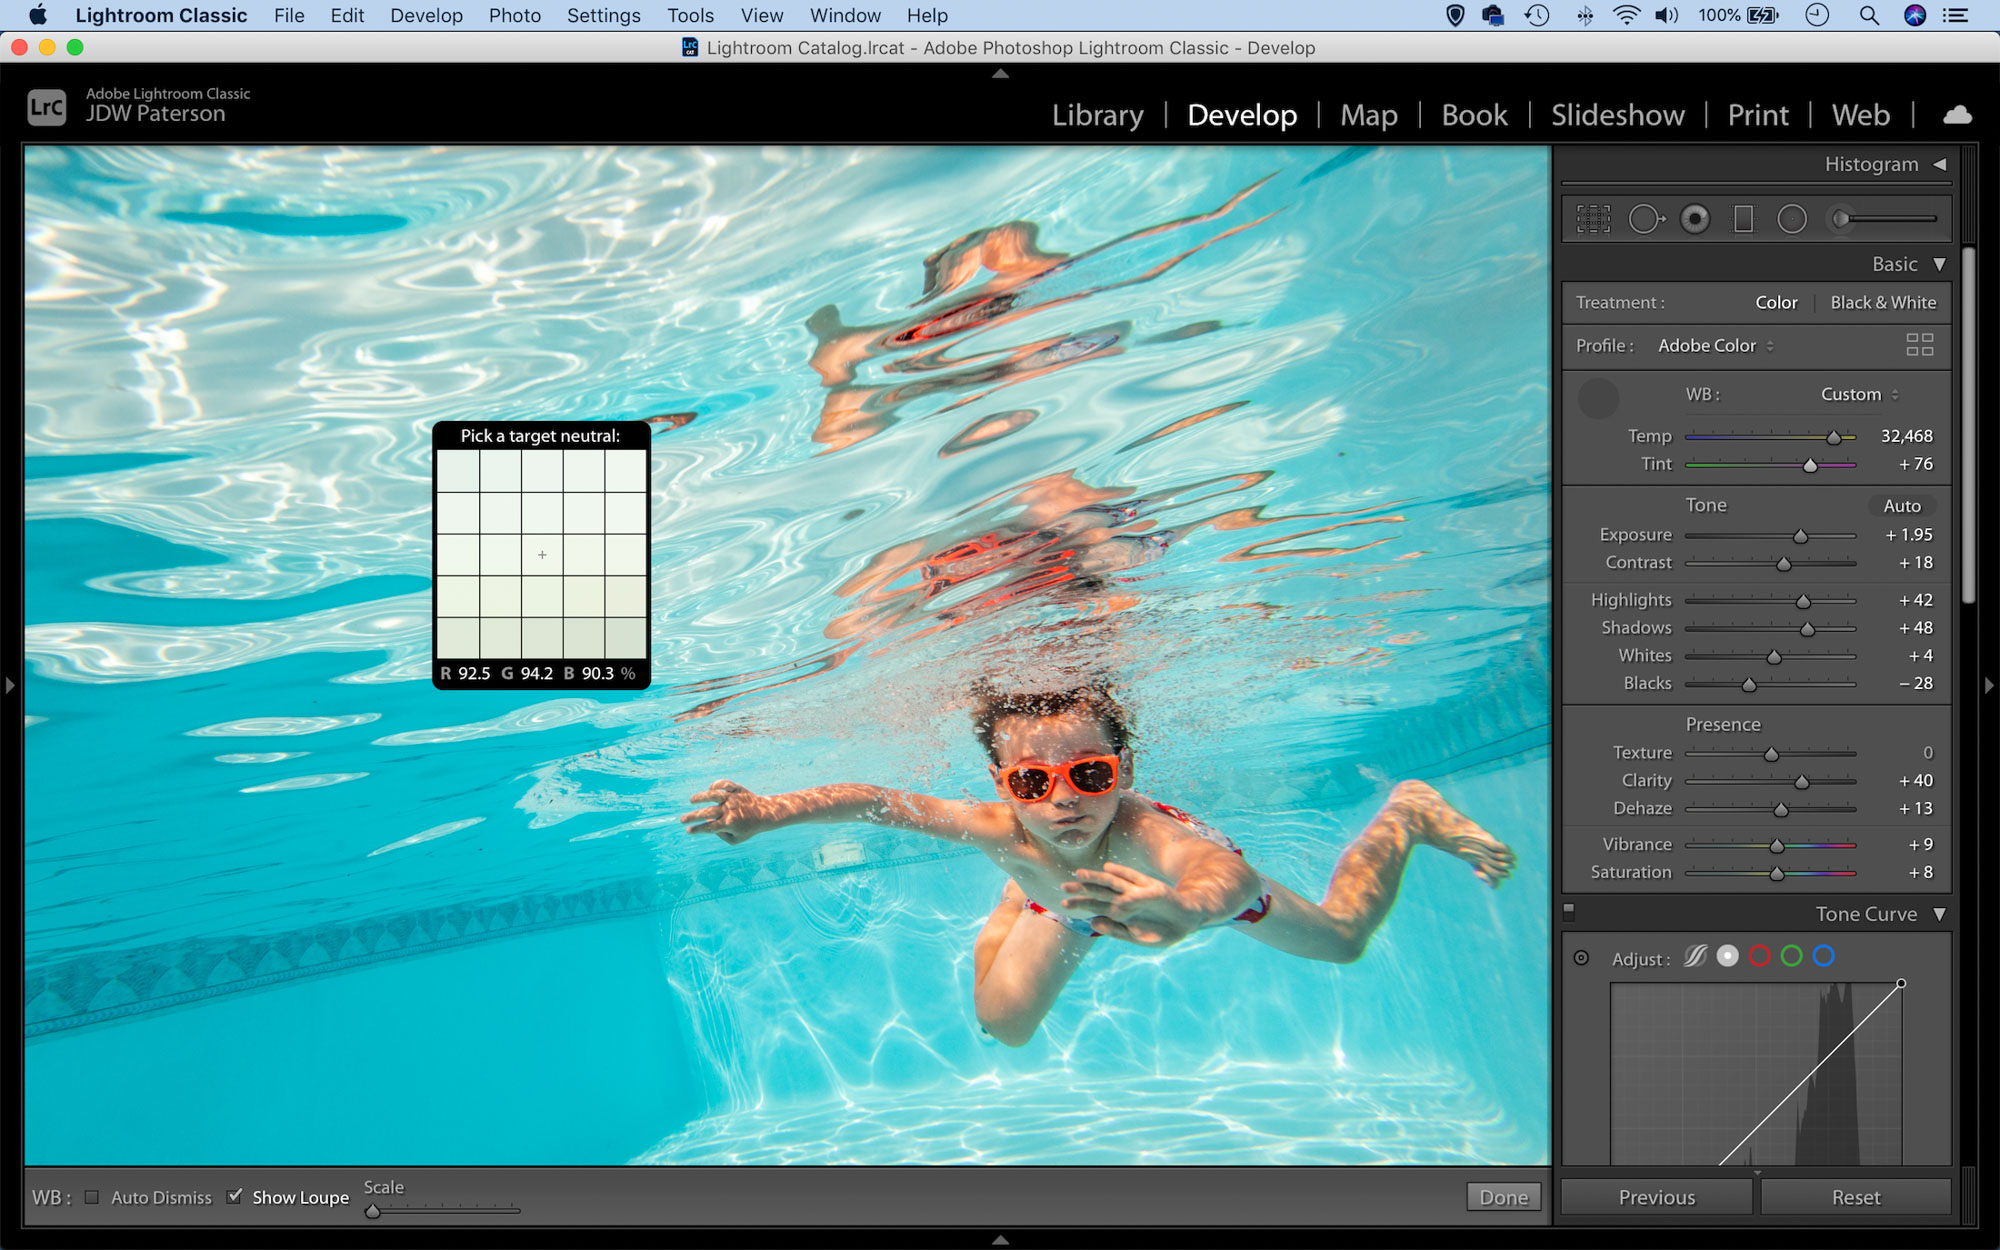
4 Fix white balance
If your colours look slightly off then you can correct them with ease using the White Balance controls, especially if you’ve shot in raw, as this means you can adjust white balance afterwards with exactly the same results as if you’d done so in-camera before taking the shot. To set the white balance, you can either adjust the Temperature and Tint sliders or alternatively grab the White Balance eyedropper tool beside them and click over a point in the image that you know should be neutral, like a grey road or a white wall.
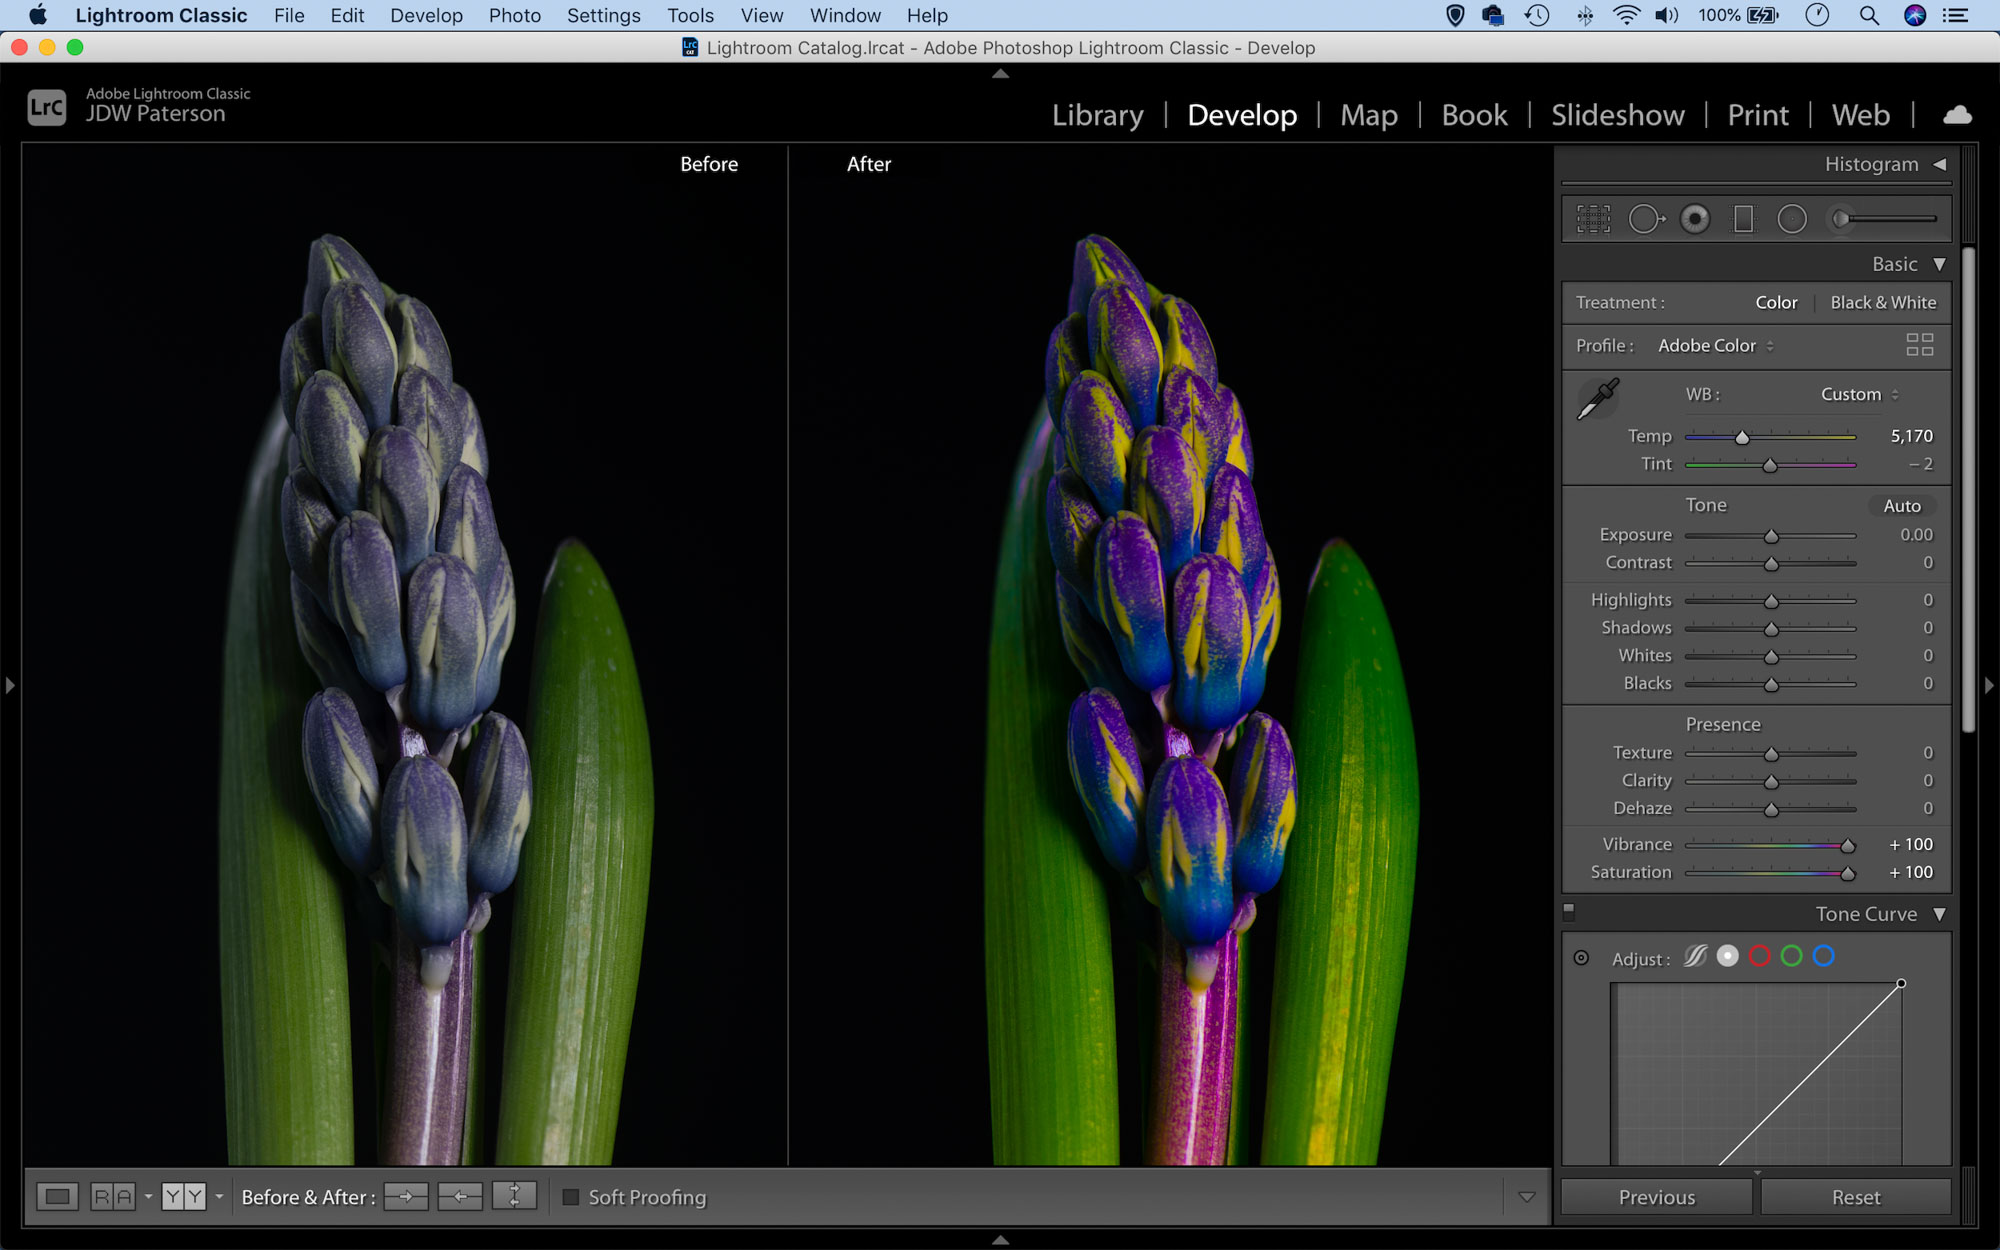
5 Boost your colours
The Vibrance and Saturation sliders are invaluable for boosting colours. Saturation offers universal control over colour intensity, while Vibrance instead targets the weaker colours, which can be useful for portraits as it allows you to strengthen colours without over-saturating skin tones. The HSL Panel below offers further colour controls. You can tweak the saturation of eight different colour ranges, or alter the Hue and Luminance instead. It’s often easier to do this on-image rather than with the sliders. Toggle the little target icon on and you can drag up or down over colours within the frame to alter them.

6 Retouch marks and blemishes
If your image is blighted by sensor marks then these can be removed using the Spot Removal tool. Simply grab the tool from the Lightroom toolbar and set it to Heal in the options below the toolbar. On a keyboard use the ] and [ bracket keys to resize the brush tip so that it’s slightly larger than the mark, then paint to remove it. If the same annoying mark appears across a whole set of photos then there’s no need to manually fix every one - simply correct one image, then sync the edit to the rest (see tip 8).

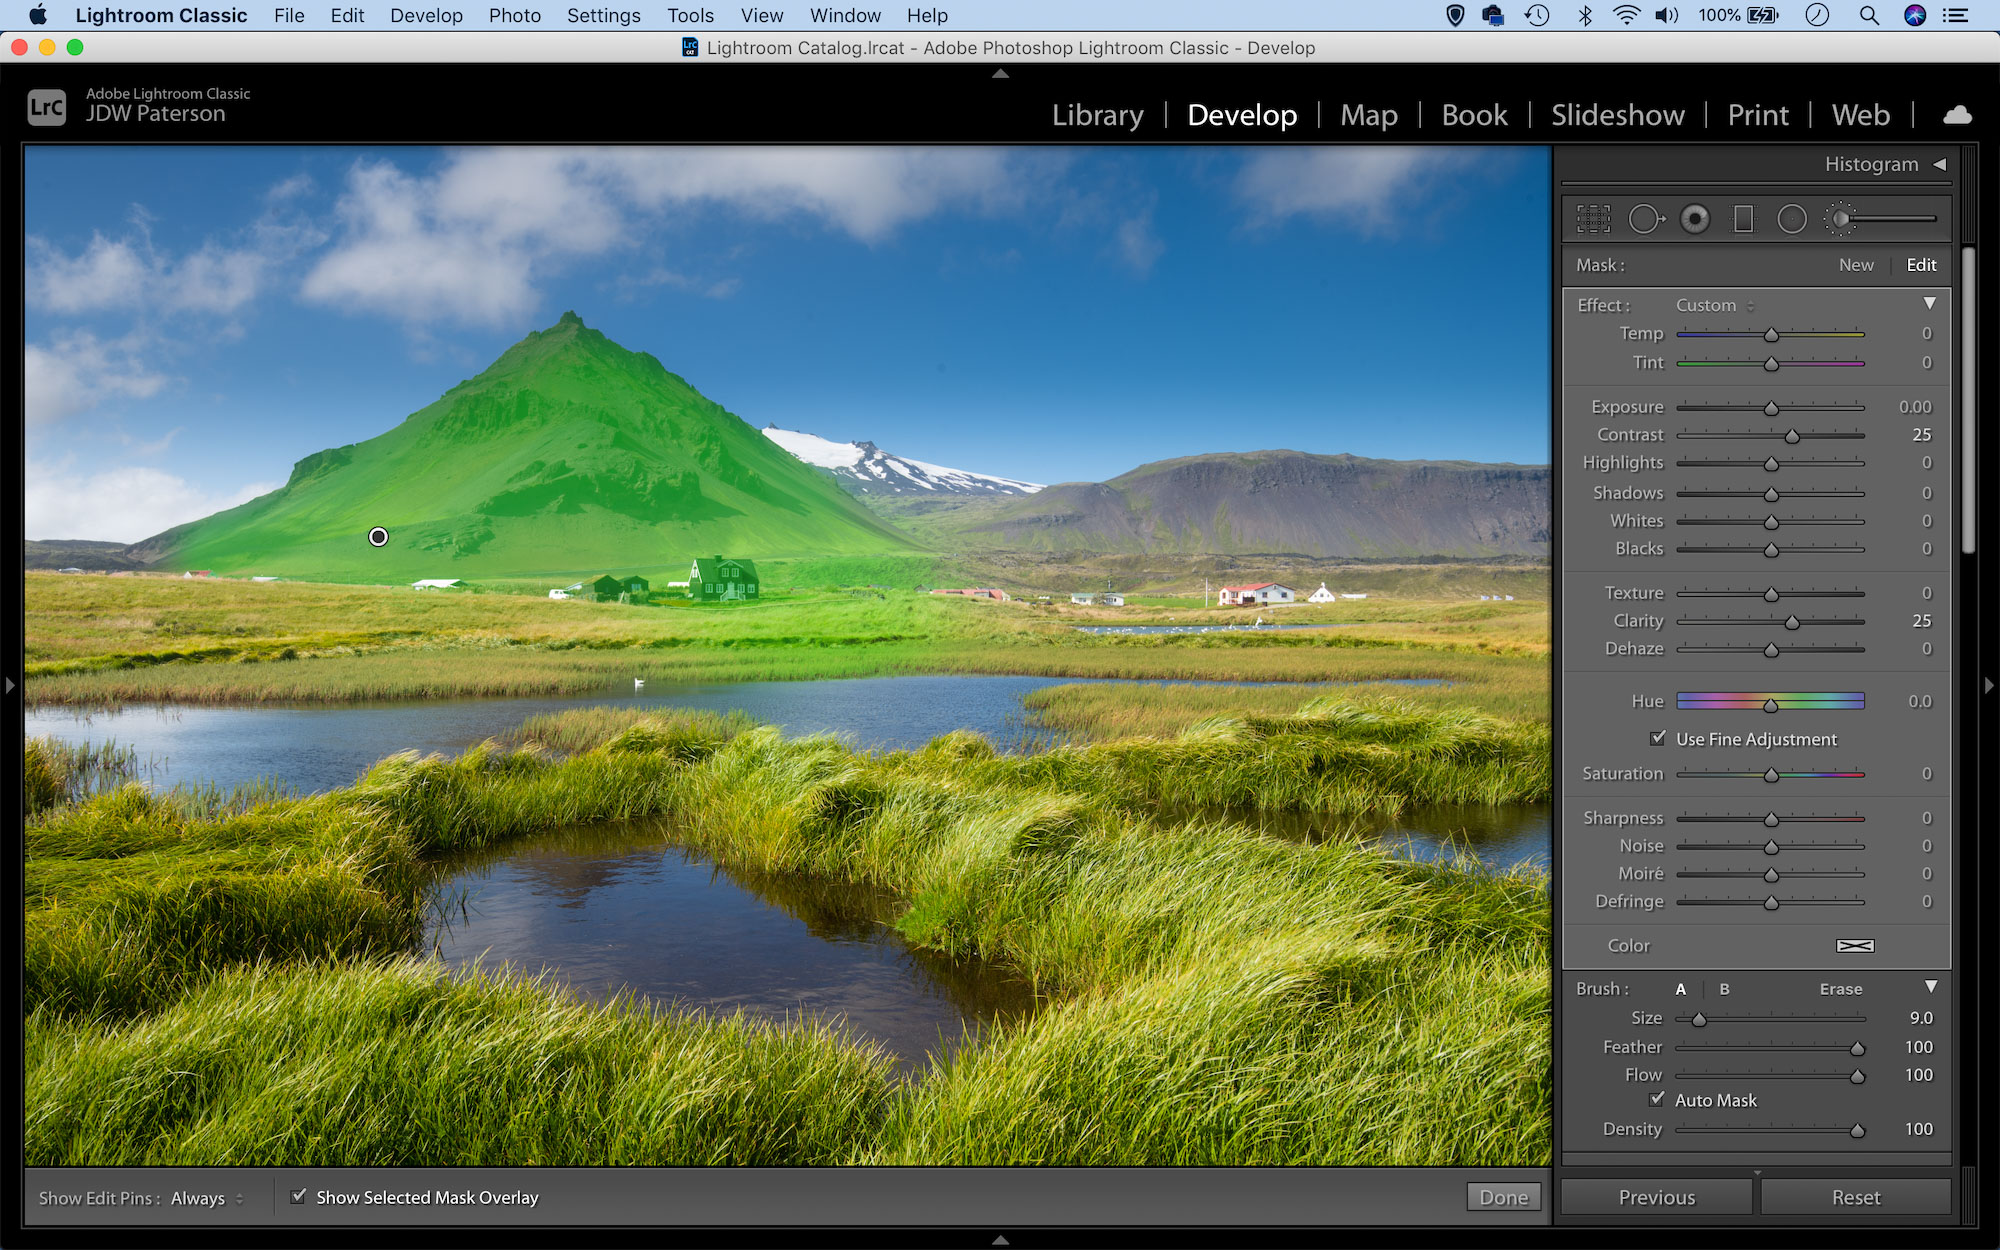
7 Selectively boost the image
Three tools in Lightroom allow you to make powerful local edits to boost parts of your photos. Whether you need to enhance a sky, boost the colours in your subject, tease out detail in shadow areas or even soften skin, these tools can help. The Graduated Filter lets you make linear adjustments, much like a lens-mounted grad. The Radial Filter creates circular adjustments, which can be useful for adding subtle vignettes to draw the eye towards your subject. The Adjustment Brush lets you paint to target a part of your photo. After defining an area with one of these tools, you can adjust the tones in any way you like using the sliders to the right.
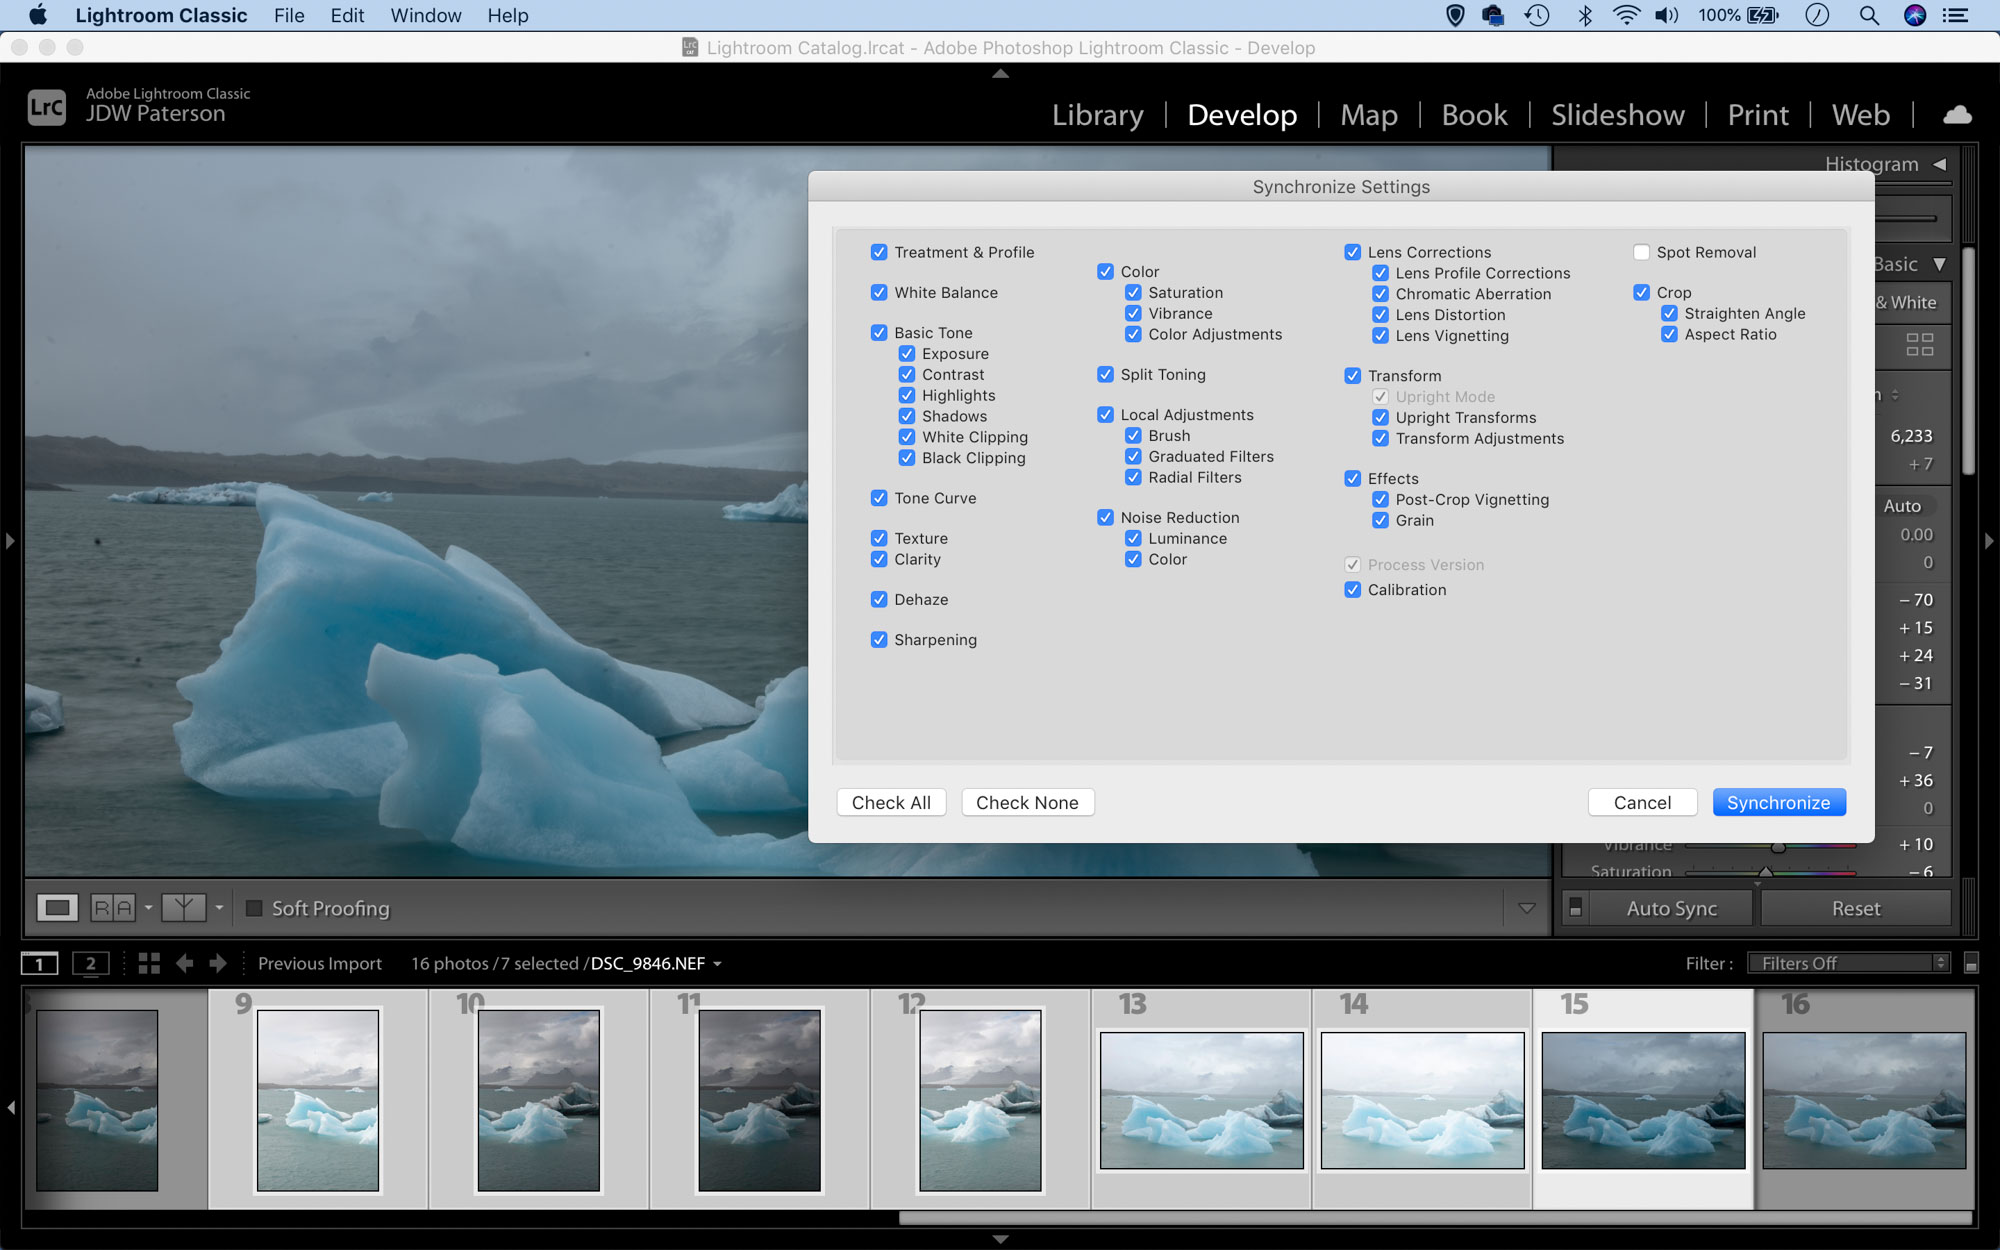
8 Sync your edits
Lightroom is a parametric editor, meaning that edits won’t alter the original image file, they simply change its appearance within the interface. These changes are stored alongside the file as extra bits of data. Not only does this mean everything remains editable, it also makes it very easy to copy settings from one image to another. To do so, simply edit one image then highlight several others (either Cmd/Ctrl+click to select individual images or Shift-click between first and last to select an entire set in the filmstrip) and click the Sync button. You can choose which edits to sync, or simply check all. This ability to copy your edits means you can quickly work up an entire batch of photos in a few minutes.
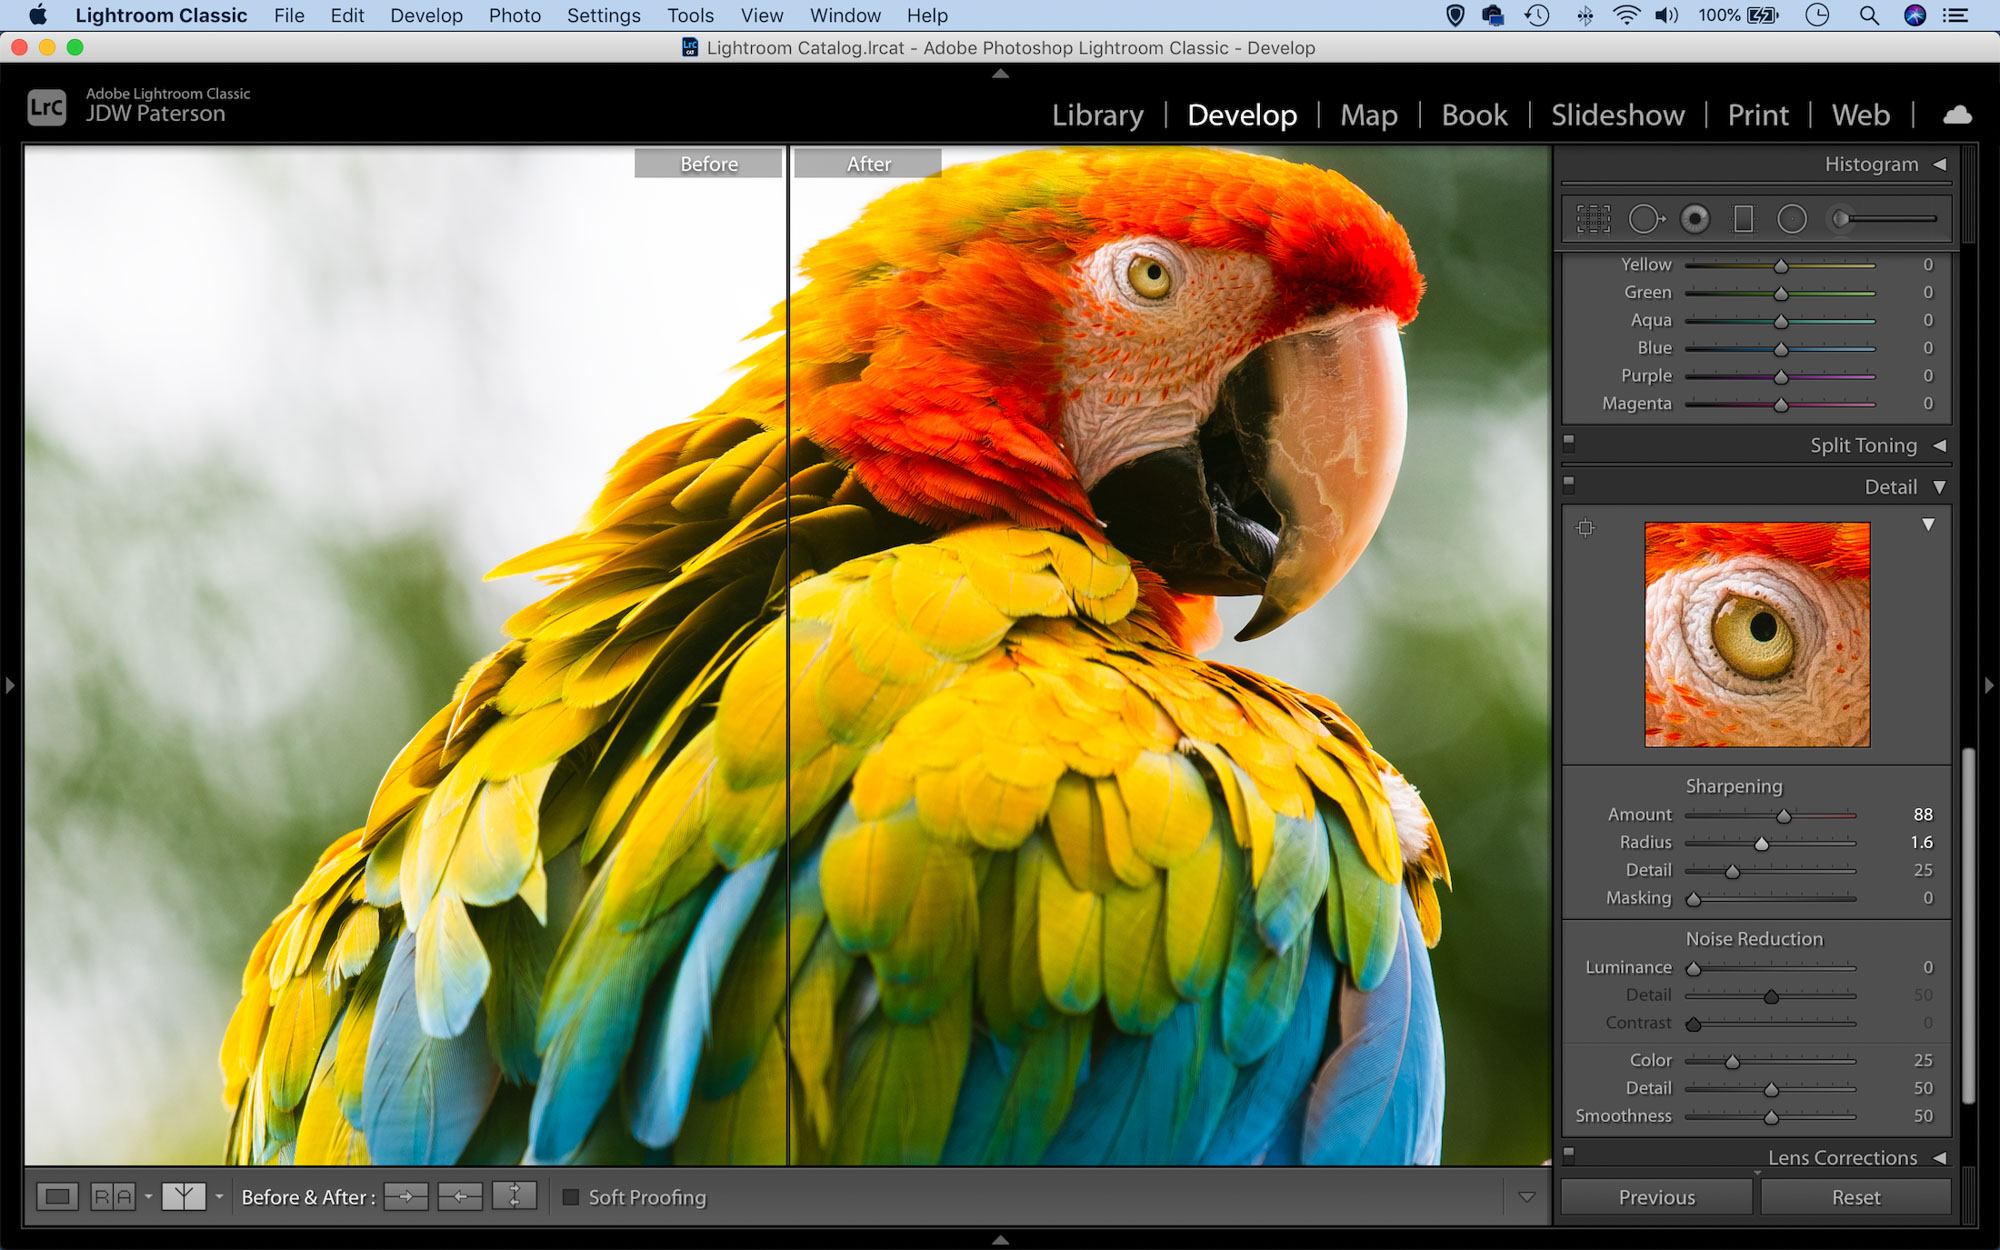
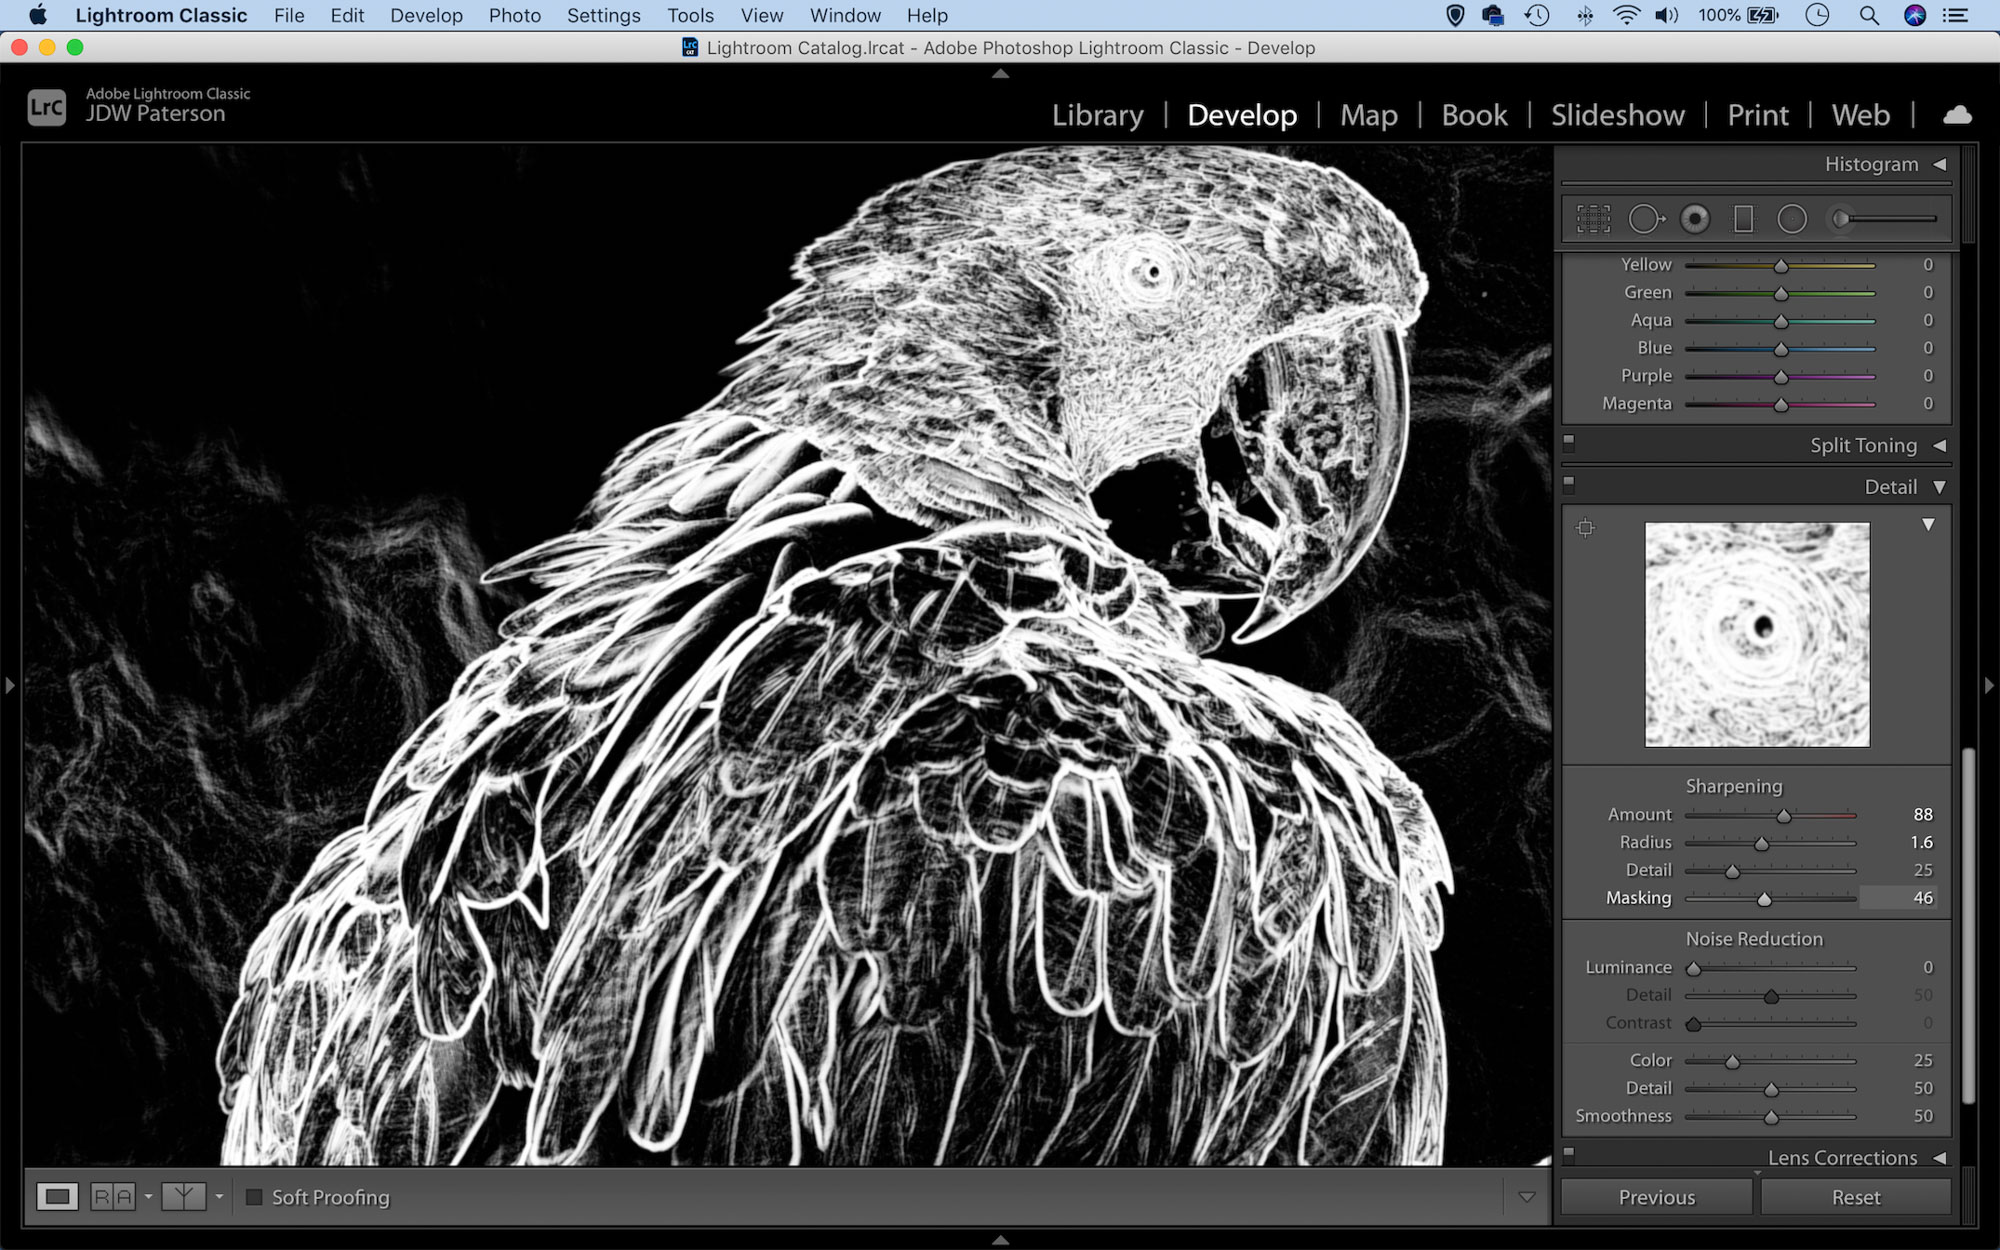
9 Sharpen the details
The Detail Panel with Lightroom’s Develop Module lets you apply sharpening and noise reduction to your photos. Sharpening is essentially localised contrast control. When we sharpen a photo, we increase contrast along edges in the image where dark pixels meet lighter ones. The dark side of the edge gets darker, the light side becomes brighter and the edge looks crisper. The Sharpening Amount slider controls the overall strength of the contrast change, while the Radius slider determines how far away from the edge the sharpening occurs.
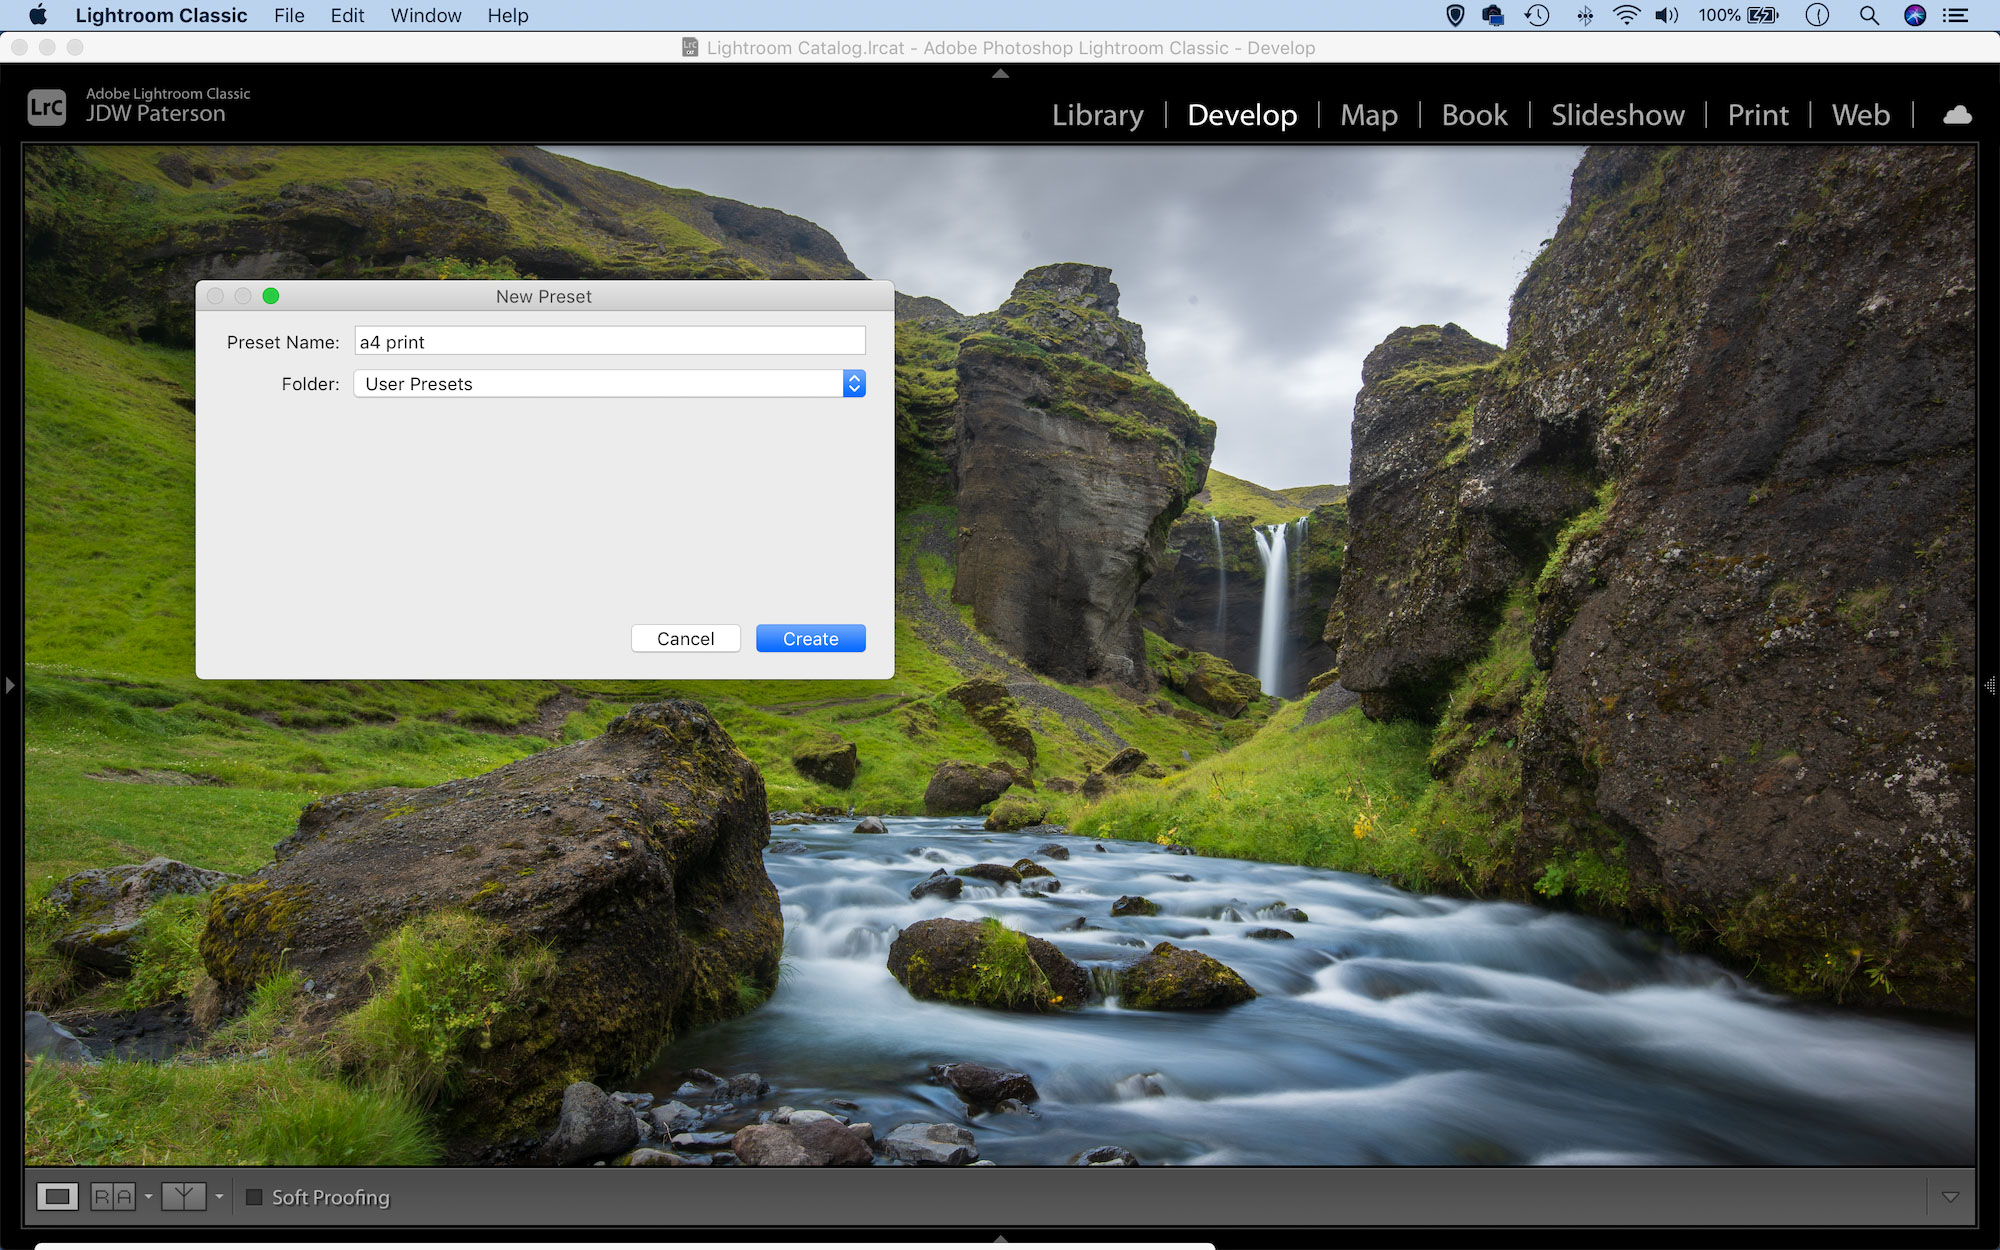
10 Exporting your images
To export an image or set of images, right-click and choose Export or hit Cmd/Ctrl+Shift+E. The Export box lets you choose an image format. Tiff is a good choice if you want maximum image quality. Jpeg is more universal and creates smaller file sizes, but keep in mind that it’s a ‘lossy’ format, so if the image is repeatedly opened and closed the compression can lead to image banding (where graduated tones clump into unsightly blocks of colour). As a rule of thumb it’s best to export as a high quality jpeg at the very end of your workflow, then keep the original on file to refer back to if necessary.


James has been a professional photographer and award-winning journalist for the past 15 years. He is editor of Practical Photoshop magazine and contributes to leading photography publications worldwide.
View all articles

