


Learn how to capture more dynamic landscapes and seascapes shots by pushing your smartphone to its photographic limits


Smartphone photography has come an incredibly long way in a relatively short amount of time. And as the capabilities of smartphone cameras improved, alongside the fact that you nearly always have your phone with you, they quickly became the snapshot camera of choice. The clichéd phrase, “the best camera is the one you have with you”, couldn’t ring truer.
"...for the more creative photographer, manual mode allows you to take more control to produce some unexpectedly impressive results, although not without challenges."
Smartphones offer the ability to capture great images with ease in a wide range of situations, which coupled with the fact we nearly always have them with us makes them extremely useful tools. And for the more creative photographer, manual mode allows you to take more control to produce some unexpectedly impressive results, although not without challenges.
Most smartphone cameras have a fixed aperture between f/1.6 and f/2 which means that they have great light-gathering capabilities. And the reason that they can capture such a large depth-of-field, despite this fast aperture, is simply because the camera sensor is so small that these wide apertures are comparable to roughly f/11 to f/13 on a full-frame camera.
This makes it difficult to take advantage of many smartphone cameras’ ability to shoot exposures up to 30 seconds unless shooting in extremely low light conditions or at night. But there is an easy way to shoot exposures of around one second in daylight conditions, and that’s exactly what we’re going to explore here.
See the before and after example below:
Before:
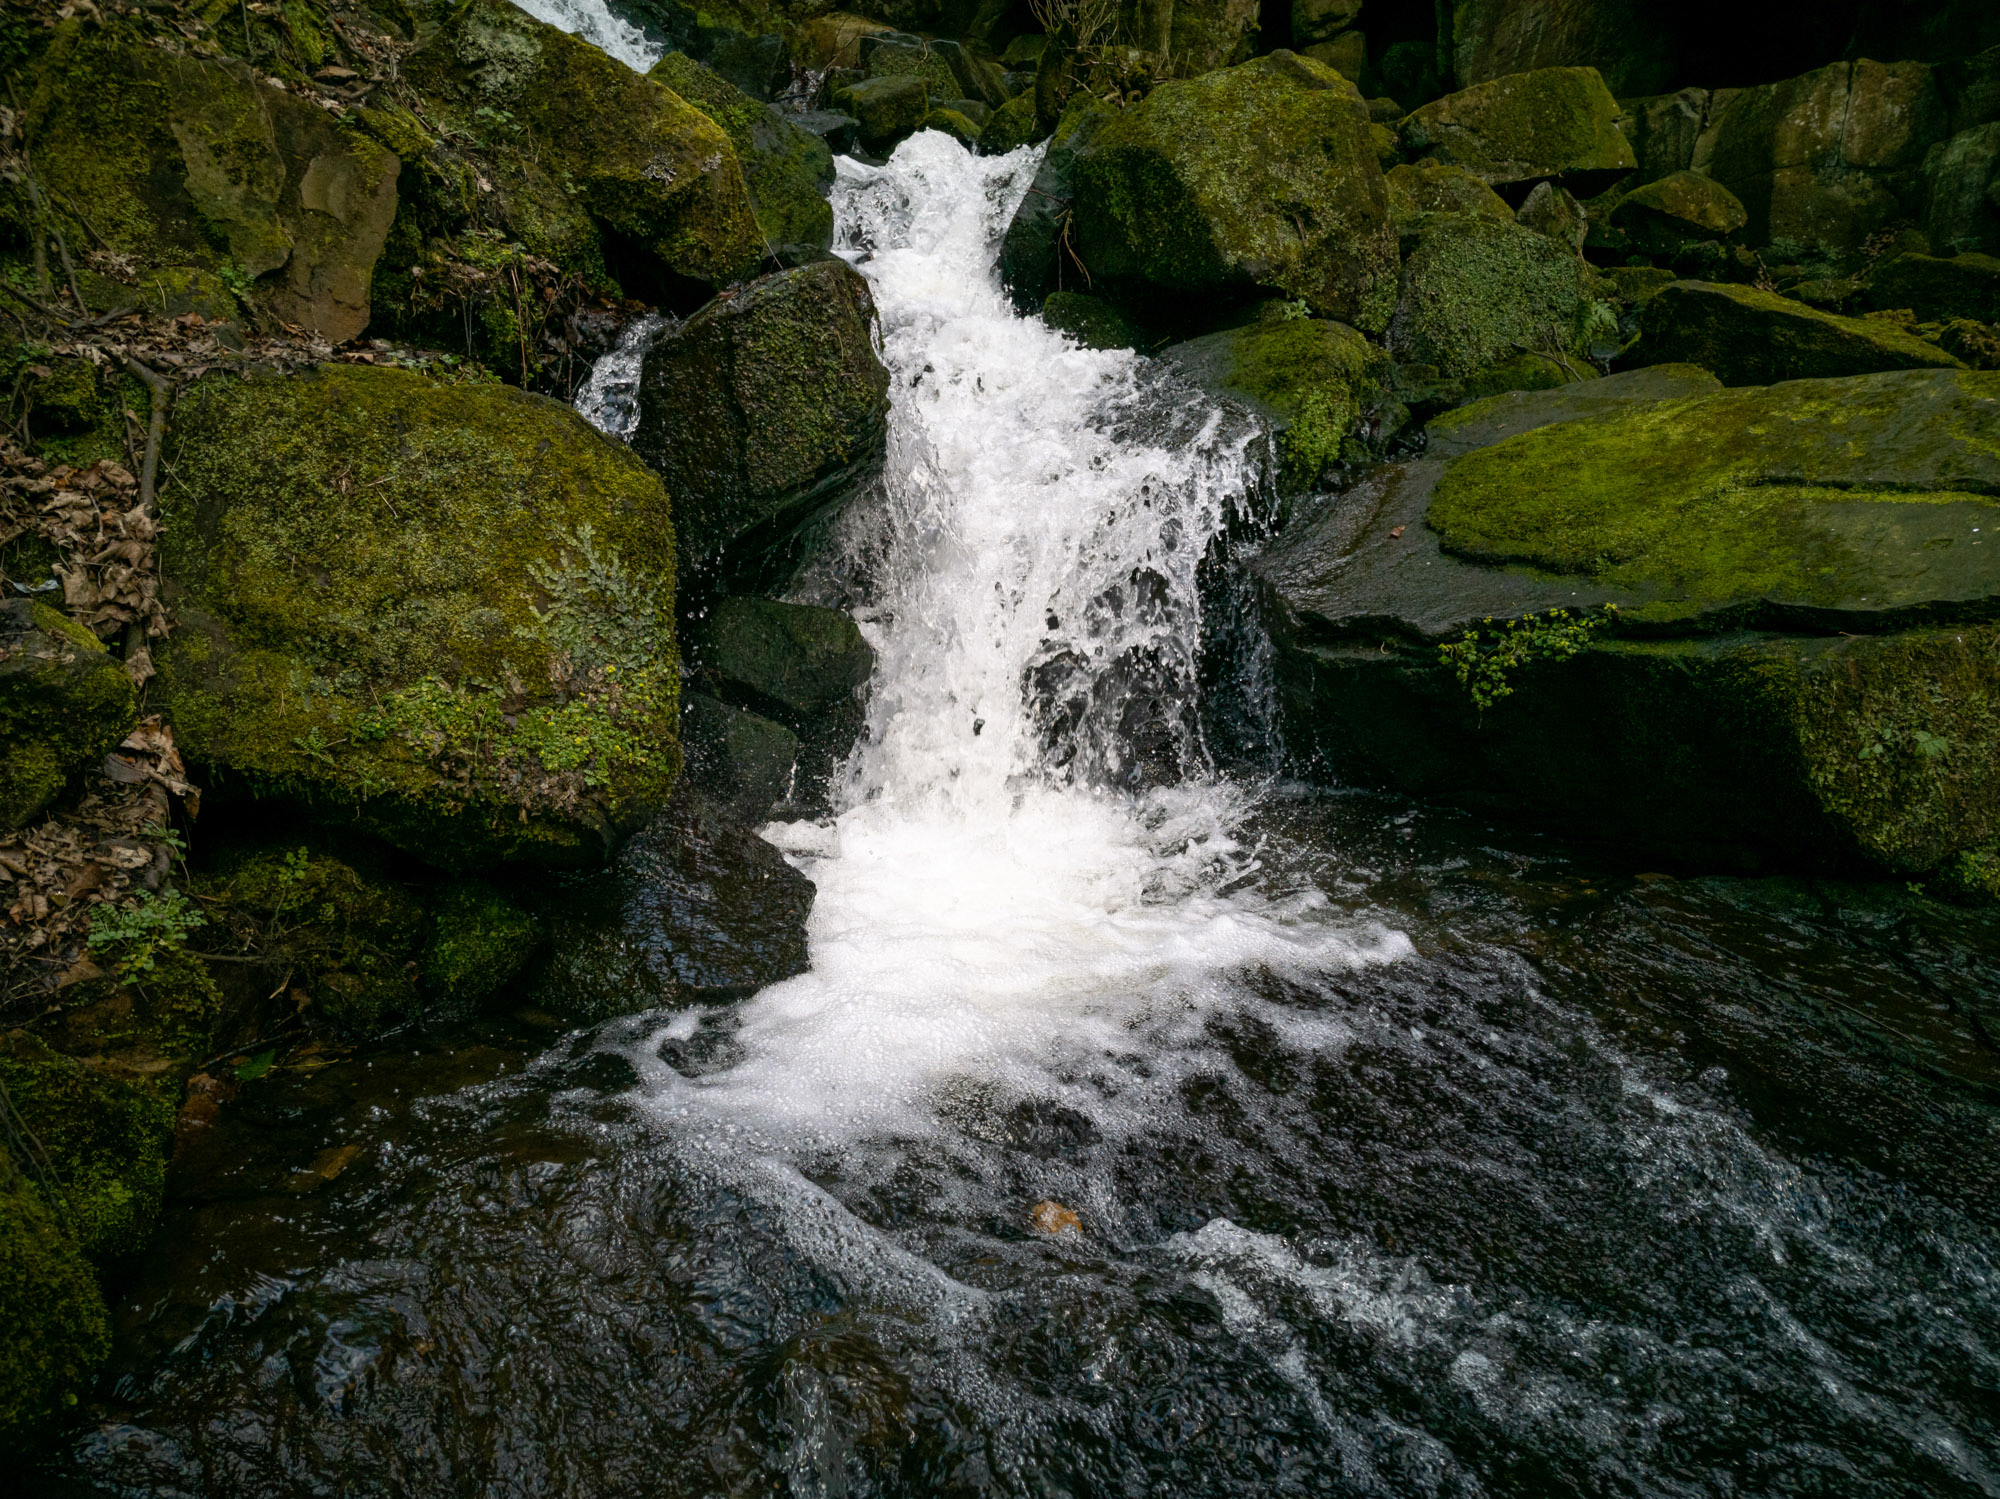
This image was taken on an overcast day at ISO 50, but the f/1.6 aperture meant that a shutter speed of 1/640sec was required which has frozen the flowing water. Rather than looking like a considered landscape photo, it looks like a standard snapshot.
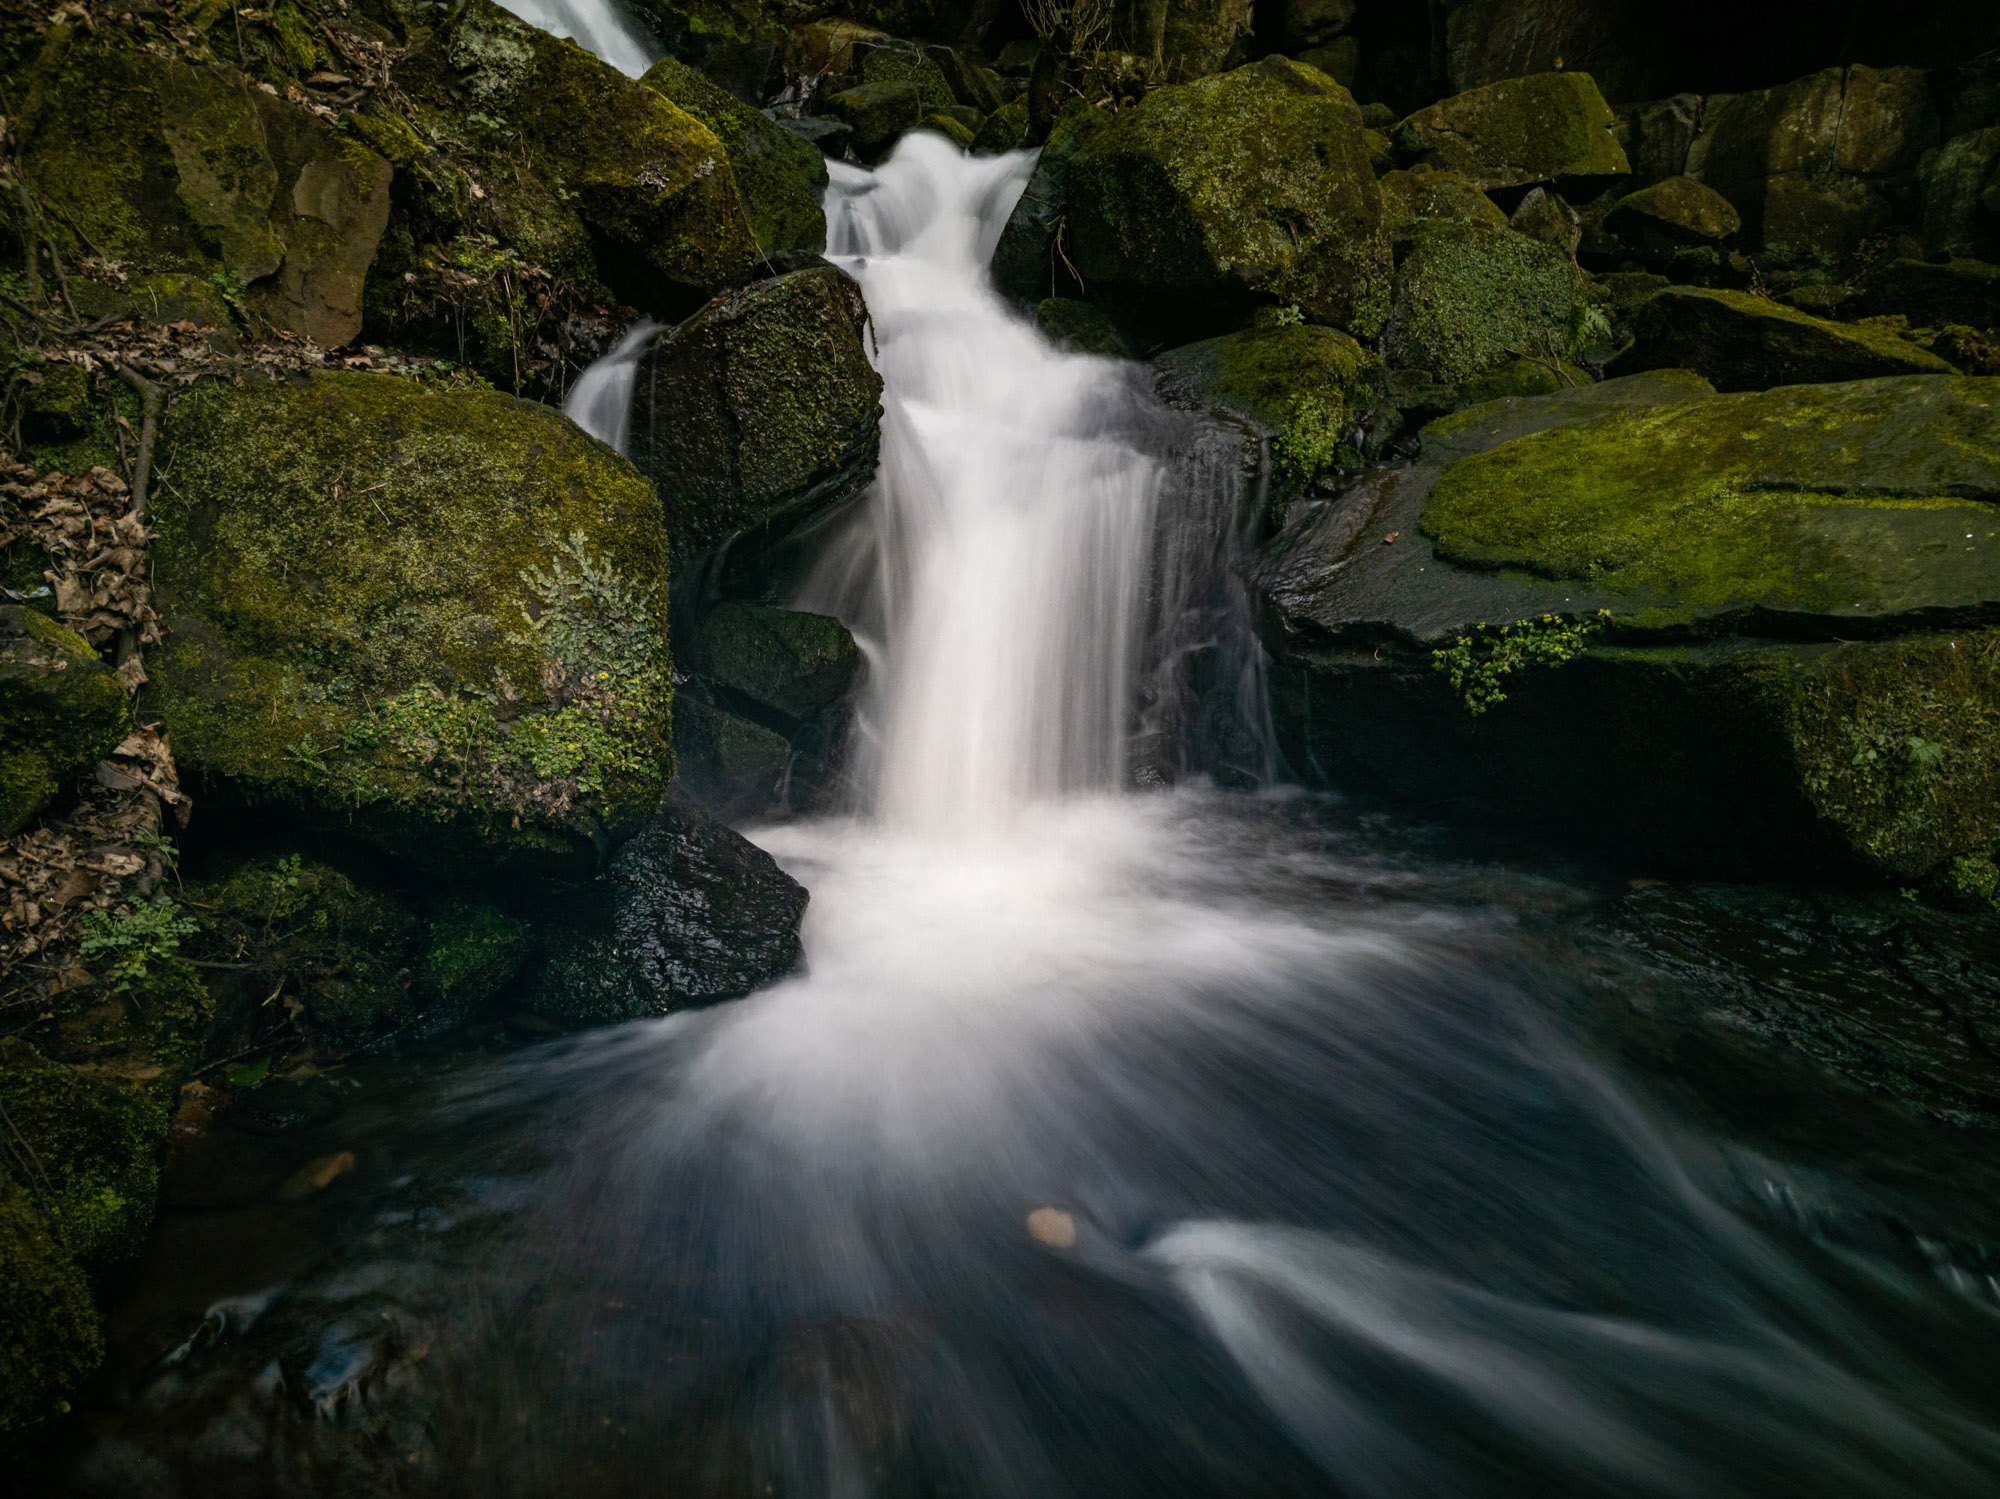
Using a 10-stop ND filter with the smartphone attached to a tripod allowed for a one-second exposure to capture blurred water. This produces a much more impressive result that looks more like it was taken with a DSLR or mirrorless camera.
Further reading on lens filters:
Learn more on how to use lens filters in your photography with our in-depth guide.
And here are the steps on how you can achieve this result. The long-exposure settings on your smartphone it can usually be found within the camera app, but if you're unsure, consult the instruction guides. The phone used for this example is an Android device captured using the cameras 'Pro' mode which allows for long exposure settings.
1 Camera settings
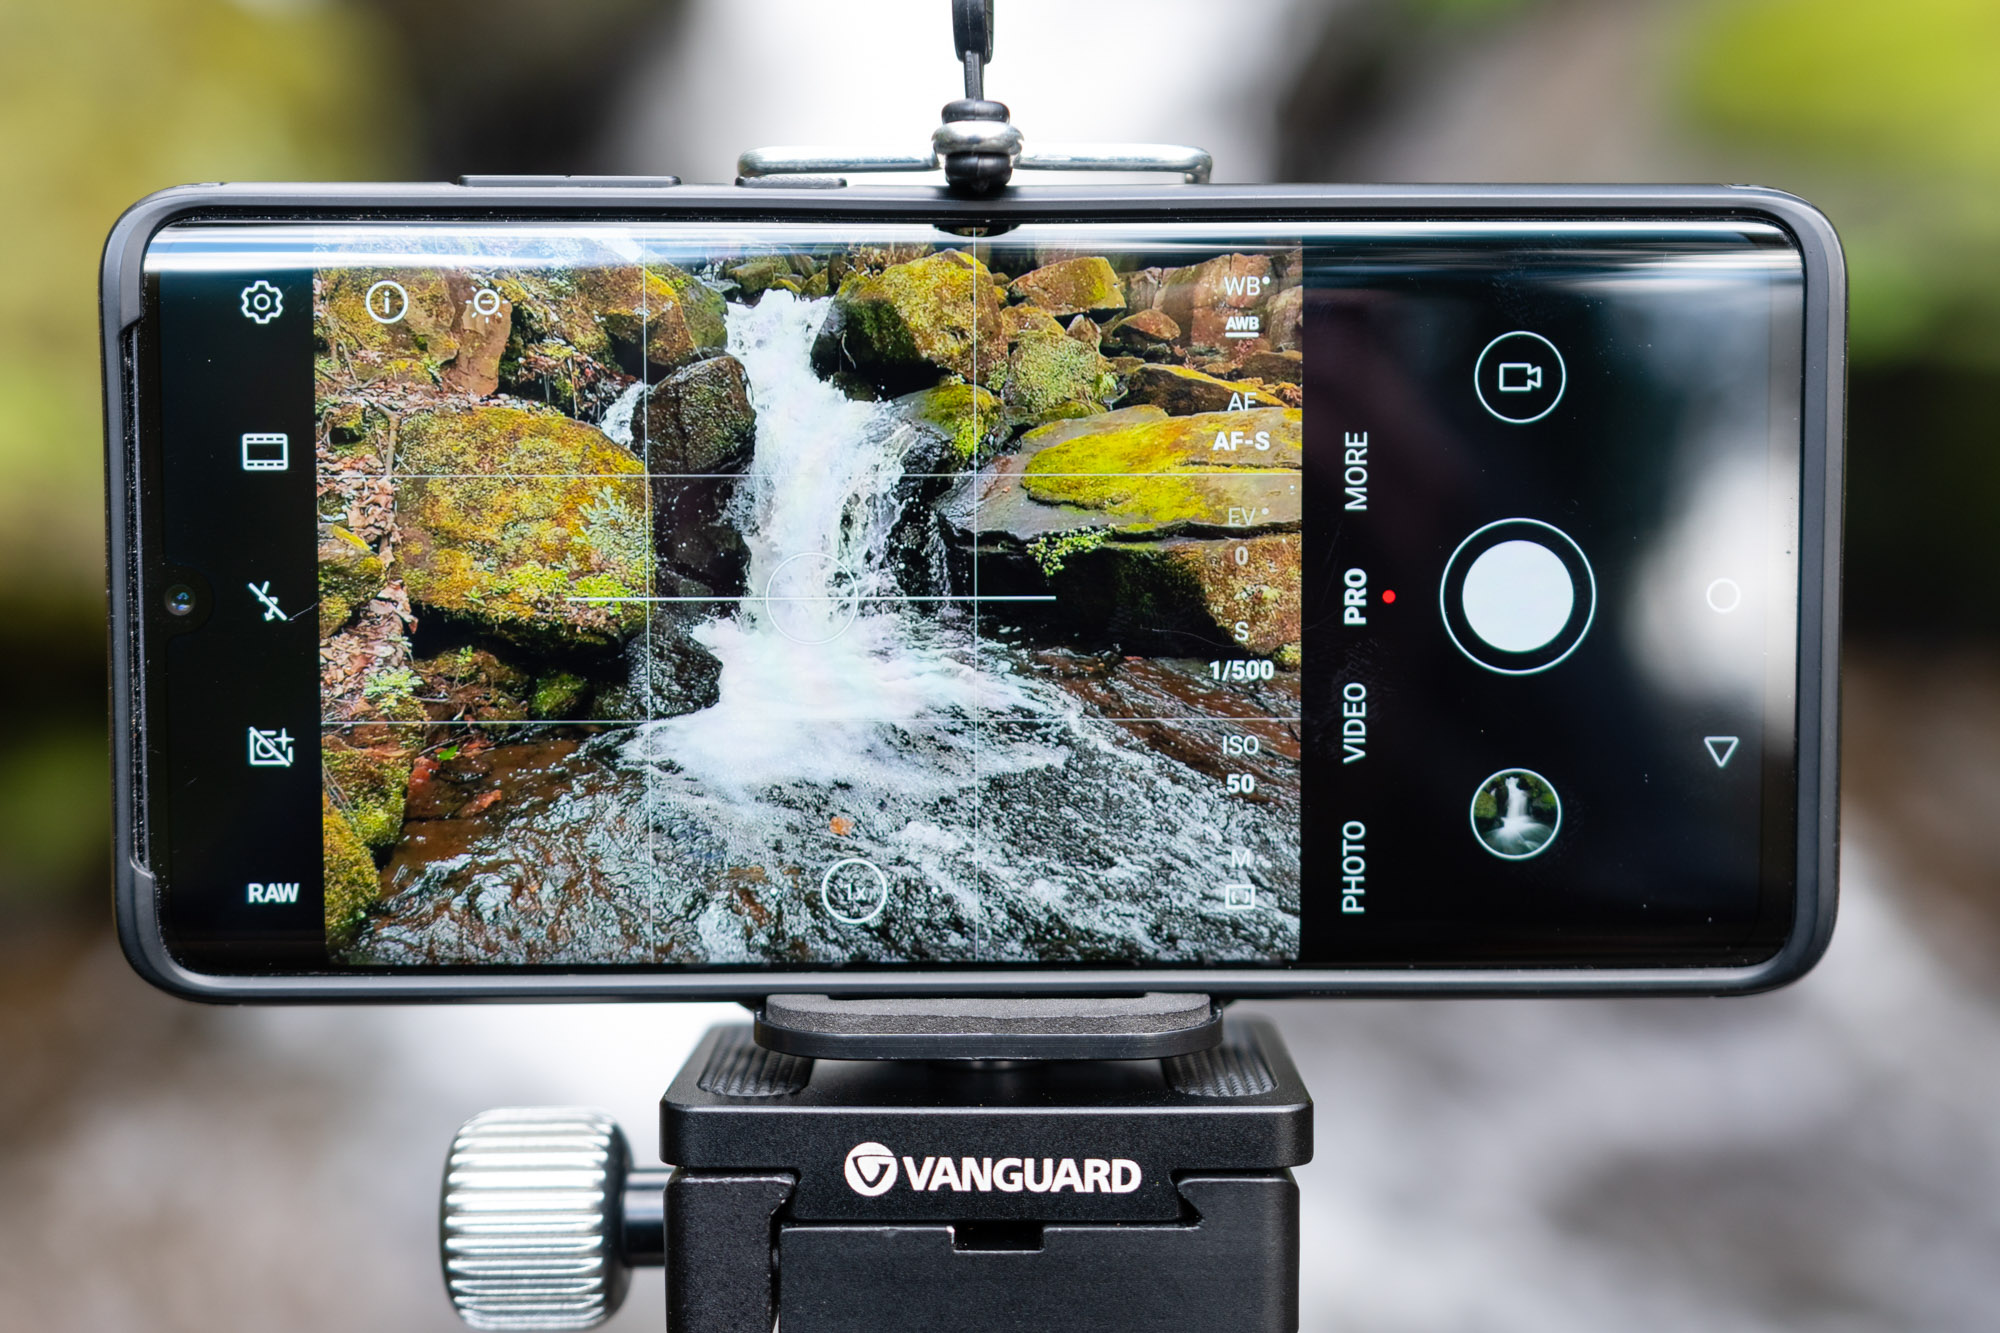
Attach your smartphone to a tripod or mini-tripod using a phone mount to hold it securely. Set your phone to manual or pro mode so you can control all settings (except for aperture). Set ISO to 50 if available or 100 if not, White Balance to Auto and at this stage set the shutter speed so the on-screen image is correctly exposed so you can compose the shot.
2 Set shutter speed
Access the camera settings and turn on the self-timer with a two or five-second delay. This will help to avoid camera shake when releasing the shutter. Next, set the shutter speed to one second which will make the on-screen image too bright; once a 10-stop ND filter is held in front of the lens during the exposure the resulting image will be correctly exposed.
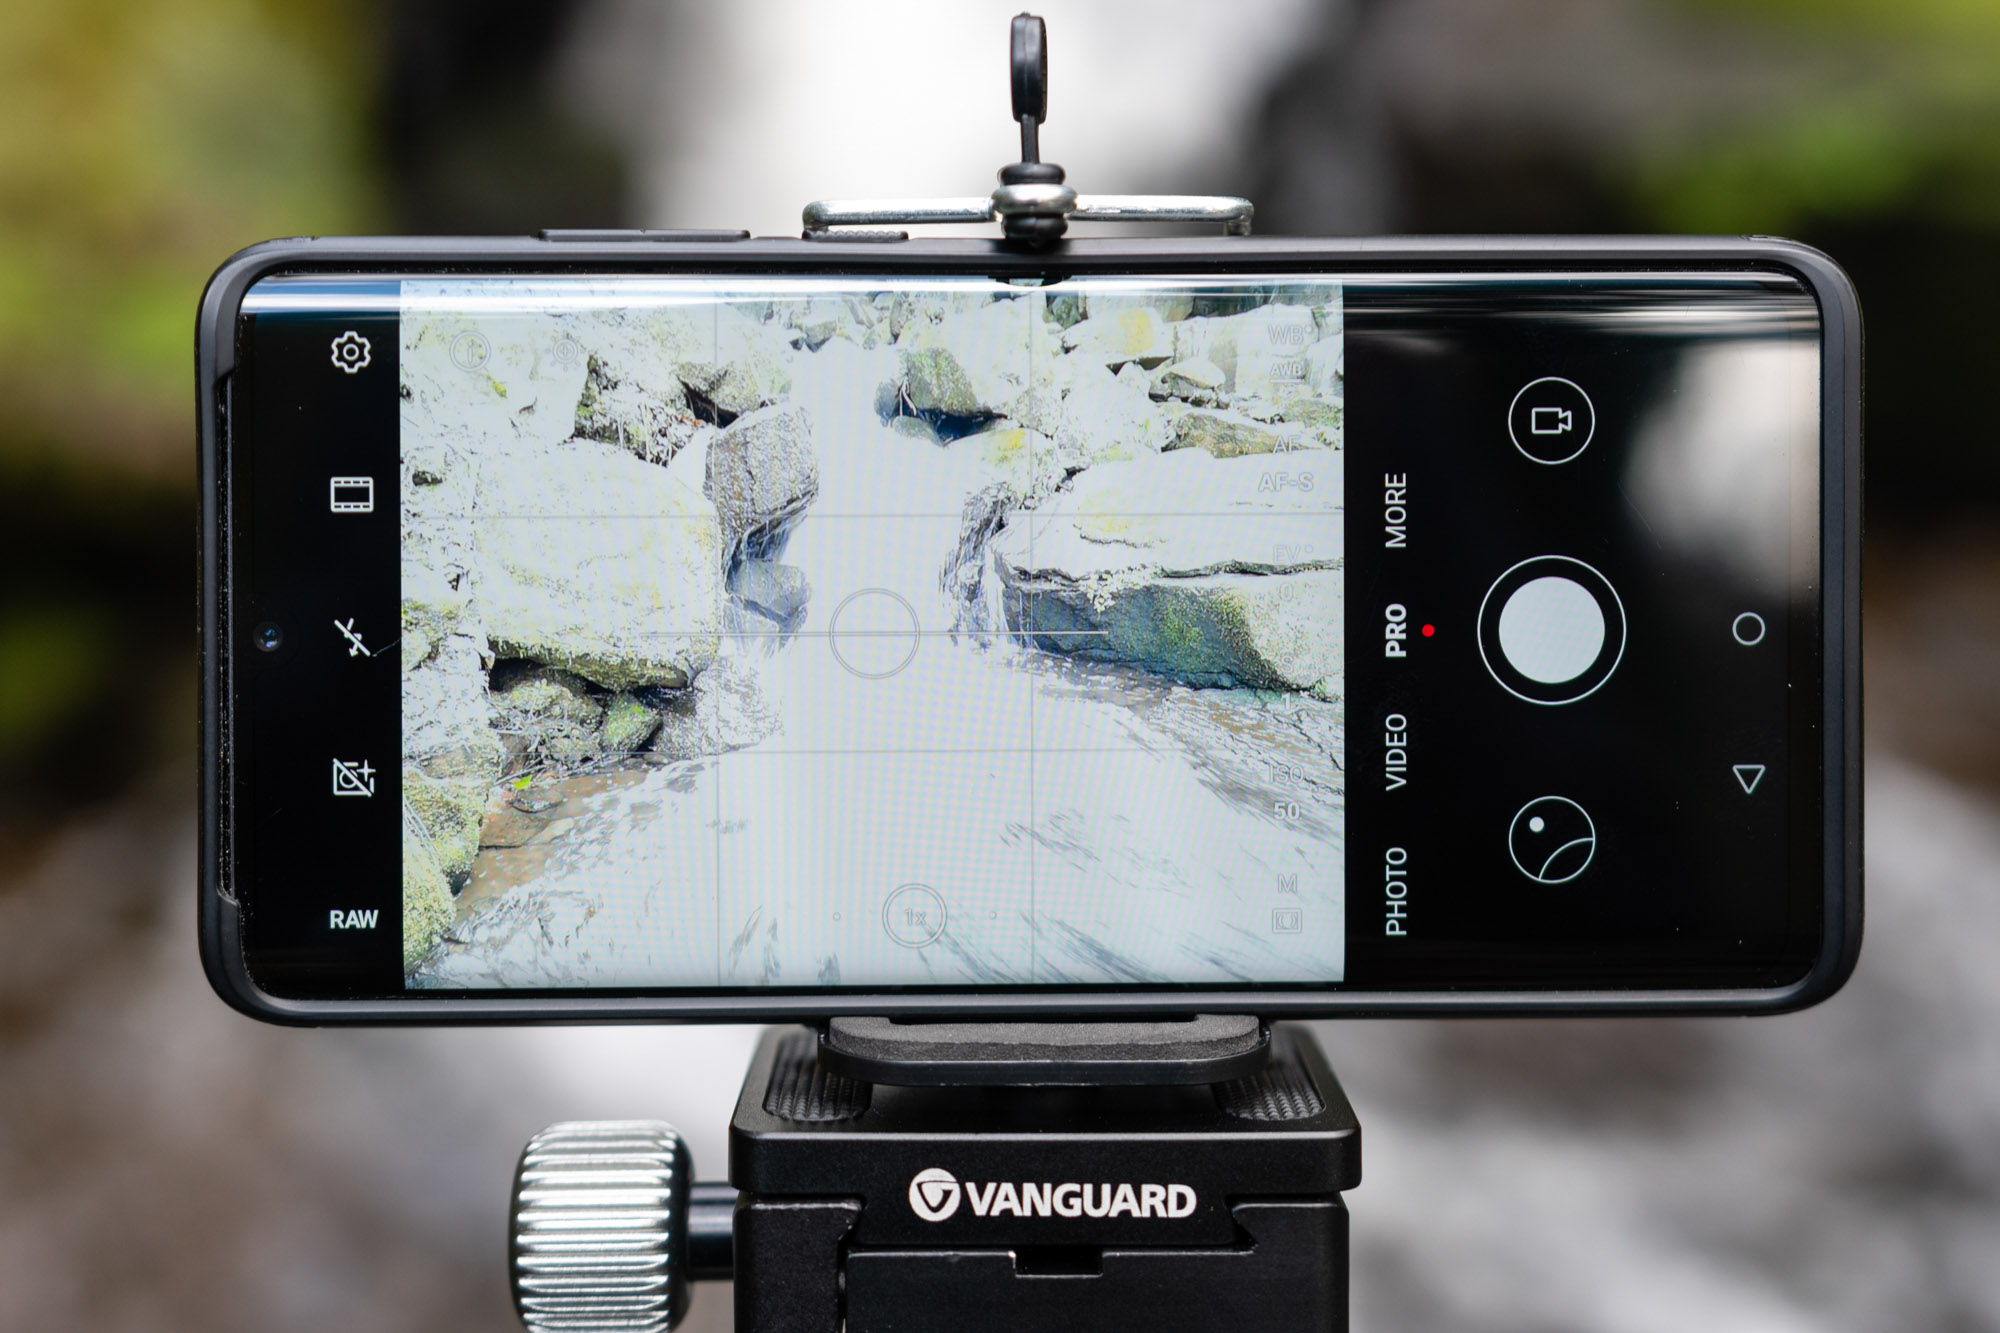
3 Take your shot
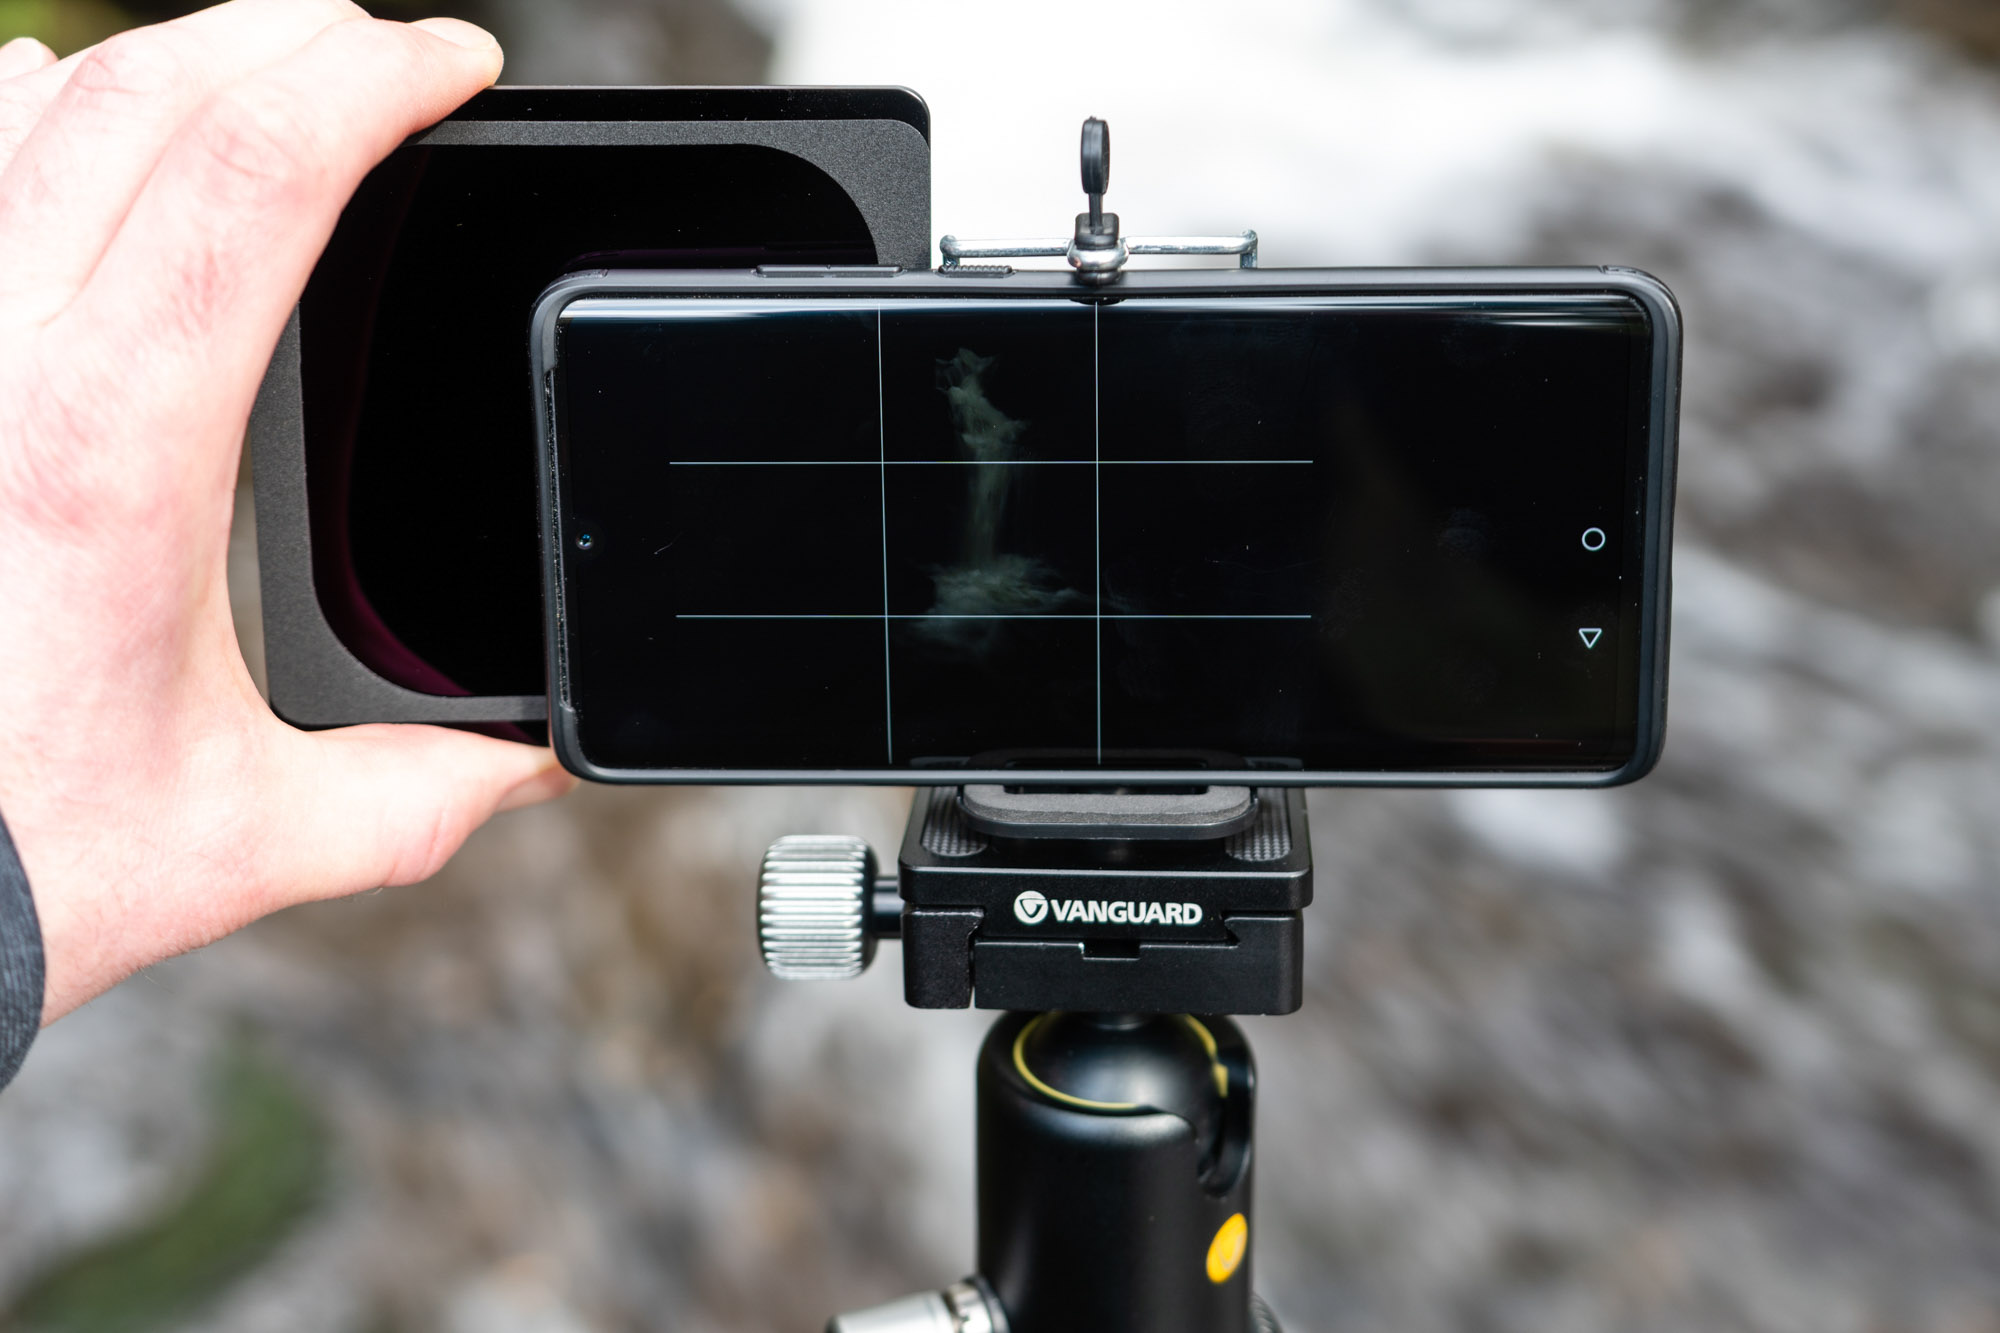
Hold either a circular or drop-in 10-stop ND filter close to the smartphone lens and press the shutter button. Most smartphone cameras count down when set to self-timer so you’ll know when the exposure is taking place. Review the image in the phone image gallery and if it’s too dark lengthen the exposure, or if it’s too light reduce the exposure time.
4 Check the histogram
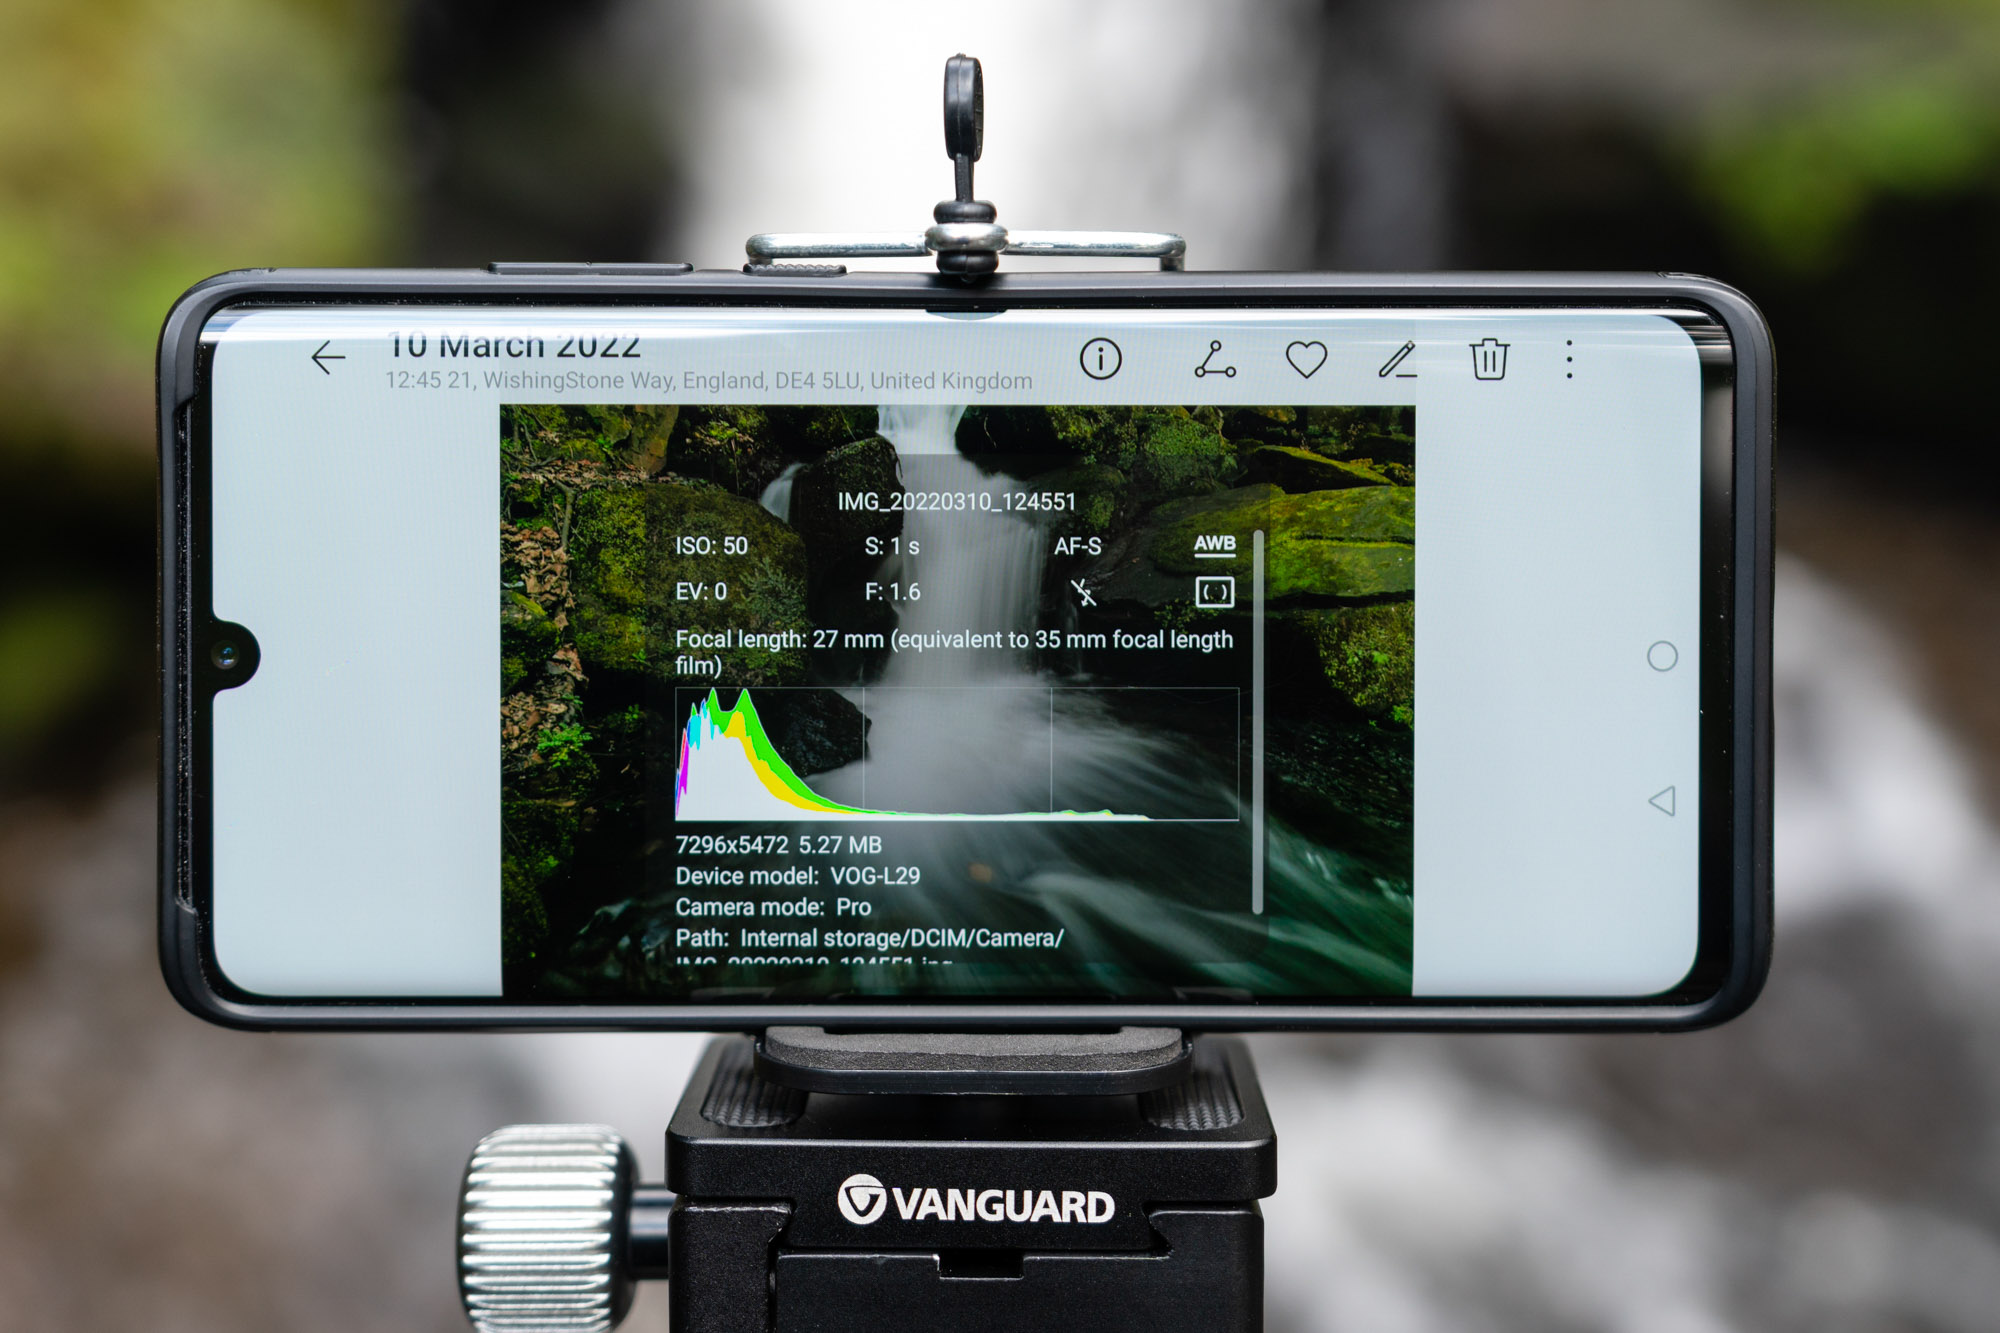
Once happy with the exposure, open the image in the gallery again and click on the info button to view the image info, which includes the histogram. One of the main problems when shooting flowing water is blown highlights, so make sure that the histogram isn’t touching the right side of the box. In this image, the shadows have clipped slightly but the highlights are perfect.
Tip:
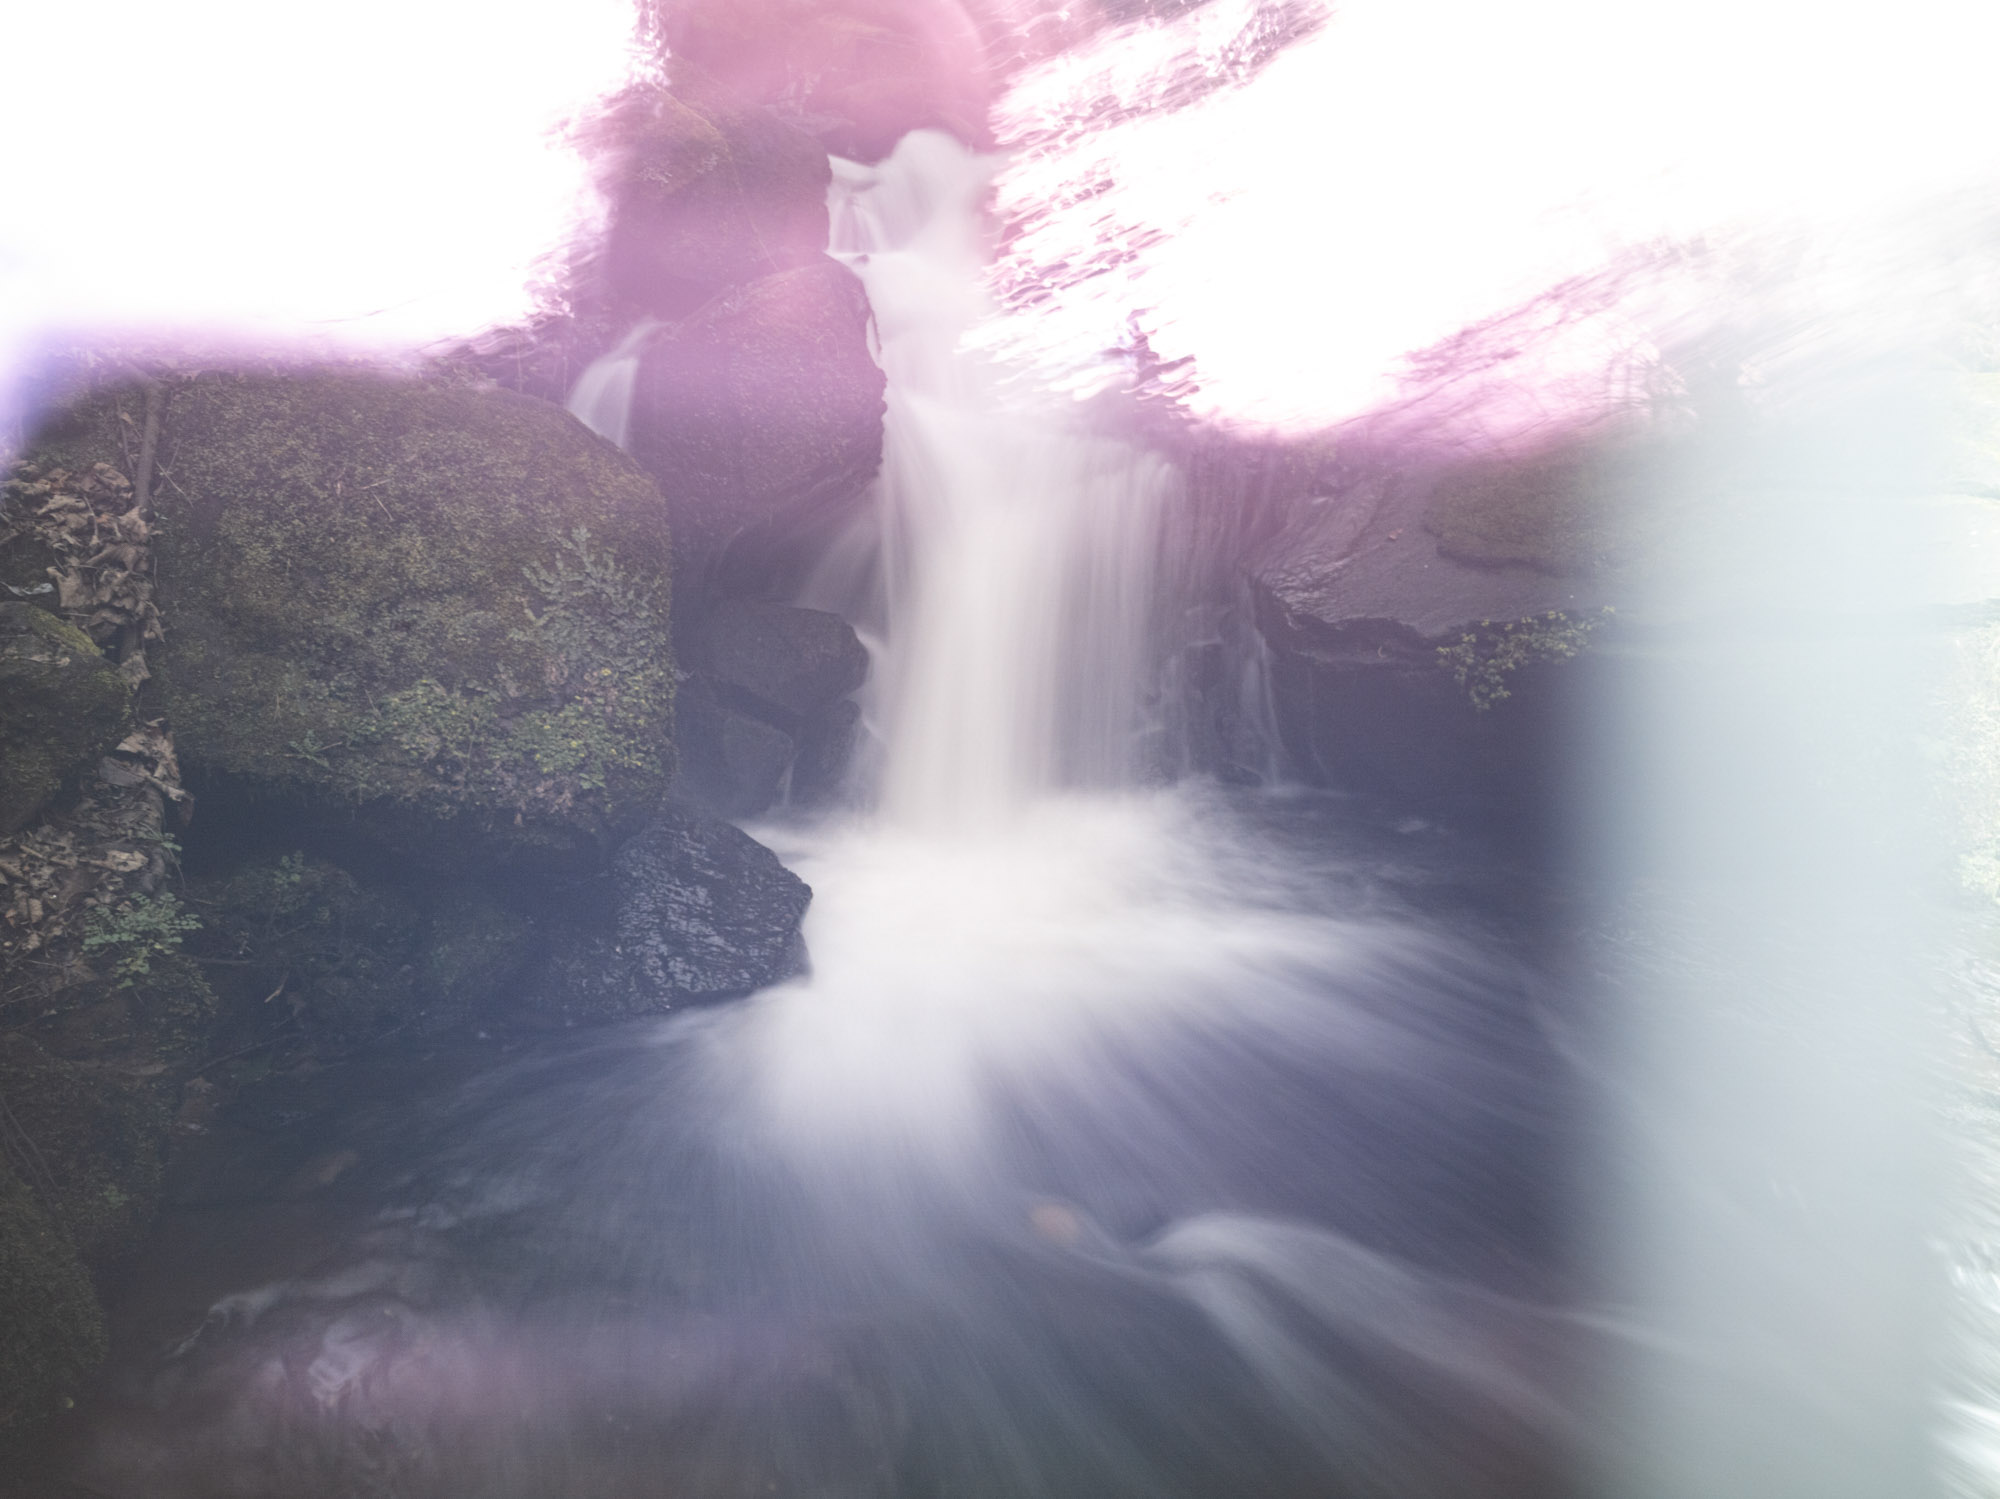
When holding a 10-stop ND filter in front of your smartphone camera lens, make sure that you’re holding it as close to the lens as possible without the two touching to avoid the risk of scratching the filter. Holding the filter too far away at best creates haze and a huge drop in contrast, but at worse, it will reflect light onto the lens and create an unattractive flare alongside the haze like in the image above.
Further smartphone photography guides:
- 5 apps for all photographers
- How to use your smartphone to take incredible photos through a telescope
- Tips for taking better photos with your smartphone
- A beginner's guide to AI and smartphone photography

James is a freelance photographer and journalist producing content for photography magazines and websites and is a former deputy editor of Practical Photography magazine. He’s also the author of The Digital Darkroom: The Definitive Guide to Photo Editing.
View all articles

