With your smartphone, you’ve got a wonderful, easy access camera in your pocket that's always on hand - to help you get the most out of taking photos on your smartphone, here are our top tips
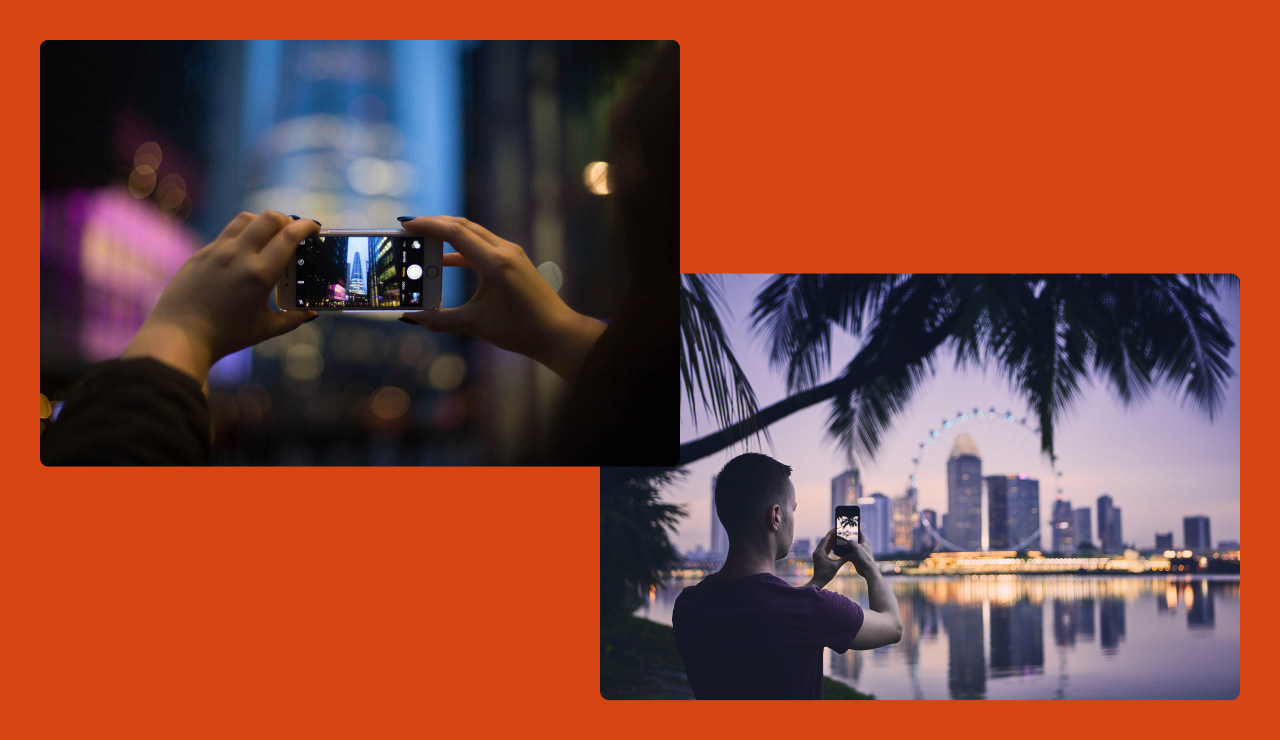
1 Hold your phone in the horizontal position
Most people instinctively hold their phones upright but it’s very difficult to take a good shot in portrait format, so hold your phone in the horizontal position to start with.

Editor's tip:
Also make sure the phone lens is also clean from pocket fluff... an easy way to ruin an otherwise brilliant shot!
2 Observe light conditions and the weather
Light is your raw essential tool for taking pictures.
Observe the weather and time of day, and avoid taking pictures directly facing the sun. The extreme times of daylight, also known as the 'Blue Hour' (twilight) and 'Golden Hour' (sunrise and sunset) always present good opportunities for capturing scenes in atmospheric light conditions.
Weather also makes a huge difference - generally the better the weather, the more flexibility you will have for lighting conditions for your shot. This isn’t to say rainy or foggy days can’t produce good results, but if you’re starting out with a basic phone camera - it’s best to look out for a nice day!

3 Take advantage of your camera's grid tool
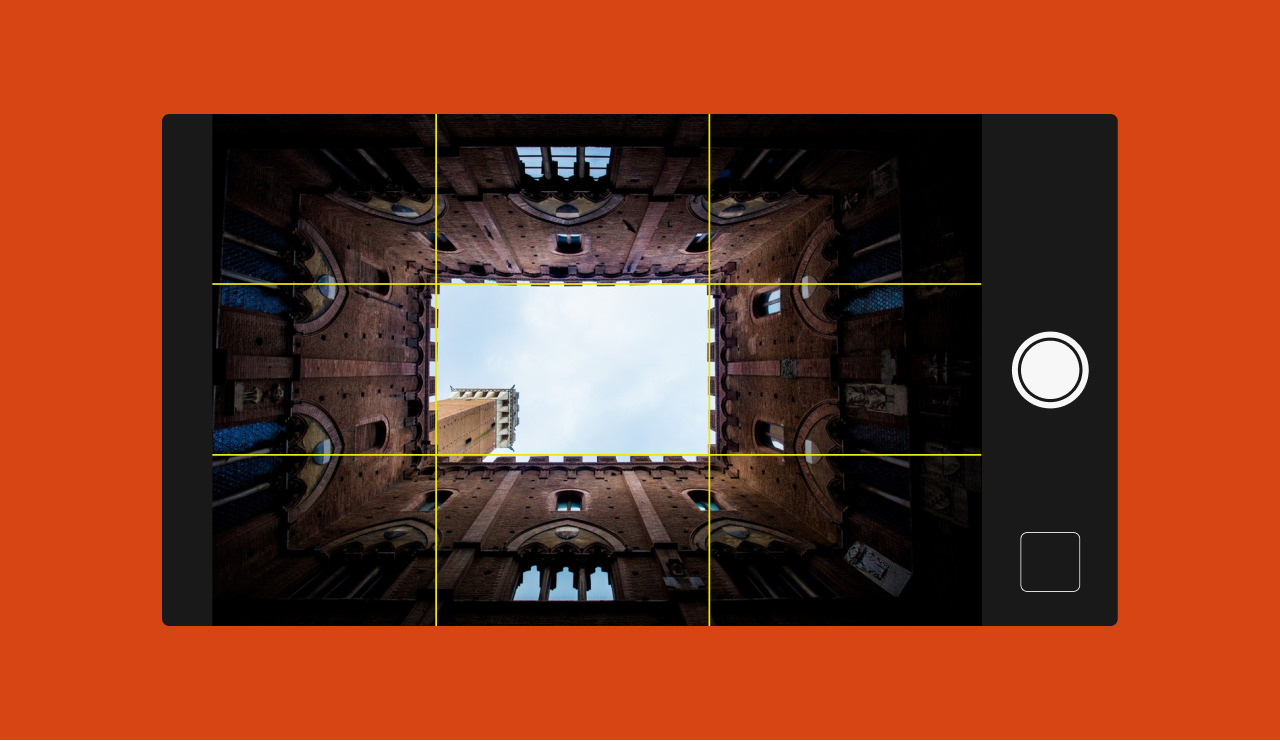
Go to your phone's camera settings and activate the grid tool. This produces a series of lines that overlay on your camera and helps for a number of reasons. Primarily, it gives you a sense of balance in your image.
If you’re taking pictures of buildings, horizons or a landscape, you can line up objects on the grid. It’s also good for taking pictures of people, as you can align eyes with lines on the grid, giving a good sense of balance to the frame.

4 Use your camera's focus feature
Almost all phone cameras enable you to select where you want the focus to be placed on your image by touching on the screen. Always use the focus feature to ensure your image won't be blurry or out of focus. And so that your camera can adapt the exposure settings to ensure a balanced image.
You also need to be as still as possible when taking a picture. Try balancing against a solid object, it could be a wall or maybe a post. By doing this, you’re creating a much better chance of getting a sharper and solid image, avoiding any camera shake or blurring from your natural body reflex. (People often don’t realise how much involuntary movement occurs when taking a picture).

5 Avoid using digital zoom
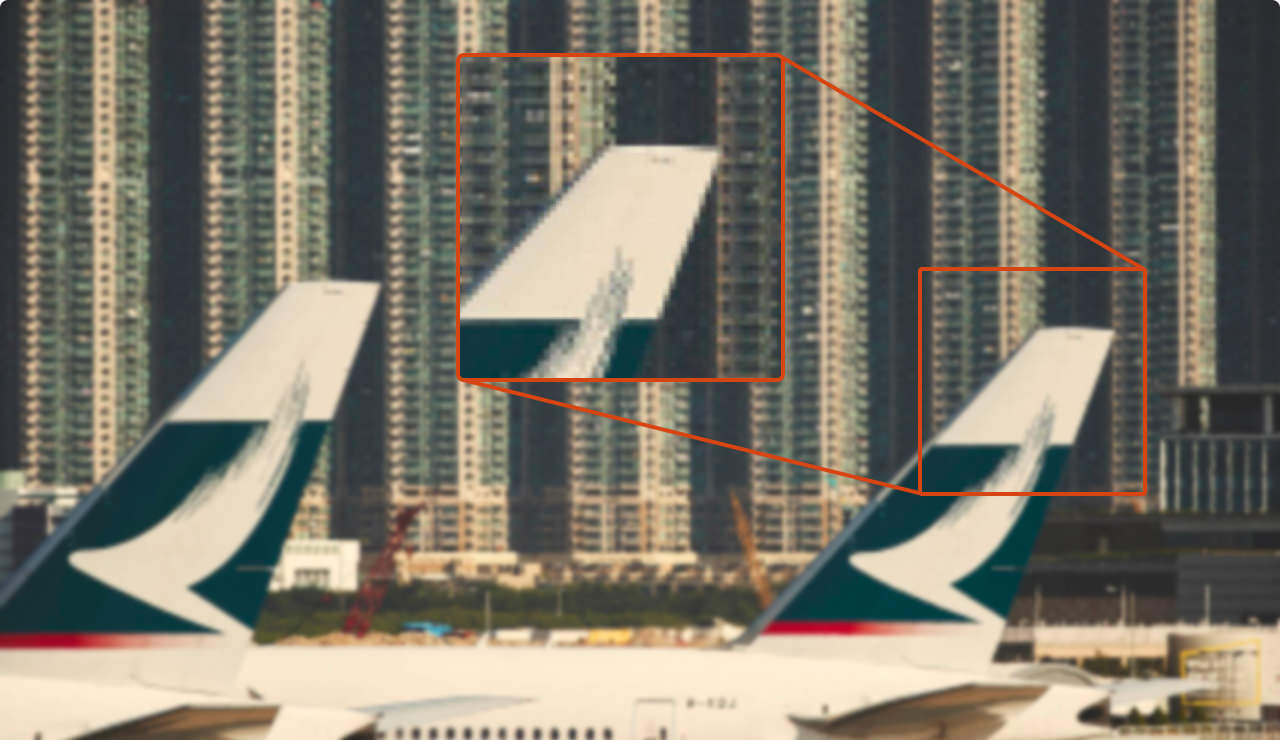
Whilst the majority of phone cameras have zoom capability, it's best to avoid this when taking images unless it's a true optical zoom (where the scene is enlarged by the moving elements of the lens). The zoom on most phone cameras isn't an optical zoom, rather a digital zoom, where the image is artificially enlarged from the original scene by interpolation (increasing the true size of the image) and cropping. This results in a blurry, undefined and pixellated image.
However, some newer models do now offer a true optical zoom, such as the iPhoneX and Pixel 4... Check out your phone's manual and see what it is capable of.

And lastly... don't forget to experiment!
Play with different filters to tell your story and try shooting in black and white... The more you experiment, the more interesting your photography will become!


