


Learn the technique of exposing to the right to perfect snow exposures along with editing guidance to get crisp, clear scenes

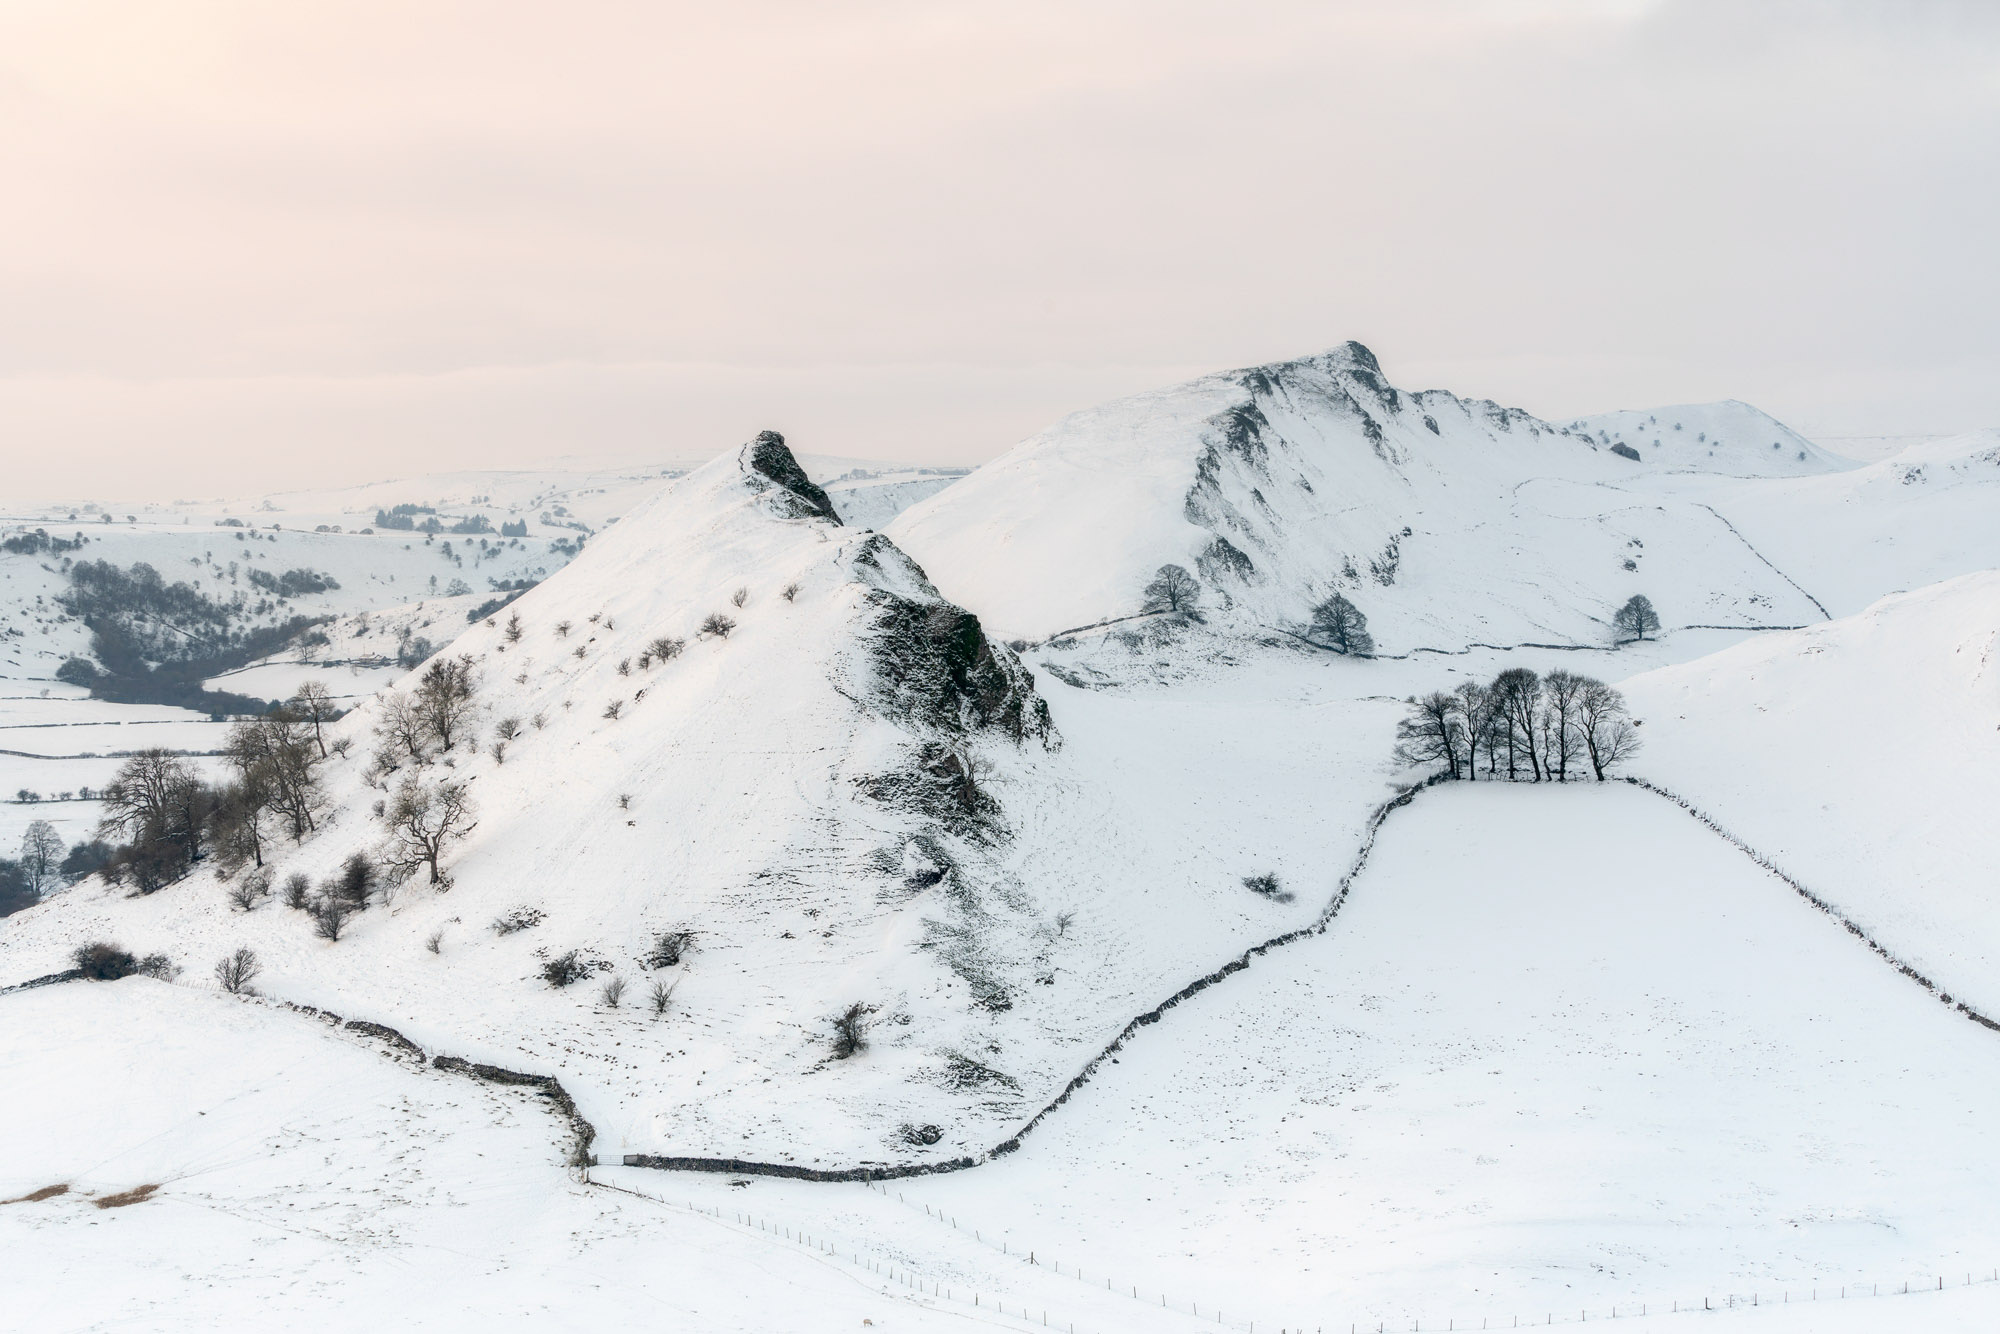
Winter is a wonderful season for landscape photographers. Not only are sunrise and sunset times at much more forgiving times than in the summer months, when the temperature drops and the conditions are just right, the landscape can be blanketed with a layer of snow that completely transforms the scene.
Capturing snow-covered landscapes can be an absolute joy, but it can also be a challenge when it comes to exposure and white balance so we’ll take a close look at how to deal with these at the shooting and editing stages. With the right basic skills, you can guarantee that your winter landscapes are captured and edited correctly.
The problem with camera light meters is that they see everything as mid-tone grey. For instance, if you fill the frame and take a photo of three pieces of paper – one white, one black and one mid-tone grey using the metered settings in manual or one of the priority shooting modes, all three will be captured grey and look almost identical.
With this knowledge in the back of your mind, you can quickly and easily anticipate when you’ll need to use exposure compensation to obtain correct exposure. And for snow-covered landscapes, depending on the scene, you’ll need to overexpose your shots anywhere between one and two stops. But most commonly, the required overexposure will fall closest to two stops.
So, let’s take a look at how to shoot and edit snowy landscapes for the most natural result possible…

How to shoot snow scenes
1 Set up your camera

When shooting snow-covered scenes, everything in terms of set-up is the same as any other landscape. You’ll likely need a tripod to support the camera during exposures that are typically too long to handhold the camera, and filters can be used to help maintain and control detail. Here, a polarising filter was used to help maintain detail on the sunlit parts of the snow, while a medium ND graduated filter was used to maintain sky detail.
Editor's note:
Learn more about ND graduated filters and other types of filters with our dedicated guide here.
2 Camera settings
Compose your image and set the camera to aperture priority mode at f/11 with ISO at 100. Make the live histogram visible in Live View because you’ll need to use this in the next step to assess how much overexposure is required using exposure compensation. If you take your shots at the metered settings, you’ll end up with an exposure that’s far too dark like the one above, which is how this scene was captured with no overexposure applied.
3 Use exposure compensation
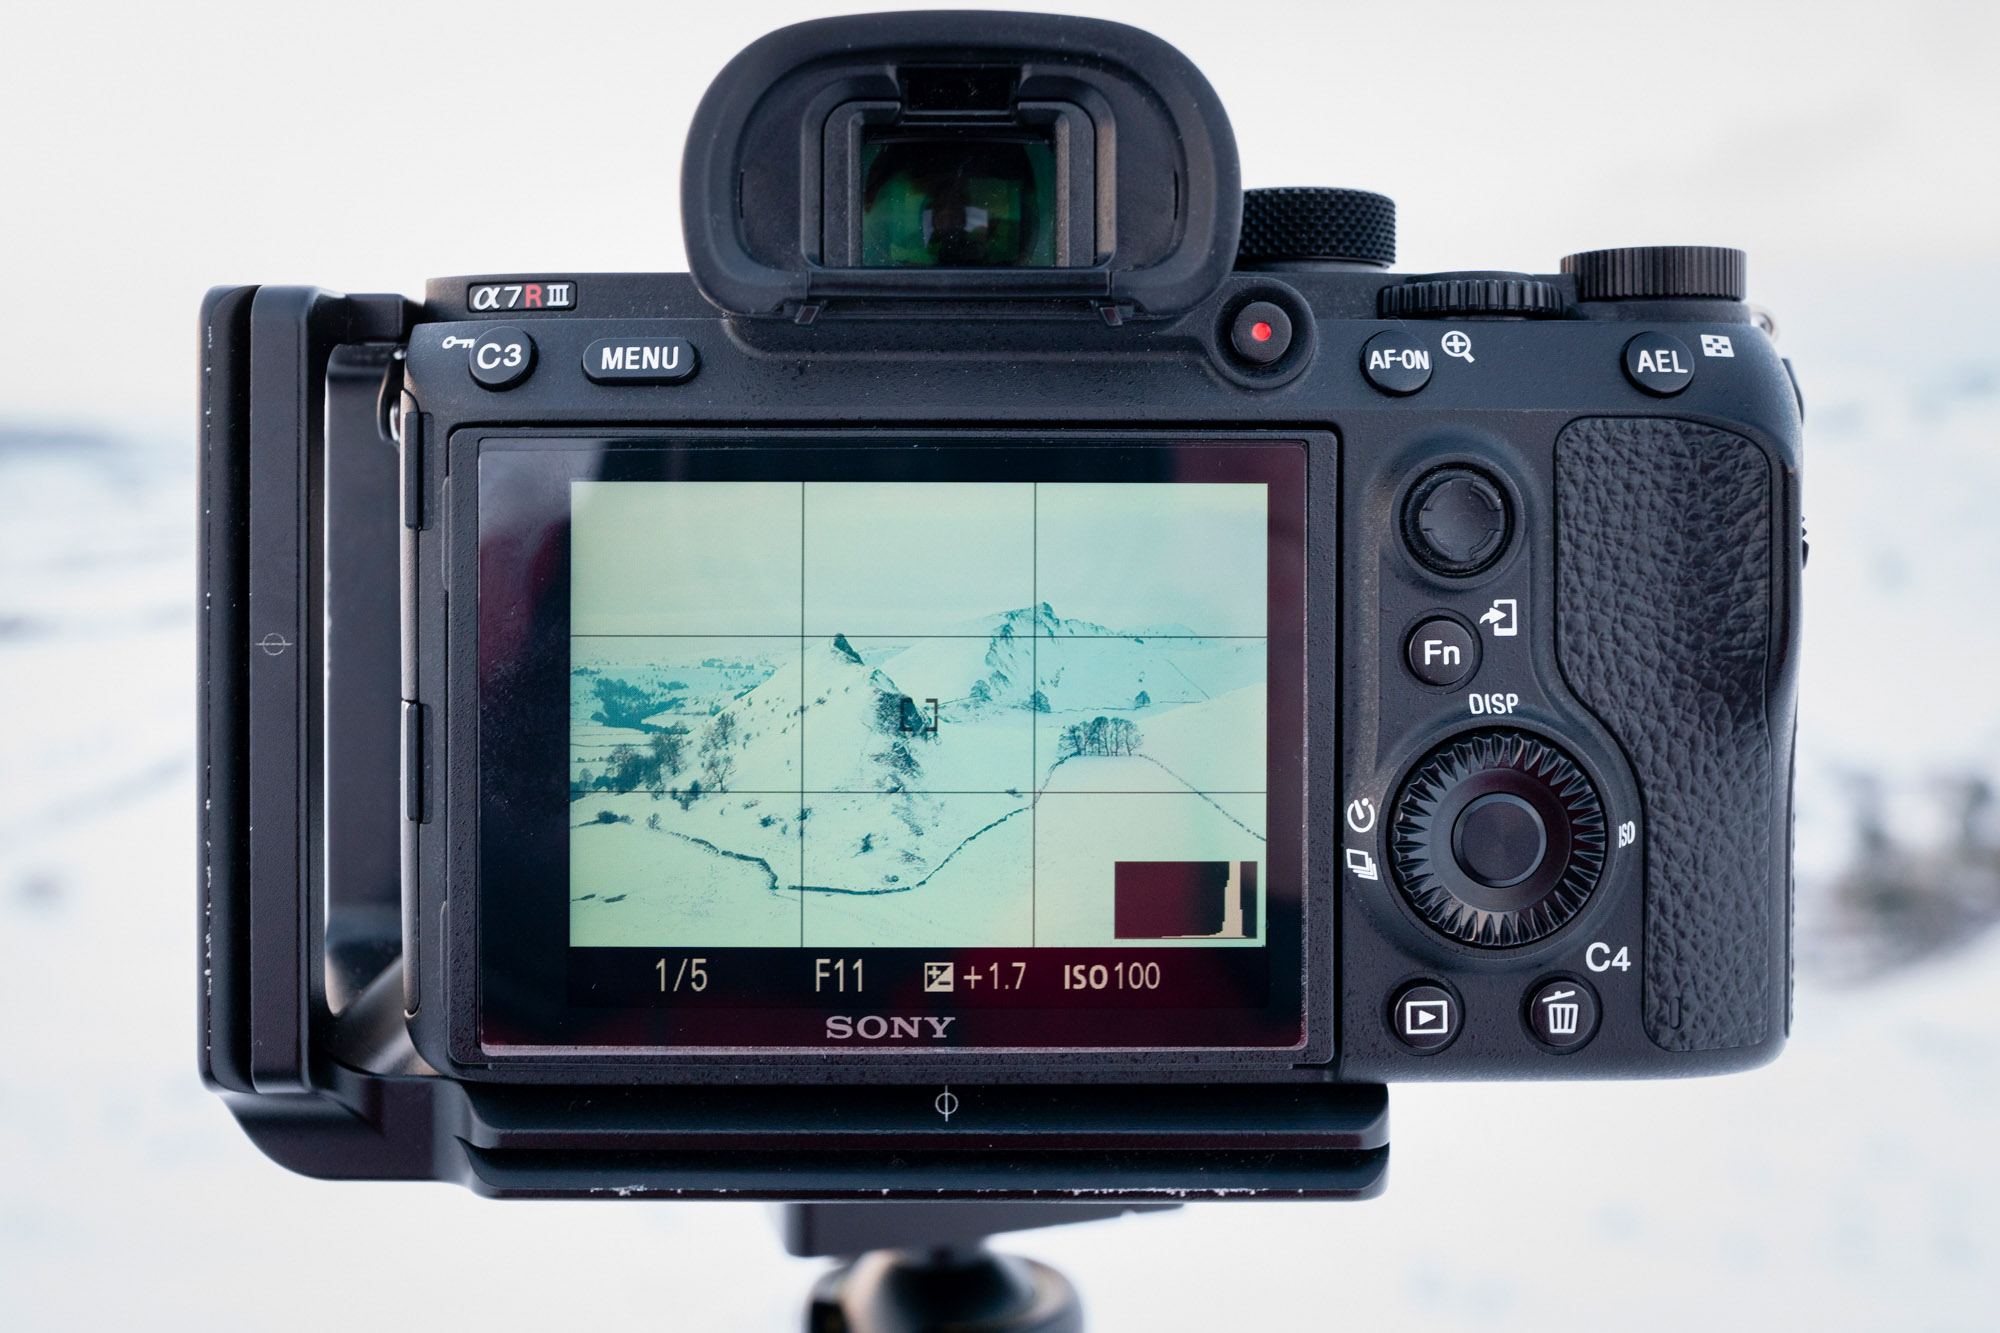
Exposure compensation can be added whether you’re shooting in aperture priority or manual mode. Use the histogram as a guide and apply overexposure until the graph is as far to the right as possible without touching the side. If the graph touches the side, you’ve blown the highlights. To do this, set a slower shutter speed if shooting in manual, or apply between +1.0 and +2.0 of exposure compensation using the dial or button.
How to edit snow scenes
1 Adjust White Balance
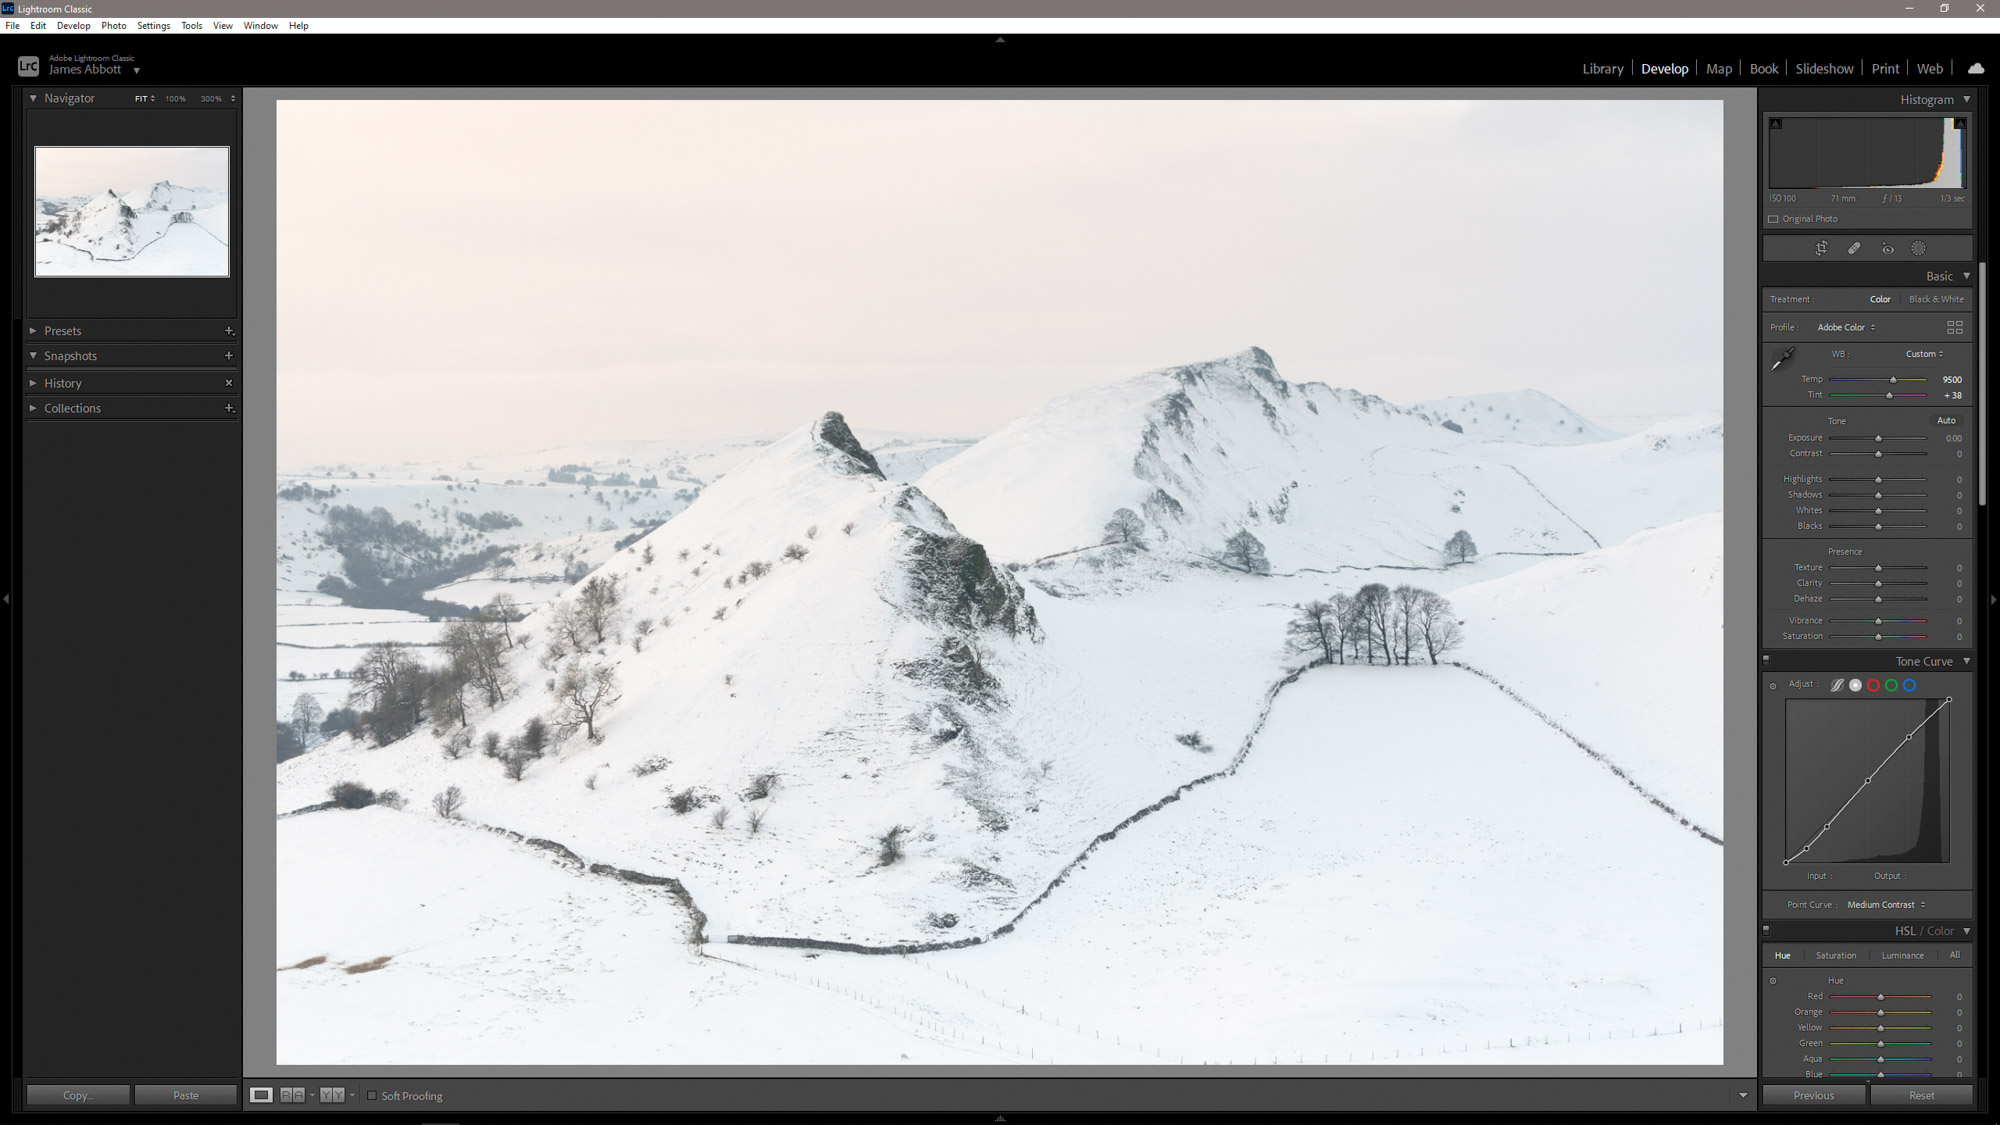
Adjusting White Balance is essential for snow shots, so click on the White Balance Selector, which is the eyedropper icon to the left of the Temp and Tint sliders in Lightroom. Next, left mouse click on a section of snow and hopefully, this will fix the temperature imbalance. If not click again on other areas until the colour balance looks correct. For this shot, this is exactly how the White Balance was corrected, although Temp was manually increased from 9400 to 9500.
2 Control brightness and detail

The scene here looked a little too light, so Exposure was reduced to -0.10. Next I increased the Whites slider holding down the Alt/Option key to show if detail was being lost. It was then reduced to the desired amount and the same was applied to Blacks. After this, Shadows and Highlights were adjusted by eye until the detail in the scene looked correct before Medium Contrast was added using the Point Curve preset on the Tone Curve.
3 Check image edges
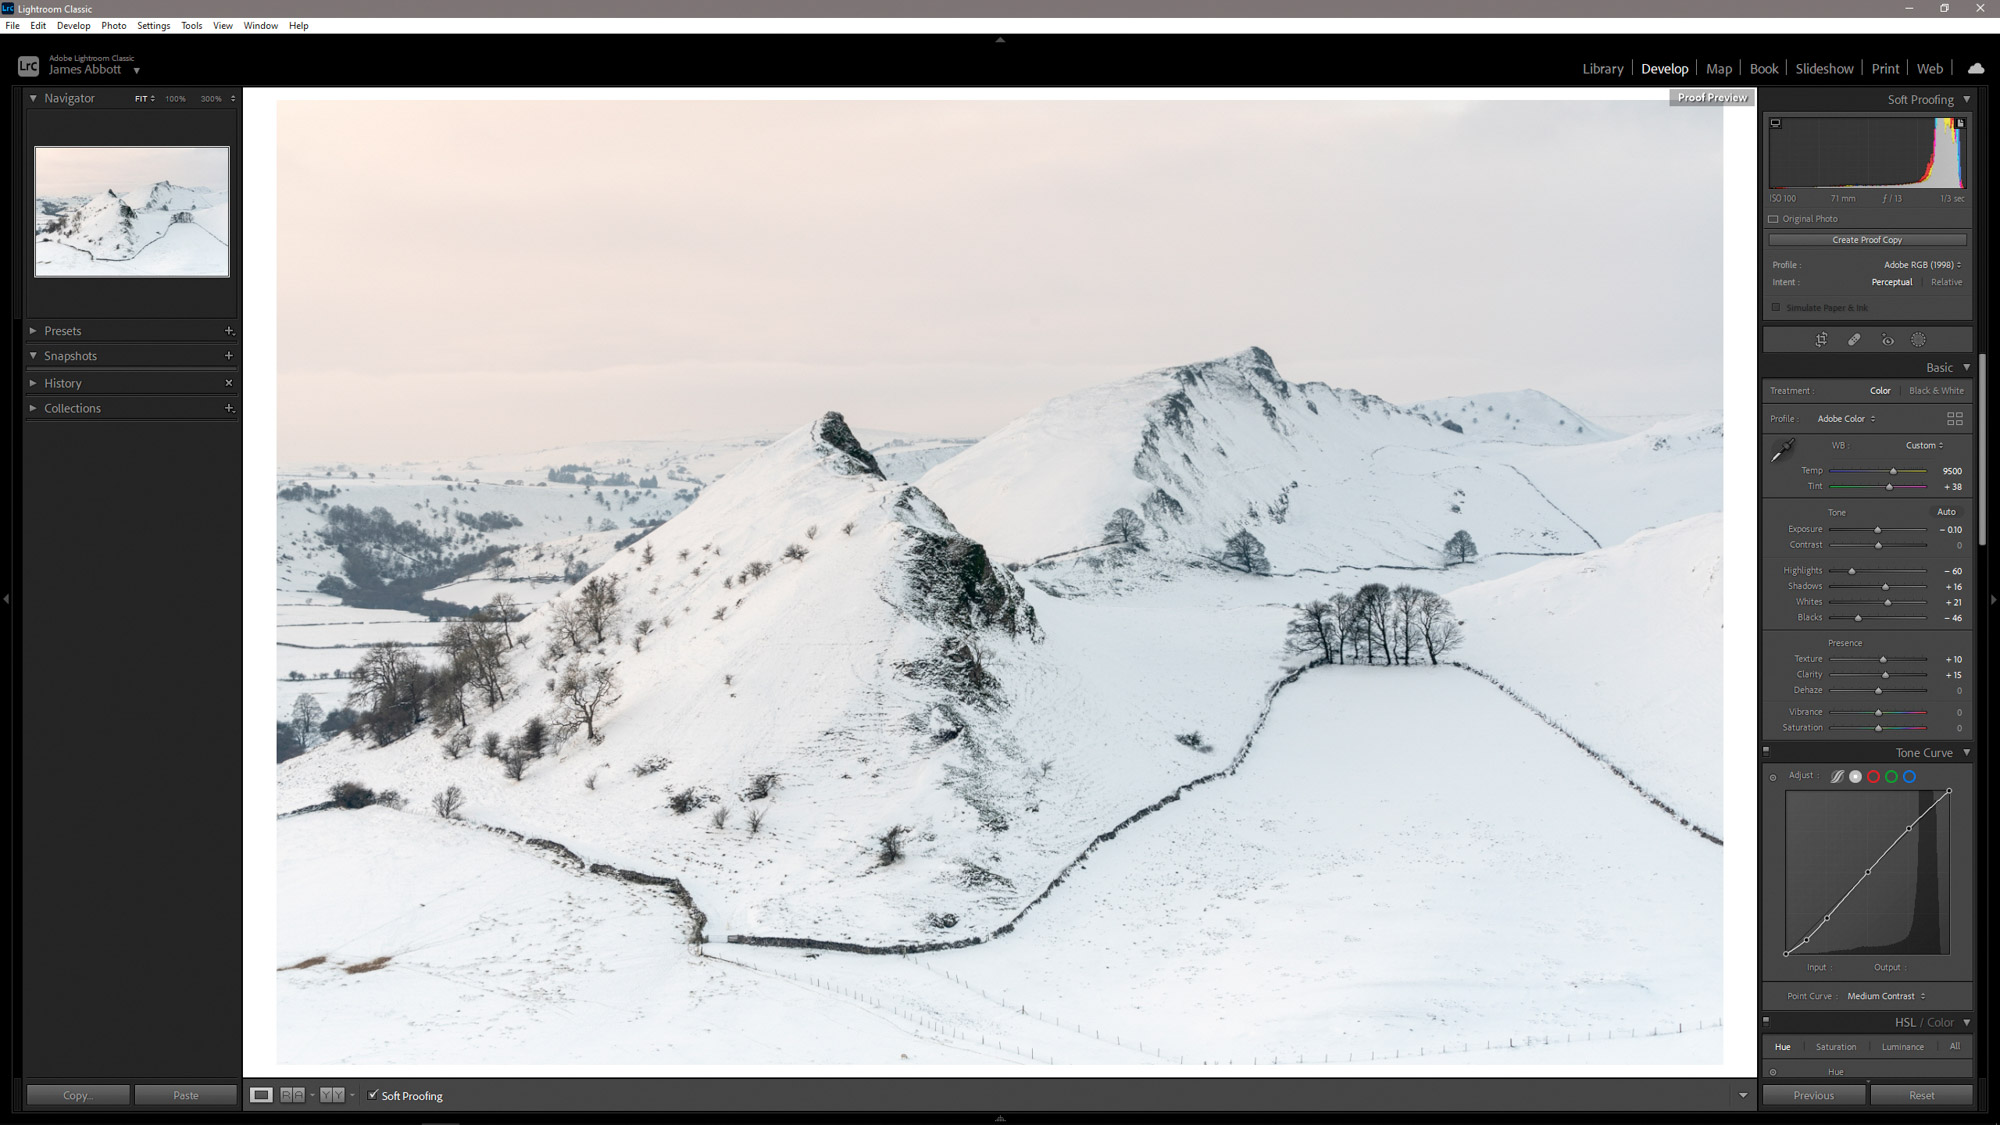
Check the Soft Proofing box at the bottom left of the image window to change the image window background to white. The reason for this is to check that the edges of the image are darker than pure white. If they are, uncheck the Soft Proofing box and Export the image. But if the edges of the image blend to pure white, uncheck the box and use graduated filters on the relevant edges and reduce the Whites by 10-20 to create the image edge.
Tip
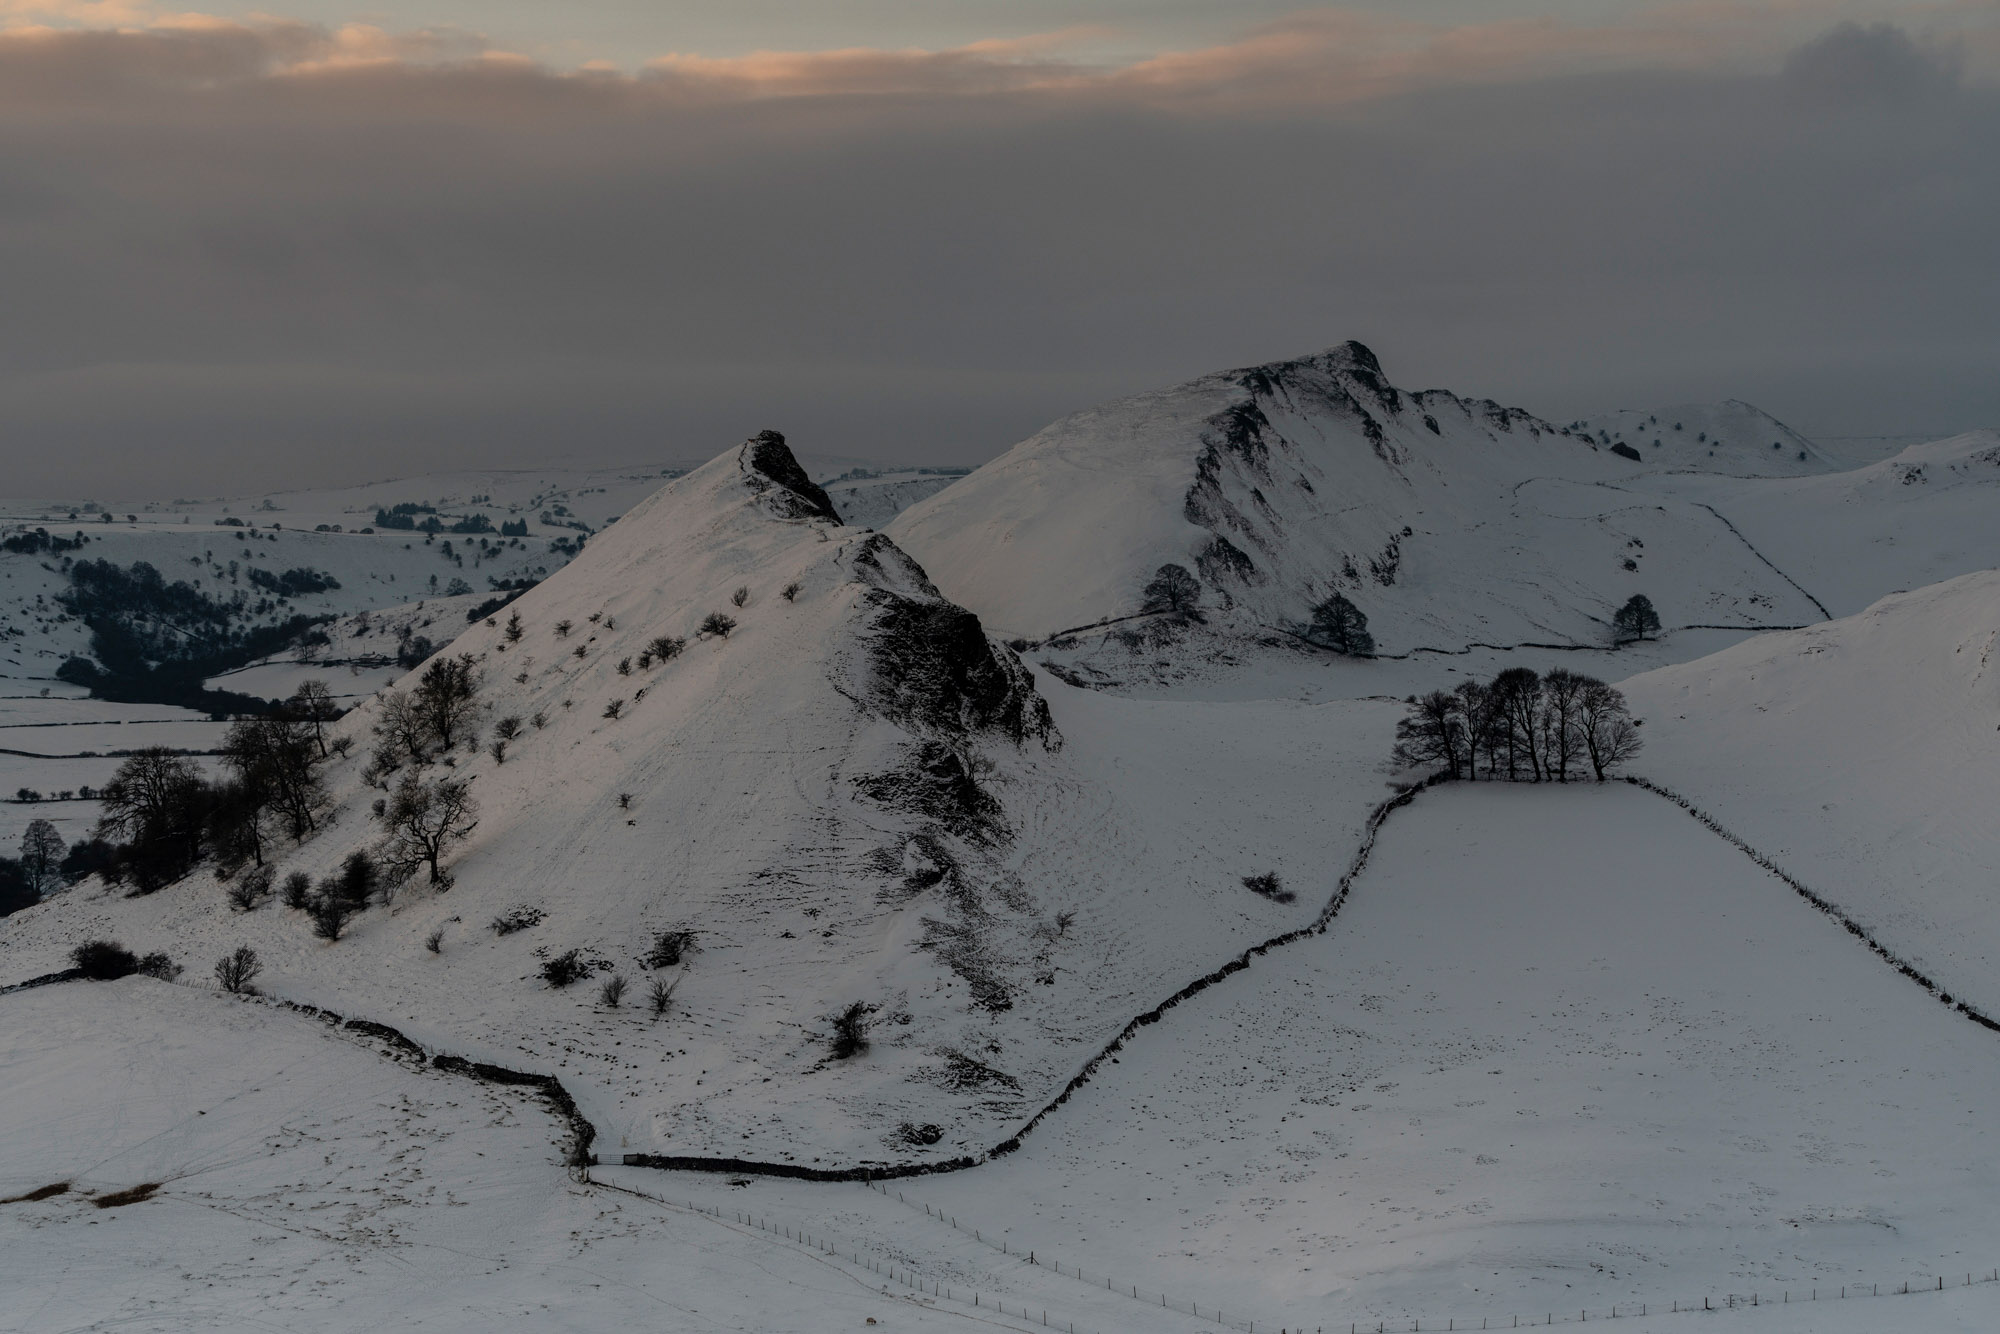
When you’re out shooting at sunrise or sunset it can be tempting to wait until the light is exactly how you would like it to look before you begin shooting. This is a risky strategy at any time of year, but in winter conditions can change in a heartbeat. This image below was taken just 20 minutes after the main shot, and closer to sunset. The problem is that a thick freezing fog began to engulf the scene, blocking the light and obscuring the hills.

The best approach is to shoot images once you’ve set up to capture the light as it changes. Fingers crossed, the planets align and you achieve the results you were hoping for. But if the weather takes a turn for the worse, at least you’ll have other options you can review once you get back home and download your images.
Video tutorial
Follow our walkthrough on how you can adjust White Balance for your winter shots in both Lightroom and Photoshop:

James is a freelance photographer and journalist producing content for photography magazines and websites and is a former deputy editor of Practical Photography magazine. He’s also the author of The Digital Darkroom: The Definitive Guide to Photo Editing.
View all articles

