


Discover a host of Photoshop tips, tricks and techniques for precise cutouts and selections of any object

Photoshop has come a long way in recent years, especially in the ease and speed at which you can make cut-outs and precise selections. Let’s take a look at the top 10 tools and techniques you need to cut out a person, select a sky or target any area in your photos...
1 The Object Selection tool
This intelligent tool lets you select objects simply by clicking on them. It employs artificial intelligence to recognise and determine the edges of the object for you, then shows you what is included with a handy overlay. If it picks up unwanted detail, you can hold Alt and drag a box over the problem area to re-analyse and subtract the portion. Alternatively, Shift-drag a box to add to the selected area. There’s also a handy ‘Show all objects’ button at the top that will isolate every recognisable object in your image, so all you have to do is hover over them.
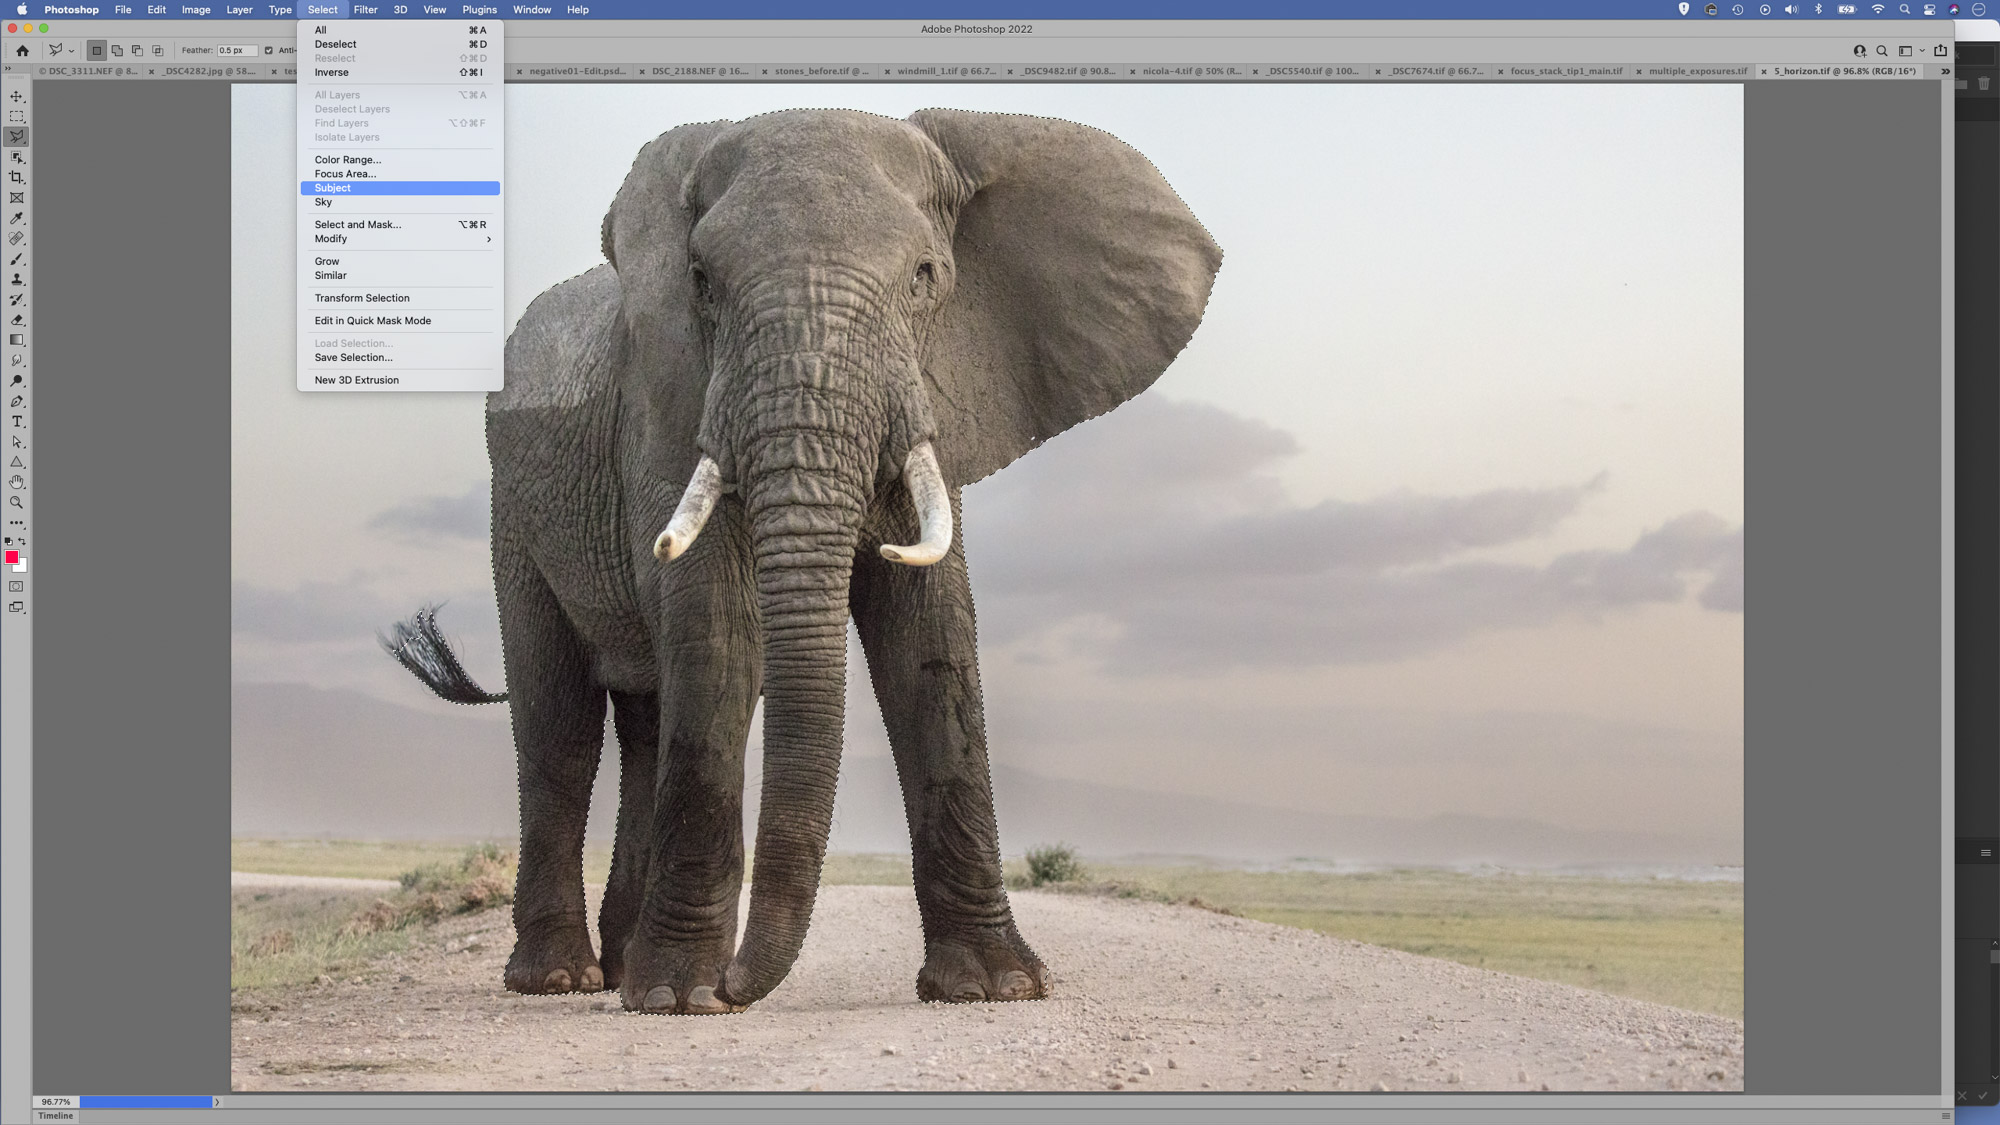
2 Select Subject or Sky
Two of the most useful tools in Photoshop, these recognise either the main subject or the sky in your photo and automatically makes a selection for you. Simply go to Select > Subject or Select Sky. The Subject command is so effective that you should probably start every cut-out in this way. Even if it doesn’t make a perfect selection, it will usually get you most of the way there. If you need to make changes, you can either use the Object Selection tool (see tip 1) or go on to improve the selection manually with the Select and Mask command (Select > Select and Mask).
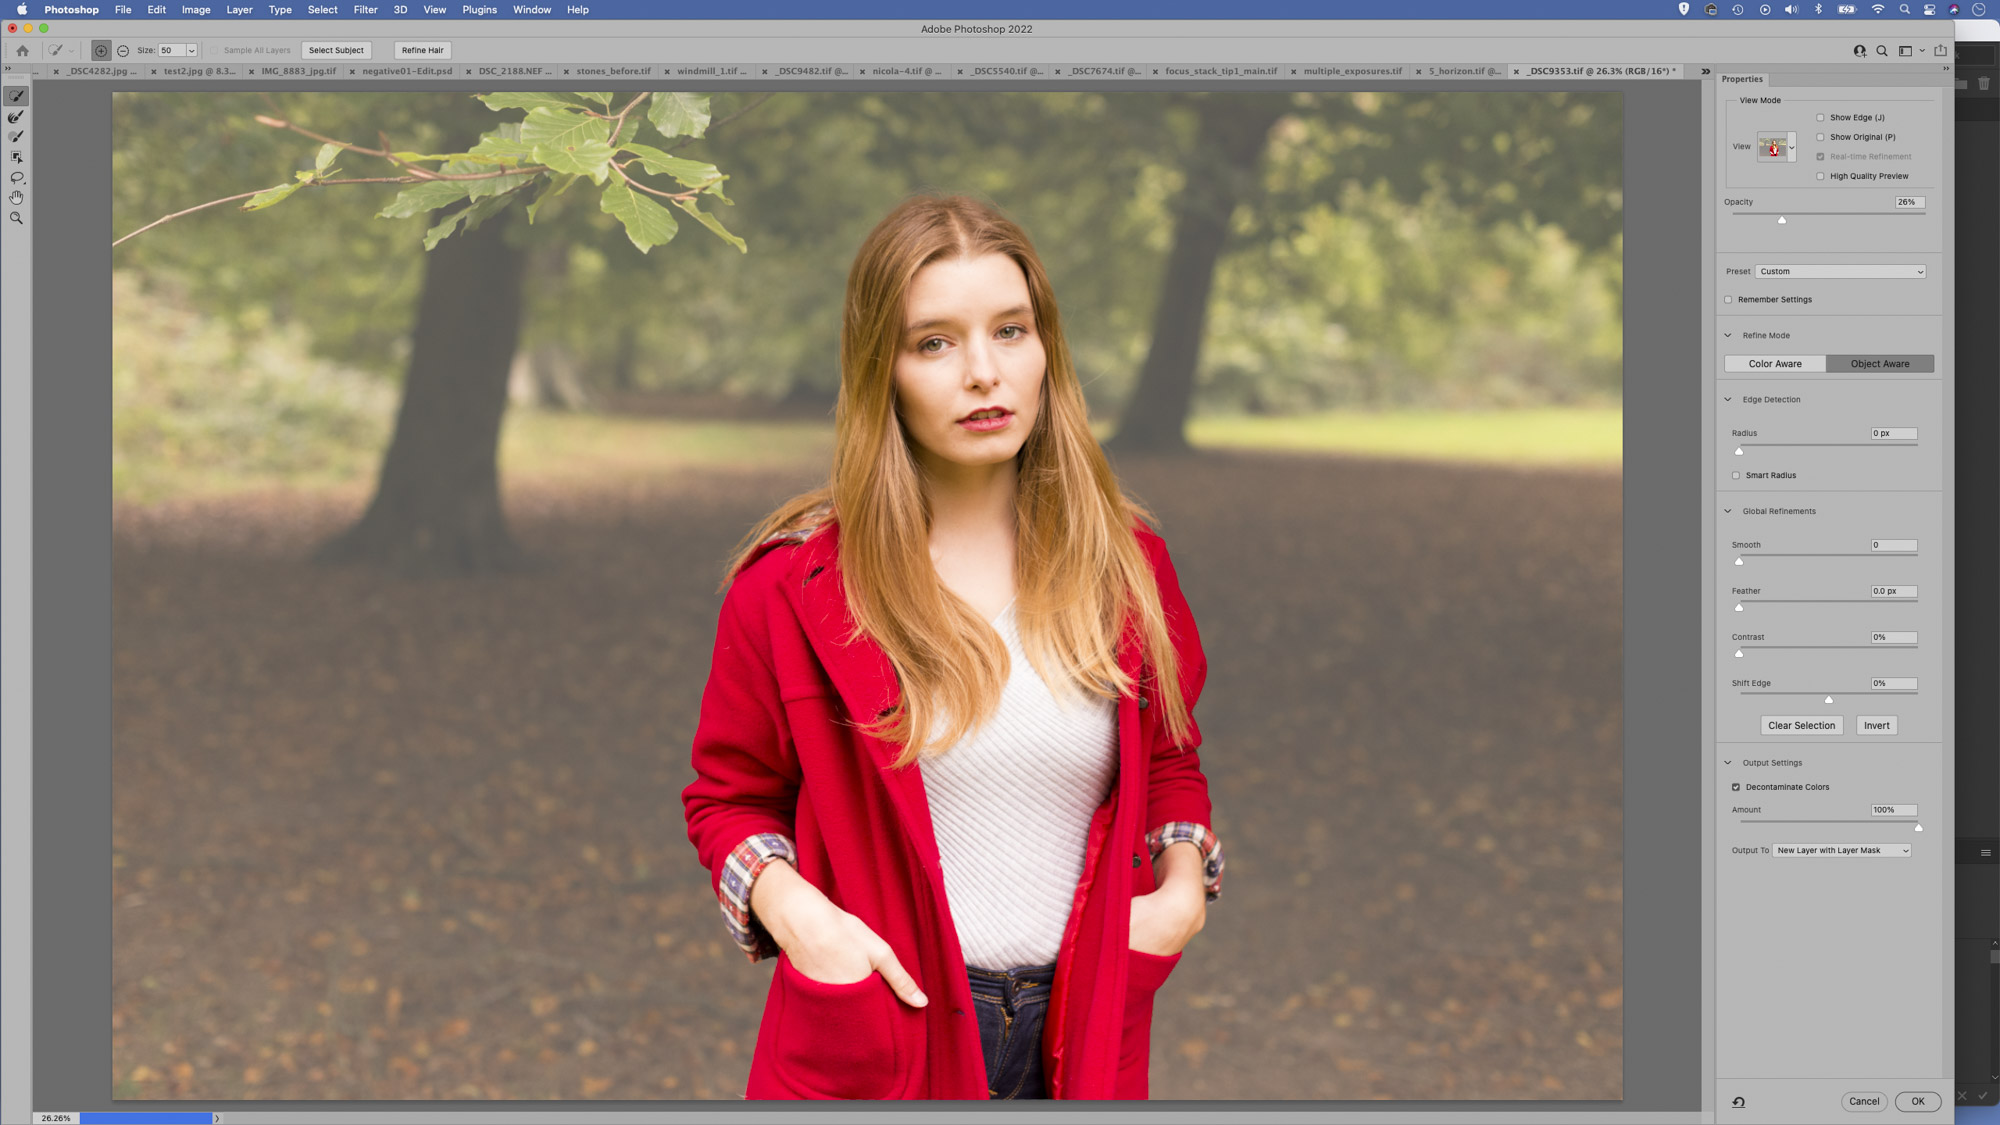
3 Select and Mask
While automated selections tools in Photoshop like the Select Subject and Select Sky commands can be huge timesavers, they may not get it right every time. So it pays to know your way around the Select and Mask command (go to Select > Select and Mask). This isn’t so much a selection tool in itself (although you can access the Quick Selection or Object Selection tools from within). Rather it’s a command for improving existing selections. Most of the time an initial selection will be very hard-edged and jagged, which isn’t much use for real-world objects. But Select and Mask lets you refine and modify the edge so it conforms to your object. Begin by hitting F to cycle through the various overlays and choose the one that gives you the best contrast. Once done, use the settings to improve the edge.
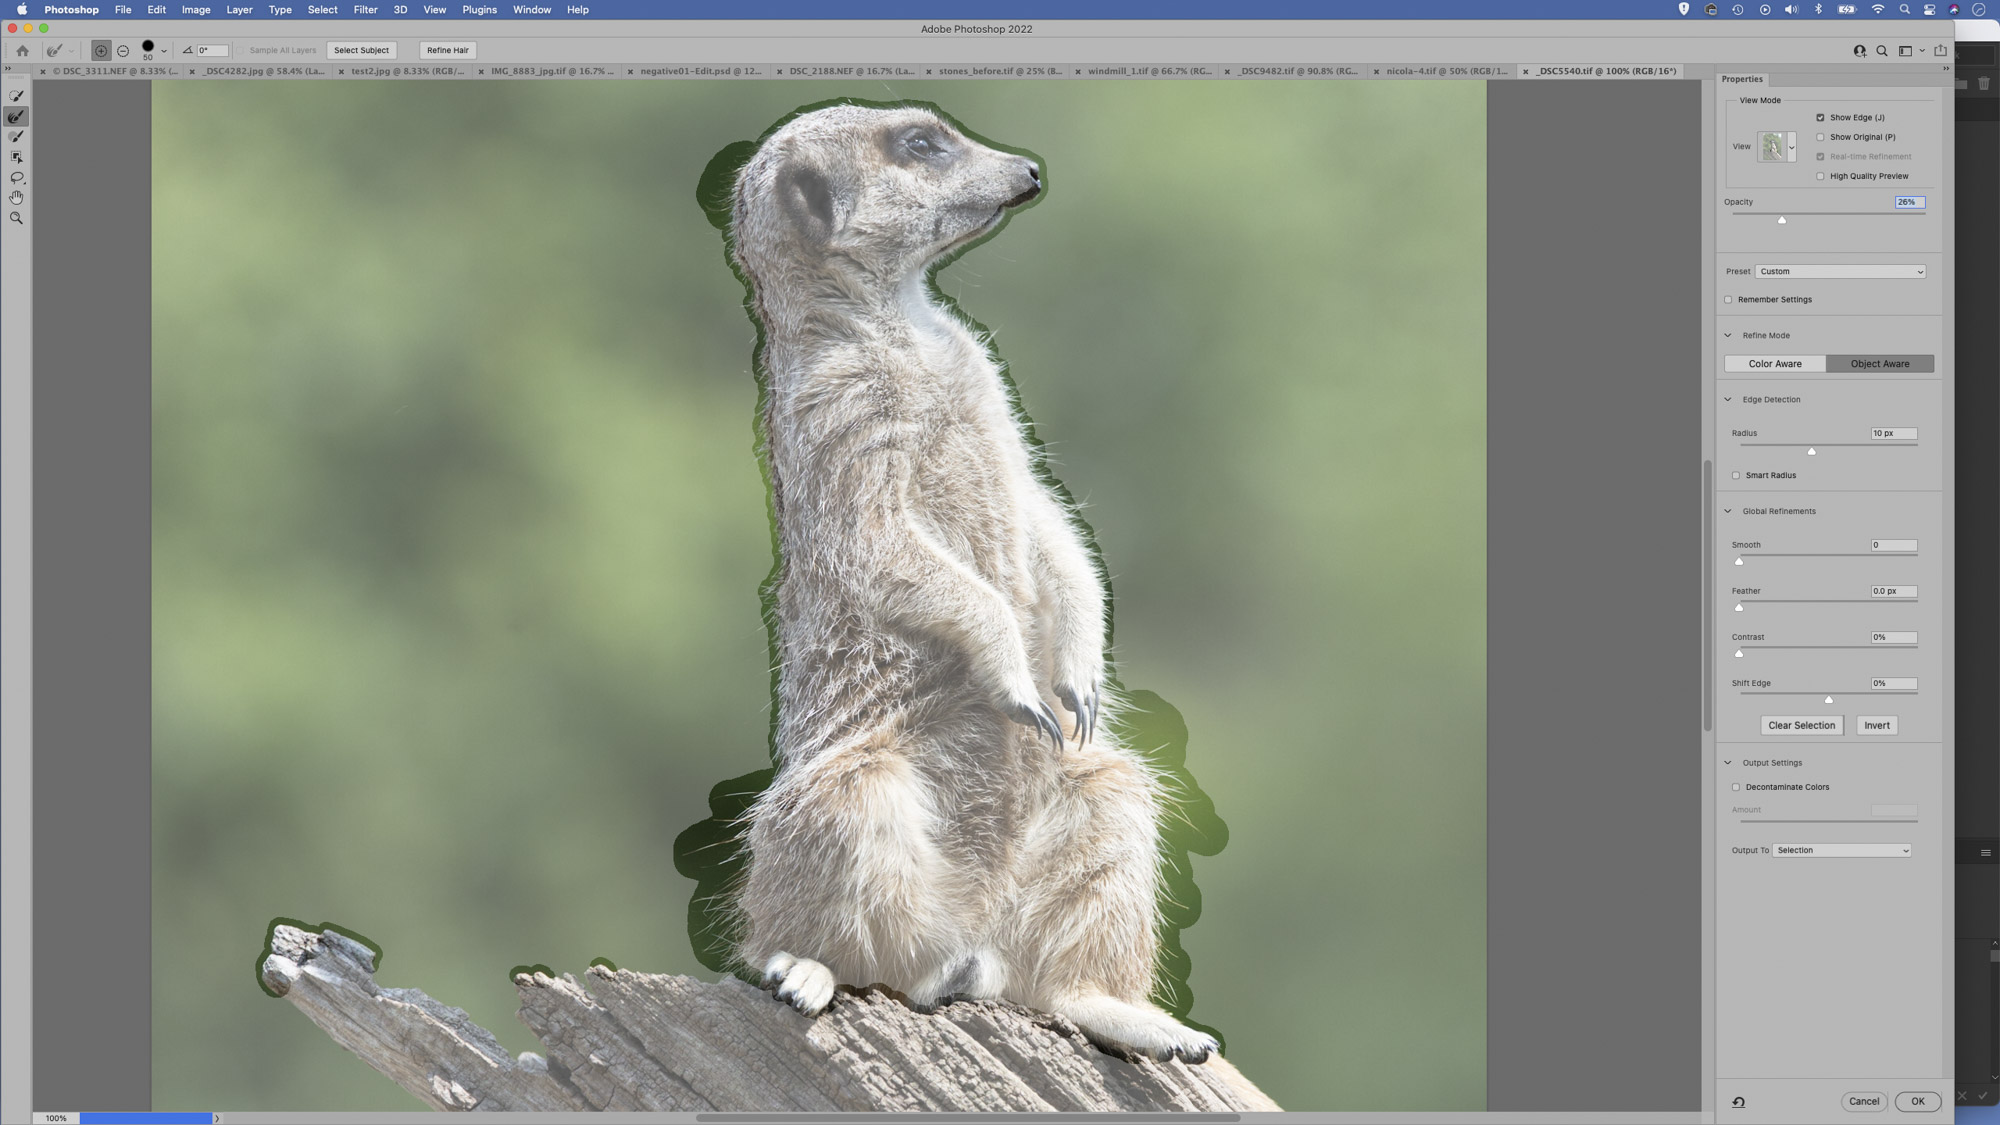
4 Improve hair and fur selections
The Select and Mask command is especially useful for isolating problematic areas like fur or hair. First, try the Refine Hair button at the top. For further control, use the Radius slider and Refine Radius brush. We can use these to improve hair selections by including any flyaway strands and removing all the little bits of background in the gaps. First hit J to show the edge, then increase the Radius to expand the area of refinement along the edge. We can also paint to expand the radius using the Refine Radius brush. Hit J again to hide the Radius view, and you’ll see a much-improved selection edge.
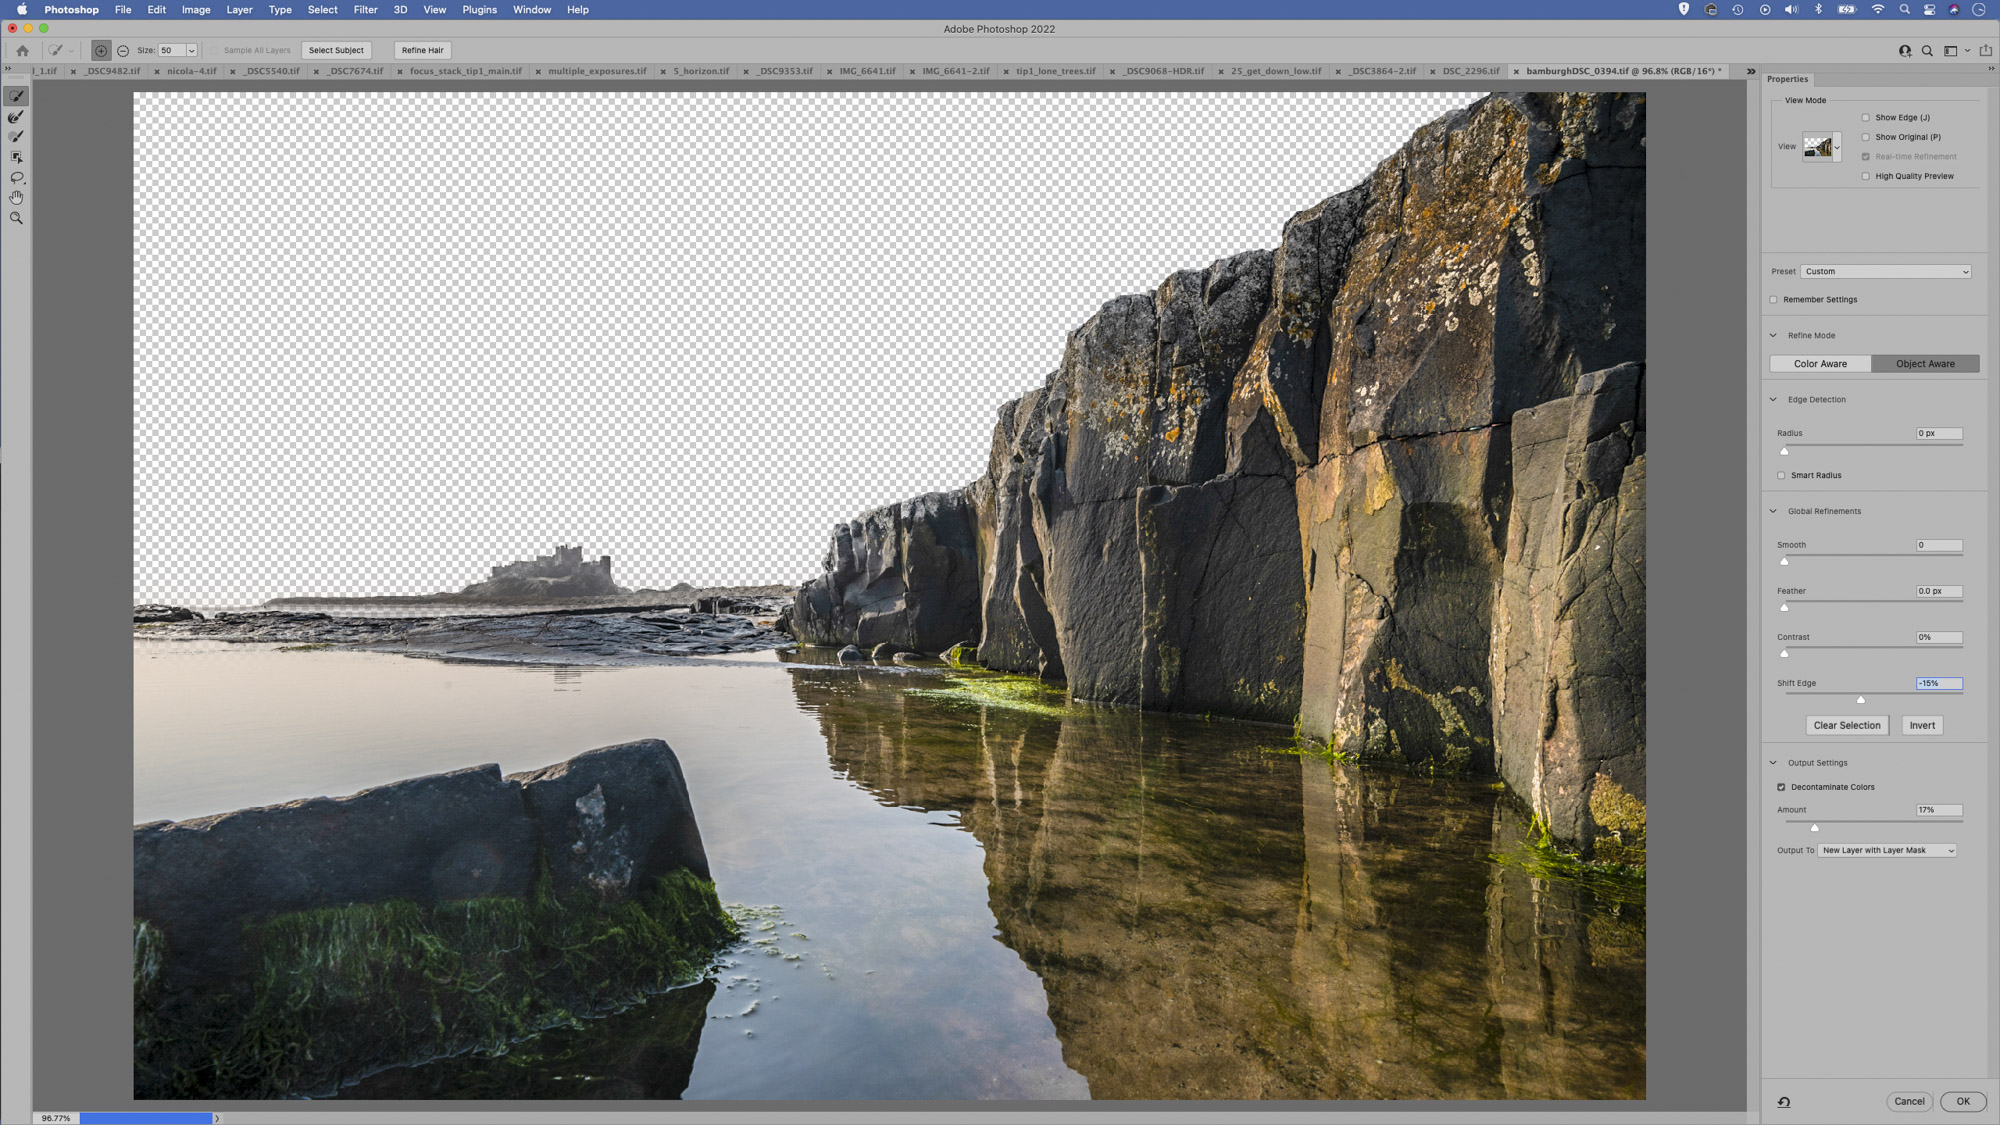
5 Fix fringing
If you’re attempting to isolate high-contrast edges - such as where sky meets land - then sometimes you might see an annoying fringe along the edge. It helps if - prior to making the selection - you use Lightroom or Camera Raw’s Lens Correction panel to remove chromatic aberration. The Shift Edge slider within the Select and Mask command can be very effective here, as it lets you squeeze in the selection or expand it slightly to correct fringing. There’s also a ‘Decontaminate Colors’ box in the command. This fills in the fringe by sampling colours from nearby pixels. As it’s a destructive edit, it automatically applies the change to a duplicate layer.
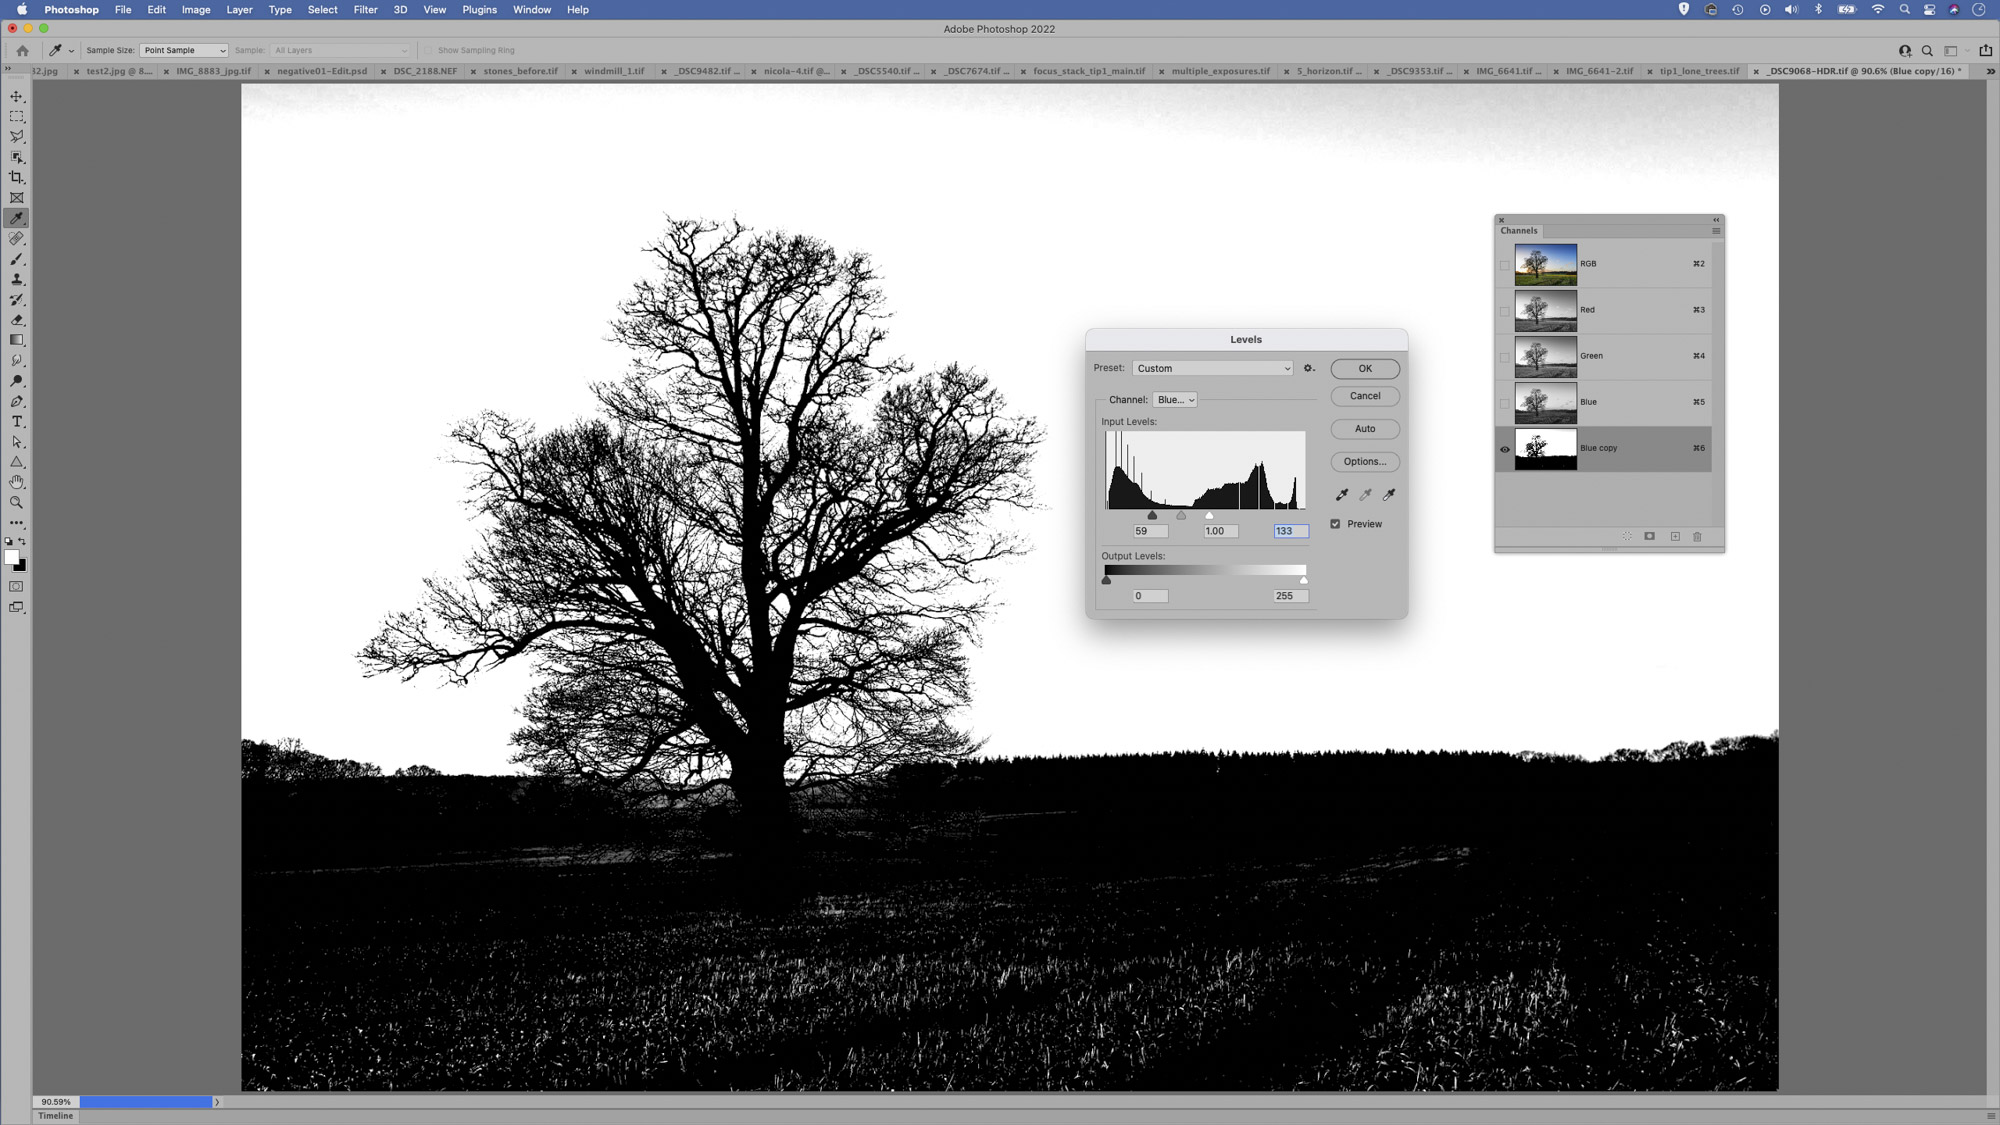
6 Make selections with Channels
Channels let you make selections based on the colour and brightness information in the image. Go to Window / Channels then click through the red, green or blur channel to see which gives you the greatest contrast between the area you want to select and elsewhere (with skies, it’s usually the blue channel). Drag the channel to the new channel icon to copy it. Next use any tools or tonal commands to modify the channel so that the target area is completely white and everything else is black. Then simply Cmd/Ctrl+click the channel to make a selection of the white areas.
7 Lock on to colours
Found under Select/ Color Range, this command is a bit like the Magic Wand tool in that it makes selections by targeting colours. But it offers far more control. To begin, grab the plus eye dropper tool and drag over the colours you want to target, then use the Fuzziness slider to widen or narrow the range of colours included.

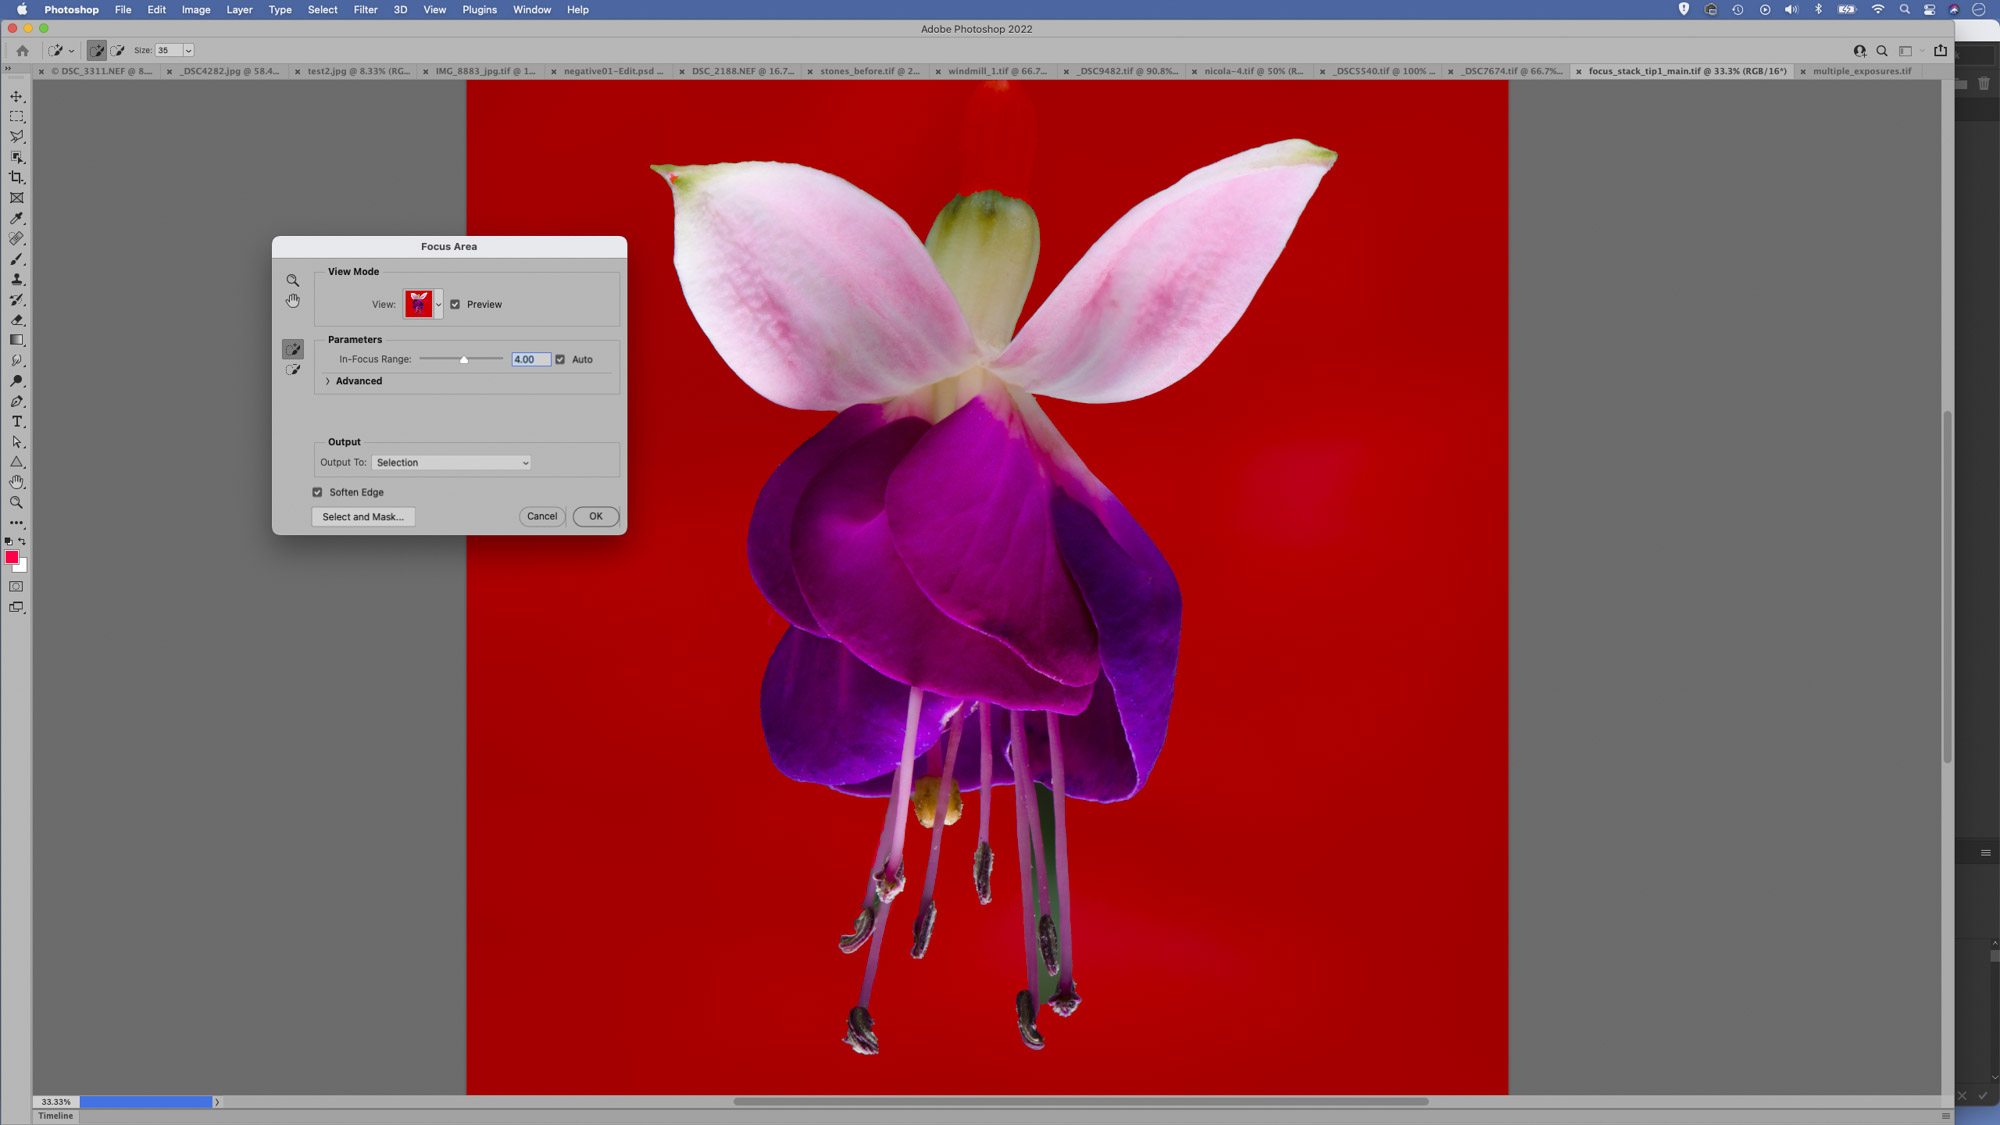
8 Select in-focus areas
This handy command lets you select the in-focus parts of an image and exclude everything else. Go to Select > Focus Area to begin, then tweak the slider to fine-tune what’s included. The Auto setting will usually do a fine job of selecting the in-focus parts. Focus Area can be especially useful for sharpening, as there’s usually no point in sharpening out-of-focus parts of an image (all we’d be doing is amplifying the image noise) so we can use Focus Area to target the in-focus parts then use the Unsharp Mask filter to sharpen them.
9 Use Camera Raw Masks
Often we might want to make a selection in order to change the colours and tones in a specific part of the image. But with the masking panel in Camera Raw/Lightroom we can skip the selection part and move straight on to adjusting the tones. Just like the Select Sky and Select Subject commands in Photoshop, the Mask Panel lets you automatically add a mask overlay to target either the subject or sky, then refine with a brush, color range or other local tools.

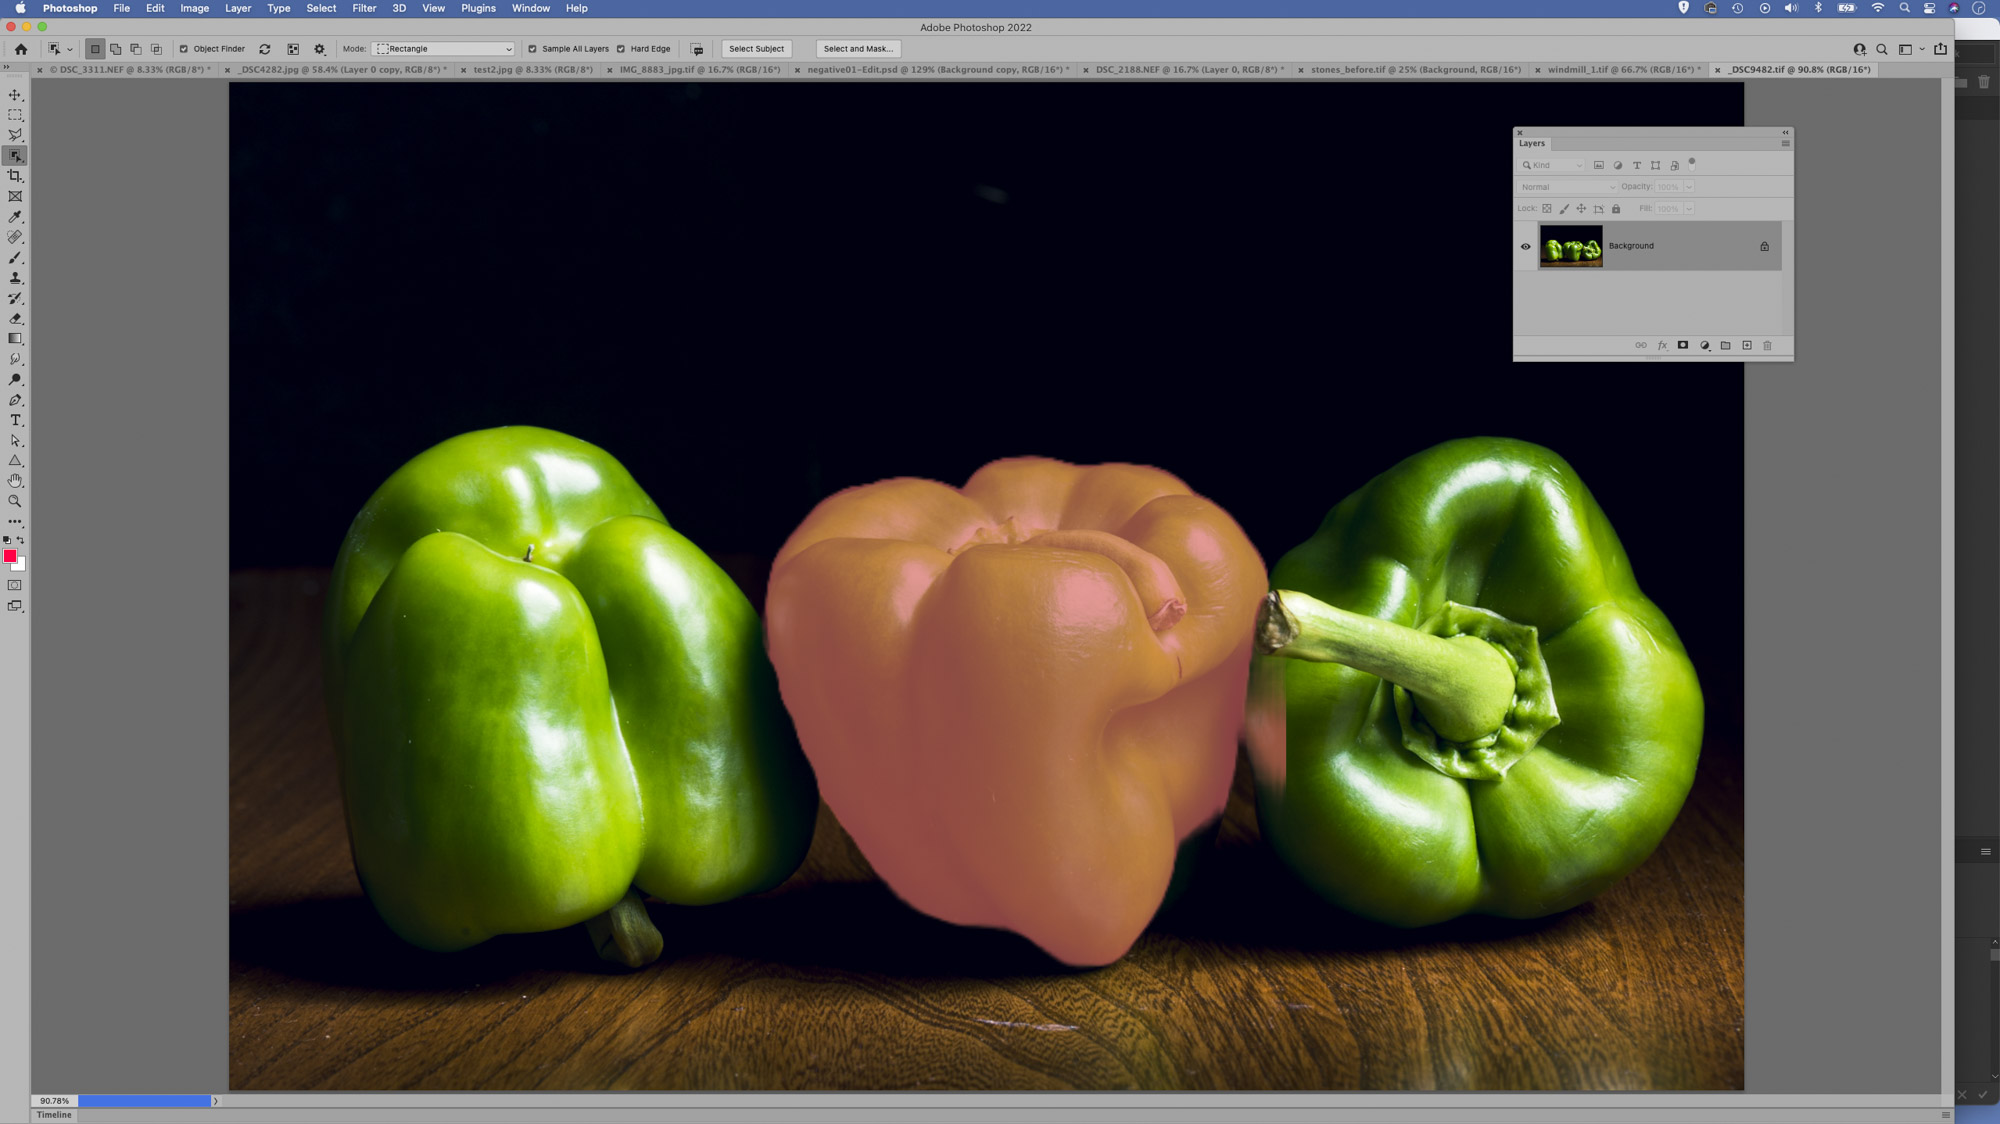
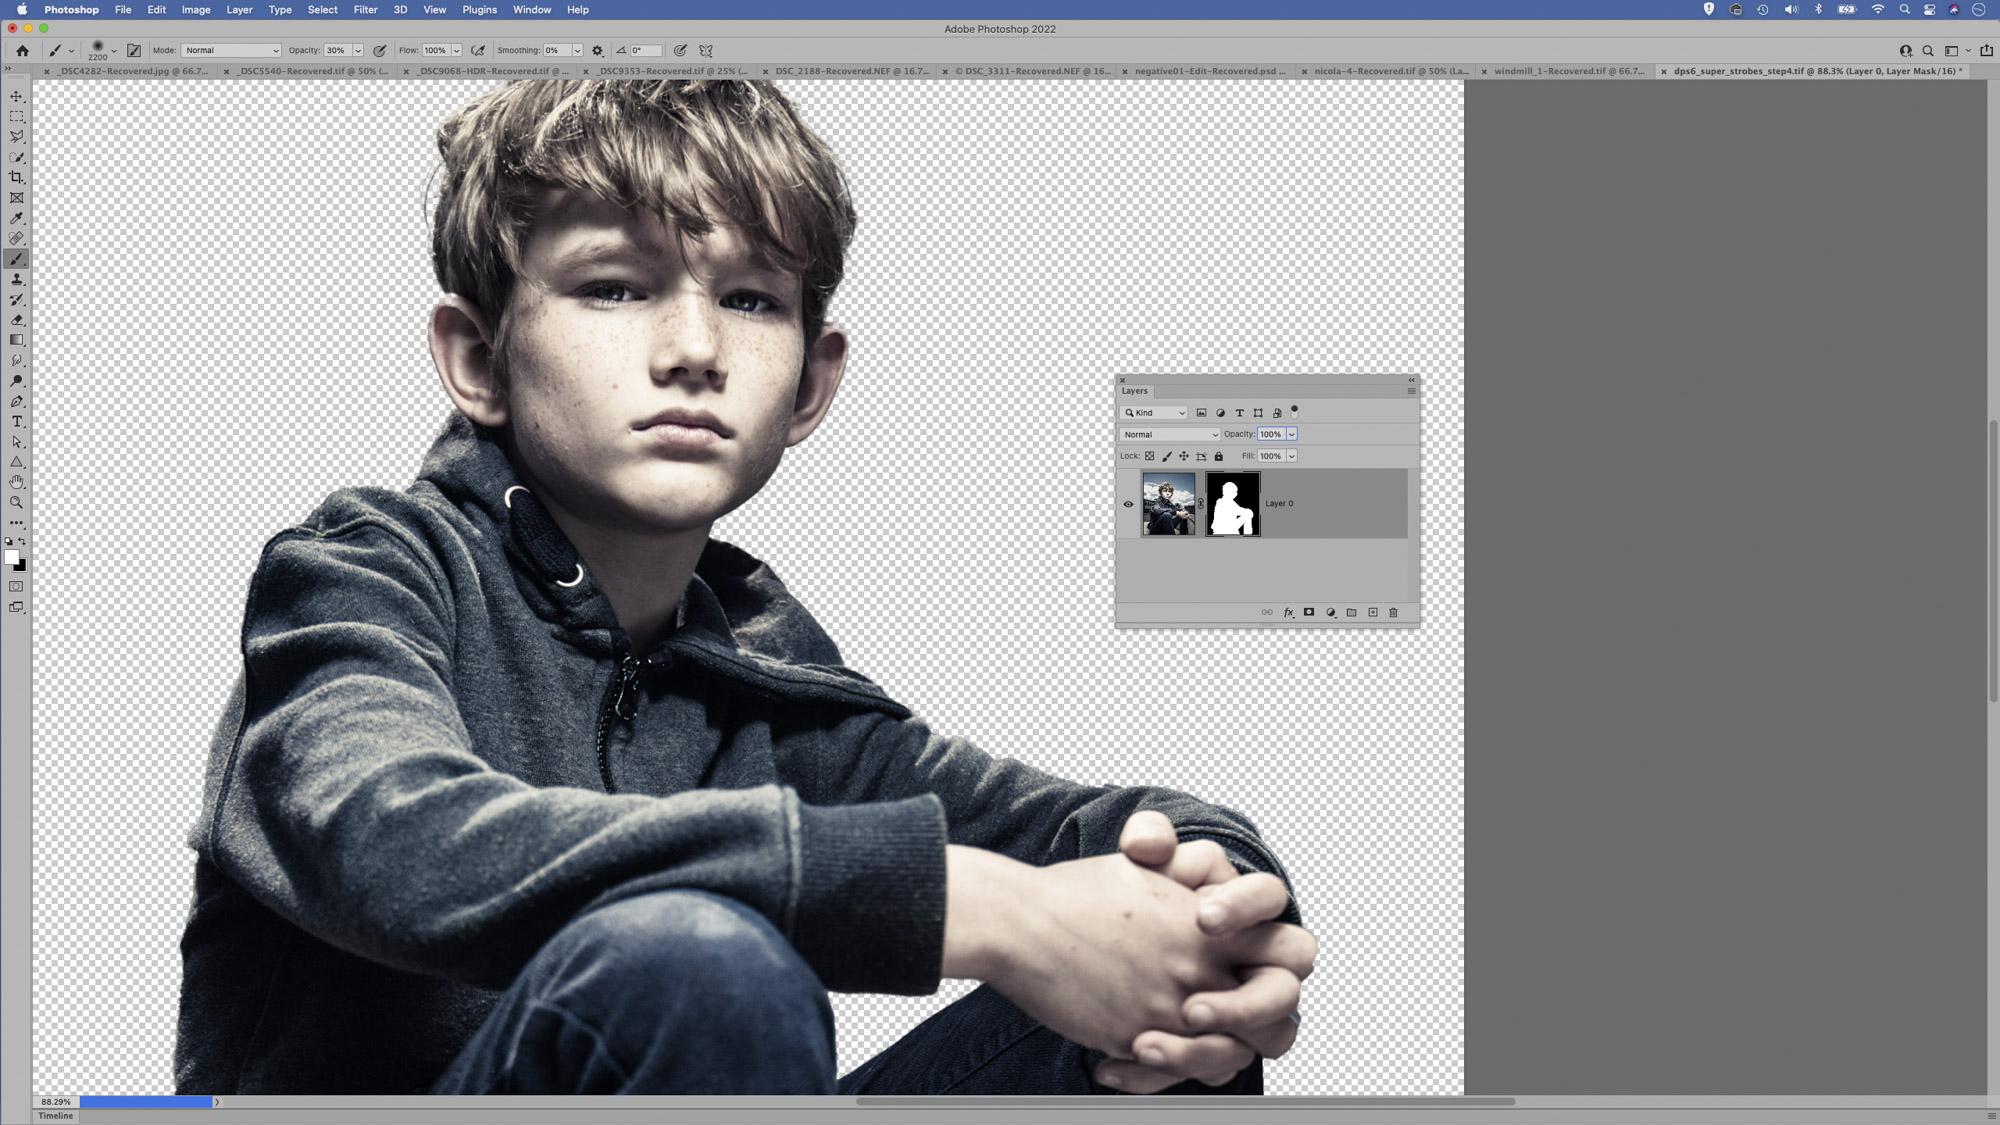
10 Get to grips with Layer Masks
Photoshop’s array of selection tools are hugely useful for isolating parts of your photos, but to truly make the most of them you need to embrace Layer Masks. These simply let you hide or reveal parts of a layer - black areas are hidden, white are visible. So not only are they hugely useful for making cutouts, they can also be used with Adjustment Layers to make local adjustments that alter parts of an image. To convert an active selection into a mask, simply click the Add Mask icon in the Photoshop Layers Panel. You’ll also find options to output selections as masks in commands like Select and Mask or Color Range.

James has been a professional photographer and award-winning journalist for the past 15 years. He is editor of Practical Photoshop magazine and contributes to leading photography publications worldwide.
View all articles

