


Film scanning is traditionally expensive which is one of the reasons many photographers fail to digitise their analogue shots, but there is another option

If you have folders full of negatives and transparencies, you could be sitting on a veritable goldmine in terms of stock photography and, indeed, your portfolio. The problem is that the cost of scanning, whether using a professional photo lab or buying a film scanner is prohibitive for many, especially if you plan to digitise medium and large format film.
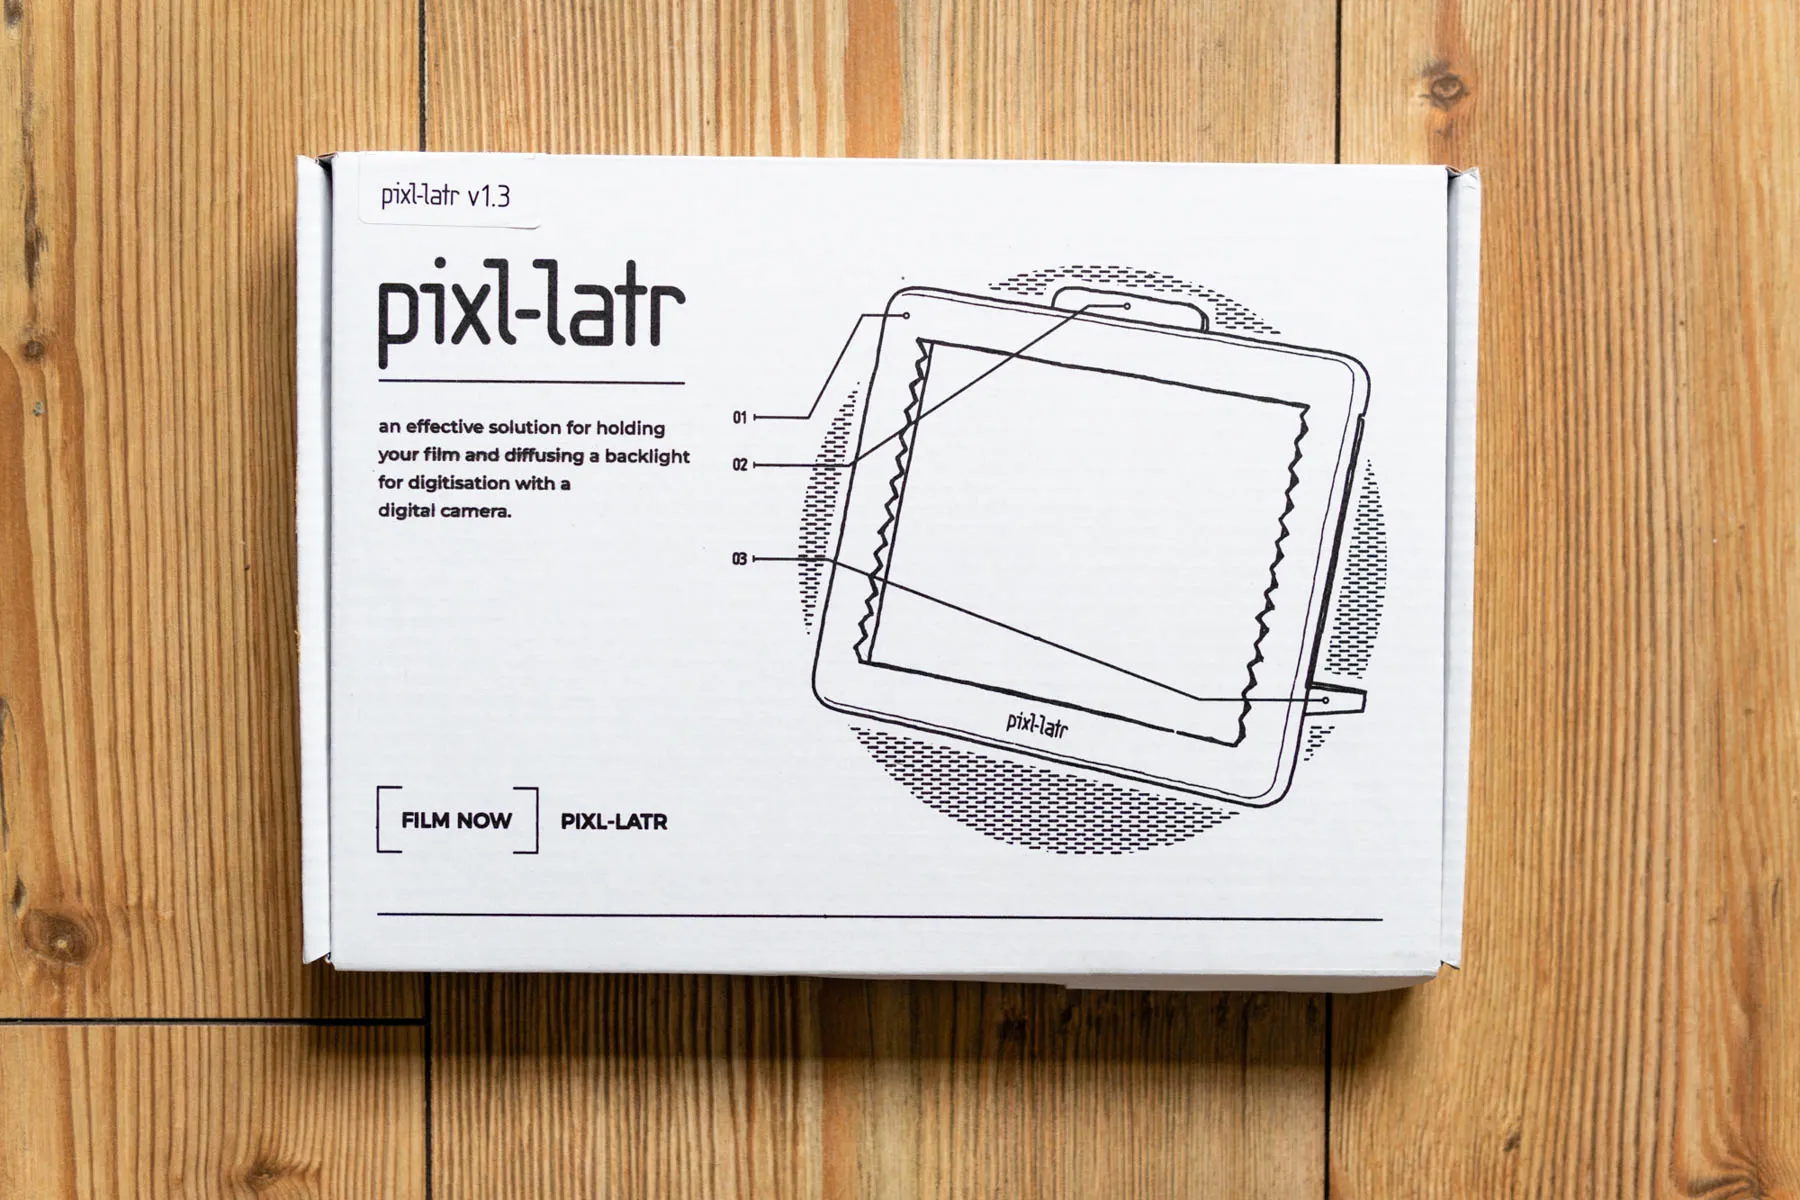
A way of digitising film that has become popular in the last few years is to use a specially designed film holder to hold the film in place, which is then positioned on a lightbox to be backlit and photographed from above. There are several options available, but one that balances cost and effectiveness well is the pixl-latr which costs £49.99. This holder can accommodate 35mm, medium format and 5x4 film and uses a clever design that distributes light evenly.
The beauty of this approach is that it’s much more cost-effective than buying a flatbed film scanner, a dedicated film scanner, or paying for a professional photo lab to scan your films. And once you’ve set up your camera and tripod, you can digitise an image in a minute or two so you can get through large numbers of images in no time.
For this approach, you’ll ideally have a macro lens, a 24-70mm or an equivalent zoom if you shoot with an APS-C or Micro Four Thirds camera. A macro lens is best because they’re designed to resolve fine detail, which is ideal for digitising film, and the image quality you can expect is just as good as what you’d get from a film scanner.
The process as a whole is incredibly quick and easy from a shooting point of view, and processing is often minimal too. The most time-consuming part of this is spot removal which can be performed in Lightroom or Photoshop. And if you’re digitising negatives rather than transparencies, you can still invert them to positive in Lightroom using the Tone Curve. So, let’s take a look at how to digitise your films using just a film holder, lightbox and a camera and lens…


Steps for use
1 Set up your film holder
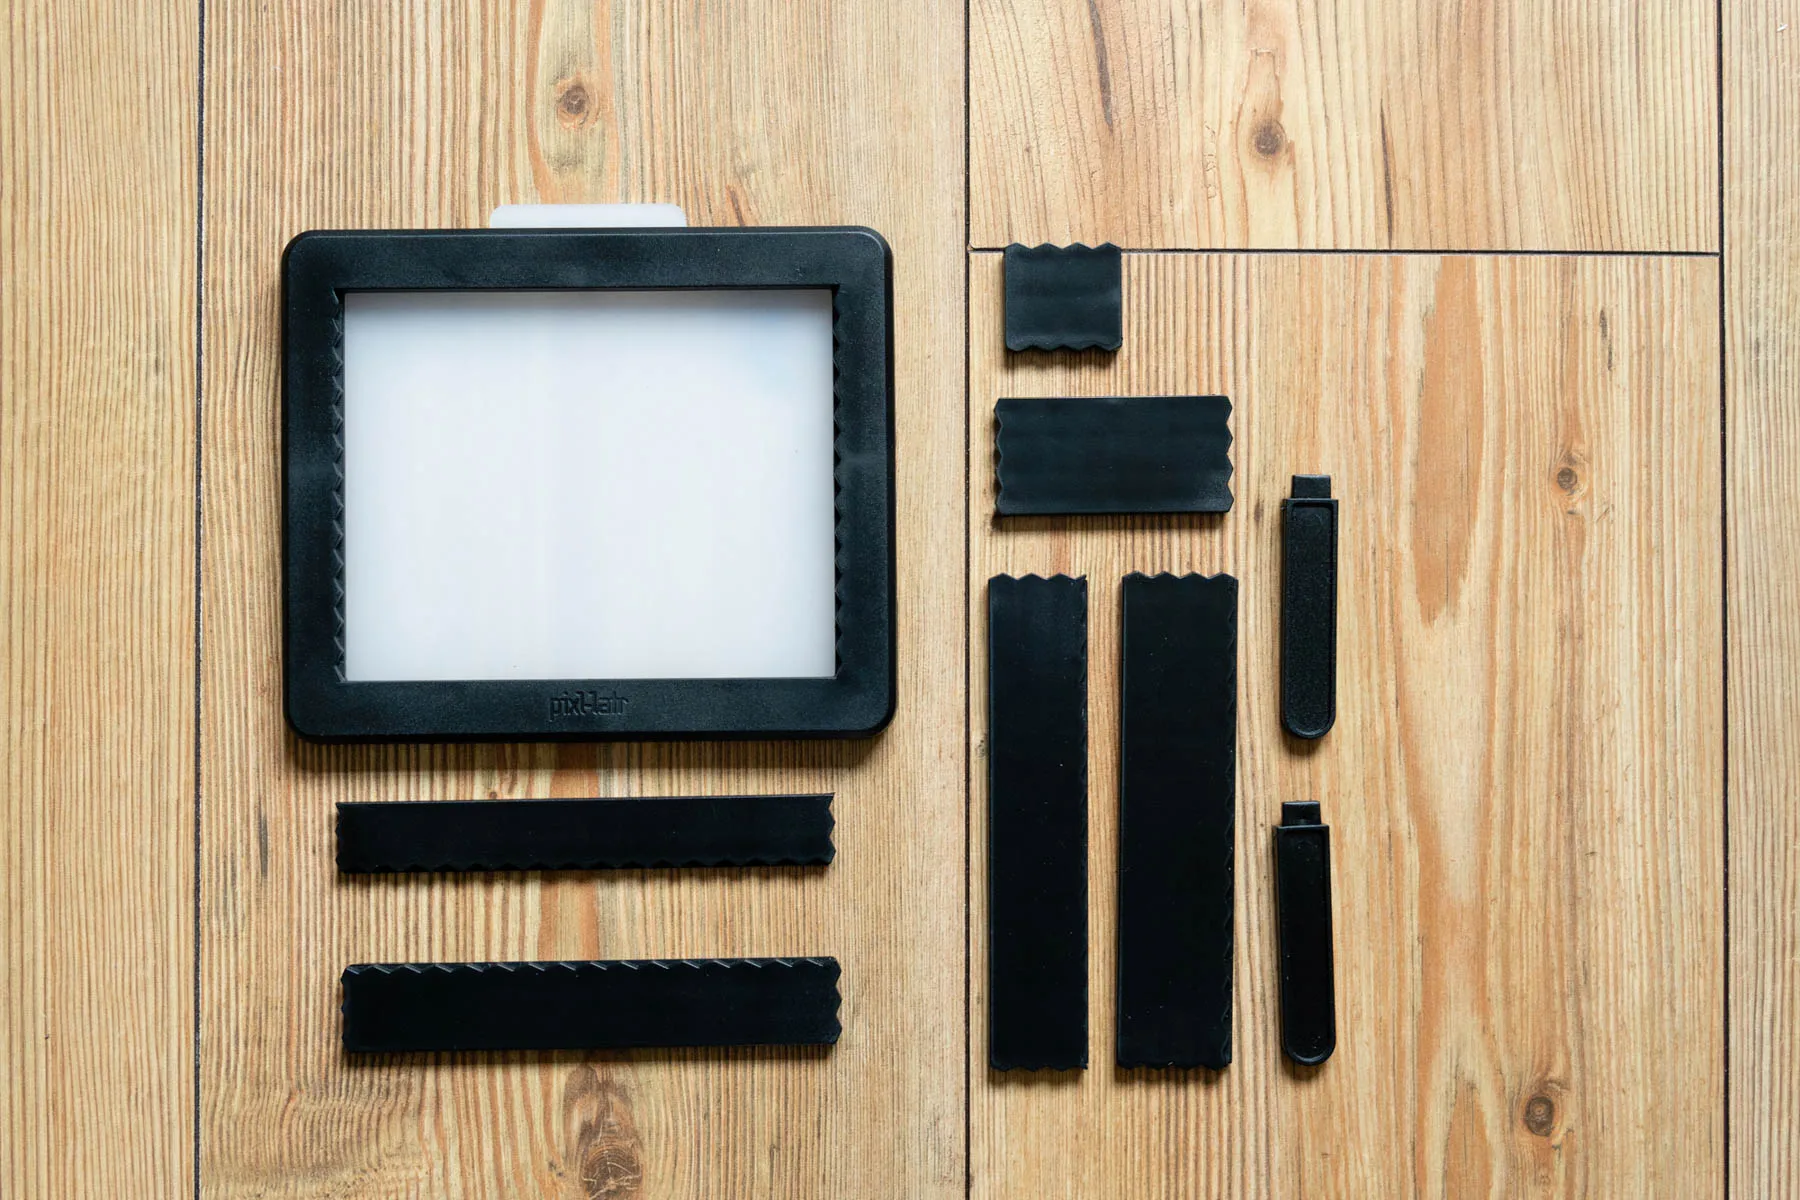
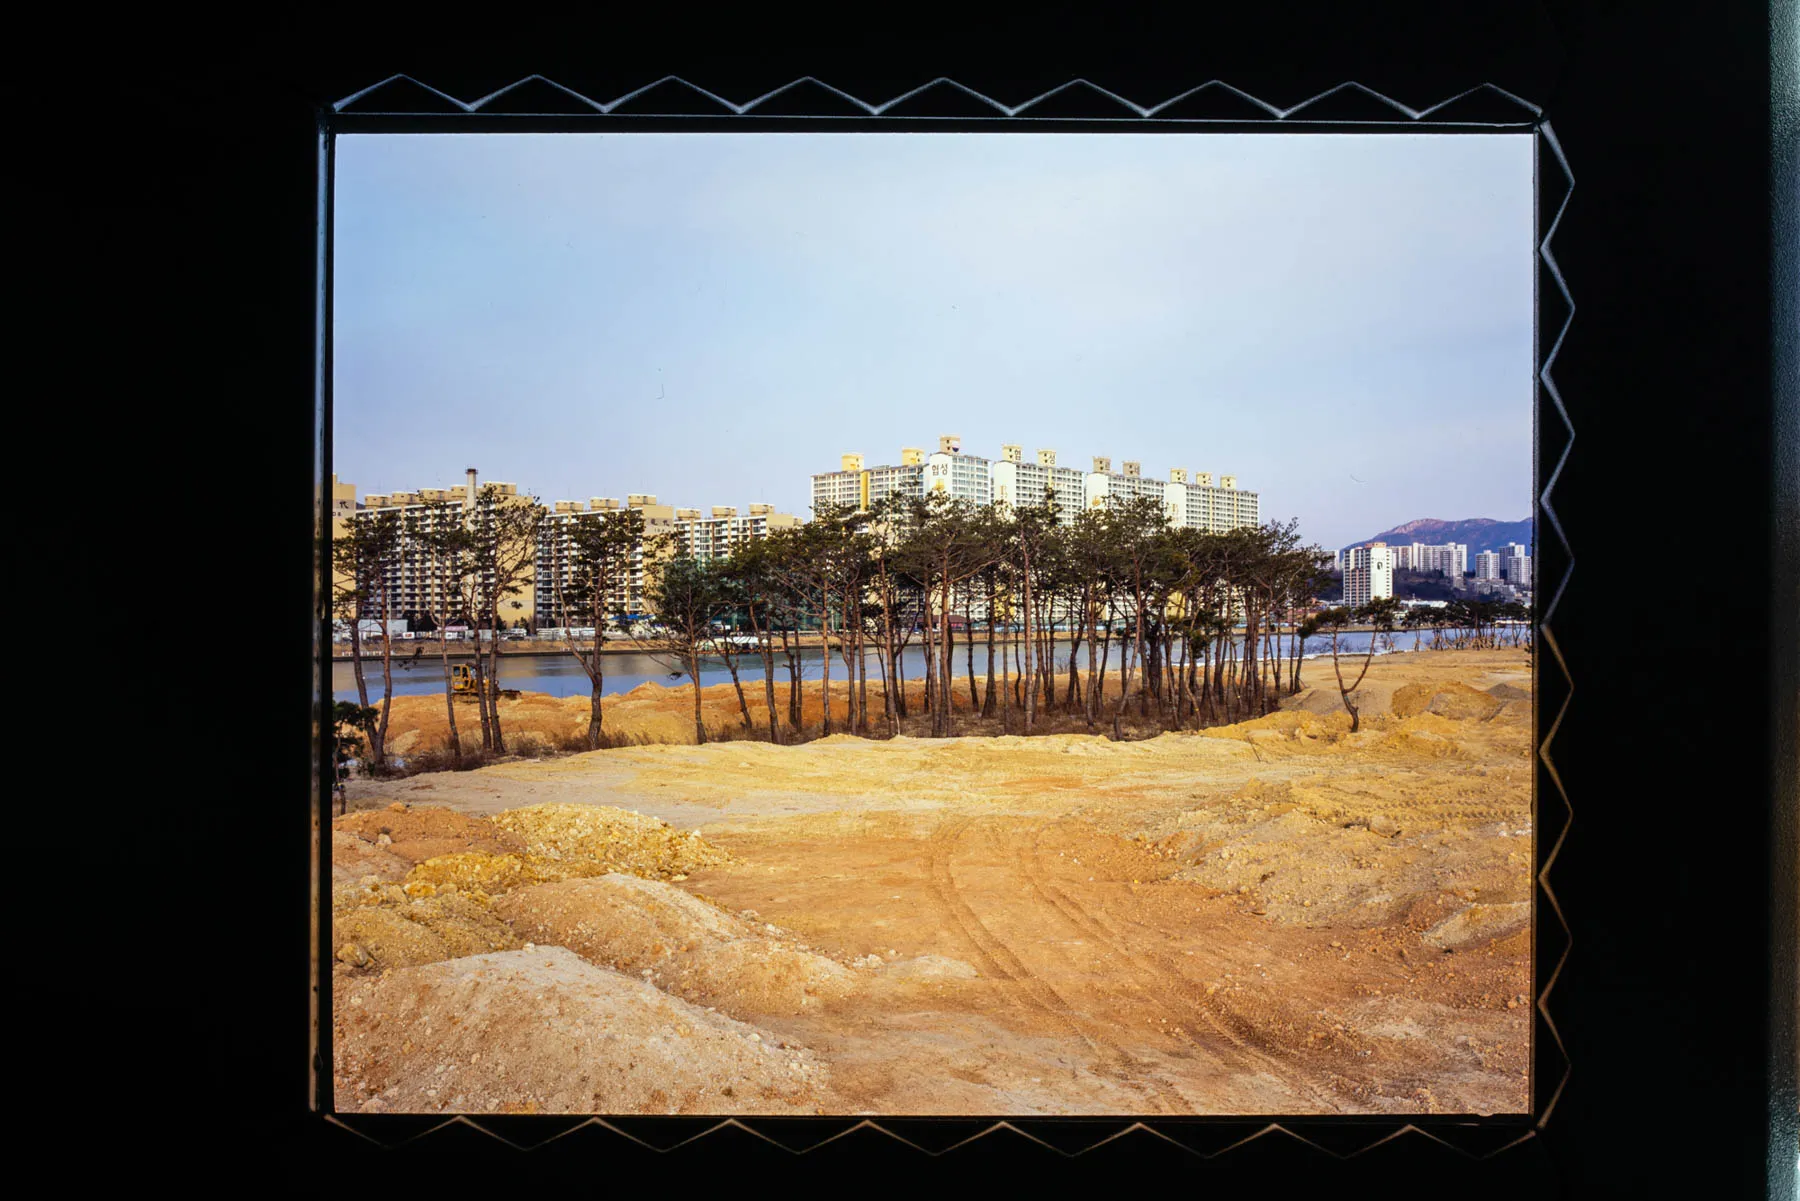
Once you have a film holder such as the pixl-latr, you’ll need to configure it for the format of film you’re digitising. Here, 6x7cm medium format film was digitised so the relevant size was created using the parts. All film holders for digitising film come with clear instructions so you can’t go wrong, and laying out all the pieces helps to make it easier to put the holder together. Once ready, insert the film with the shot you’d like to digitise in the holder and make sure that the whole frame is visible. Next, place the film holder on top of a lightbox on the floor and raise it higher using books if necessary.
2 Shoot the film
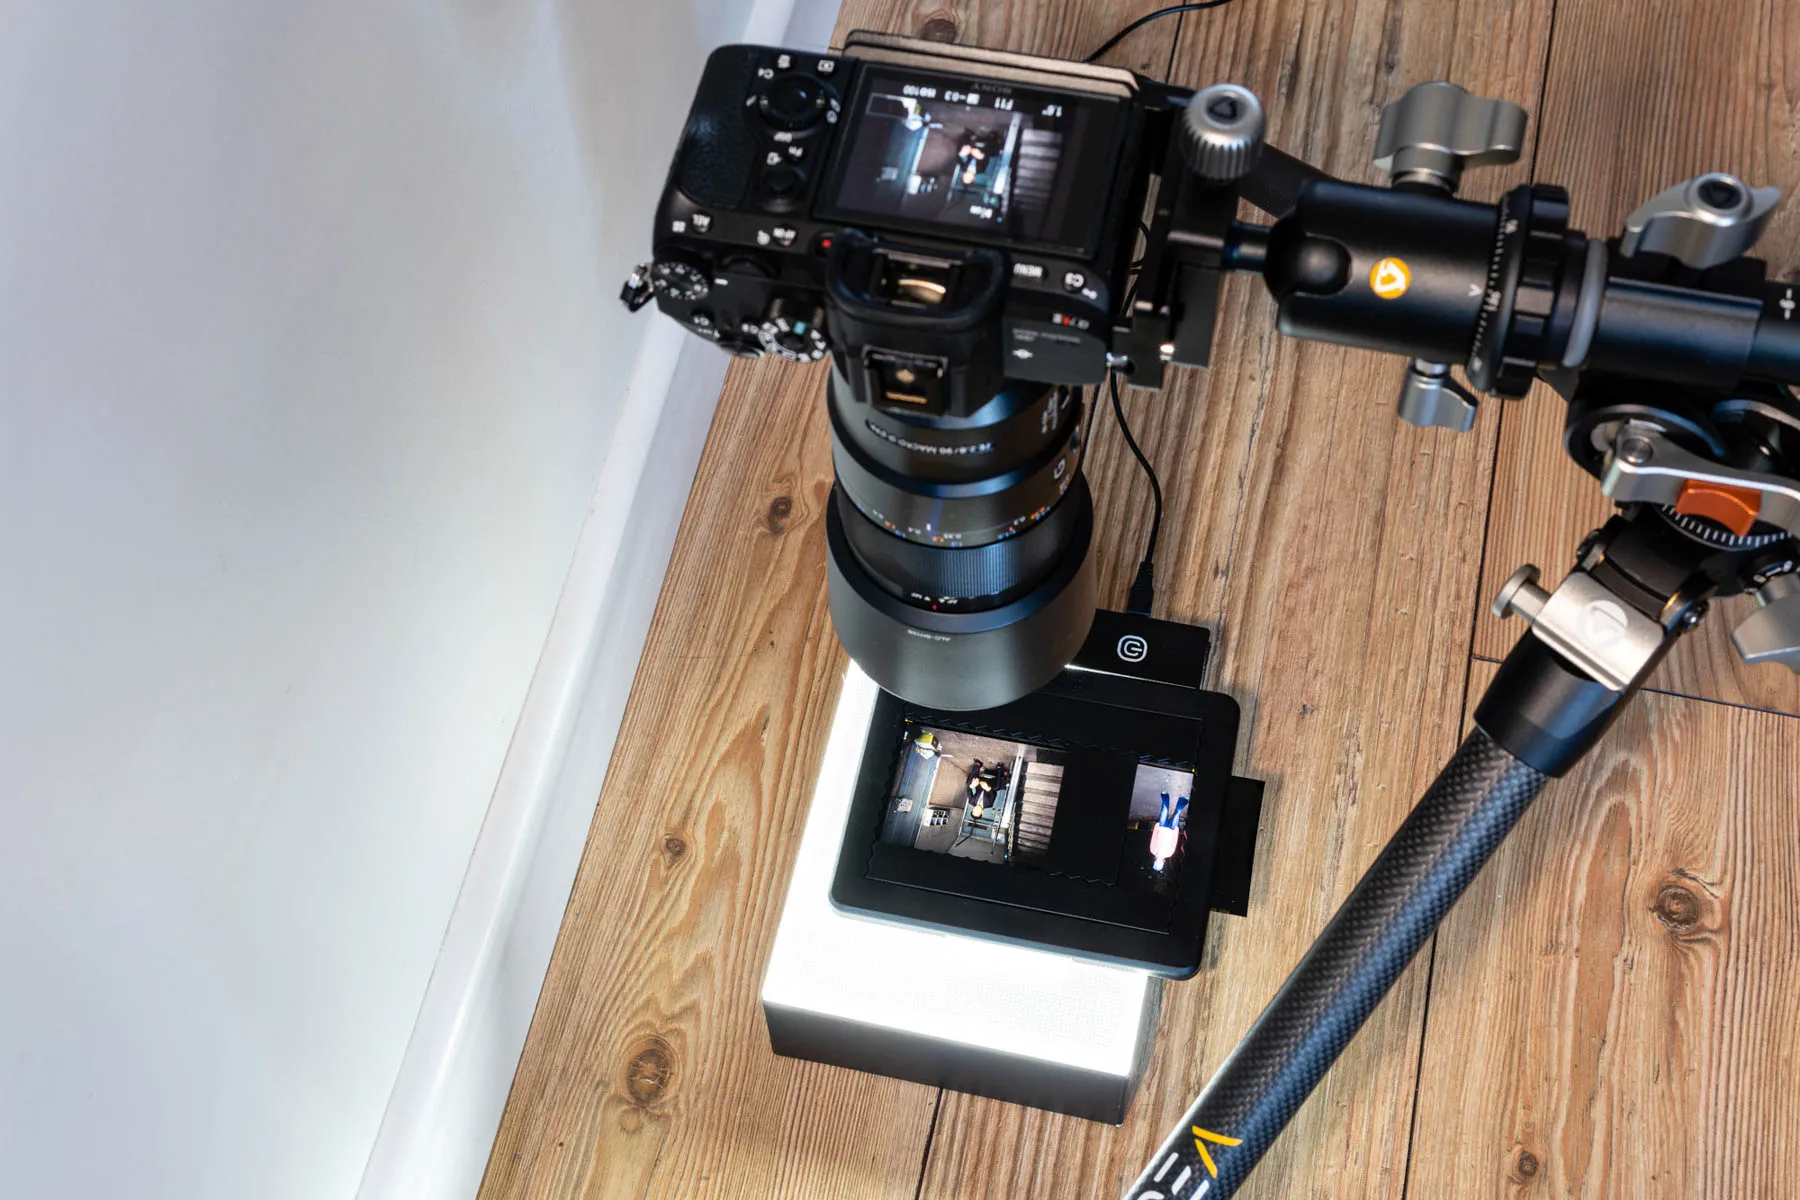
If you have a tripod with an articulating centre column, set it up so you can shoot straight down. If not, insert the centre column upside down and set up the camera so it’s facing straight down and compose the shot using Live View with the film taking up as much of the frame as possible. Shoot in Raw and set the camera to aperture priority at f/8 or f/11 for the best image quality, and set ISO to 100. You may need to use exposure compensation to lighten or darken the exposure and use either the camera self-timer or a shutter remote to release the shutter. Take a shot and check that it’s perfectly sharp on the LCD screen before moving on to the next image.
3 Crop and invert
Load your images into Lightroom and crop the film holder frame out with the Crop Tool unlocked so the proportions aren’t constrained. Alternatively, you can set up a custom preset for the film formats you’ve digitised. If you’ve shot transparencies, you’ll be able to move straight onto editing, but if you’ve captured negatives, you’ll need to invert them to positive using the Tone Curve. Scroll down to the Tone Curve and simply invert it by moving the bottom left point to the top left, and the top right point to the bottom right. The curve will now be a mirror opposite of its default and can be used in much the same way as usual.
4 Process the image
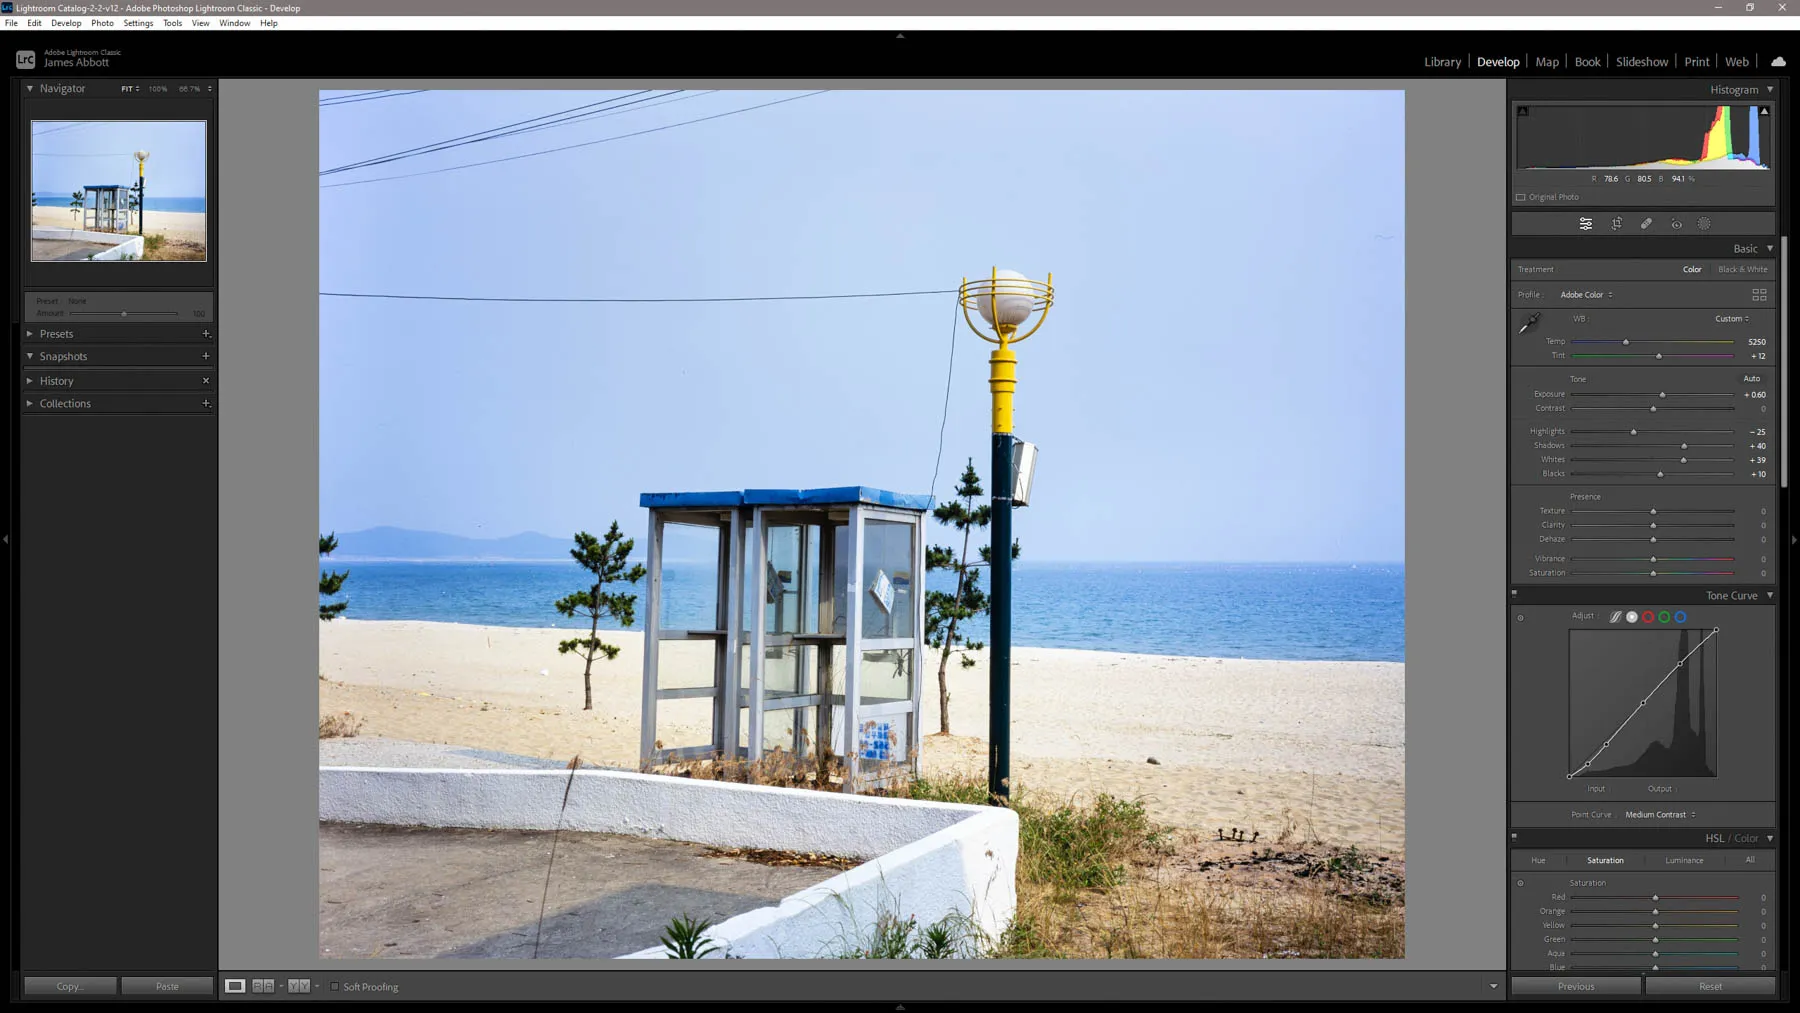
Most digitised images will look good straight out of camera, but they will almost certainly benefit from adjustments in the Basic tab, as well as applying Lens Corrections. At this stage, editing will be just like any other Raw file so you’ll be in familiar territory, but one thing you will find is that you get the best results by setting Blacks to positive rather than negative values to maintain the shadow detail present and to avoid contrast from being too strong. Once the image is looking good, you can either remove dust spots in Lightroom or Photoshop. Dust spots are the biggest problem with scanning/digitisation, even when you use a blower to remove dust from the film surface.
More film photography:
See more film photography guides and tutorials with our dedicated section on Focus!

James is a freelance photographer and journalist producing content for photography magazines and websites and is a former deputy editor of Practical Photography magazine. He’s also the author of The Digital Darkroom: The Definitive Guide to Photo Editing.
View all articles

