


Discover how to give your photos the vintage treatment with a combination of shooting skills and editing tricks

In an age where our digital cameras are capable of capturing images of crystal clear clarity and staggering detail, there’s still a place for the old-school charm of retro images with all their wonderful imperfections. Read on to discover a host of shooting and editing tips and tricks for aging your photos…
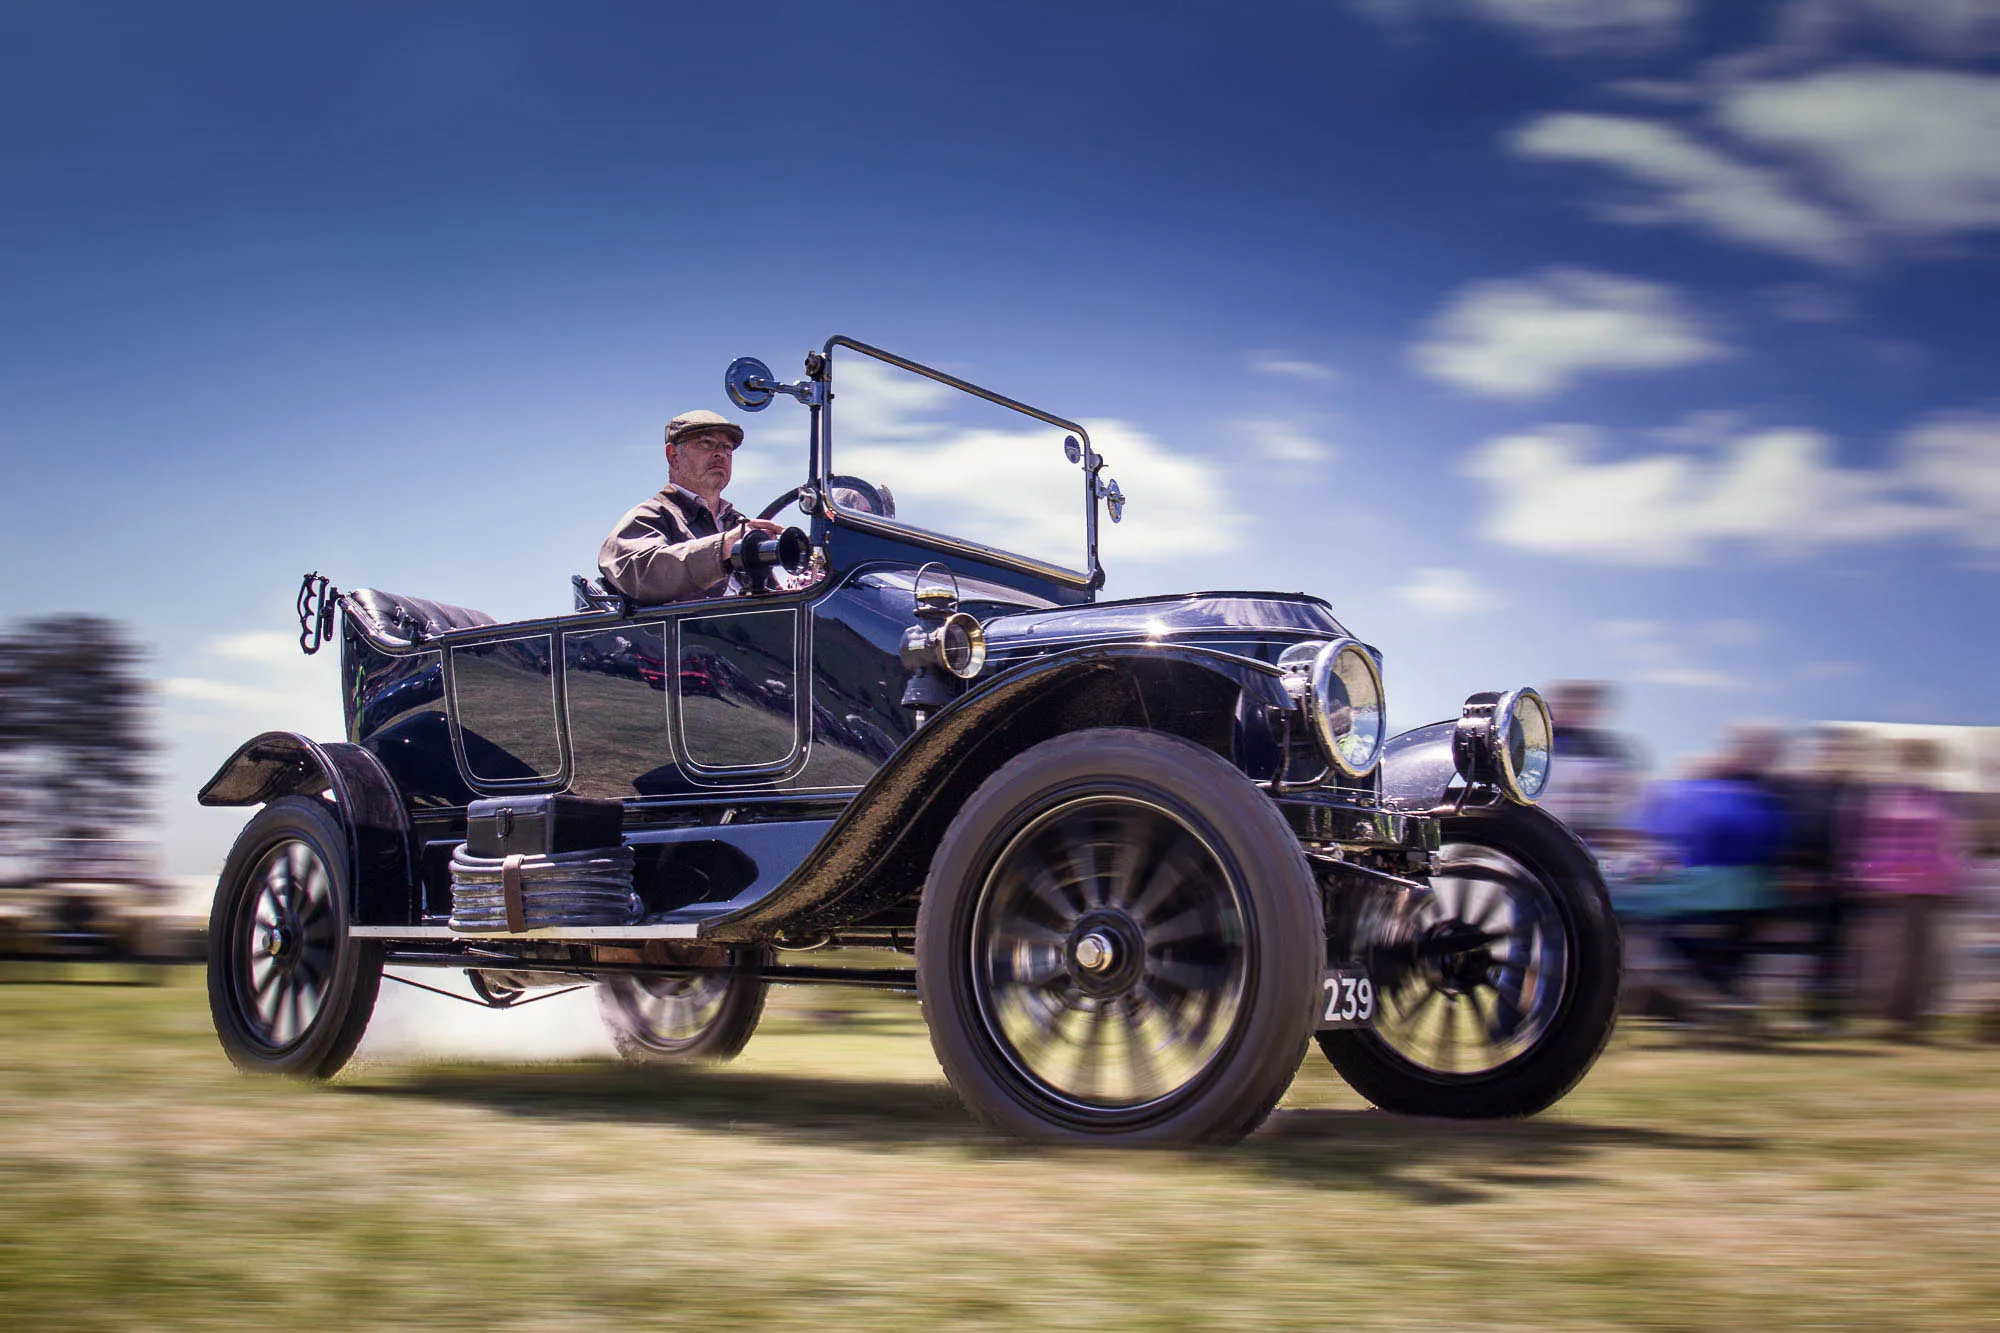
1 Go to vintage events
.webp)
There may be events in your area that give you the opportunity to shoot wonderfully old fashioned scenes, perhaps with vintage vehicles or even actors in costume. Old railways and steam train meets are a great place to start looking. Then there are wartime reenactments, vintage fairs and classic car meets. If you’re in the UK, revivalvintage.co.uk is a good place to start looking.
2 Use Monochrome picture style
.webp)
A black and white treatment is one of the ultimate ways to give your photos a classic feel. Of course, you can convert your photos to black and white at any stage. But there’s something special about shooting in your camera’s monochrome mode, as the instant feedback you get helps you to see the world in black and white. If you shoot in raw mode, the black and white effect is not baked in, so you can switch back to colour later if you prefer.
3 Experiment with Vintage Profiles
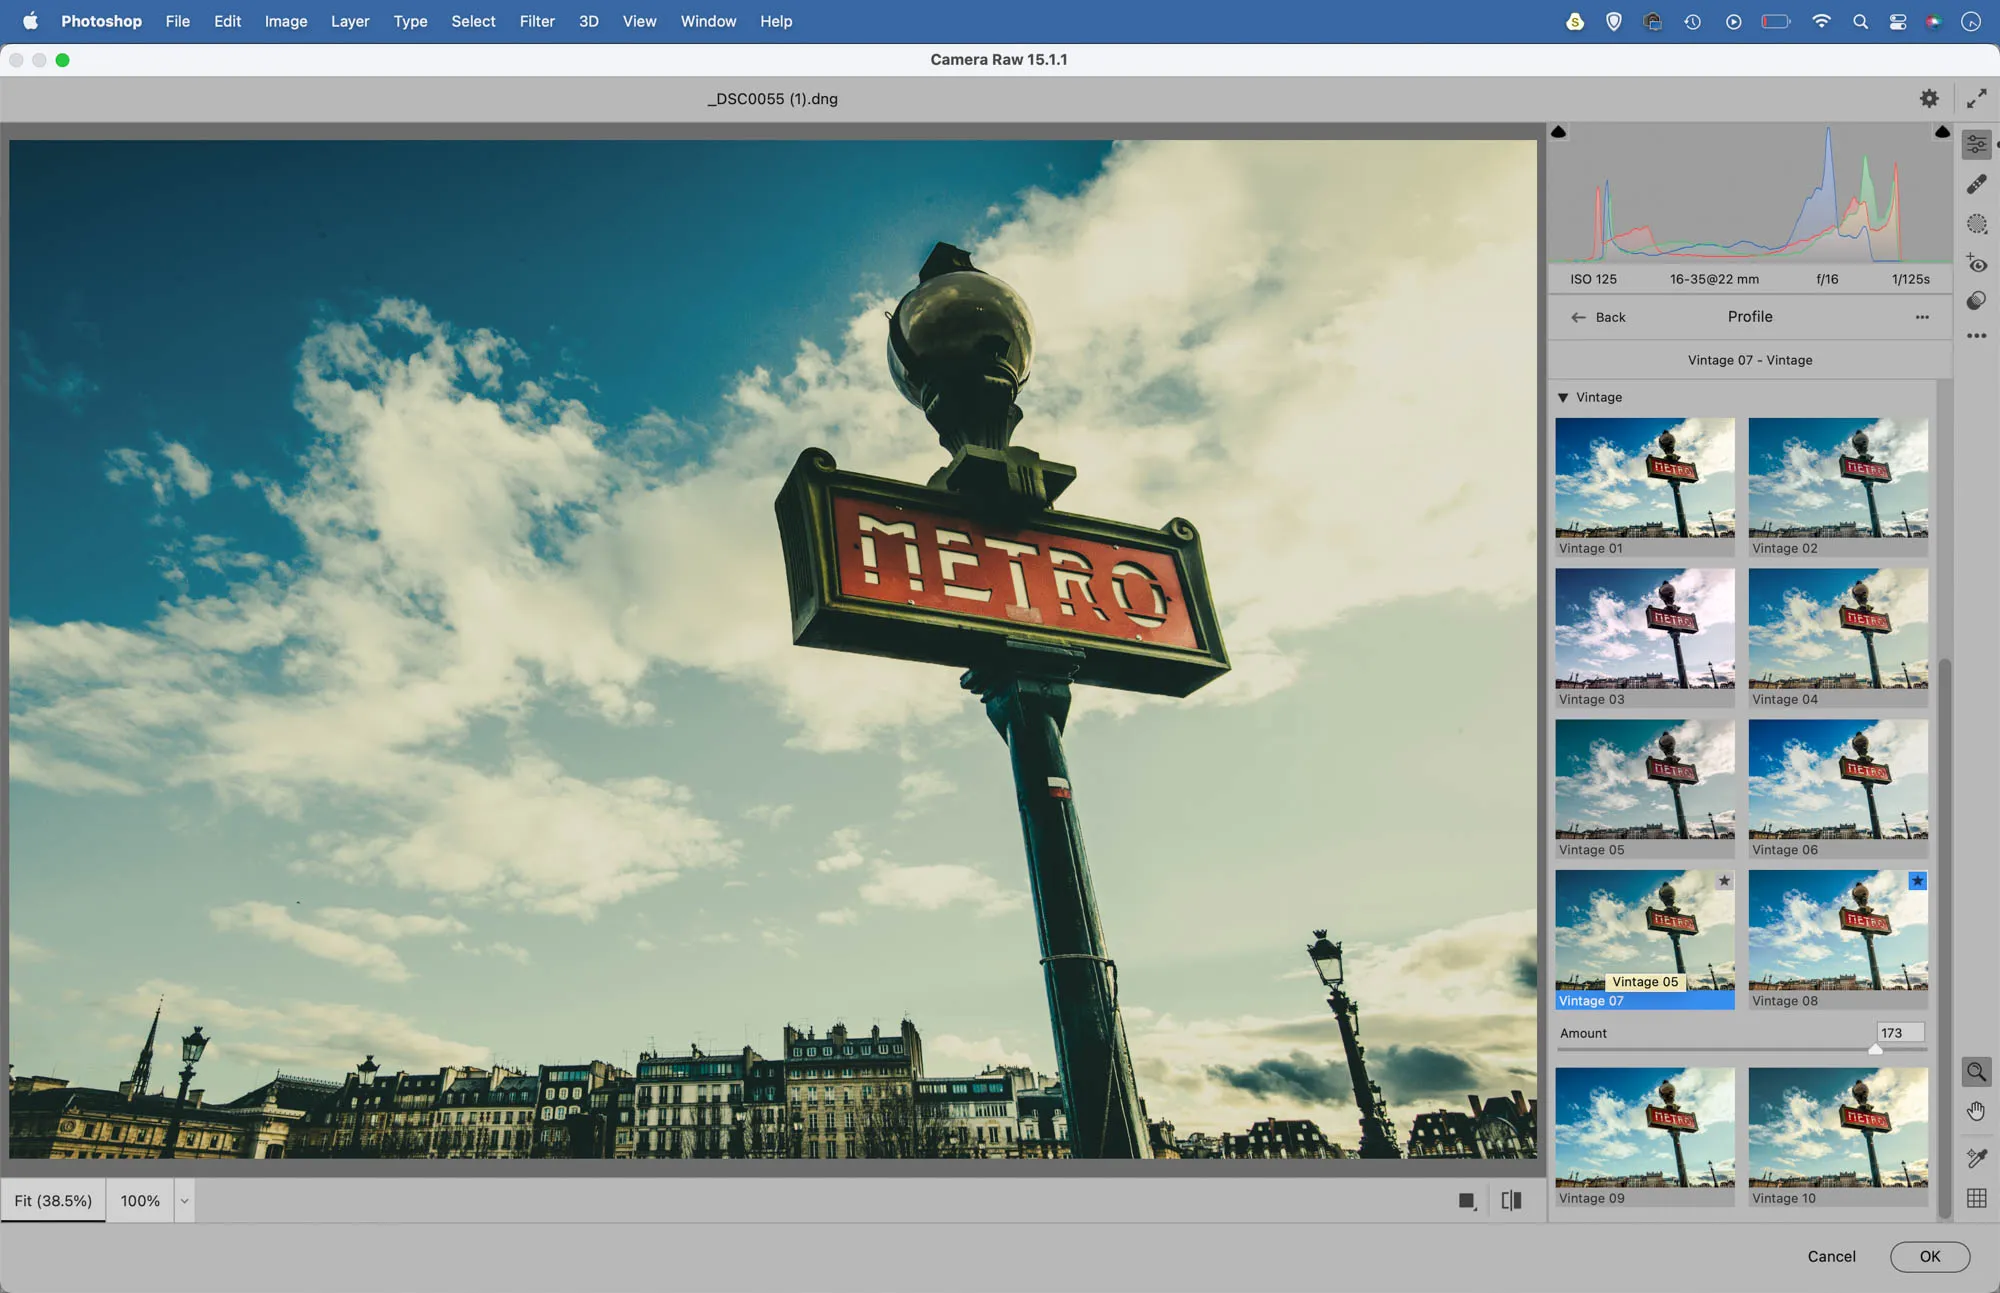
Photoshop’s Camera Raw and Lightroom both offer a default set of Vintage Profiles that quickly allow you to skew the colours in your images. Simply open the image into Camera Raw or Lightroom (or go to Filter > Camera Raw Filter in Photoshop) then click on the grid icon at the top of the Basic Panel on the right. This’ll open up the Profile Browser where you’ll find a set of Vintage Profiles. Hover over each to see how they’ll look, and adjust the Amount slider to control the strength of the colour change.
4 Shoot through an old film camera
.webp)
Many of us have old cameras but ran out of usable film years ago. However, there may be a way to take images through them. If you have an old camera with a focusing screen like an old medium format then try composing with the old camera, then aim your digital camera at the focusing screen and capture what the old camera sees. This can result in a wonderful retro quality. You get the look of the old lens with all its lovely imperfections, and the fuzziness of the screen can add to the nostalgia too.
5 Use a high ISO, or add grain later
.webp)
One of the wonderful characteristics of old film stocks was the heavy grain you would often see, especially if films were pushed in processing to squeeze more out of the ISO. We can get a similar look while shooting on a digital camera by using an unnecessarily high ISO like 3200 or more. If you’d rather keep the in-camera noise to a minimum, you can instead add heavy grain later. A simple way to do this is found in the Effect panel in Lightroom/Camera Raw. Try increasing the grain slider, then fine tune it with the size and roughness sliders.
6 Transfer colours from old photos
There are lots of ways to give your modern photos a retro colour shift, but this could be one of the most fun. Start by finding an old photo. Perhaps you have a scan of an old print on file, or you could always find rights-free vintage images online at sites like wiki commons. Open the image into Photoshop along with your modern photo then go to Filter > Neural Filters. Turn on Color Transfer, then go to the Custom tab and load in the vintage image. The filter will transfer the retro colours to your modern colours photo. Initially the effect tends to look too strong, but simply output as a new layer then lower the layer opacity to tone it down slightly.
7 Blend textures with your photos


With textures and blend modes you can easily give your photos the look of a print that’s suffered decades of neglect. Begin by building up your own library of aged textures. Take photos of old roasting tins, crumpled paper, scratched surfaces and anything else you can think of. Spend half an hour looking around the house and garden and you’re likely to find plenty of surfaces to work with. Once done, open your image into Photoshop (or Affinity Photo) then copy the texture over and experiment with the layer blend modes to combine the two. Typically the best blend modes for this are Lighten, Screen, Darken, Multiply, Overlay and Soft Light.
8 Embrace lens imperfections
.webp)
Cheap old lenses tended to be very soft in the corners and suffer from heavy vignetting. These are two simple effects to recreate in Photoshop. For vignetting, try using Camera Raw (or the Camera Raw filter in Photoshop). Go to the Effects panel on the right and experiment with the Vignetting controls to add a darkening or lightening effect to the corners of the frame. For corner softness, go to the Iris Blur filter in Photoshop (Filter > Blur Gallery > Iris Blur) and use the circular controls to blur the corners of the frame. There are also options to add grain to the blurred areas, so you can soften the details but retain the film grain look to an image.
9 Use Analog Efex Pro

Analog Efex Pro is one of my favourite plugins for adding a retro effect to photos. It’s available as part of the excellent Nix Collection. Once installed, the plugin can be launched from within the filter menu in Photoshop. It gives you lots of fun retro presets, with options to add realistic light leaks, film borders and more.
10 Matte the shadows
.webp)
Old prints tend to fade and lose contrast over time, and this is a look that's easily created with a quick Photoshop/Affinity Photo trick using Levels. Open the image then go to the Adjustment Layer options and choose Levels (or hit Cmd/Ctrl+L). Go to the Output Levels sliders at the bottom and drag the black point inwards to lighten the very darkest pixels. This is sometimes called matte-ing the blacks. You could also bring the whites in slightly to reduce the brightest pixels.

James has been a professional photographer and award-winning journalist for the past 15 years. He is editor of Practical Photoshop magazine and contributes to leading photography publications worldwide.
View all articles

