


You're bound to hear the words 'presets' and 'profiles' in relation to editing photography at some point, but not quite sure what they mean? Here’s our explainer

NEW:
Discover (and download) all Picfair presets on our dedicated Presets page on Focus.
What are presets and profiles in image editing?
In a nutshell, Presets and Profiles are a set of pre-created edits that can be applied to an image all at once. Presets and profiles can be applied to an image both during the import process or after you’ve imported your images, for example when editing your images in Lightroom’s Develop module.
"In a nutshell, Presets and Profiles are a set of pre-created edits that can be applied to an image all at once."
Presets and profiles have become extremely popular as a means to apply stylistic looks to images quickly and simply. They are especially useful when it comes to a series of images, where you want them all to have the same aesthetic as you can apply the same presets and profiles to multiple images. This also means you can significantly cut down your screen time when editing.
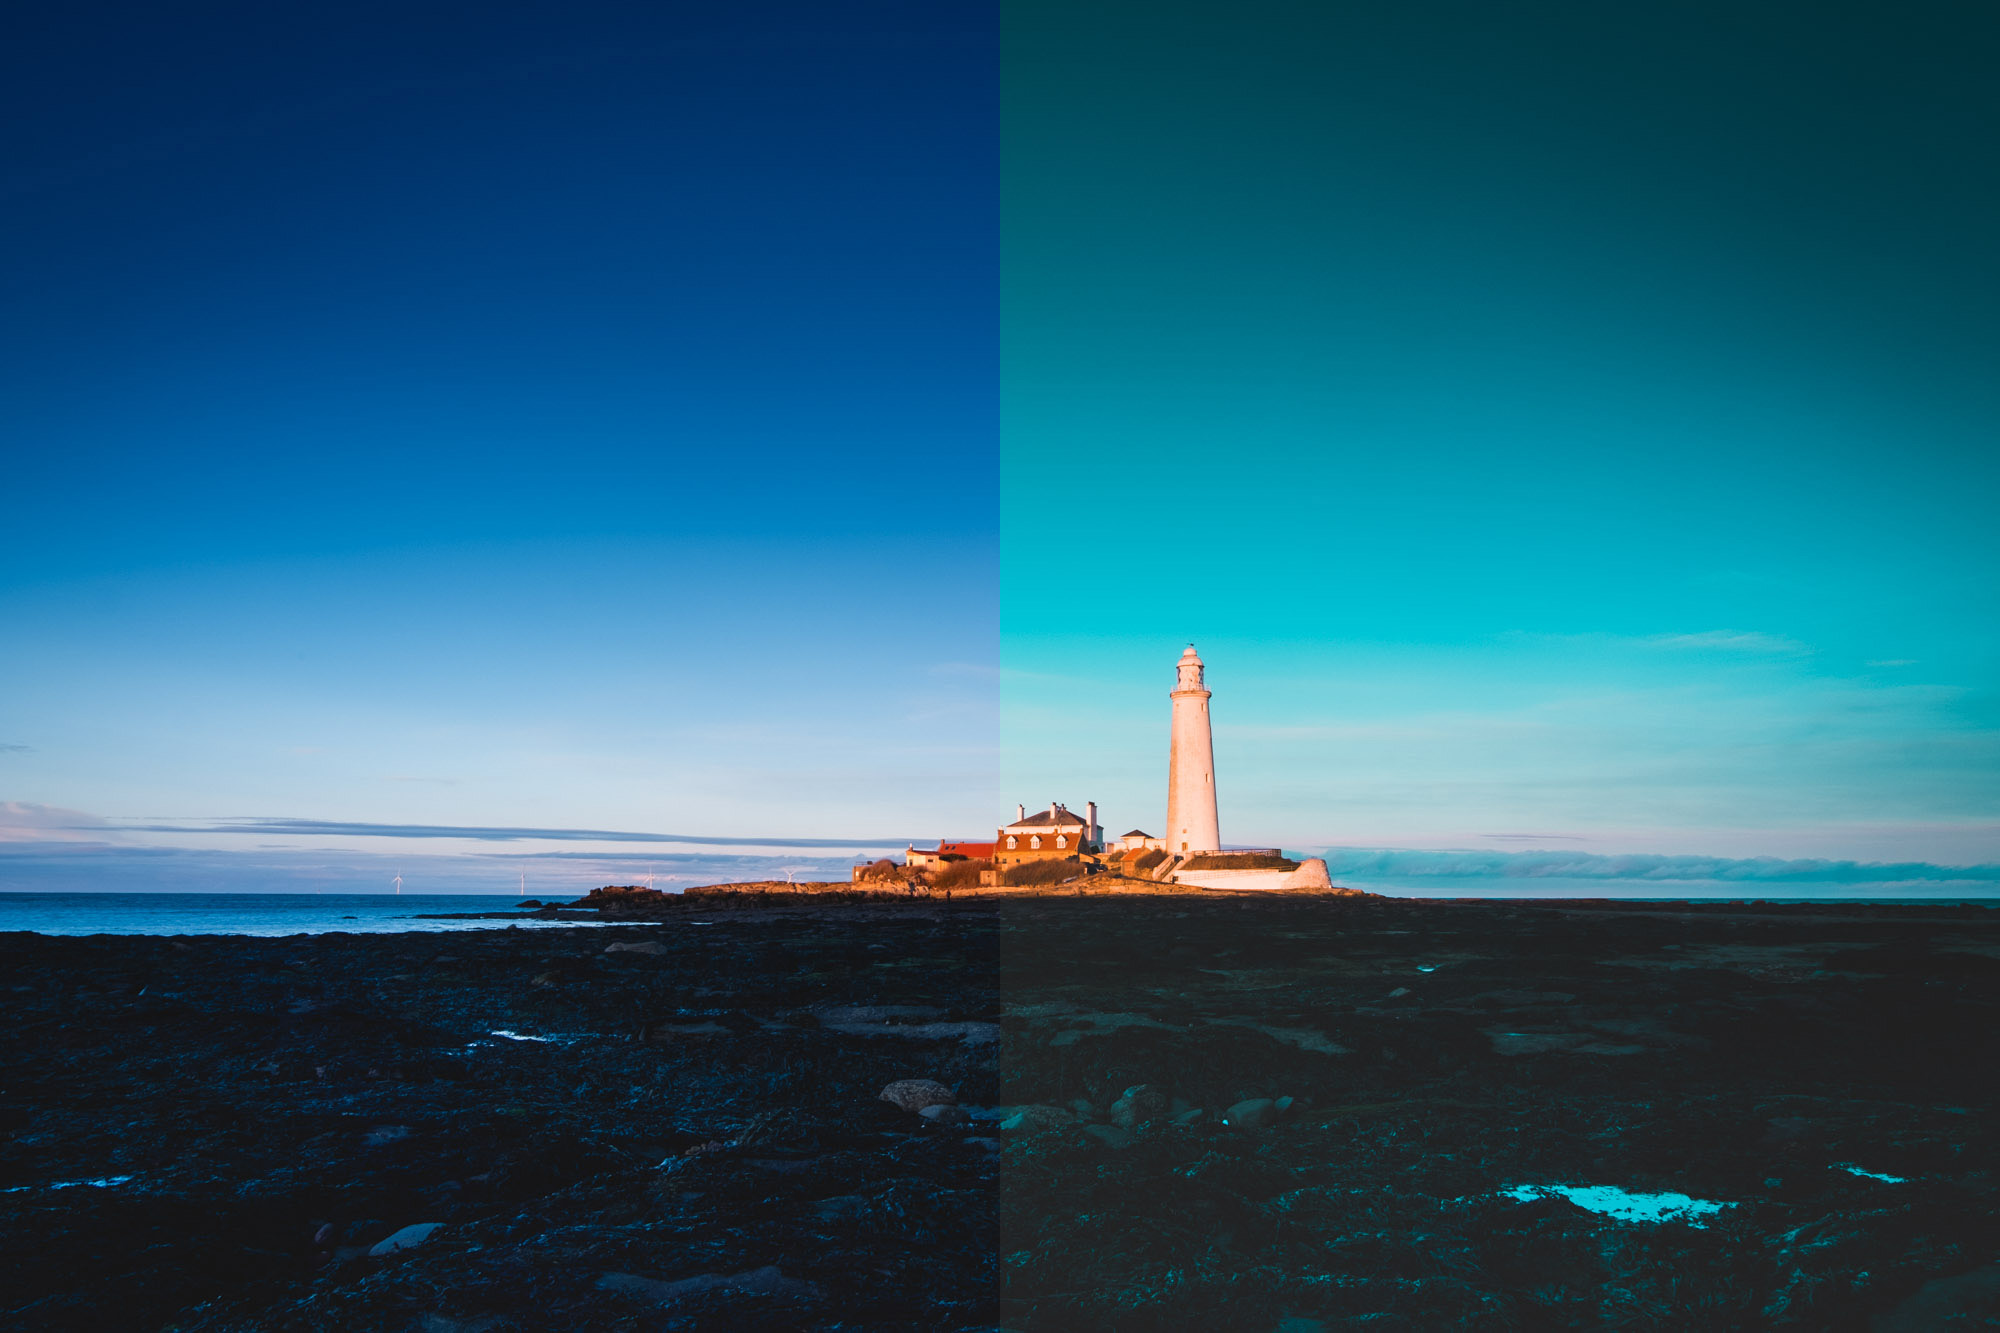
Many photographers also use presets and profiles to give their images a unique look so they stand out, and they can also greatly enhance the mood of an image and help tell the story behind it. Any Lightroom user can create a preset or profile themselves, and they can be as simple as a lens correction and contrast enhancement, or something far more intricate–involving colour grading, masks and curve adjustments.
More recently they have become a popular add-on product for professional photographers and content creators, as presets and profiles made by others can easily be imported to your own version of Lightroom. Presets have also proved invaluable in helping those without more advanced editing skills to apply specific looks to their images.
How do I create a preset or profile in Lightroom?
You can make a preset or profile from scratch in the Develop module of Lightroom, this video below shows you how can create your own, and then save them so you can apply them each time you would like to use them.
What’s the difference between a profile and preset?
There’s little difference between profiles and presets - but act in the same way, but namely profiles act as a ‘base layer’ when converting RAW information from your images. So for example, when opening an image in Adobe Camera Raw, it would be more common to apply a profile during the RAW conversion process.
If you’re relatively new to presets and profiles, or mainly using Lightroom, you don’t really need to worry about the difference too much - both apply the same effects, it just comes down to preferences with workflow.
Are there any disadvantages with presets and profiles?
"There are many places out there that offer free presets, however these are often tied-in with signing up to spam-like marketing lists... only go to reputable sources if you're looking to import free-to-use presets"
Generally the advantages of presets and profiles majorly outweigh any disadvantages, but there are some.
If you’re not making your own presets and you’re looking at importing them, and especially those that are particularly popular, there’s a risk that your images will have exactly the same aesthetic as many other photographers. That’s not to say you shouldn’t still go ahead and use them, just make sure you add your own personal touch with your own small edits.
When you import a preset you don’t need to keep those exact edits and settings once you've apply it to your images, you can easily adjust them–as you would when editing any other image. So you create your own unique look with the preset and apply this so your images stand stand out.
And also, when getting presets from others, take some time to look at the reviews if any, or example images of the preset applied. Not all presets are a perfect fit, and and sometimes they can do more harm than good to your image. Some presets that include sharpening adjustments or extreme tonal and contrast changes can actually reduce the overall quality of your image and even result in parts of your image being ‘clipped’ - which means a loss of detail in your shots. Some of these severe adjustments may not be fully visible either until the image is printed, so it’s always worth doing some sampling and testing beforehand.
Make sure you go to reputable sources for your presets too, there are many places out there that offer 'free preset packages', however these are often tied-in with signing up to spam-like marketing lists, the annoyance of which isn’t worth it in the long-run. So shop around and only go with the best quality presets out there.
Does Picfair offer free presets to use for my image edits?
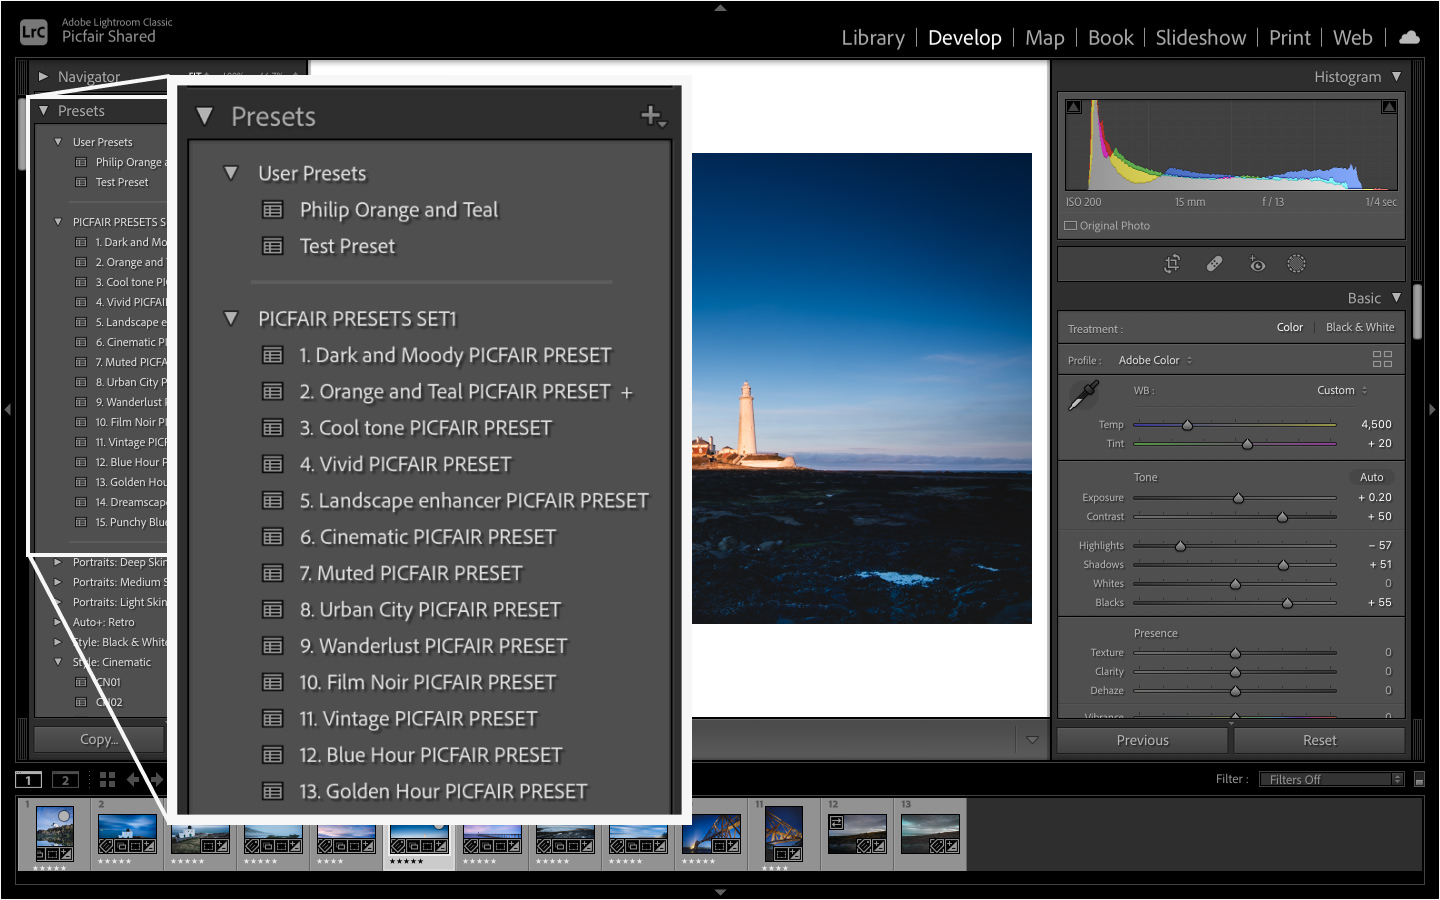
Yes! You can download them all from our dedicated Presets page on Focus! And here’s how to install them:
Editor's note:
I hope you like using these presets and profiles with your images, which were put together with our photographers at the heart of it. Great edits can really help you tell the story behind your image and and bring out the very best from your shot.
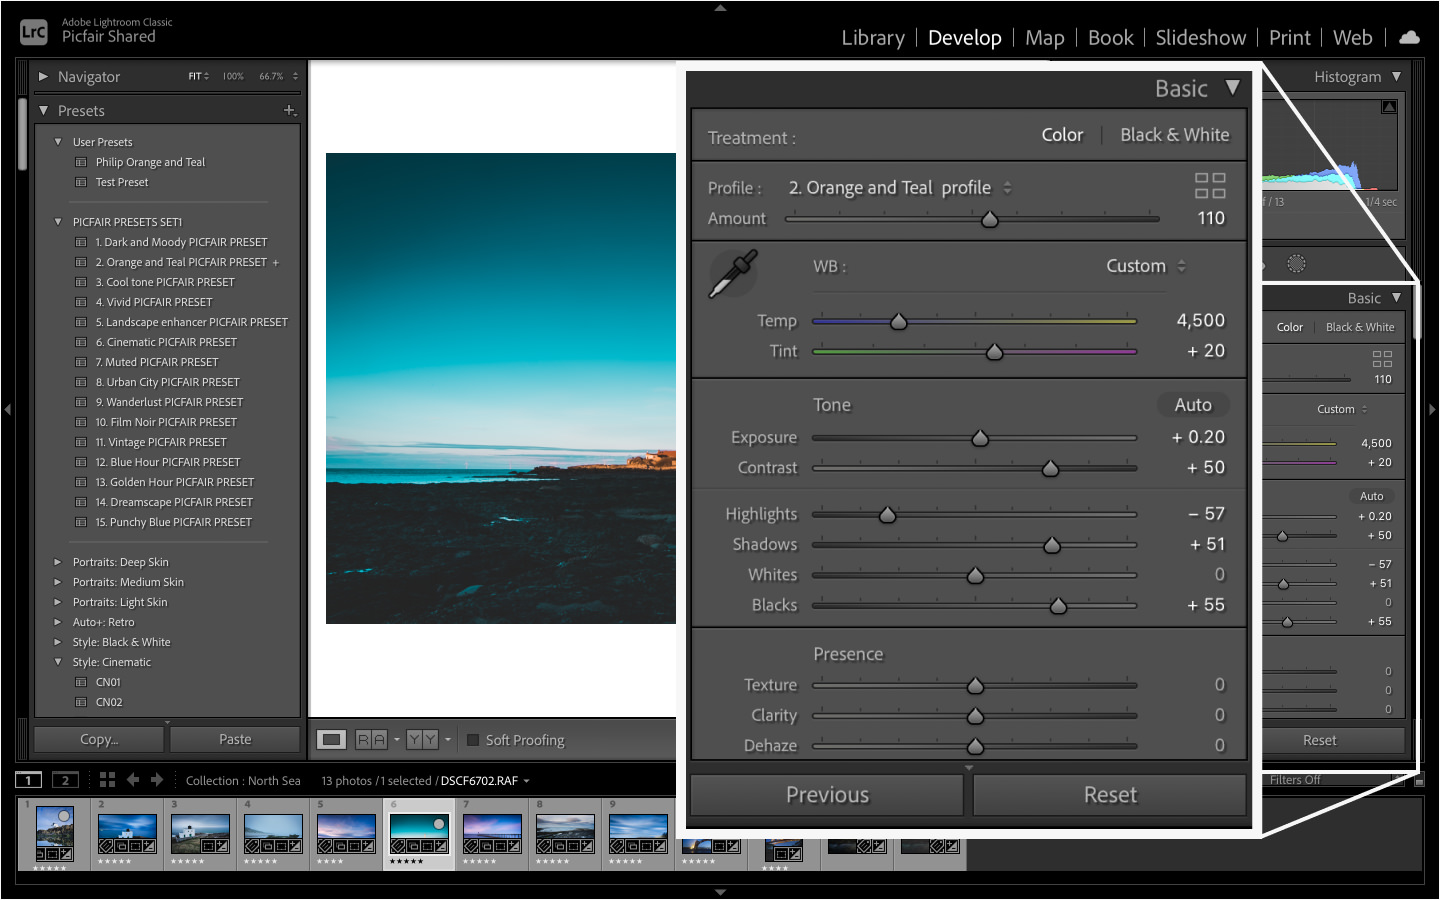
I'd recommend spending some time trying out different looks, using the slider to get the optimum effect that you're happy with, and generally just enjoy the editing process. You can find many more post-production how-to guides with our dedicated editing category here.


