


Whether you want to make a print or present your images onscreen, follow these simple editing tips and tricks for optimum quality

We put so much time and effort into taking photos, it makes sense to take a moment or two to perfect them before printing or presenting on a screen. Here are ten tips and techniques to help you get maximum quality and impact from your best photos…
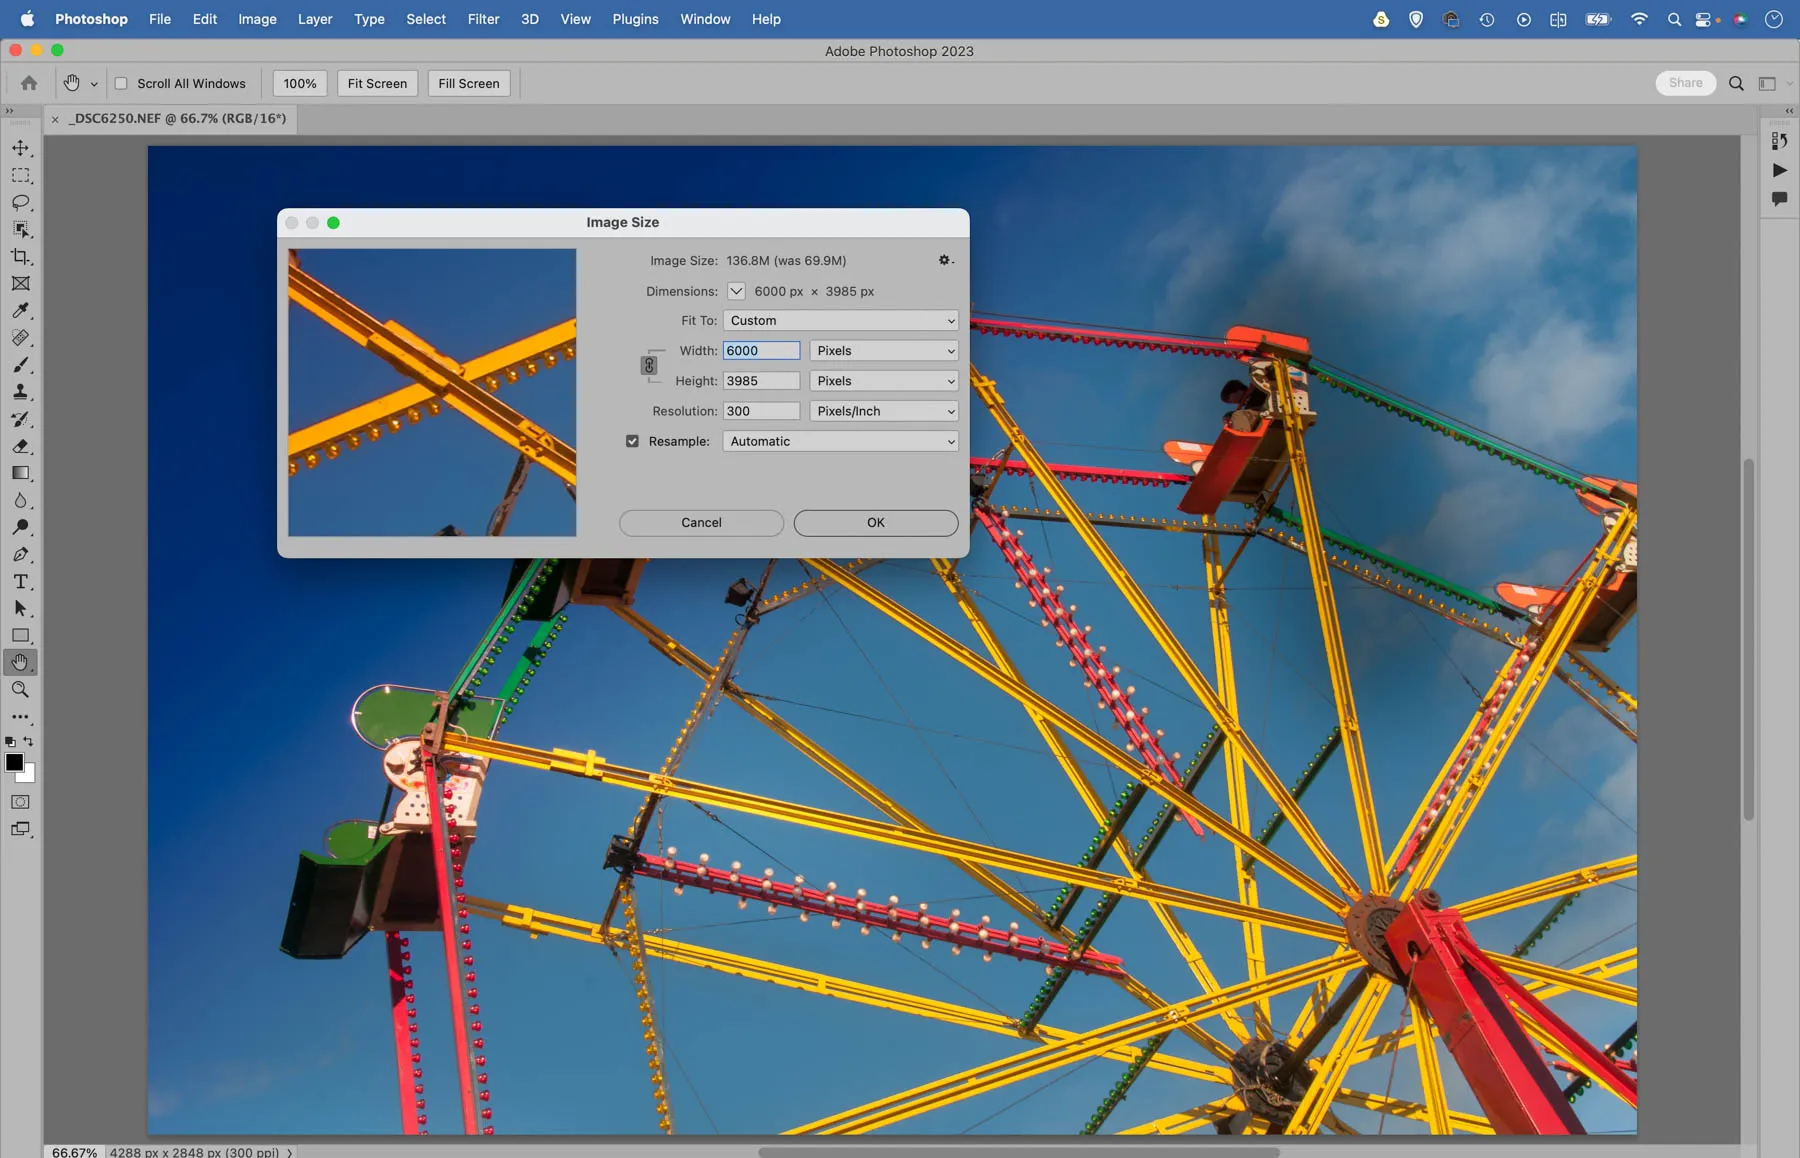
1 Use the right resolution
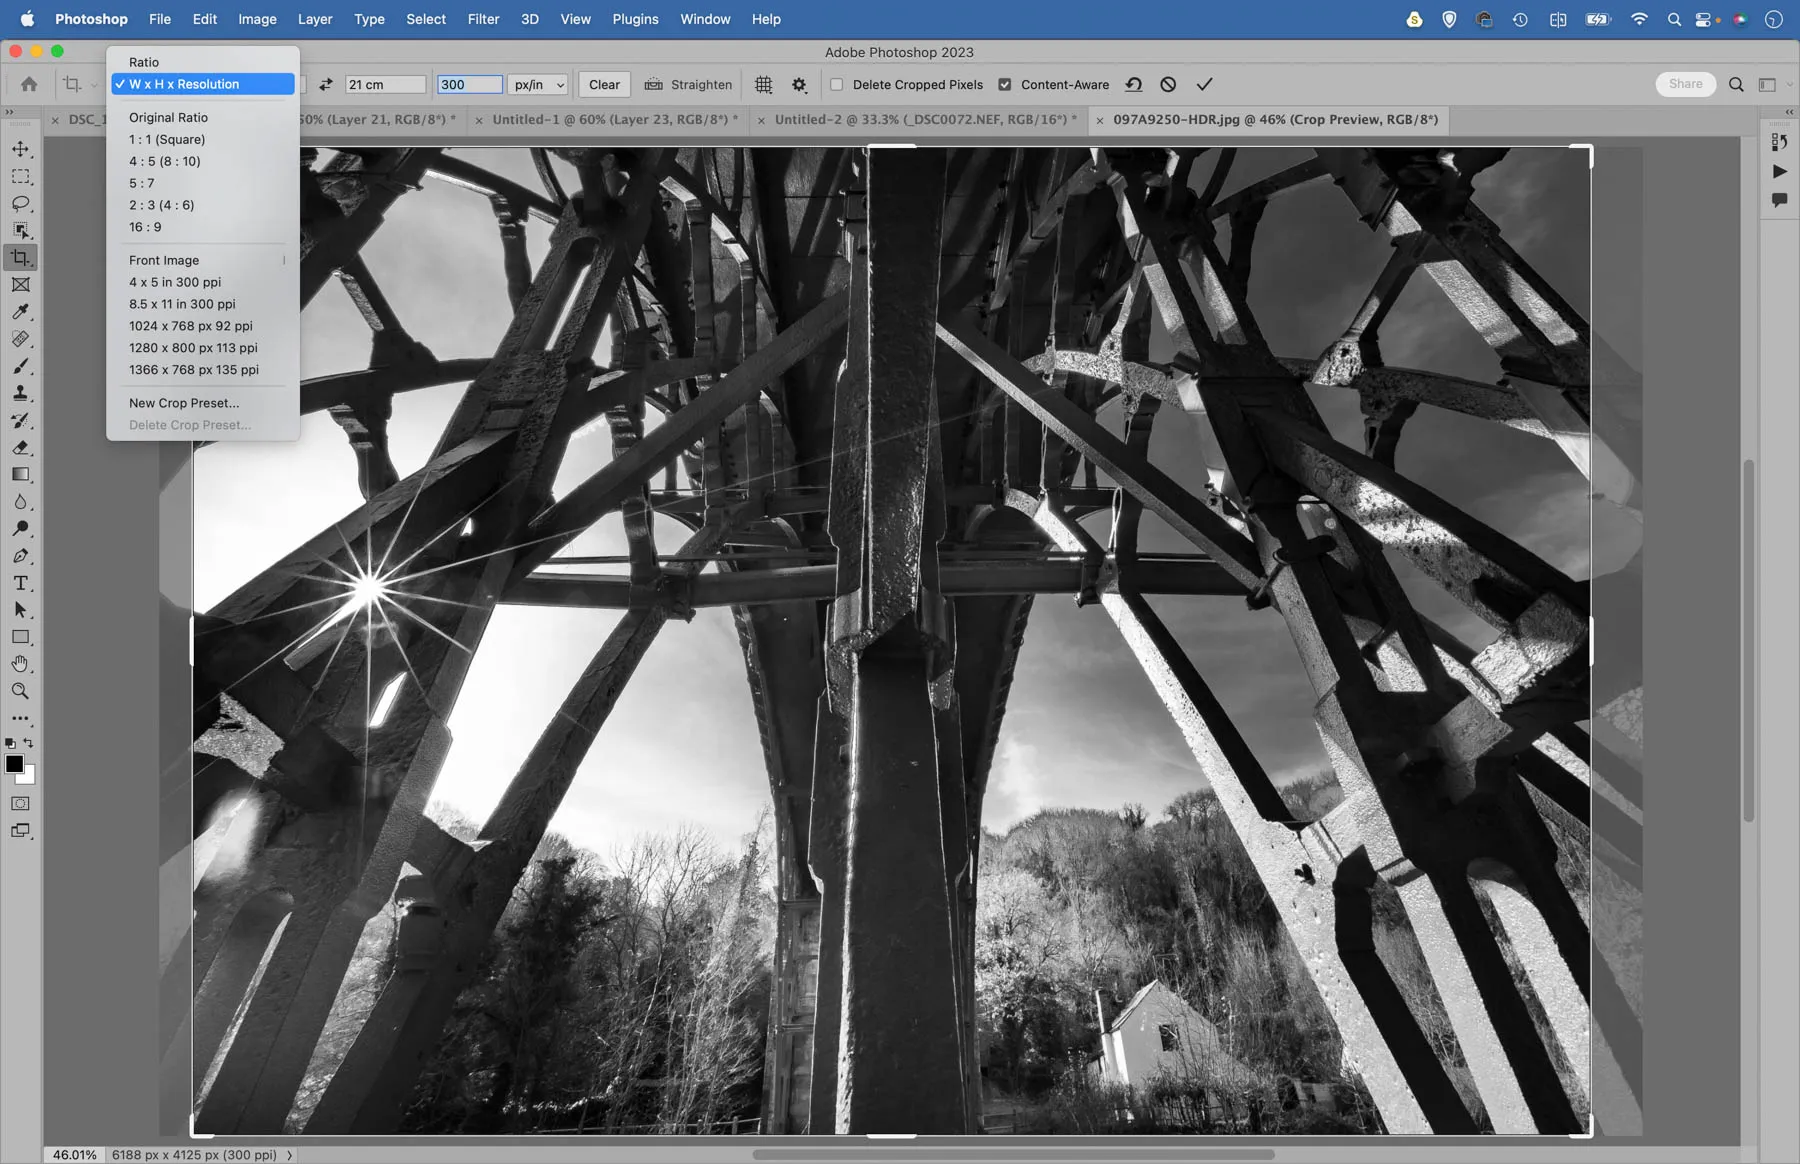
Whether you want to make a print or post your image online, setting the right resolution is important, as it ensures that the number of pixels in the frame matches the chosen output. If you are intending to make a print, first crop to the right width and height then ensure the resolution is at 300 pixels per inch (also called dots per inch or dpi for short). For viewing on a screen or for the web, use 72dpi. Usually this means downsizing your image so be sure to save a copy, but at times you may want to increase your resolution. The Super Resolution command in Lightroom and Photoshop (within Camera Raw) is great for this. It employs AI to double your image size.
2 Sharpen on output
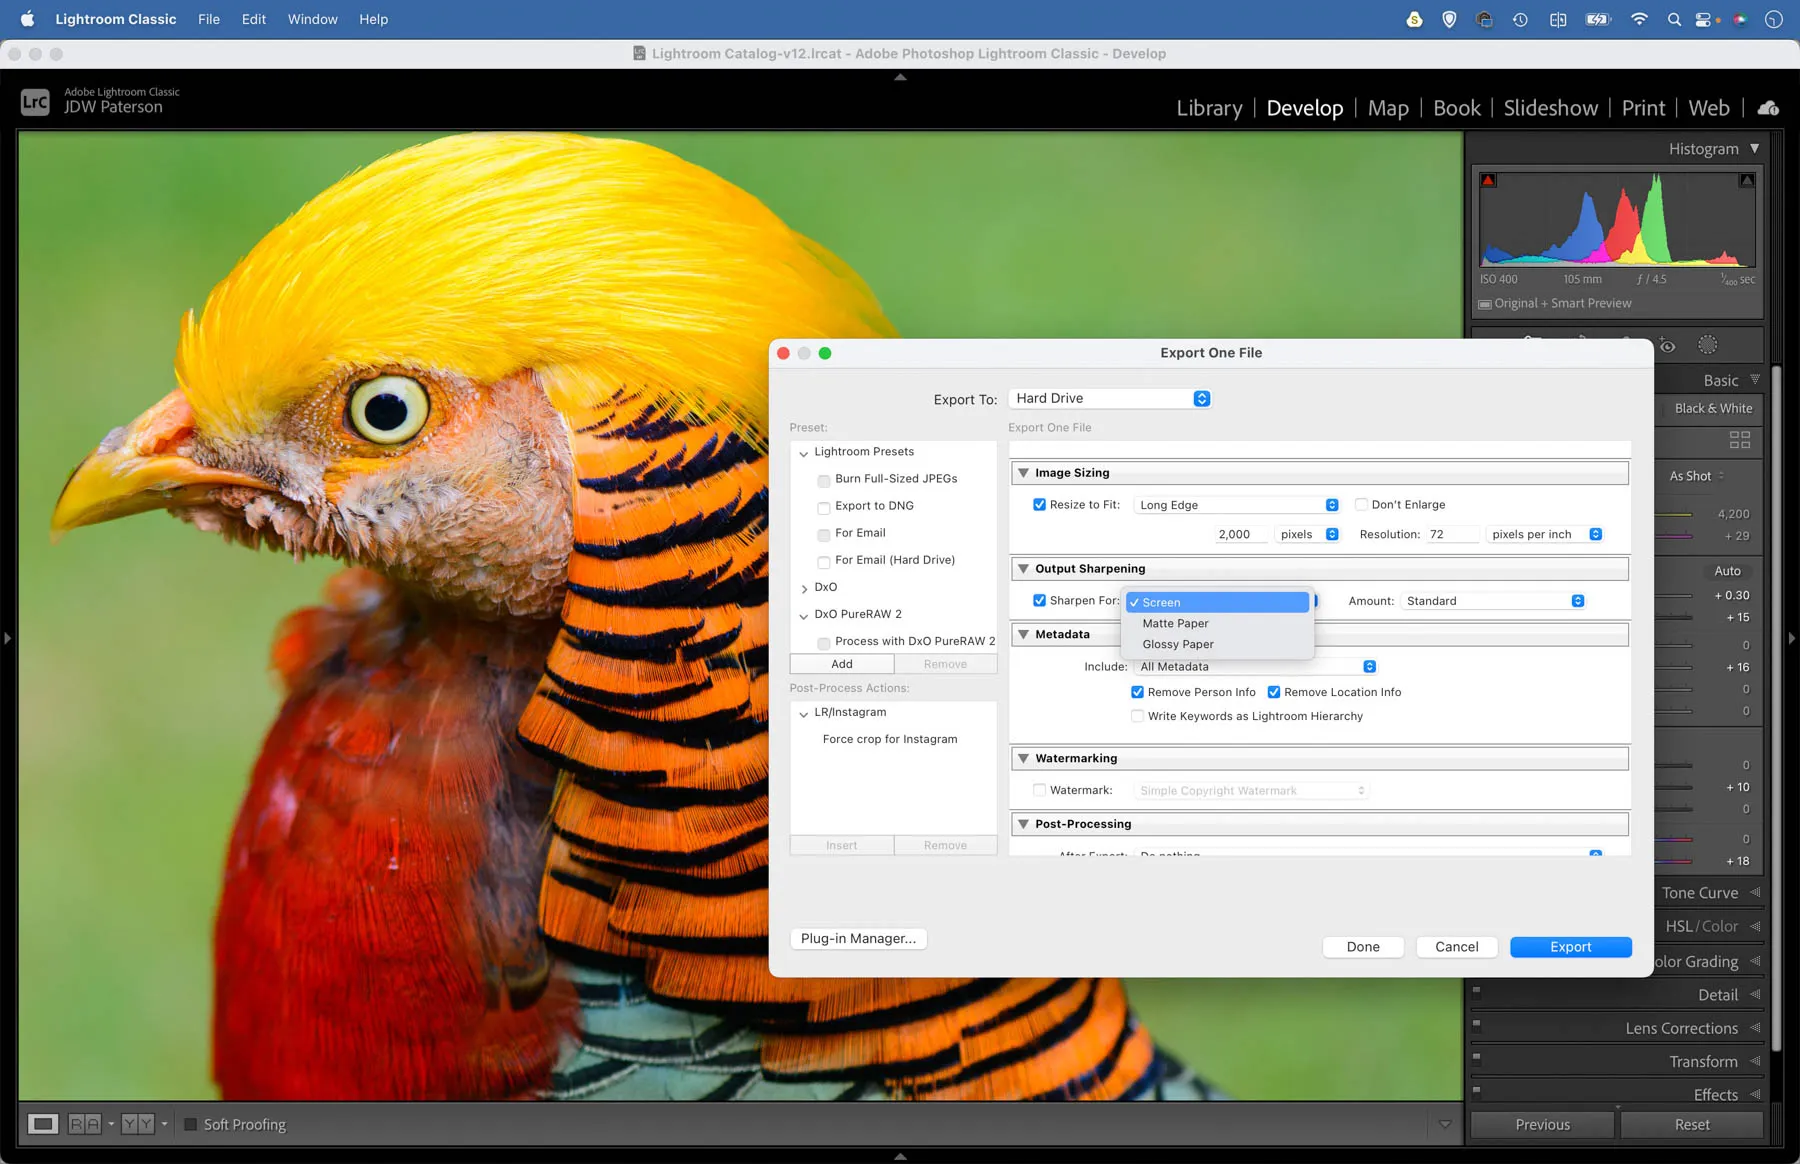
Sharpening is a vital part of the image-editing workflow. It ensures the details in your photo look as crisp as possible. Final sharpening - sometimes called output sharpening - should be carried out after the image has been resized for the chosen output, be it print or screen. There are lots of great sharpening tools like the Unsharp Mask command in Photoshop. But if you want a really simple solution, try the output sharpening settings in LIghtroom’s Export dialog. They may look a bit rudimentary for serious users, but they’re actually very good for applying sharpening that is tailored to the specific resolution of the image. First set the resolution in the export settings, the go to the output sharpening and set a media type like Screen, Matte Print or Glossy Print, choose a strength from low, medium and high, then export the image in your chosen file format.
3 Fix sensor marks

There are some obvious errors that should be fixed before presenting your images, like wonky horizons or shoddy cropping. But then there are less obvious issues like sensor marks. These may not be immediately apparent, but once noticed they can completely spoil an image. So clean your camera’s sensor regularly, and ensure a sensor mark check as part of your image-editing workflow.
4 Correct chromatic aberration

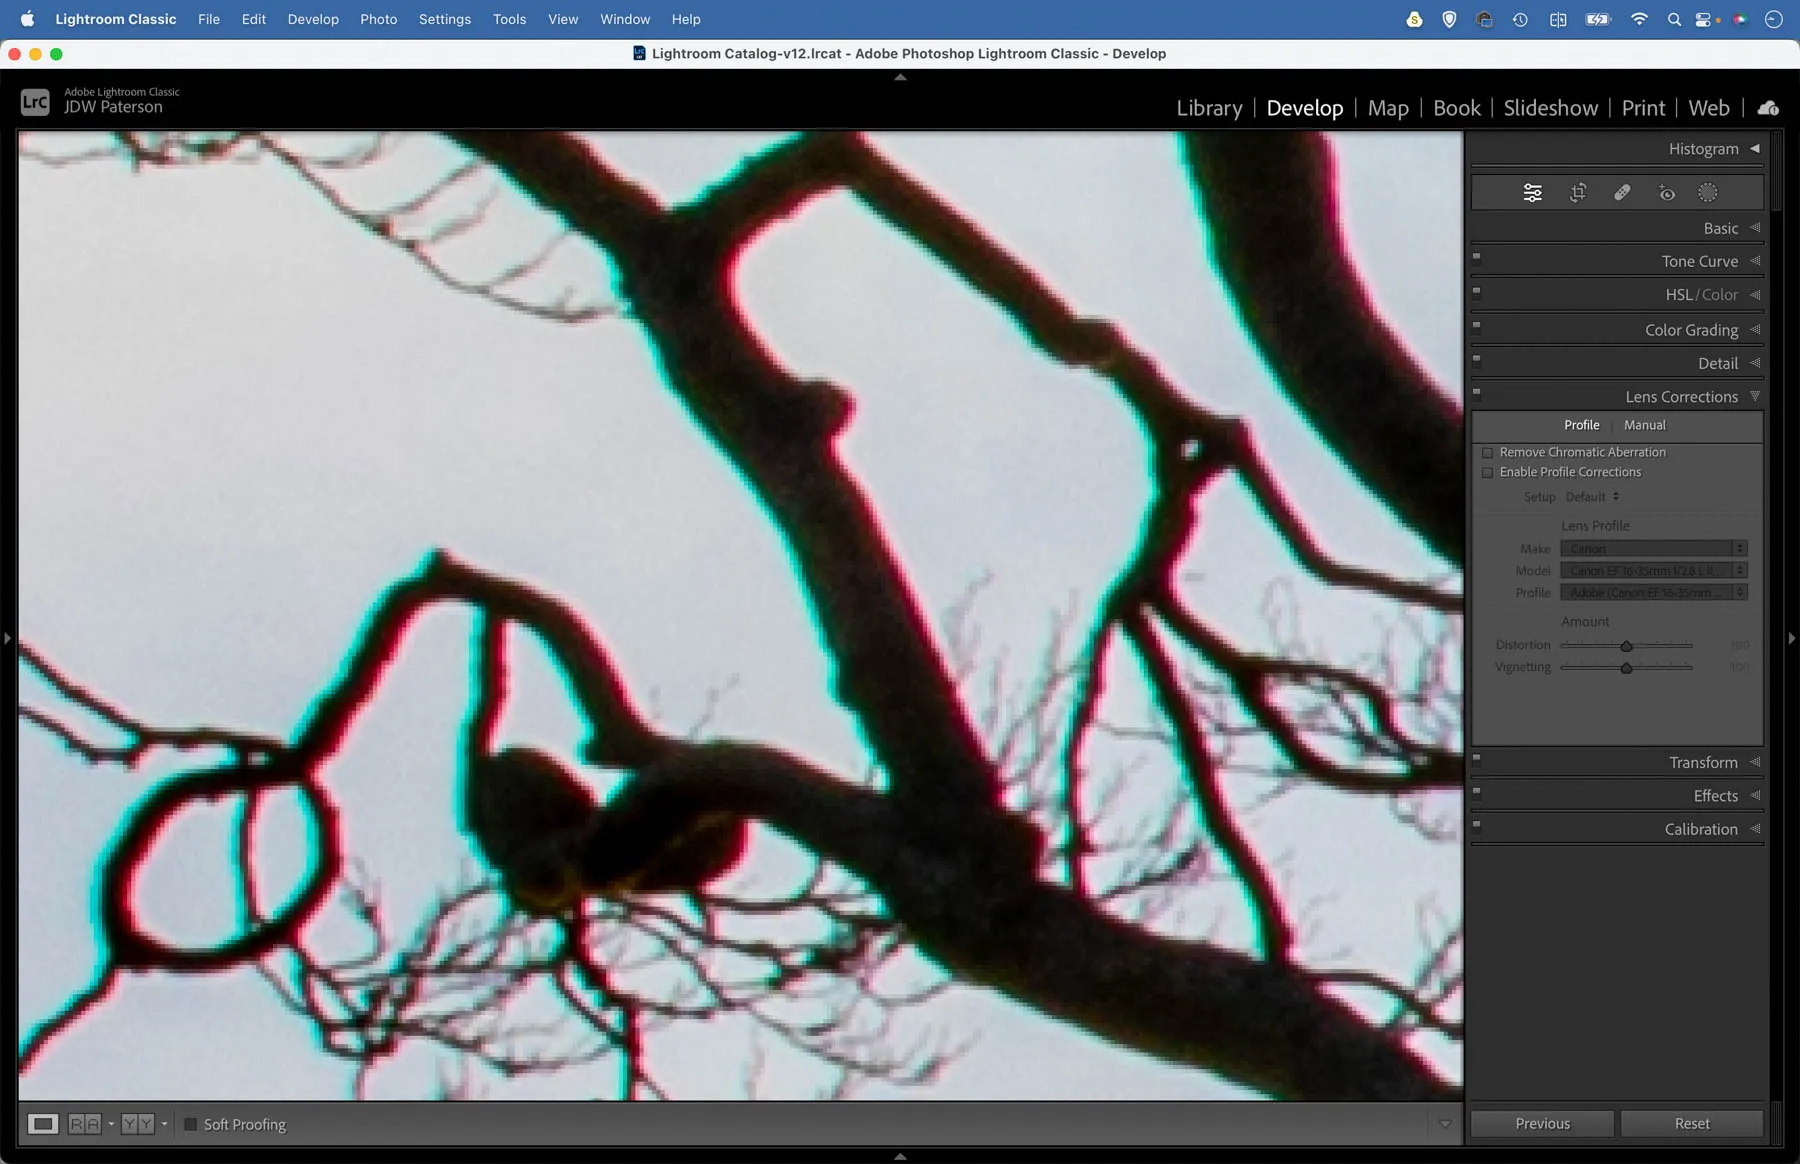
No matter how good your lens, it can still suffer from chromatic aberration. Colour fringing can occur in areas of contrast where dark edges meet light ones. It’s usually easy to fix, so there’s no reason why it should appear in your photos. If using Lightroom, simply head to the Lens Correction panel and check Chromatic Aberration. Some photographers like to set it up as a default, so that every image they open or import automatically has the fix applied. To do so, fix one image (and don’t make any other changes) then go to the preset panel and create a preset, making sure to only tick the Lens Correction field. Next go to Lightroom Preferences, click the Preset tab and choose the newly created preset in the Global Settings section. Now the preset will be applied to every image you open.
5 Correct noise with DxO PureRaw

Grainy noise can be a problem when shooting with high ISOs. There are several plugins out there that do a great job at reducing noise, and my favourite is DxO PureRaw. DxO have a great reputation for quality results, and their Lightroom plugin PureRaw could be their most useful tool yet. Through expensive lab testing, DxO have created a database of fixes for almost every camera/lens combo you can think of. With minimal effort on your part, it improves your raws straight-off-the-bat by applying tailored fixes for optical flaws. But even better is the noise reduction feature. Called DeepPrime, it is capable of cleaning up noise in high-ISO images to an astonishing degree.
6 Check image guidelines
If you’re preparing images to upload to a specific site or platform, then take a moment to check their image guidelines first. As well as useful information on file types and resolution, you may also find rules on the type of images that are permitted. Picfair, for example, does not accept composites, heavily filtered effects or images overlaid with type.
7 Manage colours
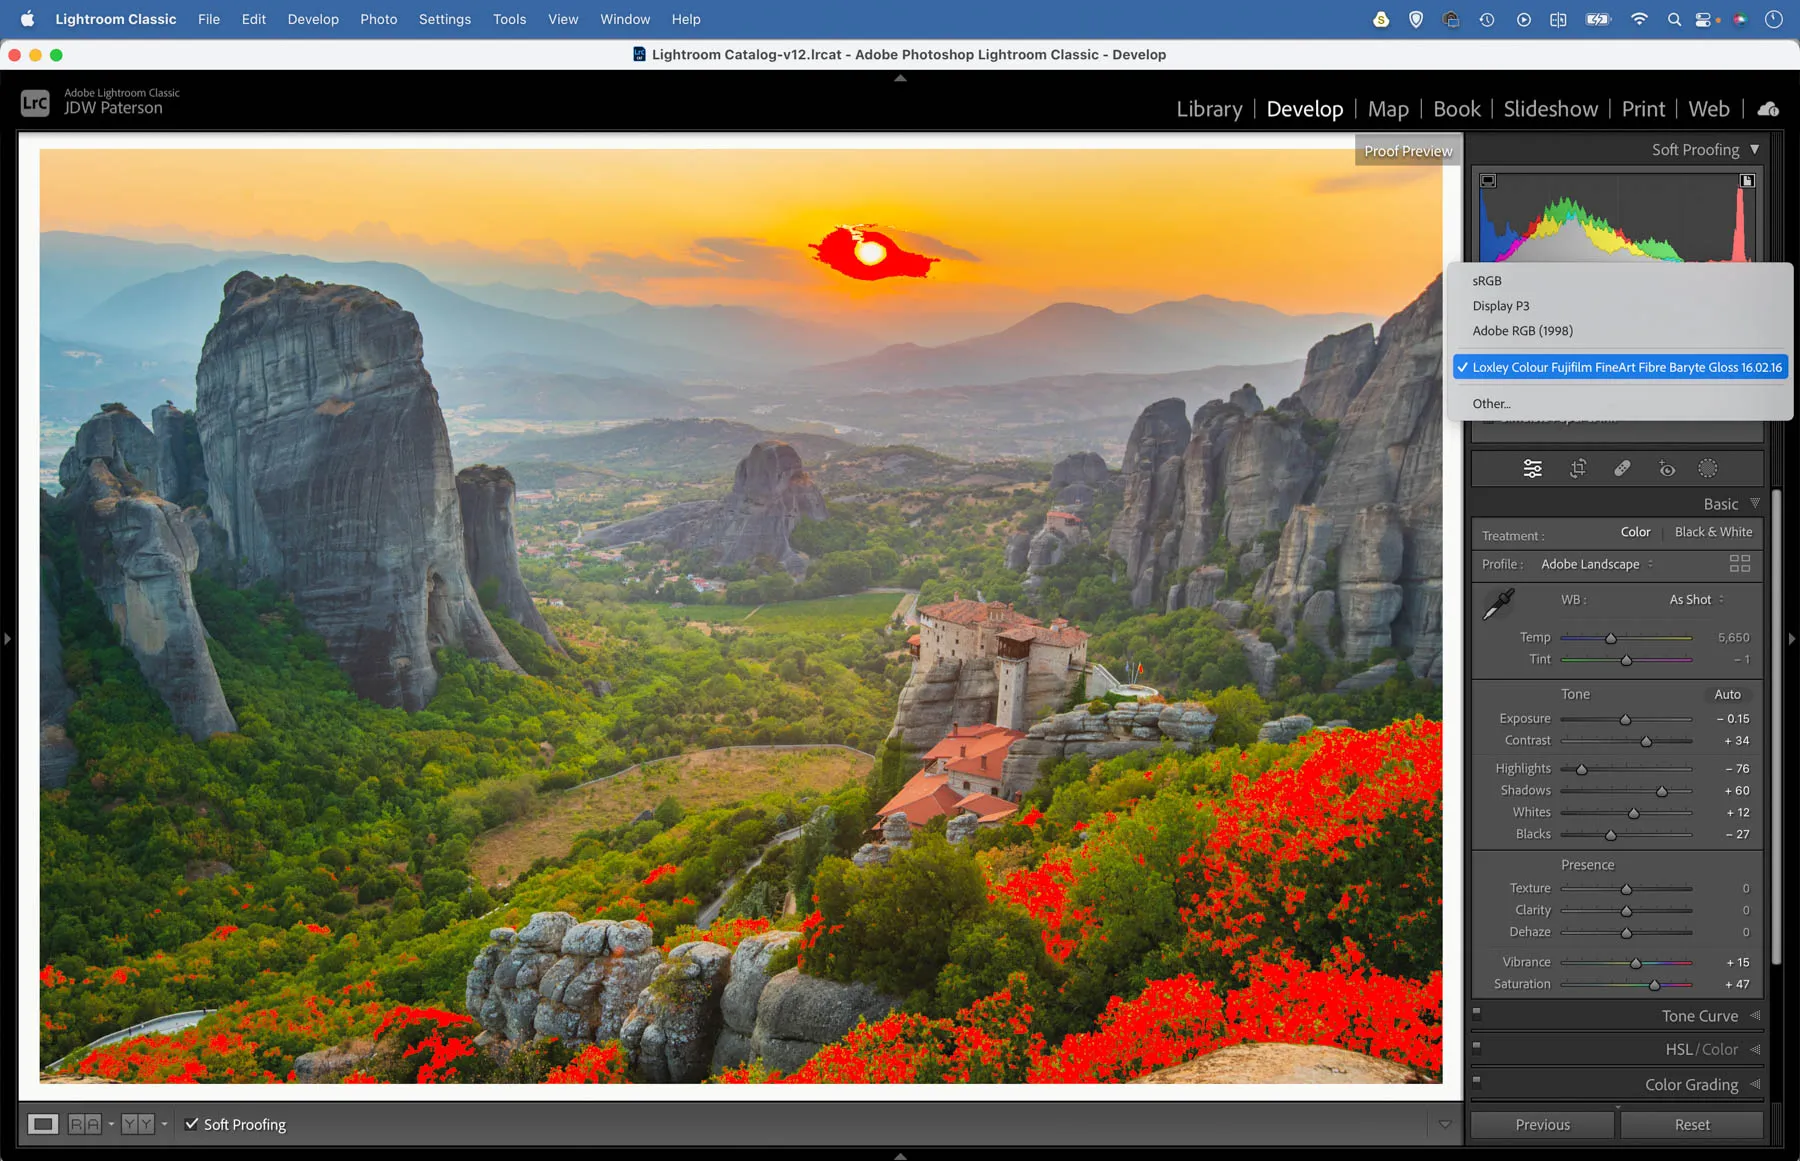
Colour management can be a daunting topic, but you only need a basic grasp to get quality results. In essence, colour management ensures that the colours you capture when taking the photo look similar on your monitor when editing, and again when printed or posted online. The challenge is that each of these stages is capable of producing a different range of colours, which we call profiles. Firstly, it’s important to have a calibrated monitor so the colours you see onscreen are accurate. For editing, we usually use a wide profile like Adobe RGB 1998. But for web we need to export as sRGB, which gives a smaller range of colours. When it comes to printing, download ICC printer profiles for your chosen printer and paper combinations, then use Soft Proofing in Lightroom or Photoshop to simulate what the print will look like.
8 Export tricks
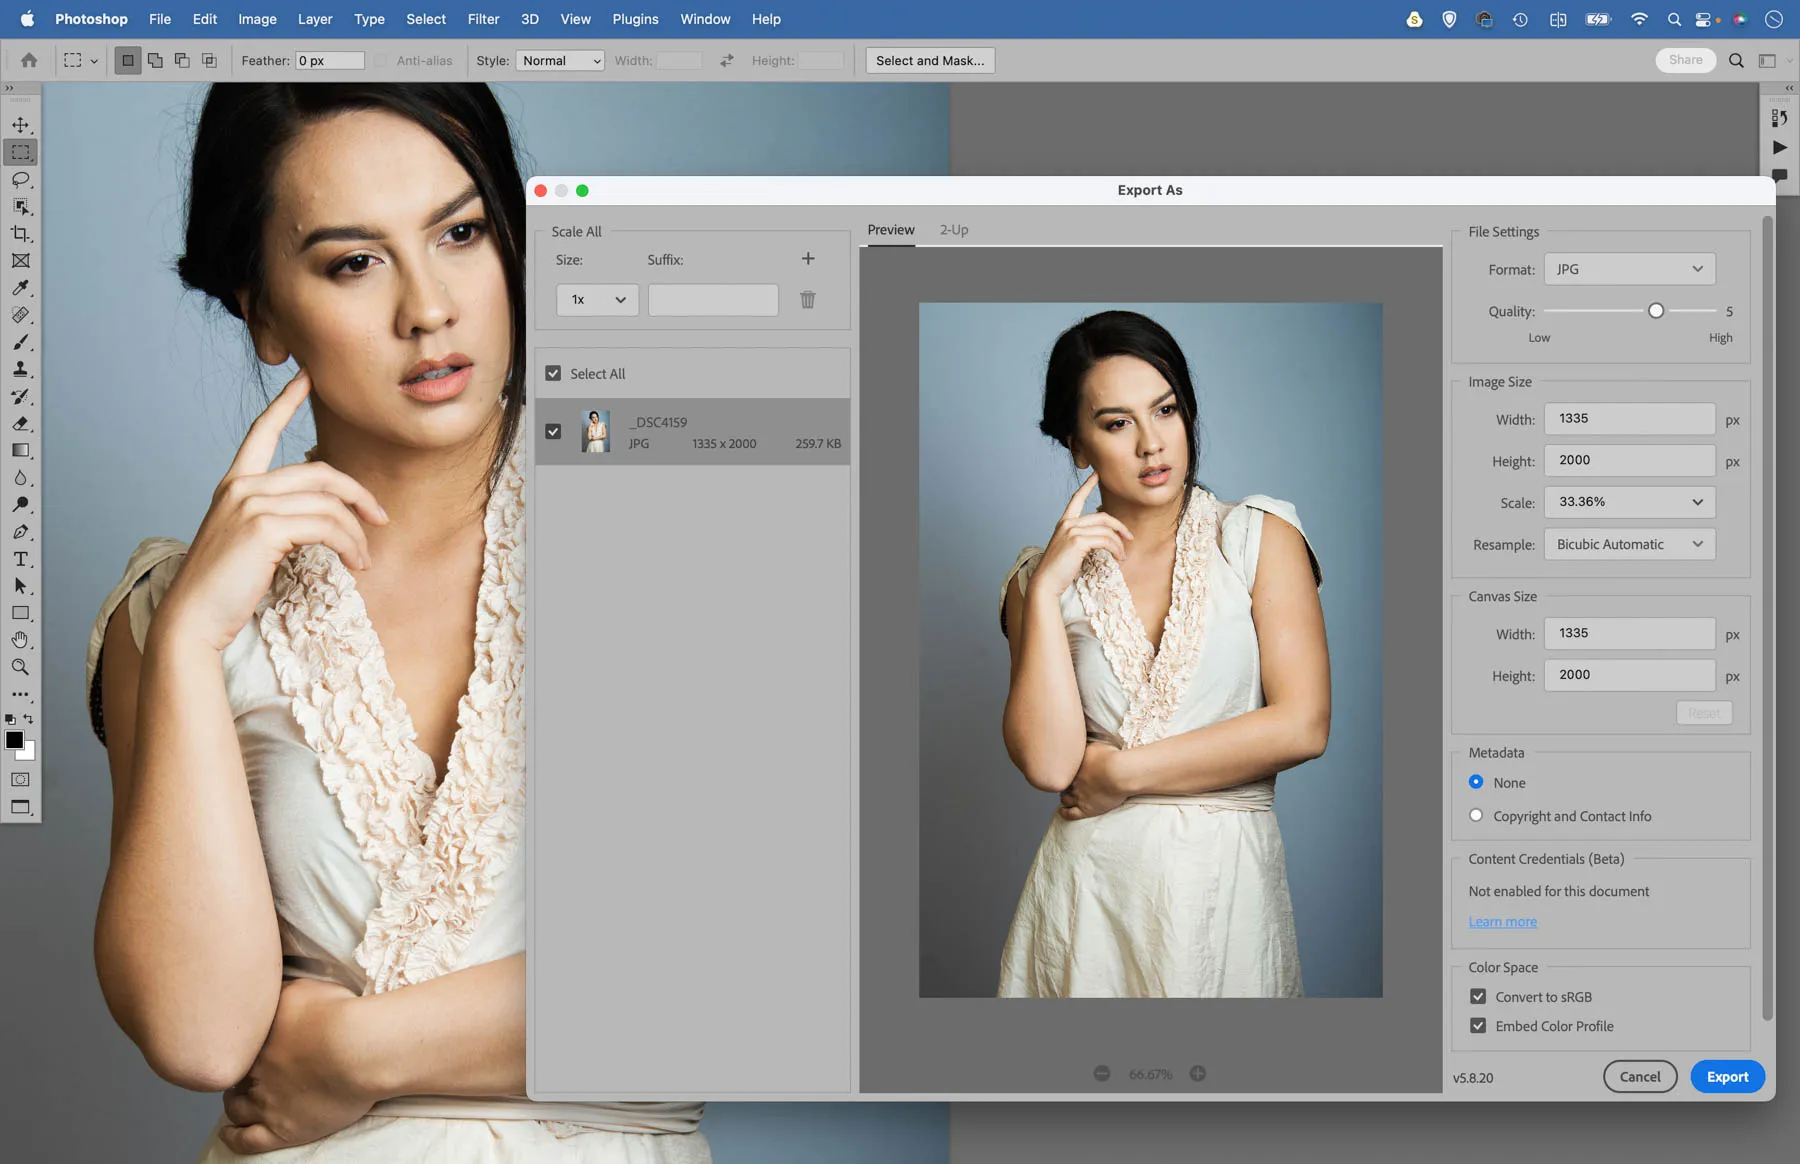
Photoshop has a couple of very handy commands that speed up the process of saving images in different sizes, quality and format, which is especially useful for web. Go to File > Export and you’ll find Export As. This allows you to quickly set a file format, resize and choose a jpeg quality (you can also right-click any layer in the layers panel to quickly launch Export As). Alongside Export As there’s also the handy ‘Export image as PNG’ feature. PNGs aren’t ideal for photographers, but you can change it to save as jpegs instead within File > Export > Export Preferences.
9 Tweak output black levels
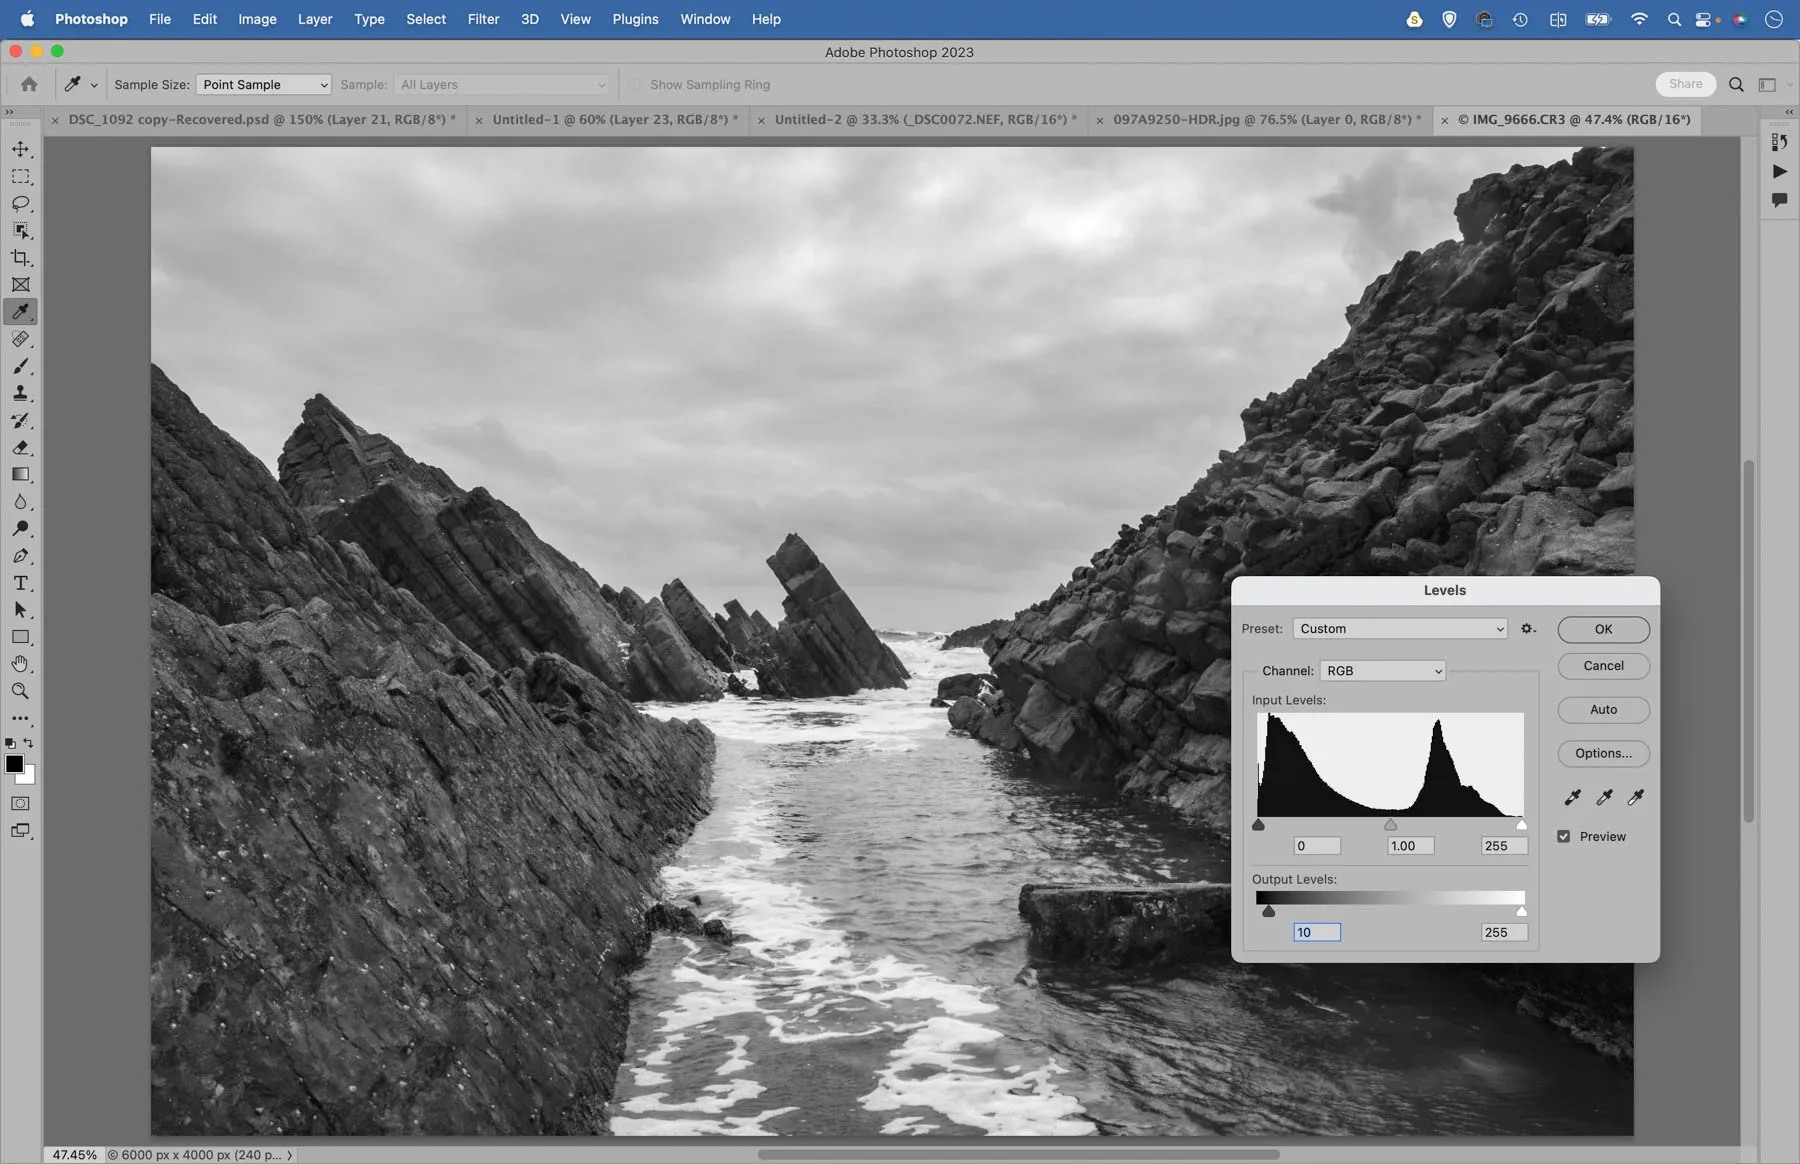
When making a print the deepest shadows can often come out as pure black, because the print isn’t capable of producing the depth that we see on a screen. A quick trick with Levels in Photoshop can remedy this by slightly lifting the black point, which is the point at which colours in the image become pure black.
10 Make Watermark and Copyright presets
A watermark can help to protect your photos. Some libraries and sites like Picfair add watermarks to your photos upon uploading them. But if you need to add your own, it’s easy to set one up in Lightroom. Simply head to the Print or Web modules and you’ll find watermark options in the Output Settings Panel on the right side. It’s also worth making a copyright preset and saving this into the metadata of your image. To do so, head to the Metadata panel in Lightroom’s Library Module to create a copyright preset.

James has been a professional photographer and award-winning journalist for the past 15 years. He is editor of Practical Photoshop magazine and contributes to leading photography publications worldwide.
View all articles

