


Master these key Photoshop tools and commands to take your image editing to the next level

Photoshop opens up all kinds of possibilities for creative image-editing, but it can be a daunting application for the beginner. One of it’s greatest strengths is the sheer breadth of tools, filters and commands. But this variety can leave the uninitiated feeling overwhelmed.
Thankfully, if you can master a few fundamentals then things become a lot easier…
1 Layers
The foundation on which all edits are made, Layers are an essential part of the Photoshop workflow. A layer is simply a part of your document - whether it be a pixel image, text, tonal adjustments or other element. Like the layers of acetate used in hand-drawn animation, these different elements are stacked on top of one another to form a whole, with upper layers obscuring those beneath. As such, layers can be changed independently of one another, swapped out, moved around, faded out, resized, turned off and edited in any other way you like. Layers let us keep our workflow non-destructive, so we have the freedom to go back and change any element at any time.
For a simple example of layers in action, open any image then hit Cmd/Ctrl+J to copy the original layer. Add any filter or tonal effect you like to this duplicate layer, then go to the Layers Panel. The bottom layer will house the original untouched image, so you can go back to it whenever you like.
2 Adjustment Layers
Layers aren’t just for housing images or other design elements, they can also be used for tonal changes. Adjustment Layers work by affecting all the layers below them in the stack, so they let you make tonal enhancements to several layers at once. To add an adjustment layer, click the circular icon at the bottom of the Layers Panel. The list of options includes Photoshop essentials like Levels, Curves and Hue/Saturation. Like all layers they remain independent and editable, so you can double-click the layer thumbnail to edit the tonal change at any time. You can also reduce the layer opacity to lower the strength of the effect, or make it work selectively over parts of the image with a layer mask.

3 Curves
Of all adjustments, Curves is without doubt the most powerful. Unfortunately it can also be one of the most frustrating for beginners. To add a Curves adjustment, click the Create Adjustment Layer icon in the Layers Panel and choose Curves. This adds the effect as an Adjustment Layer so it affects all the layers beneath, but if you prefer you can also press Cmd/Ctrl+M to apply Curves directly to a pixel layer. The diagonal Curve line represents the tonal range of the image from the shadows on the left to the highlights on the right. We can add points to move the line. At any point where the line is dragged above its original position, the part of the tonal range will become brighter. Dragged below, that point becomes darker. We can also target colour channels to shift colours in a similar way.

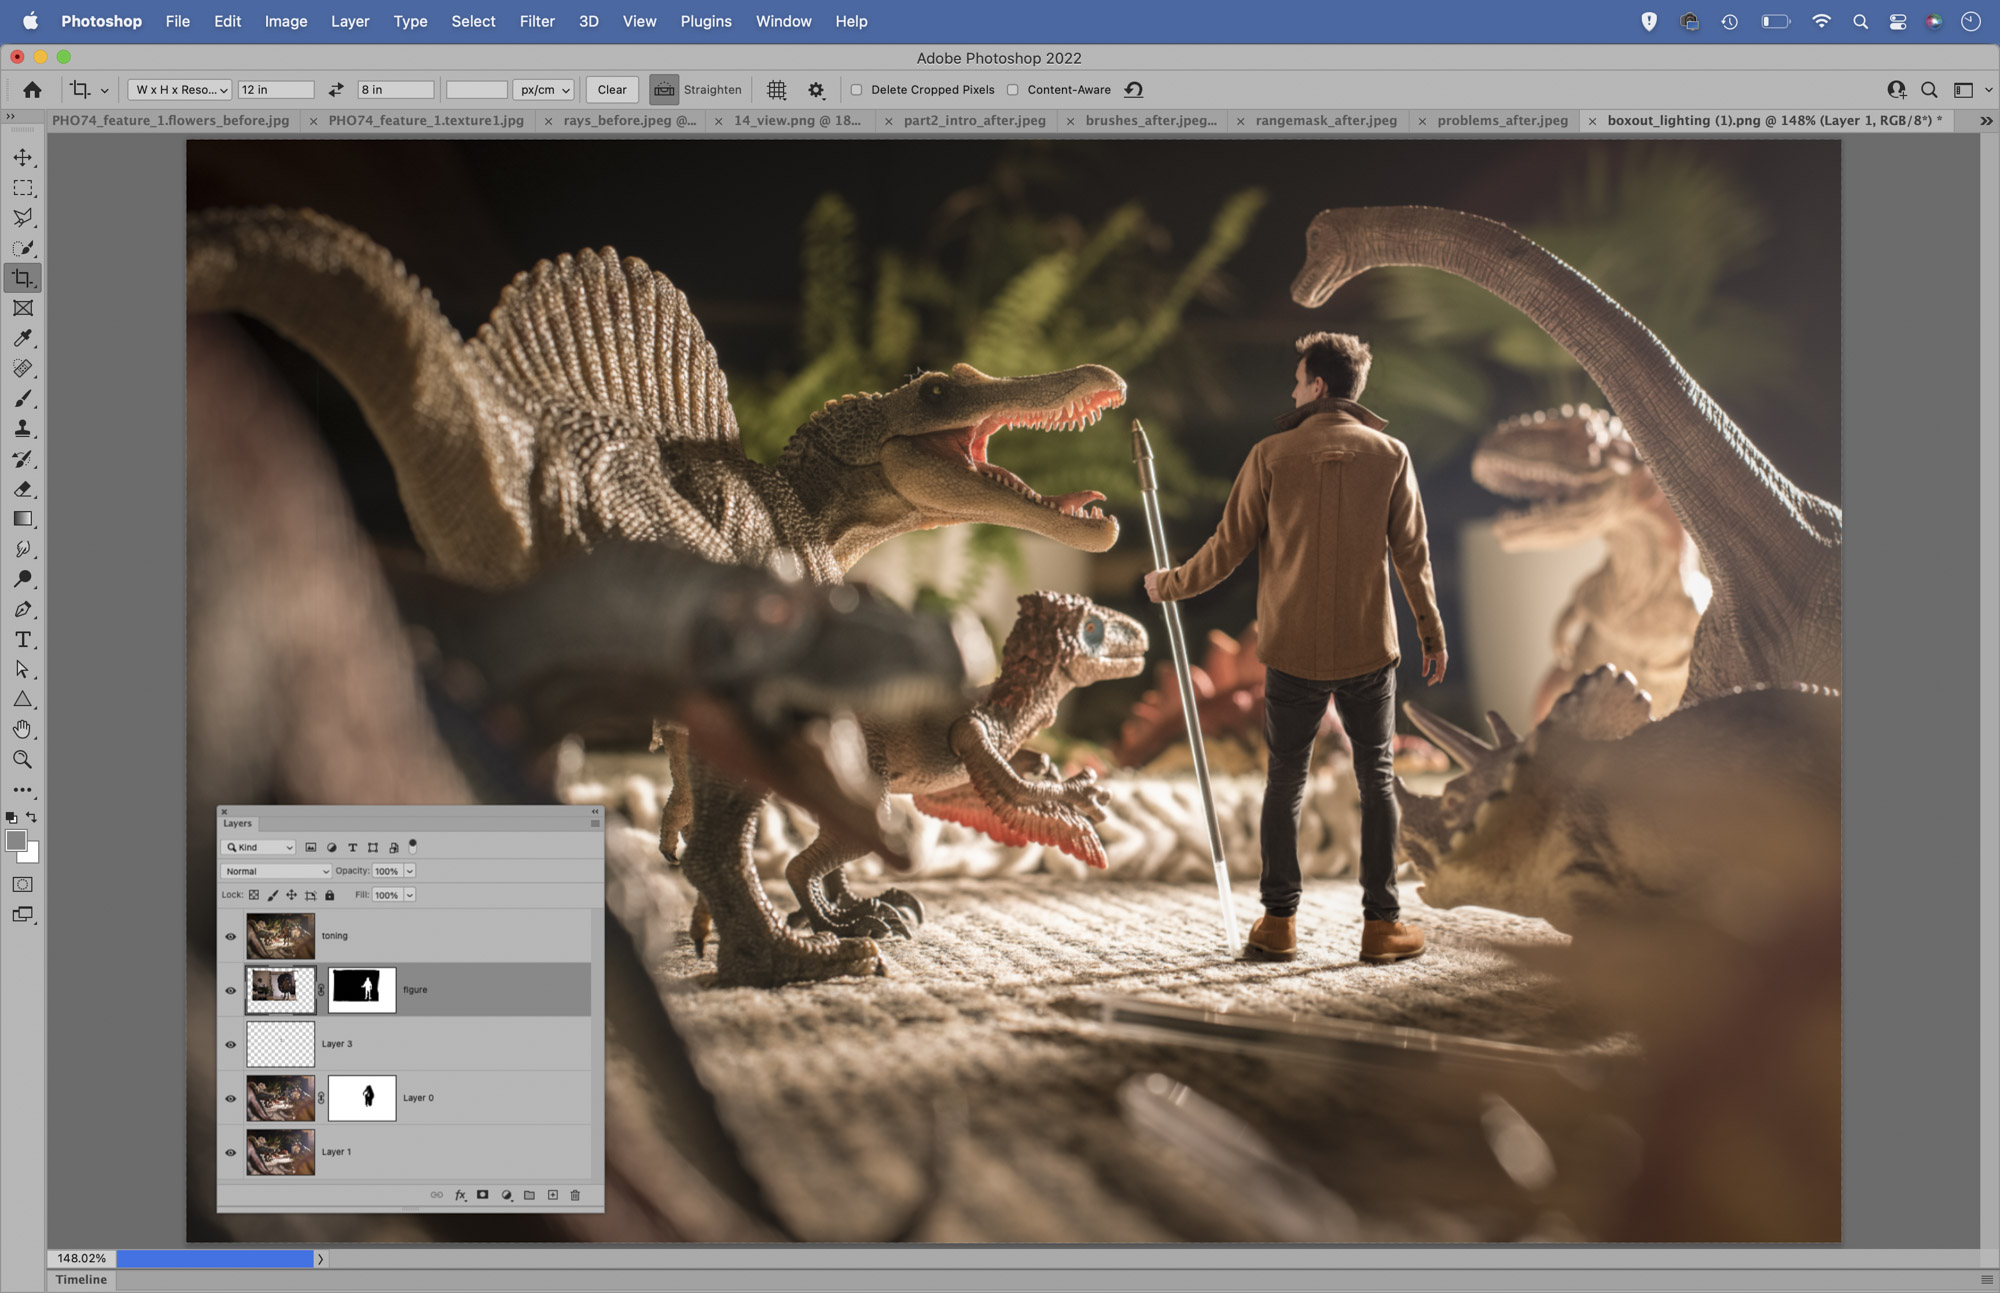
4 Layer Masks
Layer Masks work by allowing us to hide or reveal parts of a layer. To add a mask, click the mask icon at the bottom of the Layers Panel. A little white box will appear on the layer. This is the Mask thumbnail. While it is highlighted, we can paint with black over the image to hide parts of the layer, thereby revealing the layers underneath. Alternatively, we can paint white to reveal hidden areas, or paint grey to add areas of semi-transparency. Often it makes sense to completely hide everything on a layer, then reveal just the part that you want. To do so, add a mask, hit Cmd/Ctrl+I to invert it to full black then grab the brush and paint with white over the image.
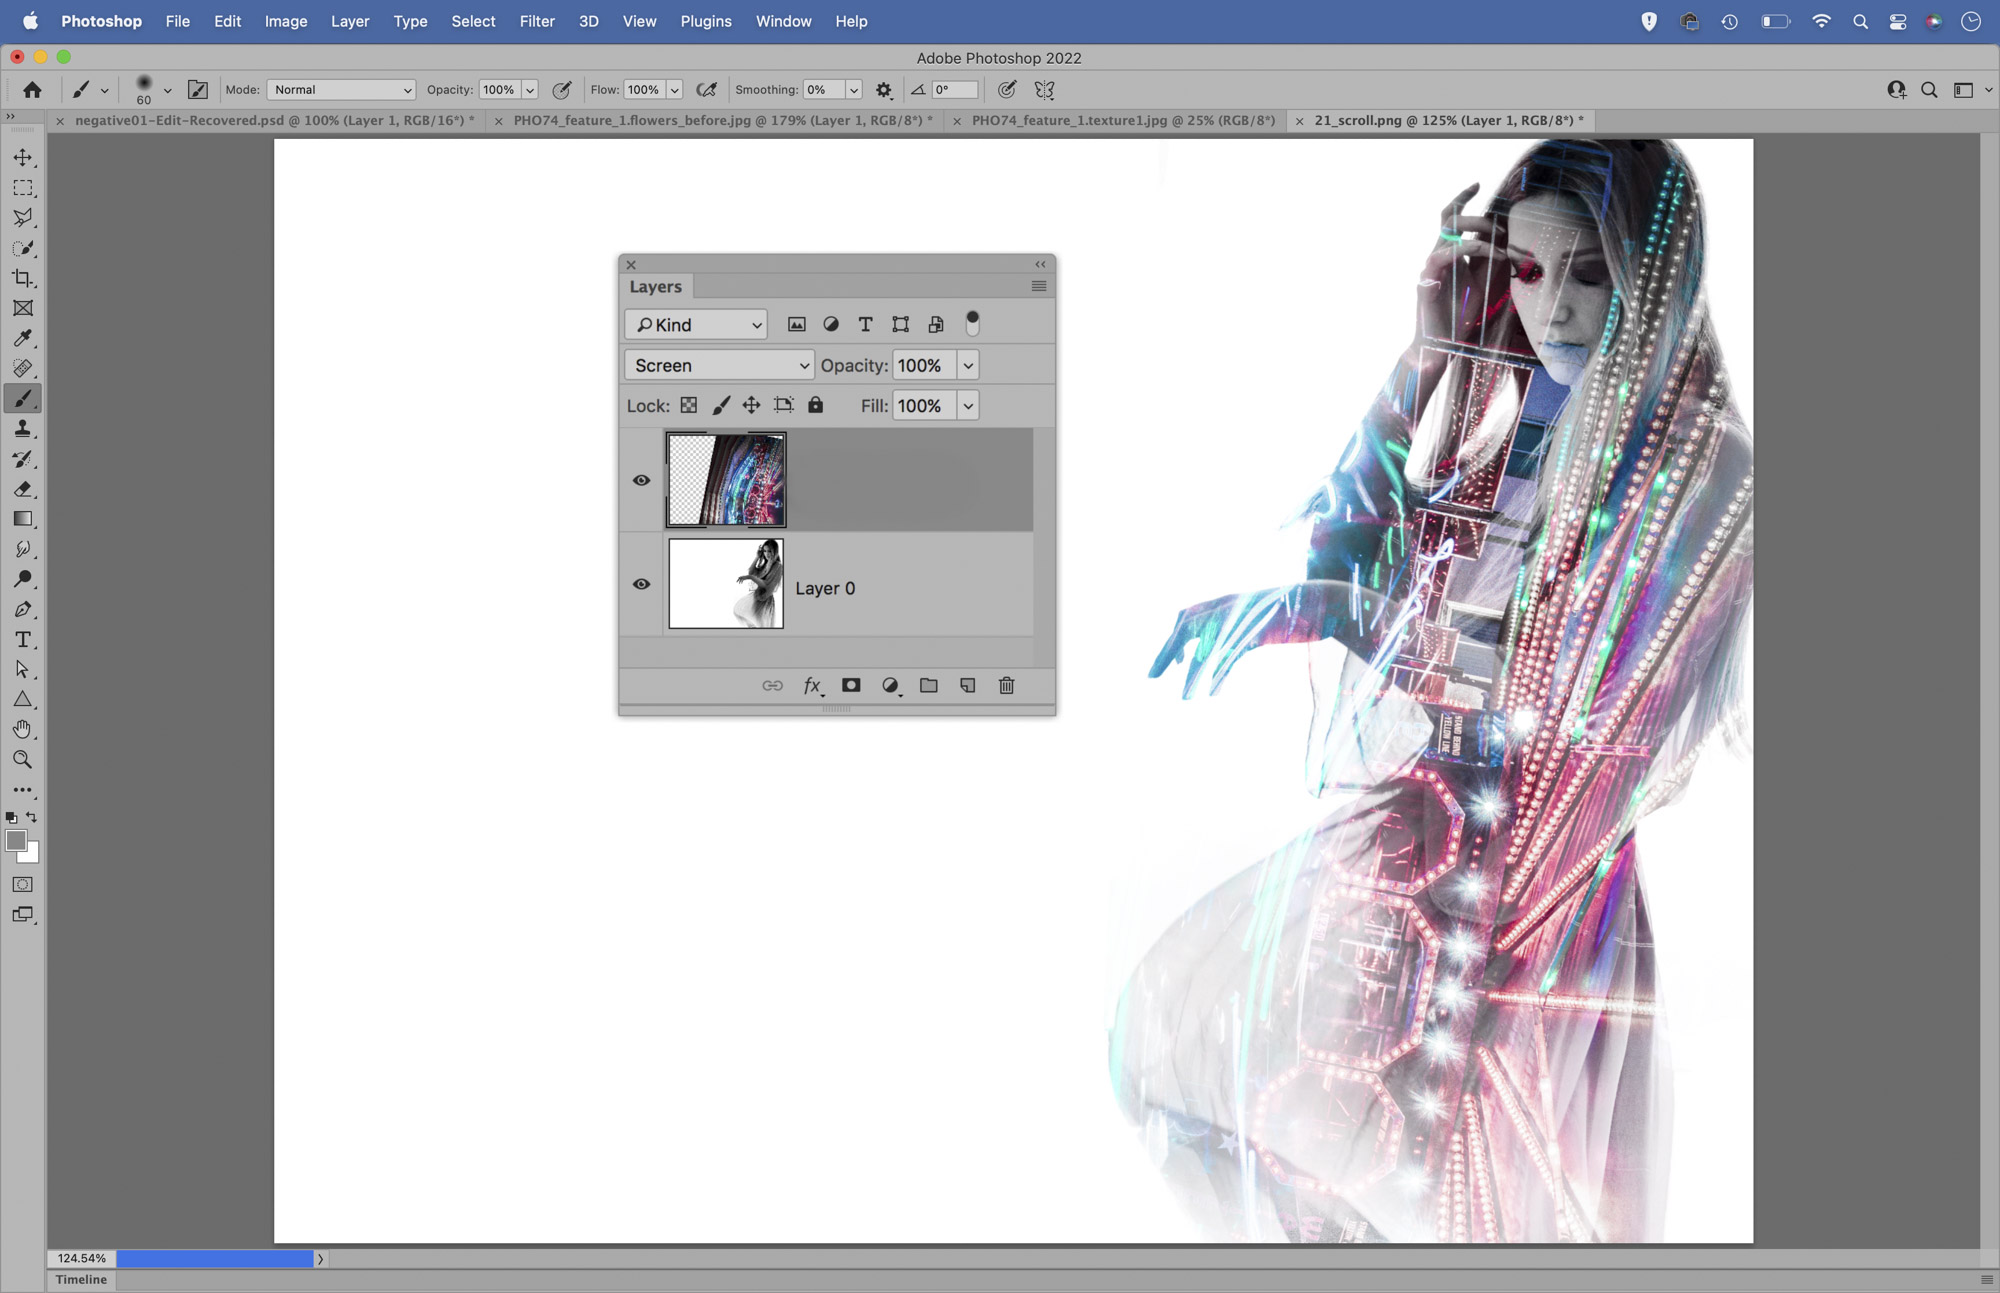
5 Blend Modes
Blend Modes allow us to change the way one layer blends with the layers below it in the stack. There are 26 different blend modes to choose from, accessed via the dropdown at the top of the Layers Panel. Two of the most useful are Multiply and Screen, which work by combining either the brightness or shadow values of the blend layer with those below. The Darken and Lighten modes work in a similar way, but only show pixels that are either darker or lighter than those on the layers below.
For a simple Photoshop Blend Mode effect, we can combine an image with a texture. Copy (Cmd/Ctrl+C) and Paste (Cmd/Ctrl+V) the texture on top of your photo, then hit Cmd/Ctrl+T to resize it to fit. Once done, go to the Blend Mode dropdown and experiment with the different modes. Overlay and Soft Light are usually reliable modes for texture blending.
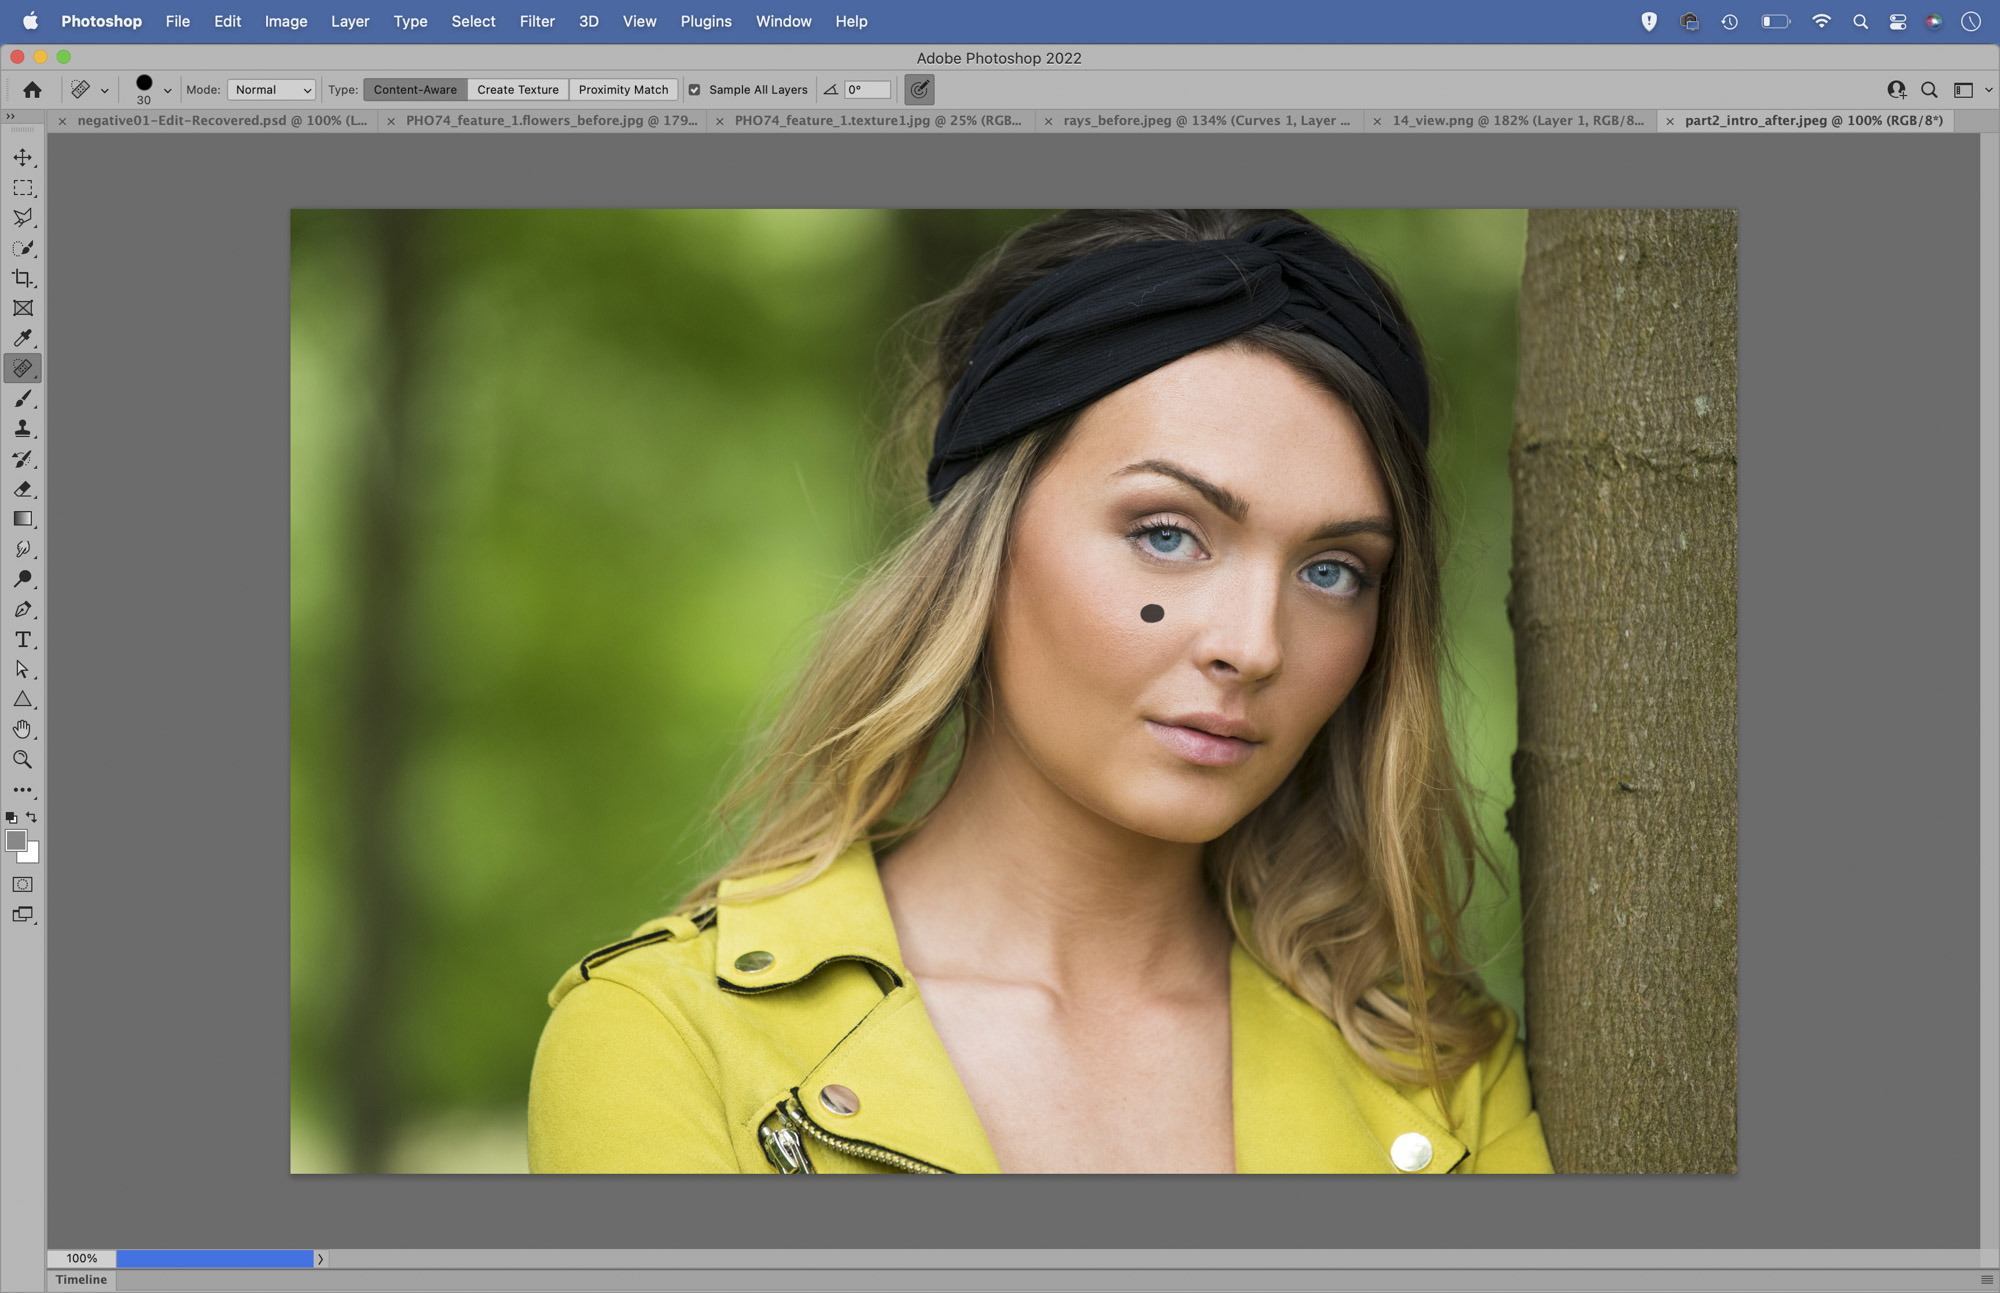
6 Healing tools
The term ‘Photoshopped’ has entered modern parlance, but it really only refers to one part of Photoshop - the retouching tools. These allow us to fix distracting details, retouch portraits, remove people from backdrops, get rid of sensor marks and tidy up our scenes. The healing tools are found in the Photoshop toolbar. The simplest to use is the Spot Healing Brush tool. Grab the tool and paint over an annoying detail to remove it. To fix larger areas, try the Content-Aware Fill tool (Edit > Content-Aware Fill).
While powerful, these semi-automated tools may not leave a perfect result. But we can smooth out any rough areas manually with the Clone tool. Grab the tool, hold Alt and click to sample a clean area nearby, hit 2 to lower the opacity to 20% then paint to gradually clone over the problem area.
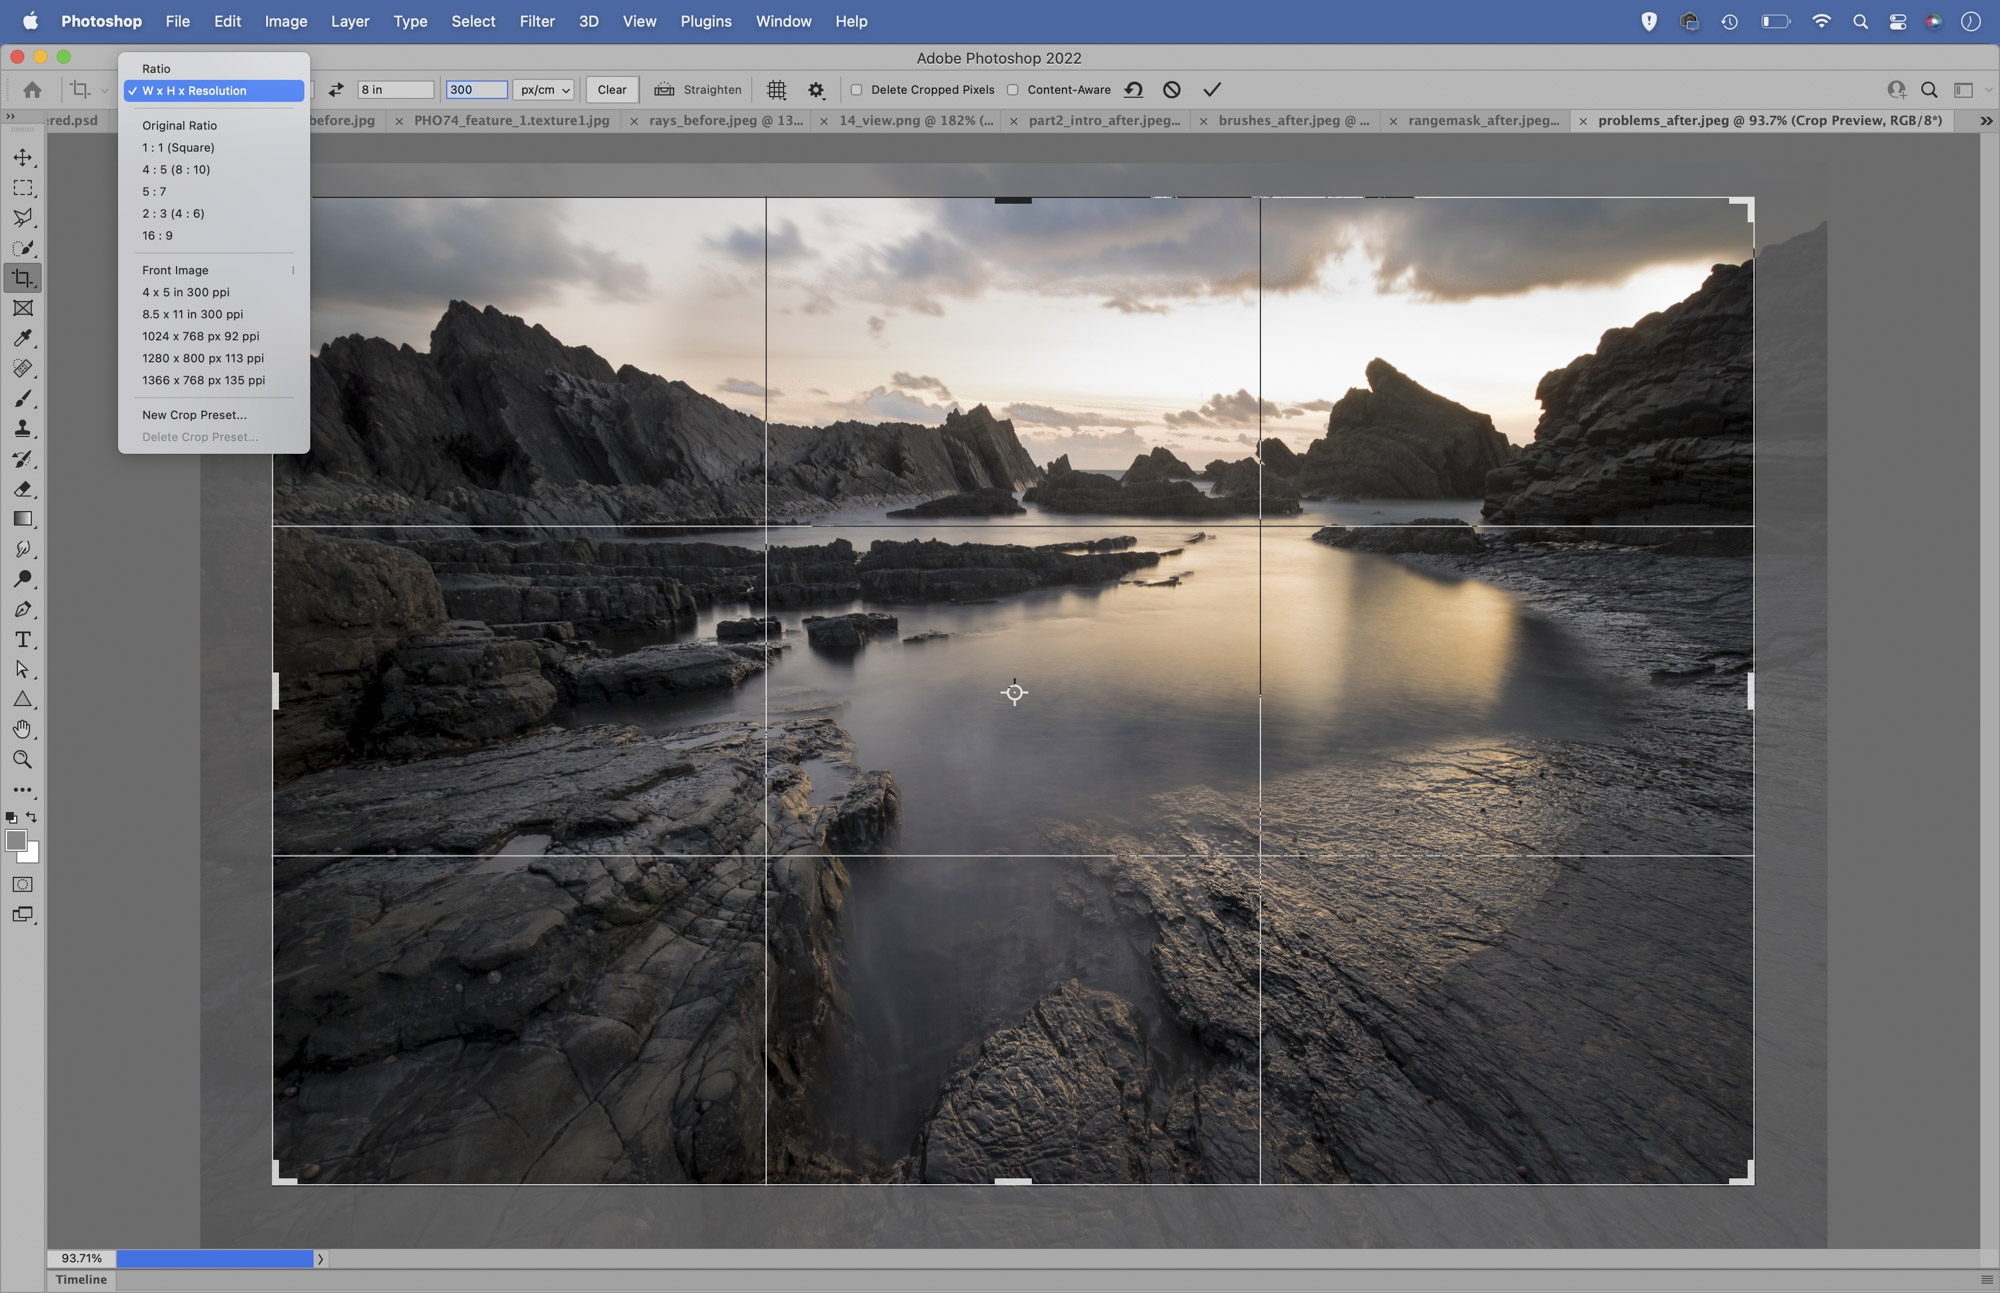
7 Cropping
Cropping is an essential part of the image-editing workflow. Initial crops to improve composition are best done in Camera Raw/Lightroom, as the crops made here can be edited at any time. In Photoshop, we can make the crop tool non-destructive by unchecking the ‘Delete Cropped Pixels’ box. We can also use the Content-Aware Fill option here to crop outside the original image area, and Photoshop will generate new pixels to fill the empty areas. The crop tool also lets you resize an image using the text fields in the options bar at the top. So you can resize the image to a specific print size by, for example, inputting 10in x 8in at 300 pixels per inch.
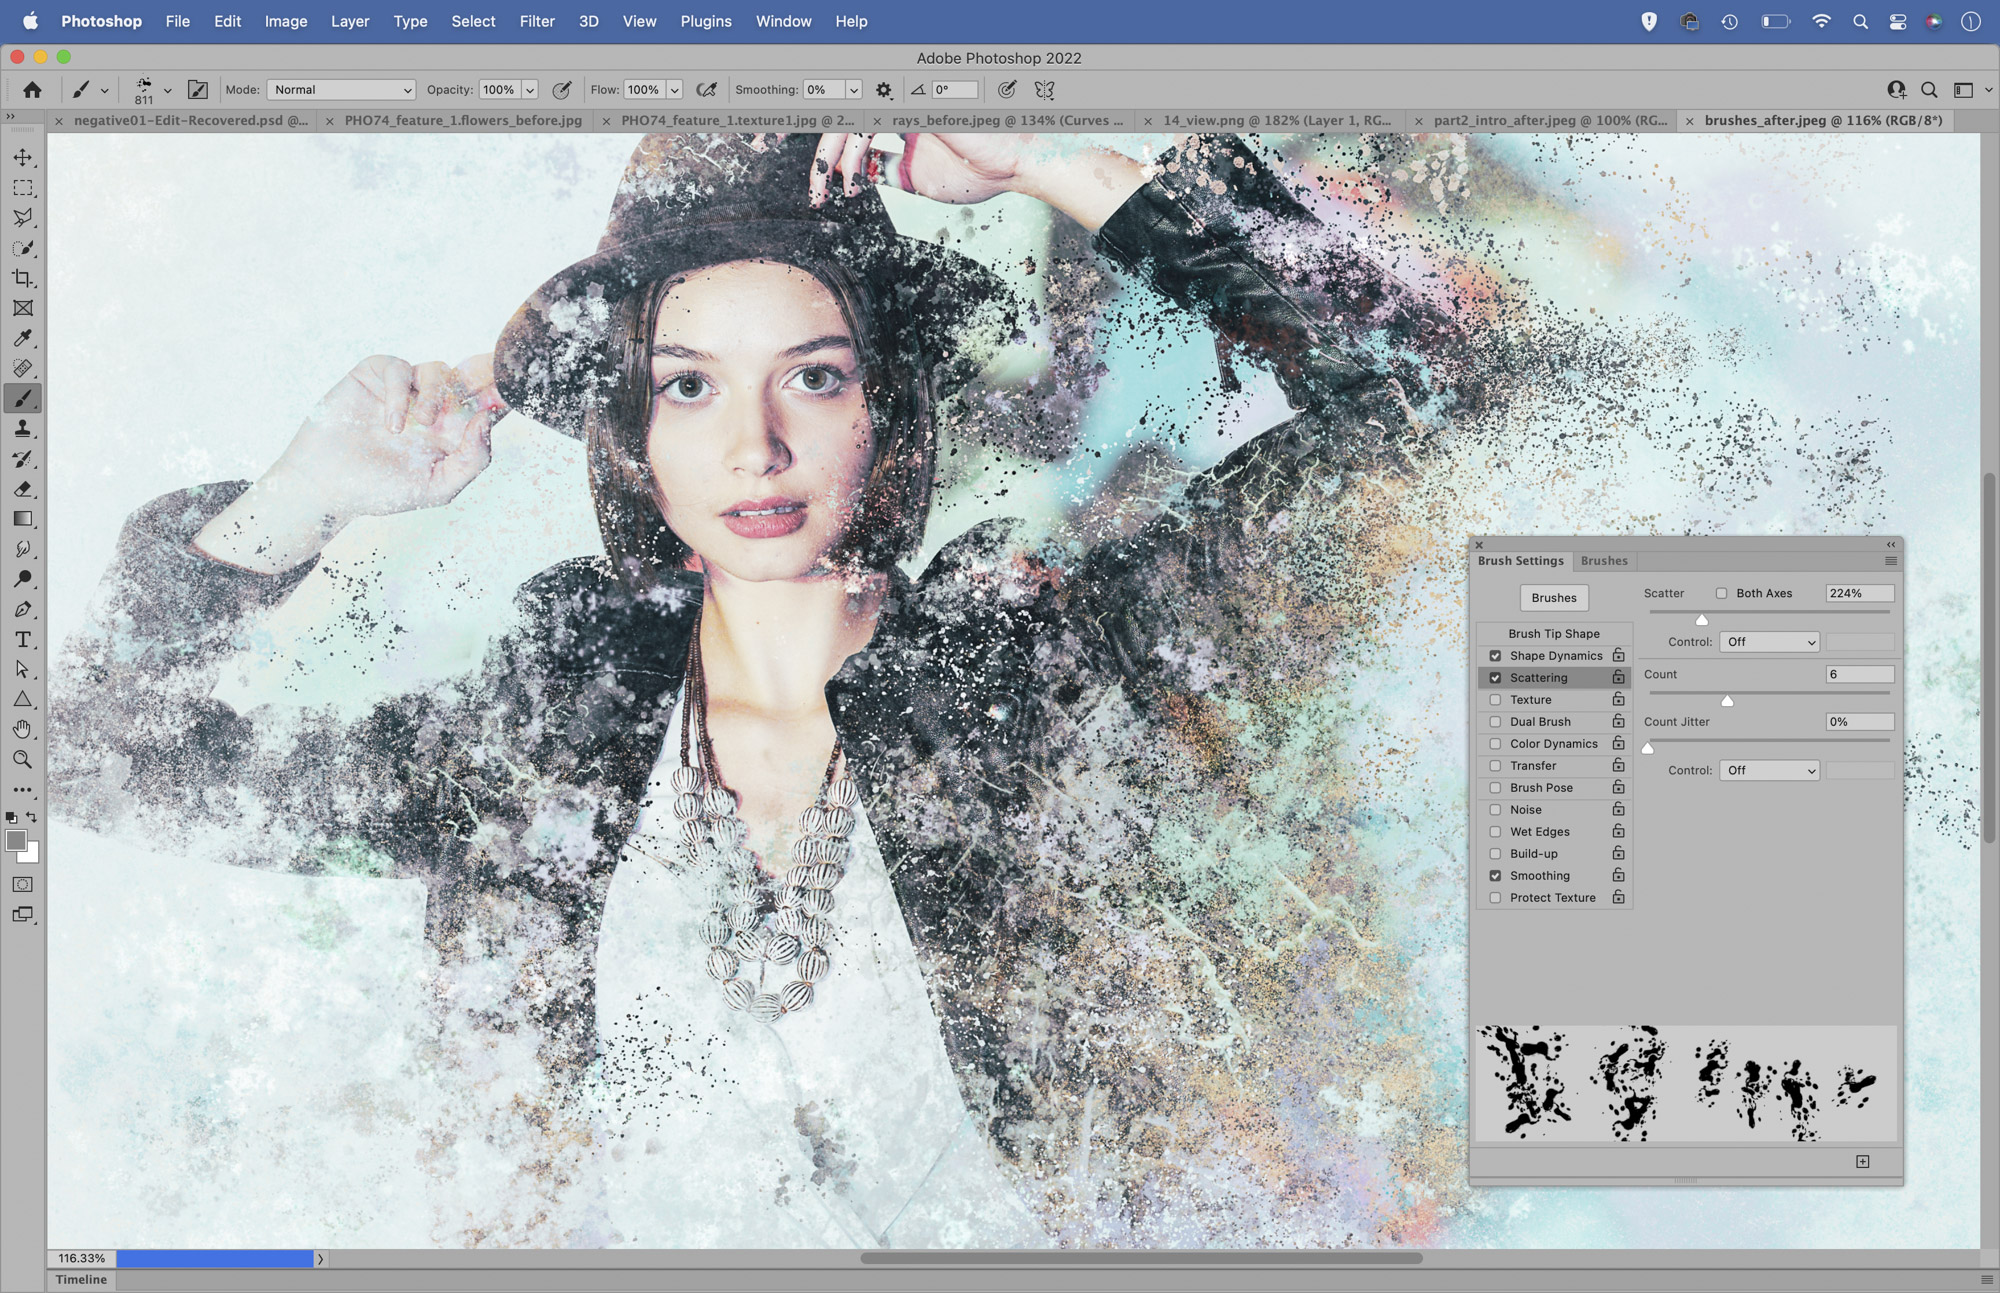
8 Brush skills
Many tools and commands in Photoshop require you to use a brush, so it helps to know a few brush essentials. The brush tip can be resized with the ] and [ bracket keys. You can also change the harness of the brush with Shift and ] or [. Several brush-based tools can also be adjusted intuitively by holding Ctrl+Alt (Mac) or Alt+right-click (Windows) and dragging left/right to alter the brush size or up/down to change brush hardness.
The Brush tool also has lots of useful settings. The Smoothing setting in the tool options at the top lets you paint smooth curves even with a mouse, and you can turn any shape you like into a brush tip by selecting it then using Edit >Define Brush Preset.
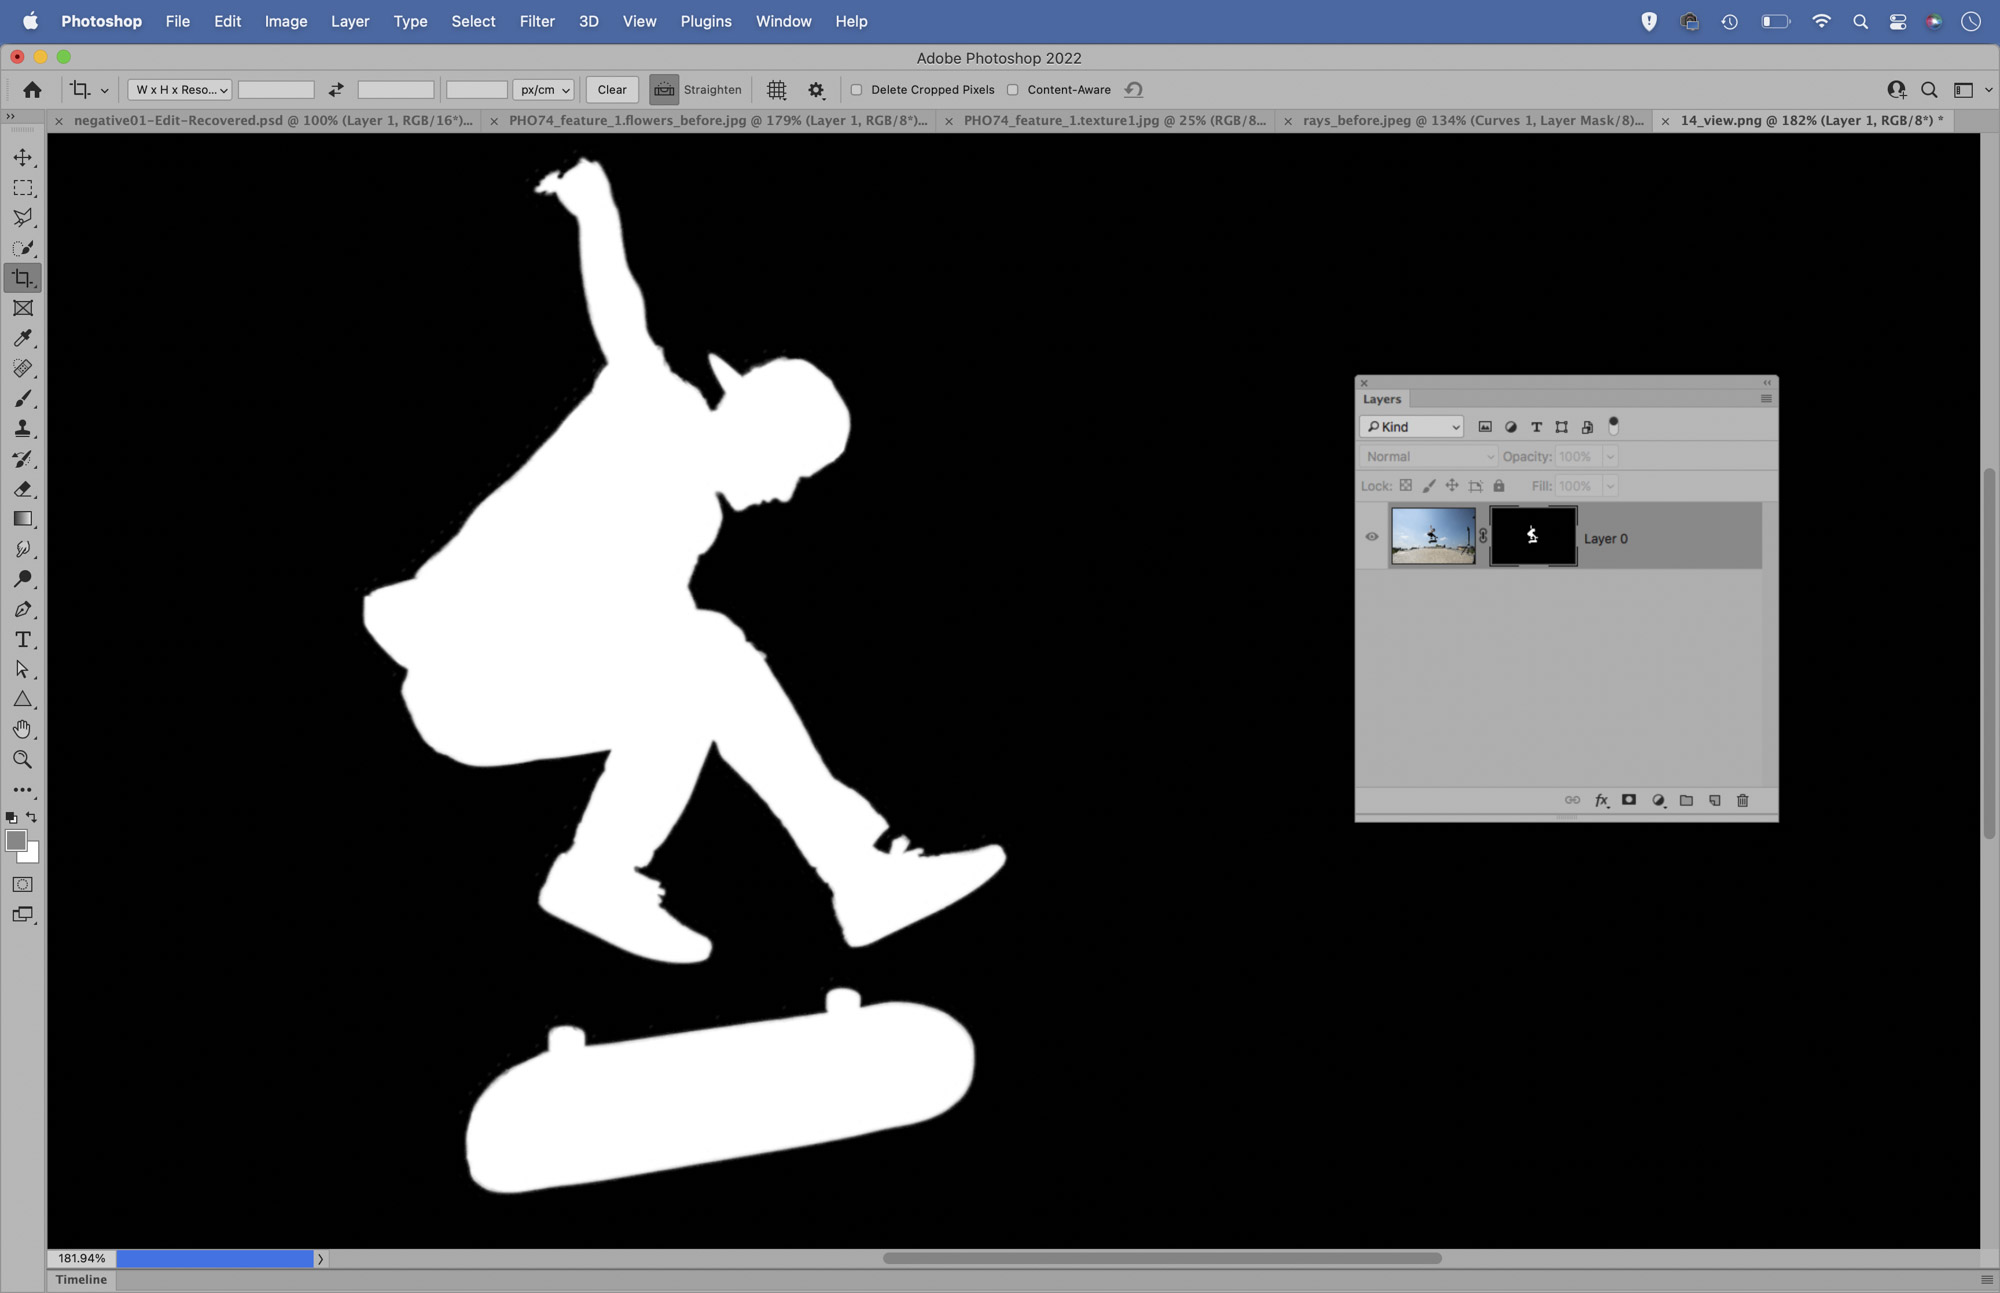
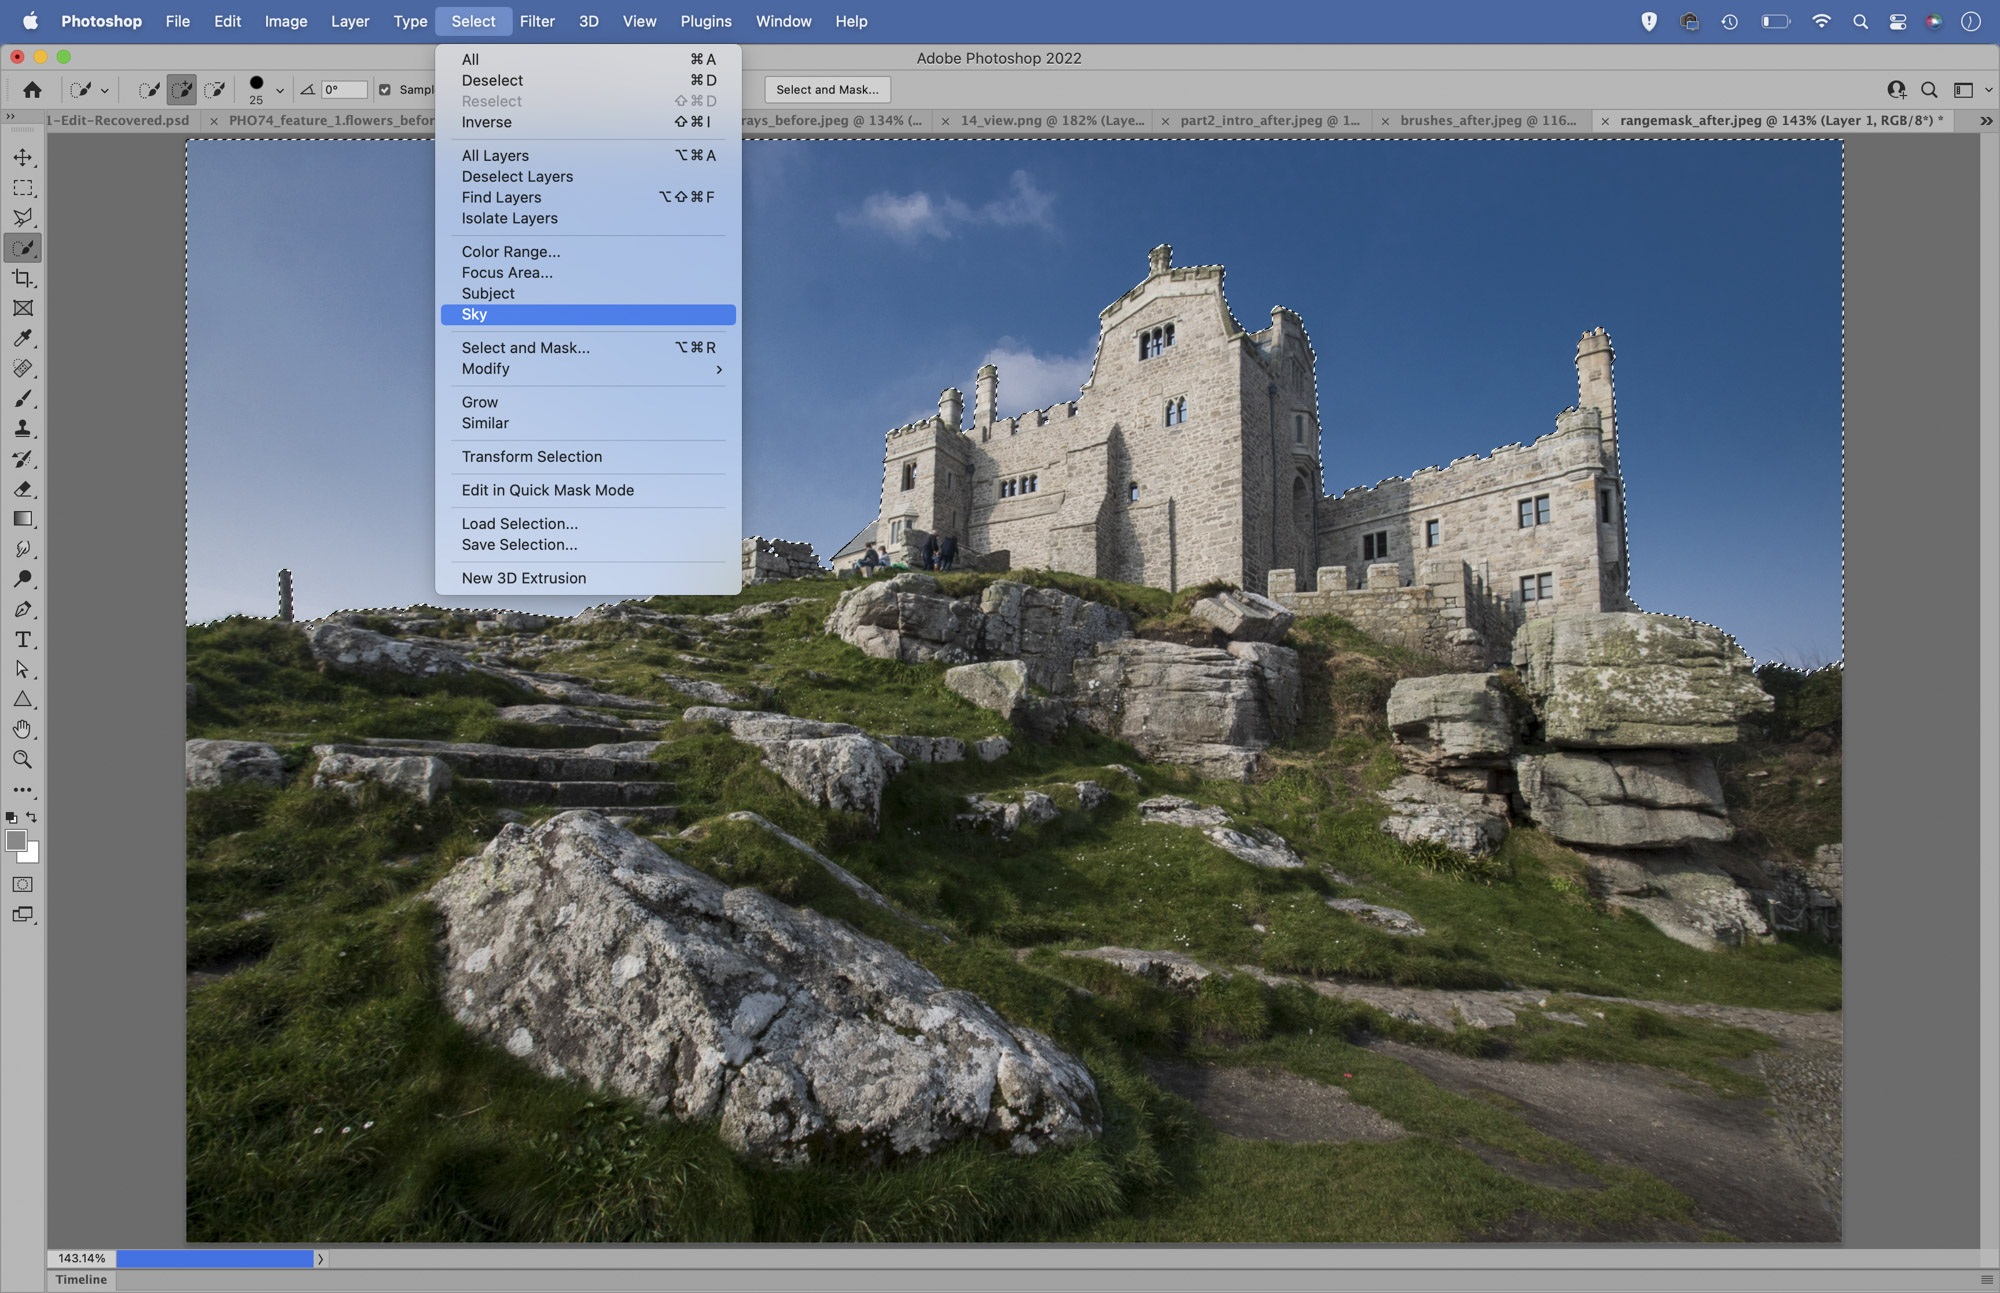
9 Selections
While other image editors are just as good for lots of tasks, Photoshop is by far the best for making selections. A selection is simply a way to isolate part of an image in order to cut it out or target it for editing. There are brilliant automated Selection tools like Select > Subject or Select > Sky that employ machine learning to target areas, then there are more manual but equally useful tools like the Quick Selection brush that snaps on to the edges of objects as you paint. After a selection is made you can go to Select >Select and Mask for a host of useful tools that let you improve the edge - very handy when attempting to select tricky areas like hair or fur.
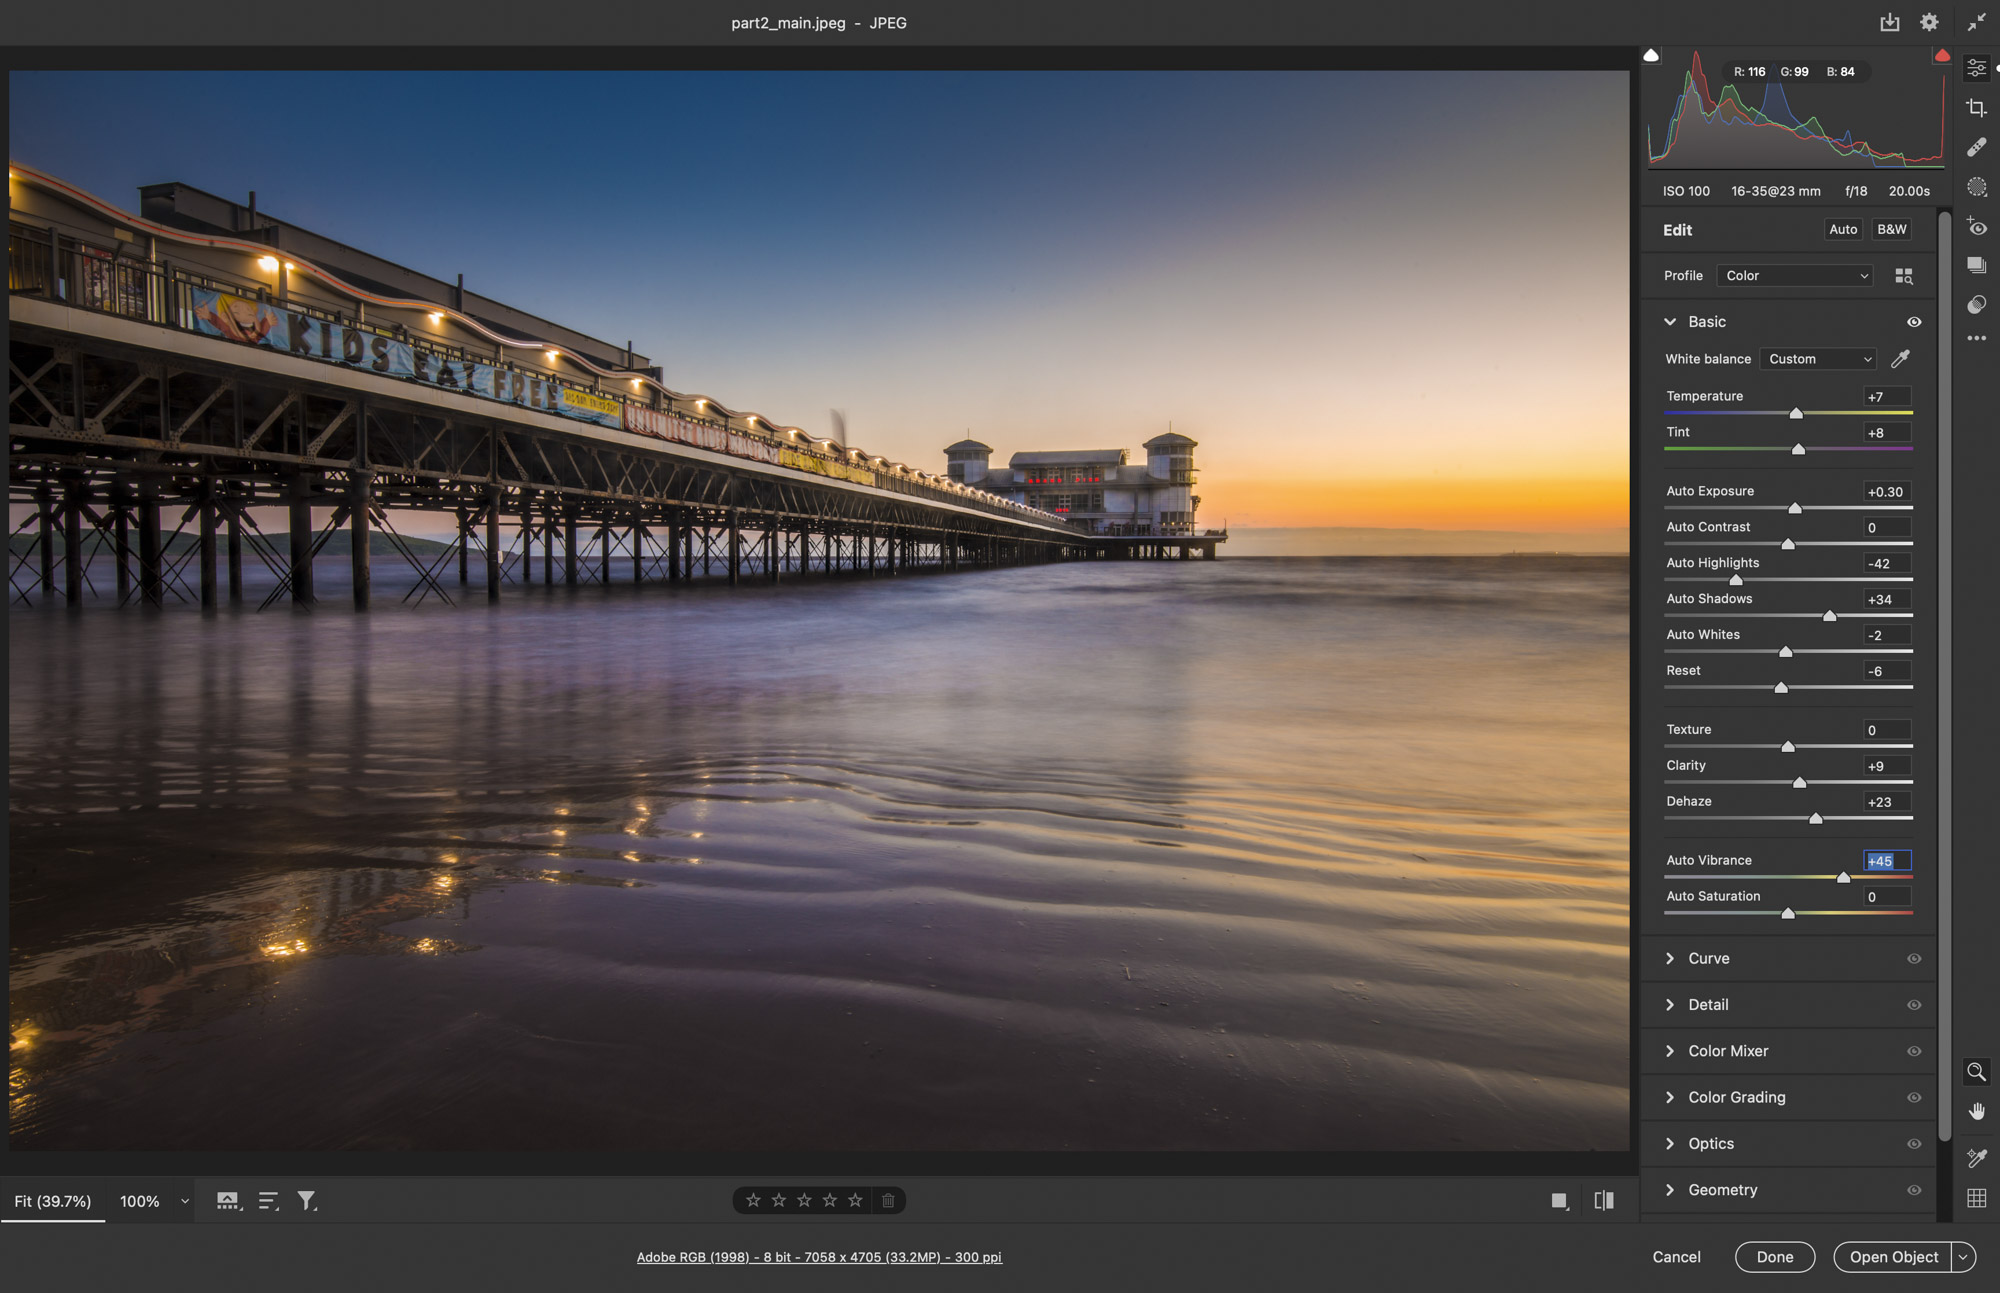
10 Camera Raw
A standalone application in its own right, Camera Raw is Photoshop’s Raw processor. If you attempt to open a raw photo in Photoshop it’ll automatically open in Camera Raw first. But Camera Raw isn’t just for raw files, you can also open jpegs (right-click in Adobe Bridge and ‘Open in Camera Raw’) and you can access the Camera Raw Filter in Photoshop (Filter > Camera Raw Filter). The controls and interface are easy to get to grips with. A series of panels to the right house the various tonal settings, and a toolbar to the far right lets you access simple tools. We use these to make initial improvements to our photo, then once we’re happy we can progress to Photoshop by hitting the Open button. The tools in Camera Raw are so good that if we only need to make basic changes then often there’s no need to open into Photoshop at all.

James has been a professional photographer and award-winning journalist for the past 15 years. He is editor of Practical Photoshop magazine and contributes to leading photography publications worldwide.
View all articles

