


Do you know the difference between sRGB and AdobeRGB color spaces, and how you should use them in your photography? This detailed guide explains all

If you have ever viewed your photos and noticed that the colour looks off, something called 'colour space' could be blamed for the issue. Knowledge of the difference between the two leading digital colour spaces -sRGB and AdobeRGB will help you ensure that your images look great, whether they are seen on screen or in print...
What is color space?
The simplest explanation of color space is that it is the range of colors shown in a photo. There are two main color spaces used in digital photography. Both have their advantages and disadvantages, depending on where and how an image is viewed.
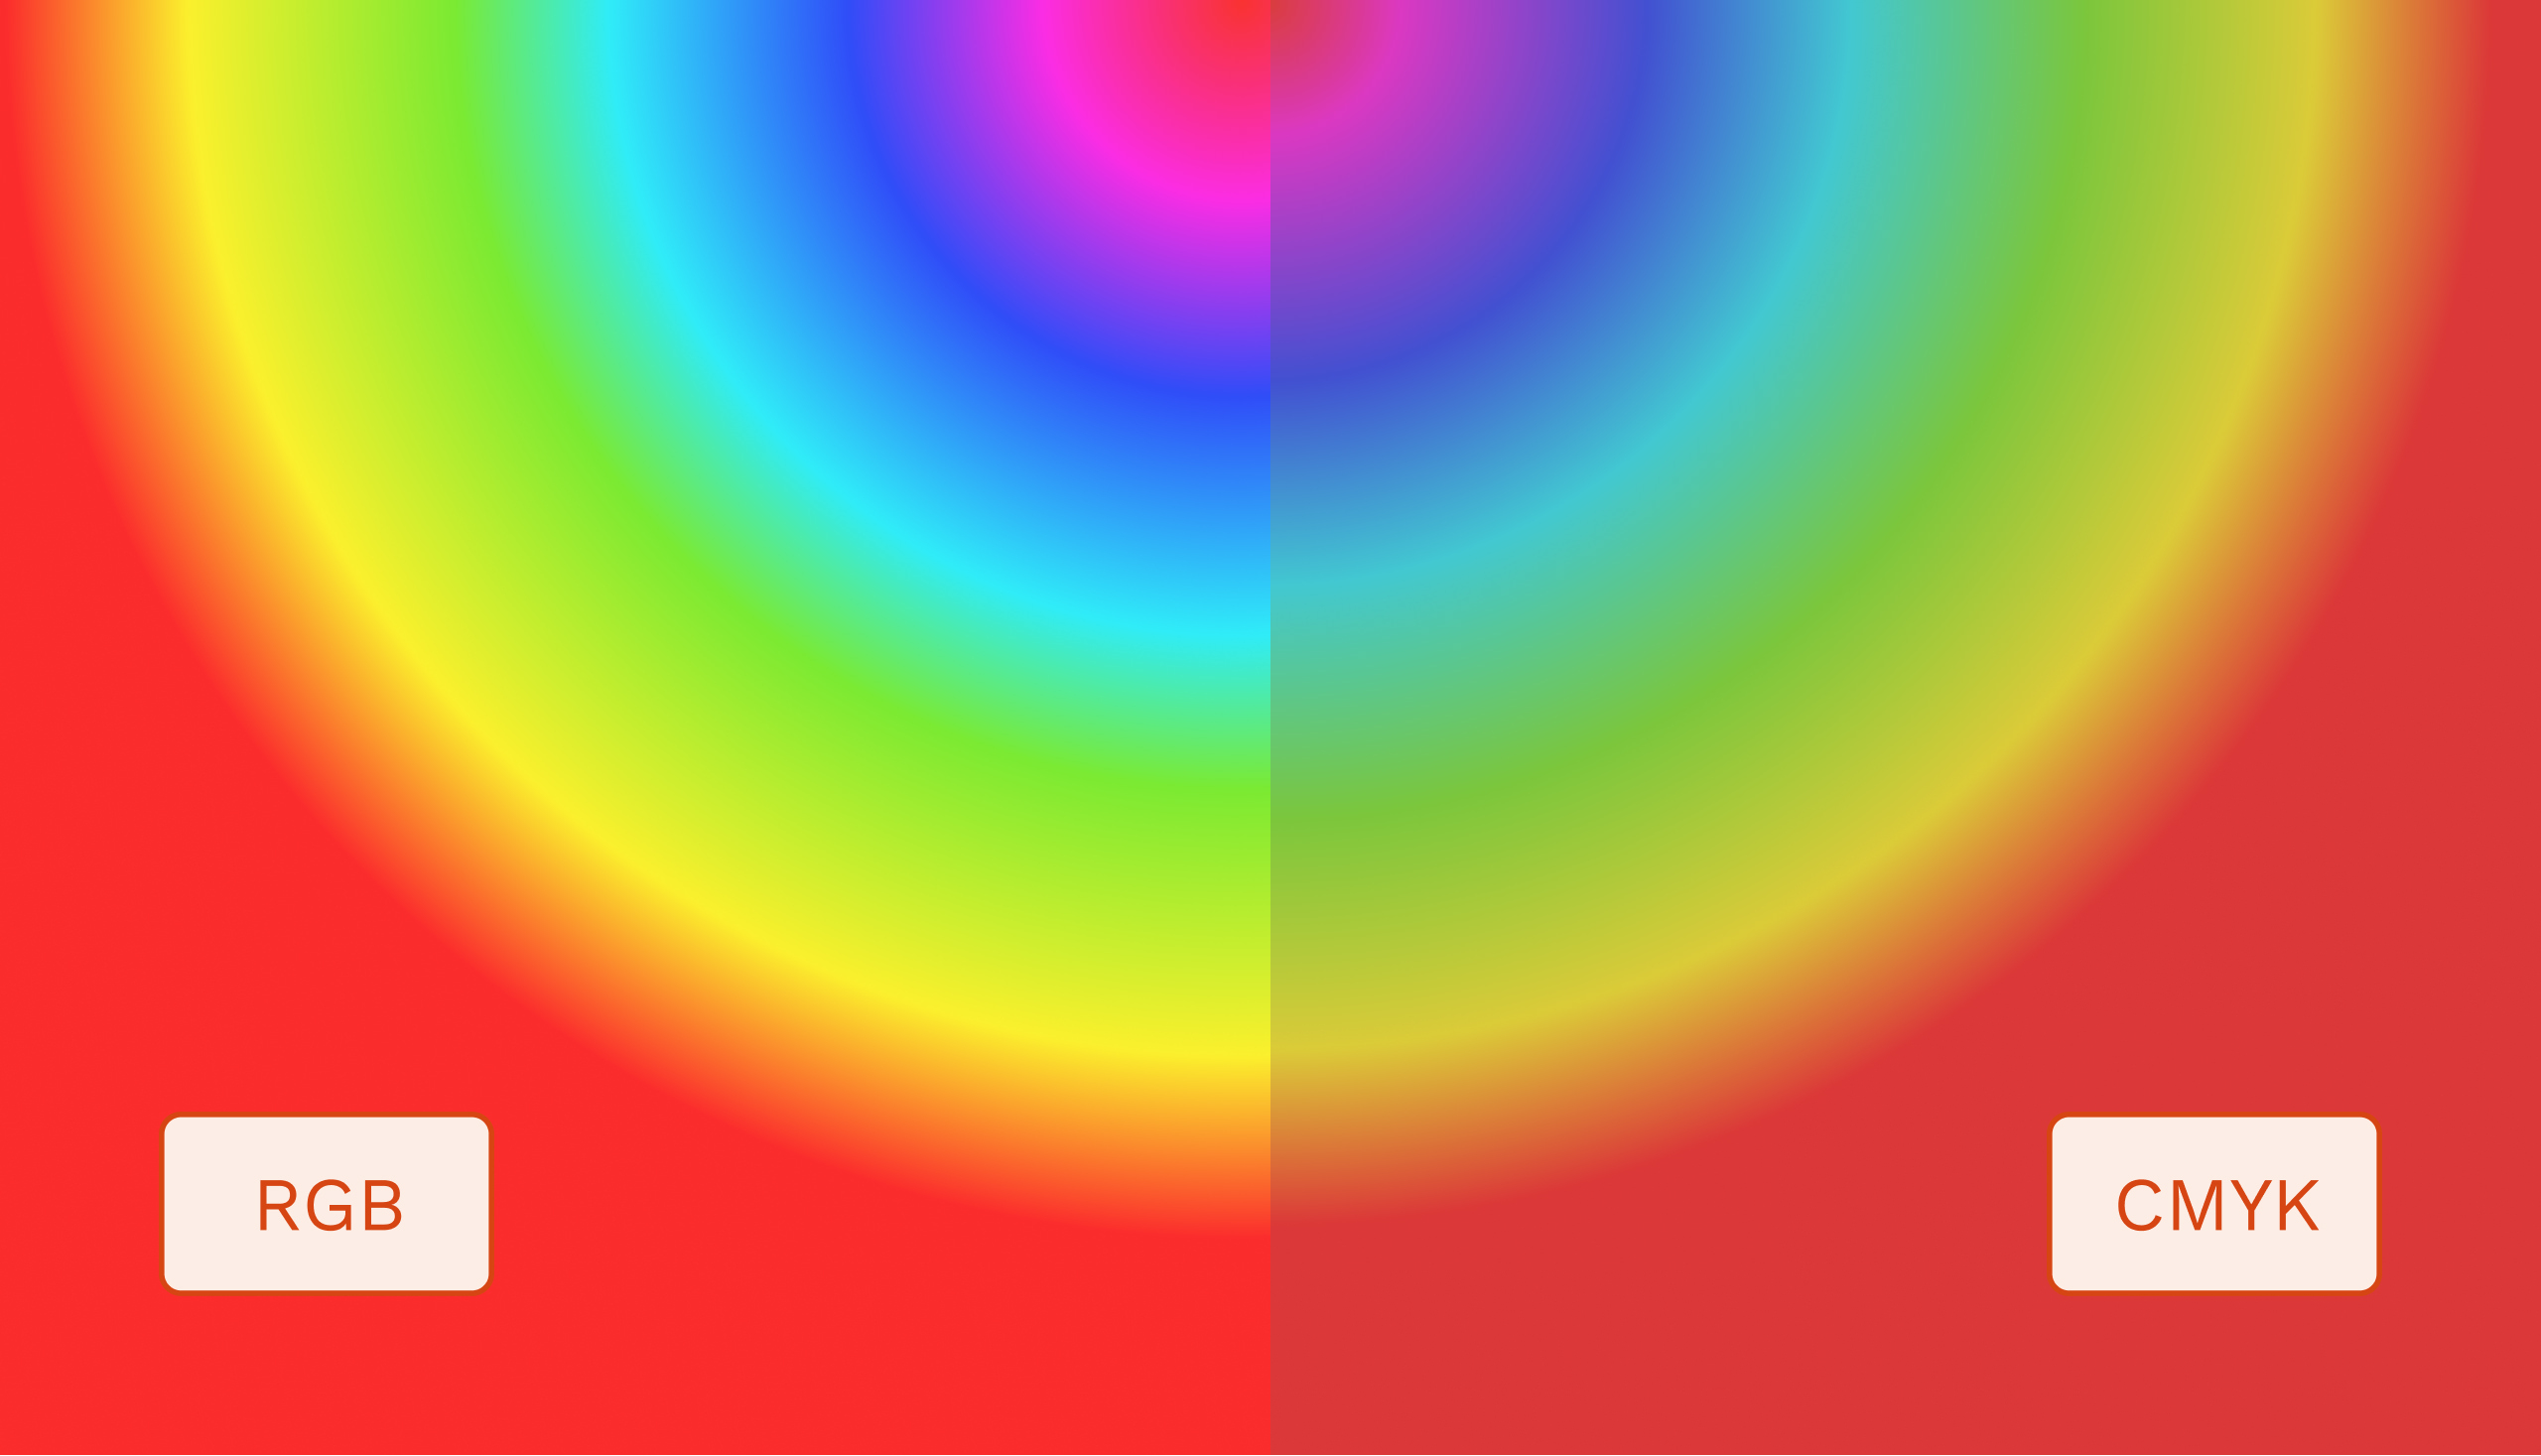
The two main color spaces are sRGB and AdobeRGB. An easier way to understand this is to think of color spaces as pallets of watercolors. AdobeRGB being one set with ten colors on it, and sRGB being another with five colors.
Here are some key points:
- RGB in both sRGB and AdobeRGB stands for 'red, green and blue'
- All the colors seen in an image in these color spaces are made from a combination of these colors
- AdobeRGB represents around 35% more colors than sRGB
- All digital displays such as monitors and smartphones use sRGB color space
- When printing, AdobeRGB is a closer match to the CMYK colos used in print
- AdobeRGB color space can be converted to sRGB without any loss of color but not vice versa
Again, color space describes the range of colors that are in a photograph. But does this mean one is better than the other? I'll come back to this later, but first, it is essential to understand what each color space is in more detail.
What is sRGB?
This term refers to a color space of RGB developed by HP and Microsoft in 1996 for digital purposes. This is generally the default option used by any computer device and many cameras. It is considered the standard option, hence the 's' in front of RGB.

sRGB is also the default for digital screens. This is because digital monitors can show considerably more colors from this color space compared to AdobeRGB. Most digital monitors can deliver around 97% of colors in the sRGB color space. In contrast, only 76% of colors in the AdobeRGB color space can be shown.
In other words, when looking at an image saved in an AdobeRGB color space on a digital screen, some colors will look different.
To create one of the colors on the Adobe RGB pallet using the sRGB pallet, you will need to mix colors. You may get a very tight match, but it probably won't be a replica. So even though the colors are close, they won't look the same. This is a very simplified example, but it explains the difference in colors in different color spaces.
The colors in sRGB are less vibrant than AdobeRGB (I'll explain why later). However, with sRGB, images will look the same on any device. This option’s most important element is consistency in colors - pictures will look the same no matter where they are being viewed.
What is AdobeRGB?
The other color space option is AdobeRGB. The vital thing to understand with this option is its relationship with the color model of CMYK. This is regarded as a subtractive color model comprised of the colors: cyan, magenta, yellow, and key or, black.

An additive color model, such as sRGB, works the opposite way. To create colors, different gradients need to be mixed. For example, an equal amount of red and blue light will create purple (or magenta). If you mix red, green and blue paint, you don’t end up with white paint, but rather a dark brown. If you combine the same color lights, you get white light.
This is why printers use CMYK, as the product (i.e. paper) doesn’t have its own light source. CMYK offers a better translation of digital photos to physical print. Essentially, CMYK offers consistency for every print in the same manner as sRGB does for digital screens.
As mentioned above, sRGB is a color space that excels in the digital world where light can be mixed. However, when images are printed, the CMYK subtractive color model shows the colors best.

The concept of CMYK color space inspired Adobe to create their color space in 1998 to allow photographers to have a different option when shooting and presenting their photos in print. It also helped expand on the visible colors that can be captured while being photographed. AdobeRGB can capture a broader gamut of colors, which means that it can have more potential than sRGB.
This is not to say that photos will be better with AdobeRGB, but simply that the image will show a broader range of colors in print (around 35% more). For example, a more significant difference in the vibrancy of colors may be evident (i.e., dark blues look darker and light blues look lighter).
The same colors will seem more muted in sRGB with less differentiation between its shades. But remember, the vibrancy of color with AdobeRGB will only be reflected in print, not on digital screens.
The other benefit of AdobeRGB is that it can be converted to sRGB color space without color loss. But unfortunately, sRGB cannot be converted to AdobeRGB without losing some colors. This is because AdobeRGB contains a more extensive palette than sRGB. So, to convert from sRGB to Adobe RGB, there aren’t enough colors to replicate it in AdobeRGB.

Which is better?
All this might sound like AdobeRGB is the better option as you're working with a much broader range of colors. However, it is essential to remember that we live in a digital world. Your images are far more likely to be seen and used online than they are in print. This is why sRGB is commonly the more popular color space choice when displaying and selling images in an online environment.
Most publishers and clients who print photos are also likely to have their own color correction setups to get the desired output for their product, regardless of what color space your images are in.
Whether sRGB or AdobeRGB is the best option that will ultimately depend on you. It depends on the context of your work and where and how the audience will view your photography either predominantly on screen, or in print.

How to view, select and change color space
Photo editing software makes it incredibly quick and easy to switch between color spaces. But before I go through how to change color space on a photo, keep in mind this important fact that I mentioned earlier:
Converting an AdobeRGB color space to sRGB is lossless. But converting sRGB to AdobeRGB results in some color loss.
With this in mind, my advice would be that if planning on using AdobeRGB color space at any time, take your photo in this color space and convert it to sRGB when needed.
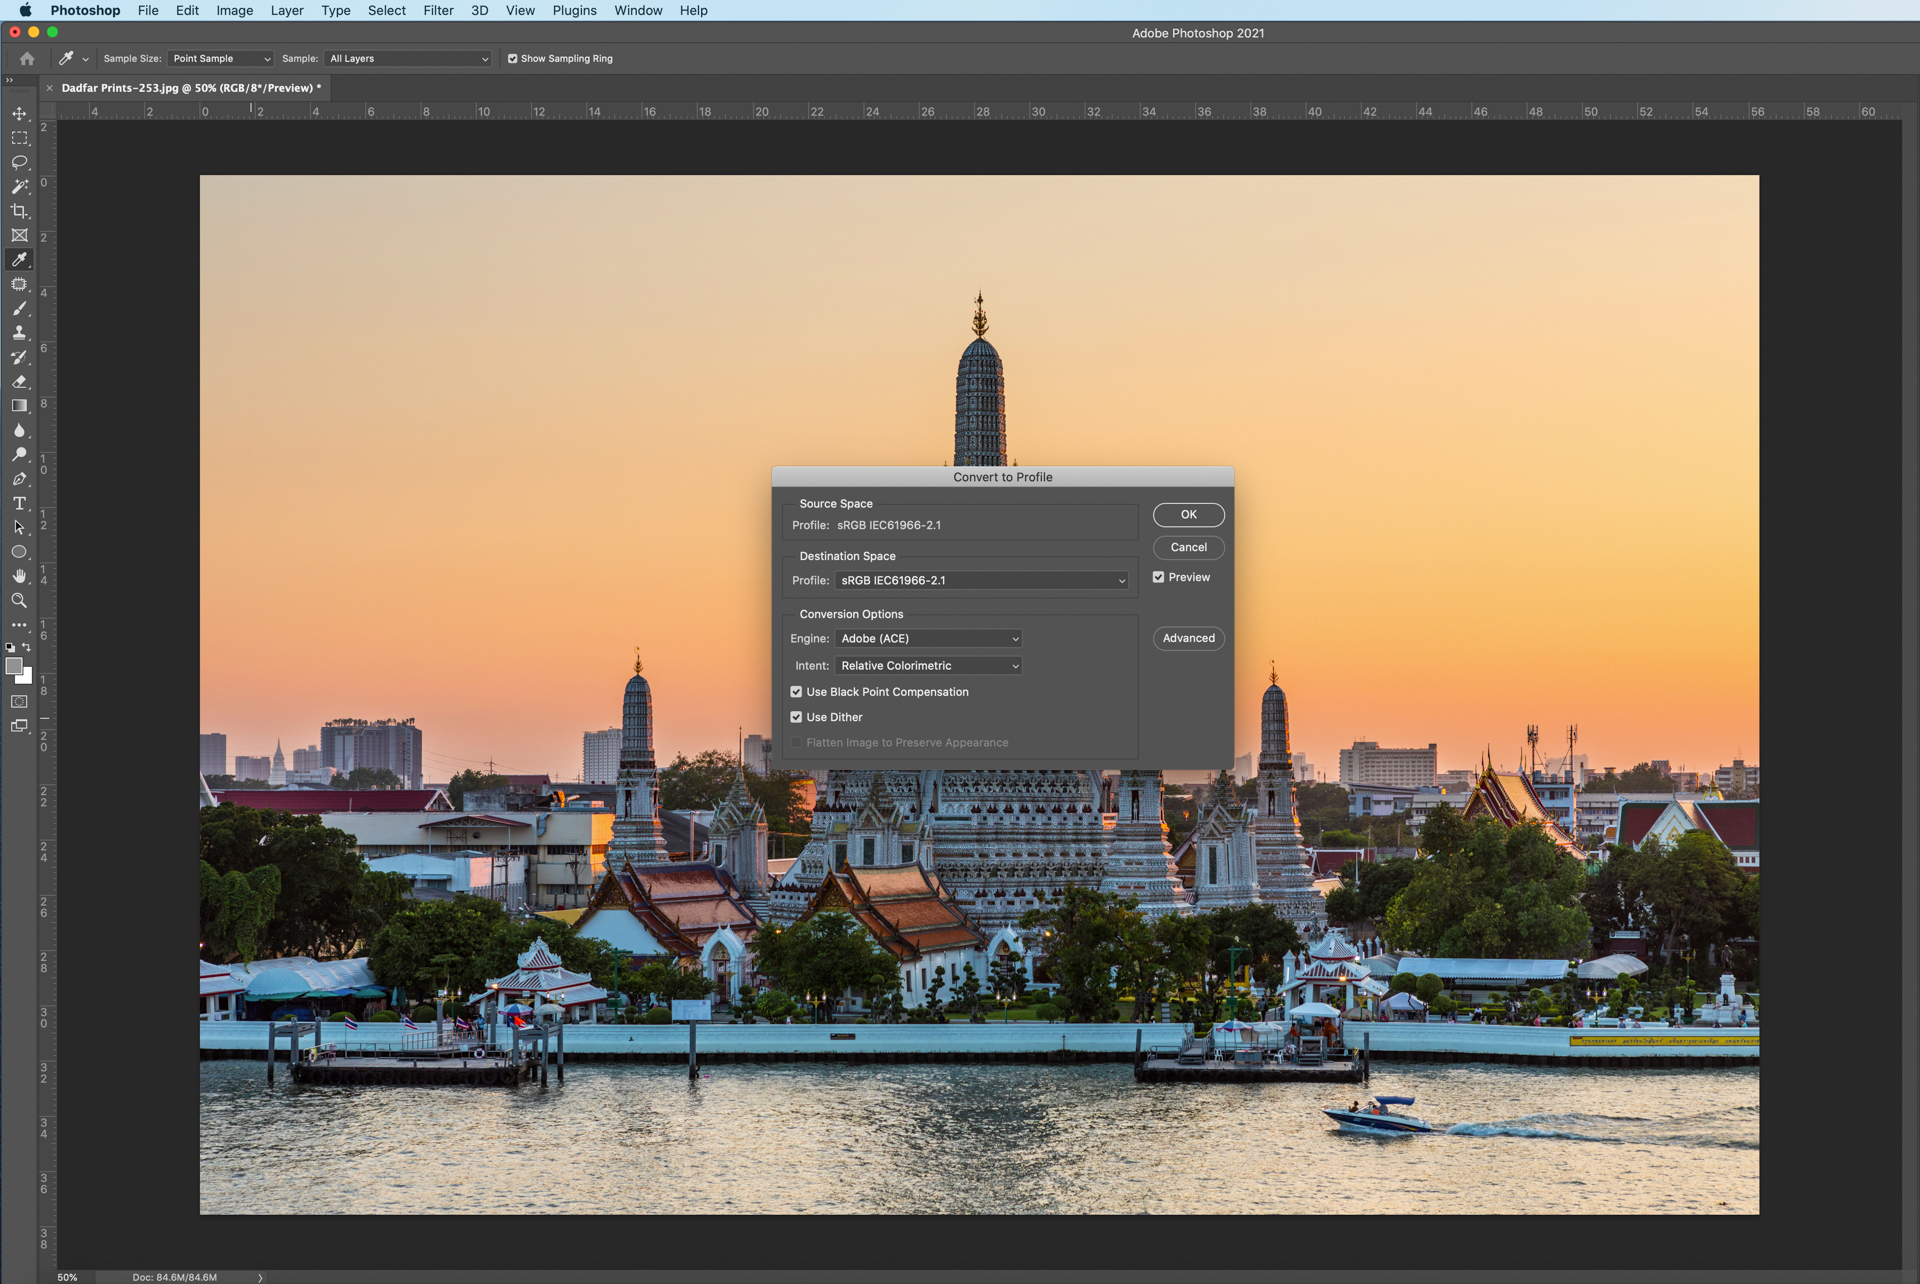
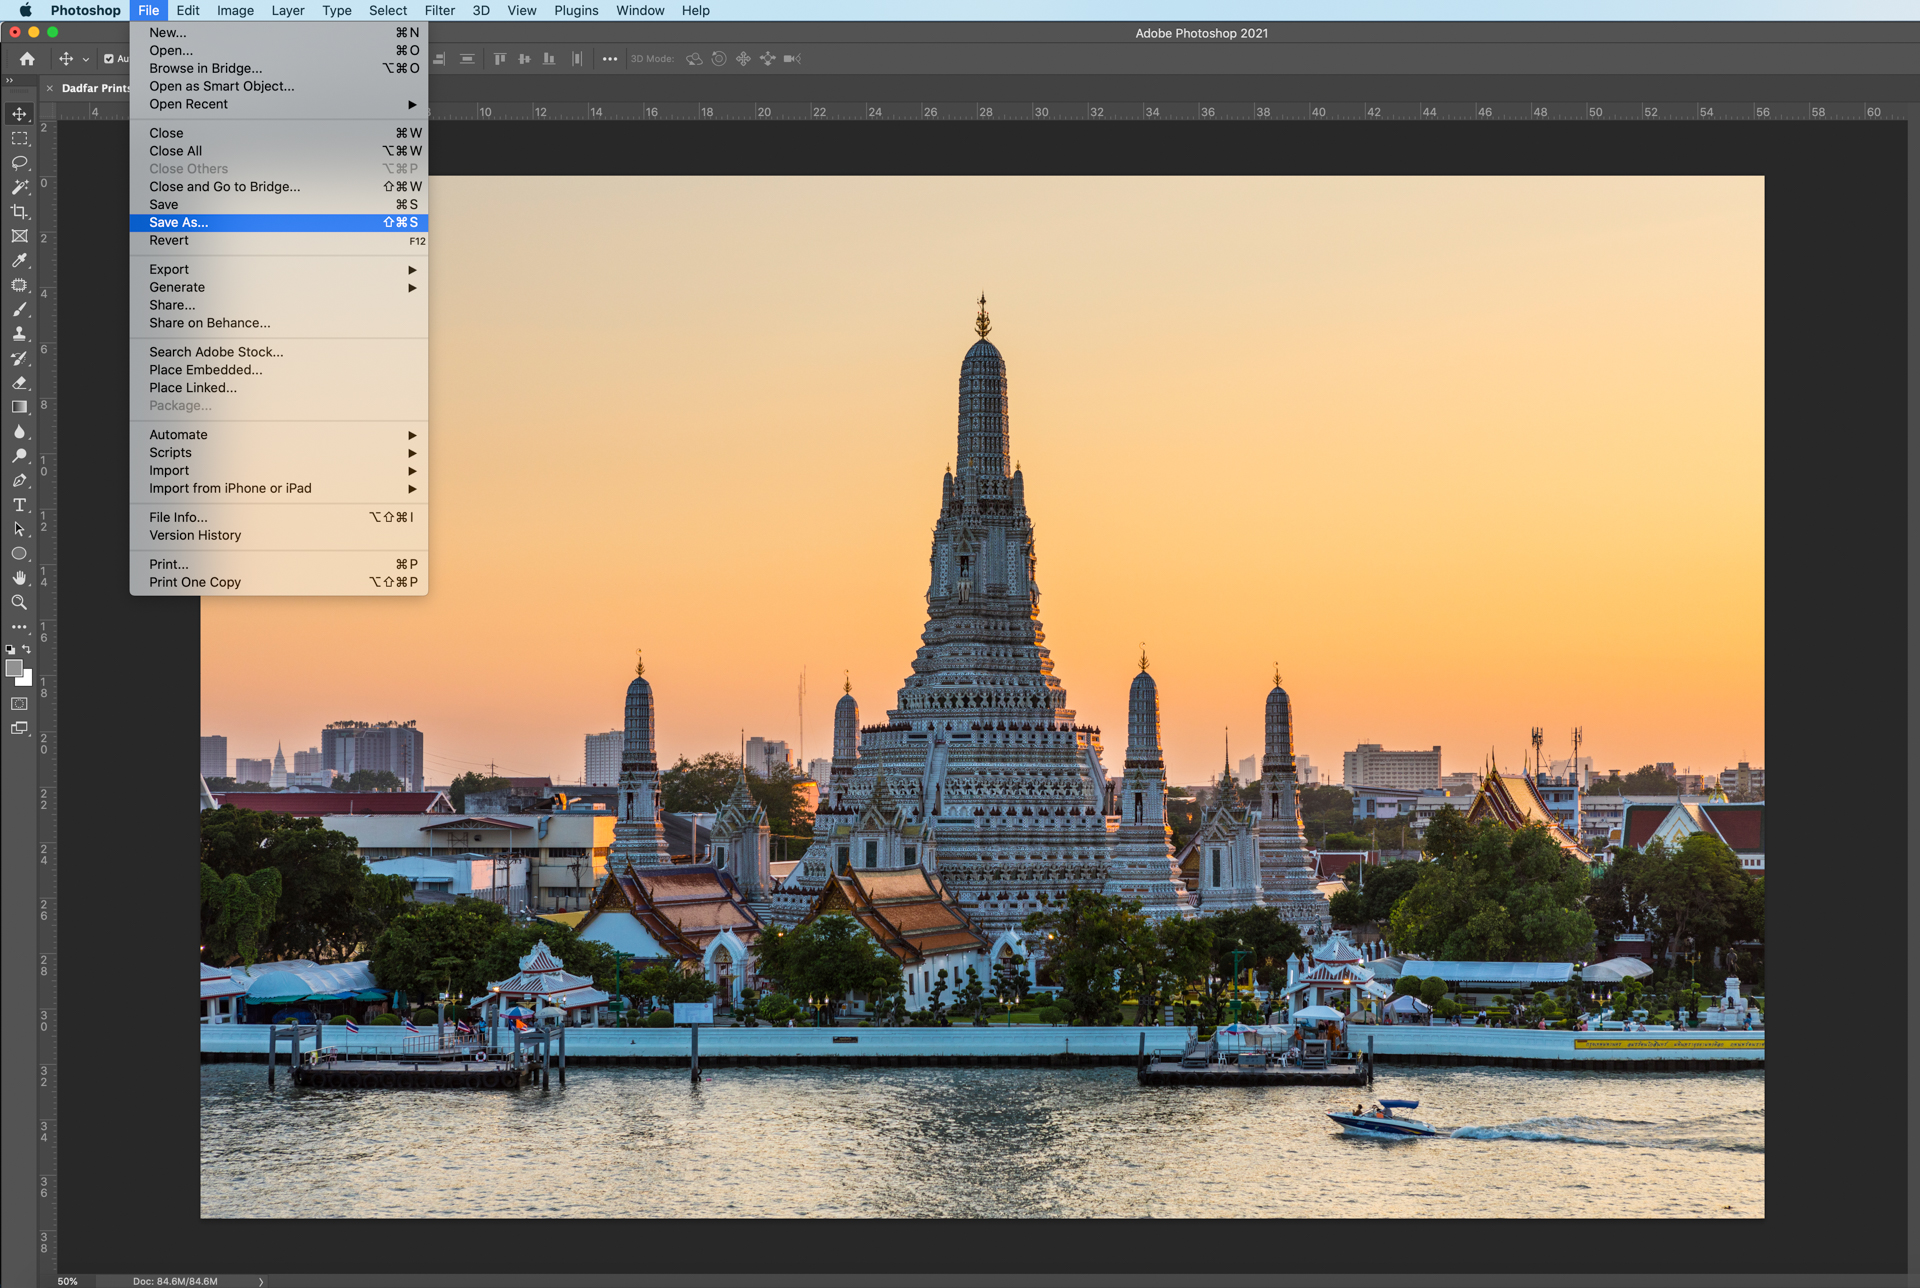
Here is how to check, change and save an image in a different color space using Photoshop:
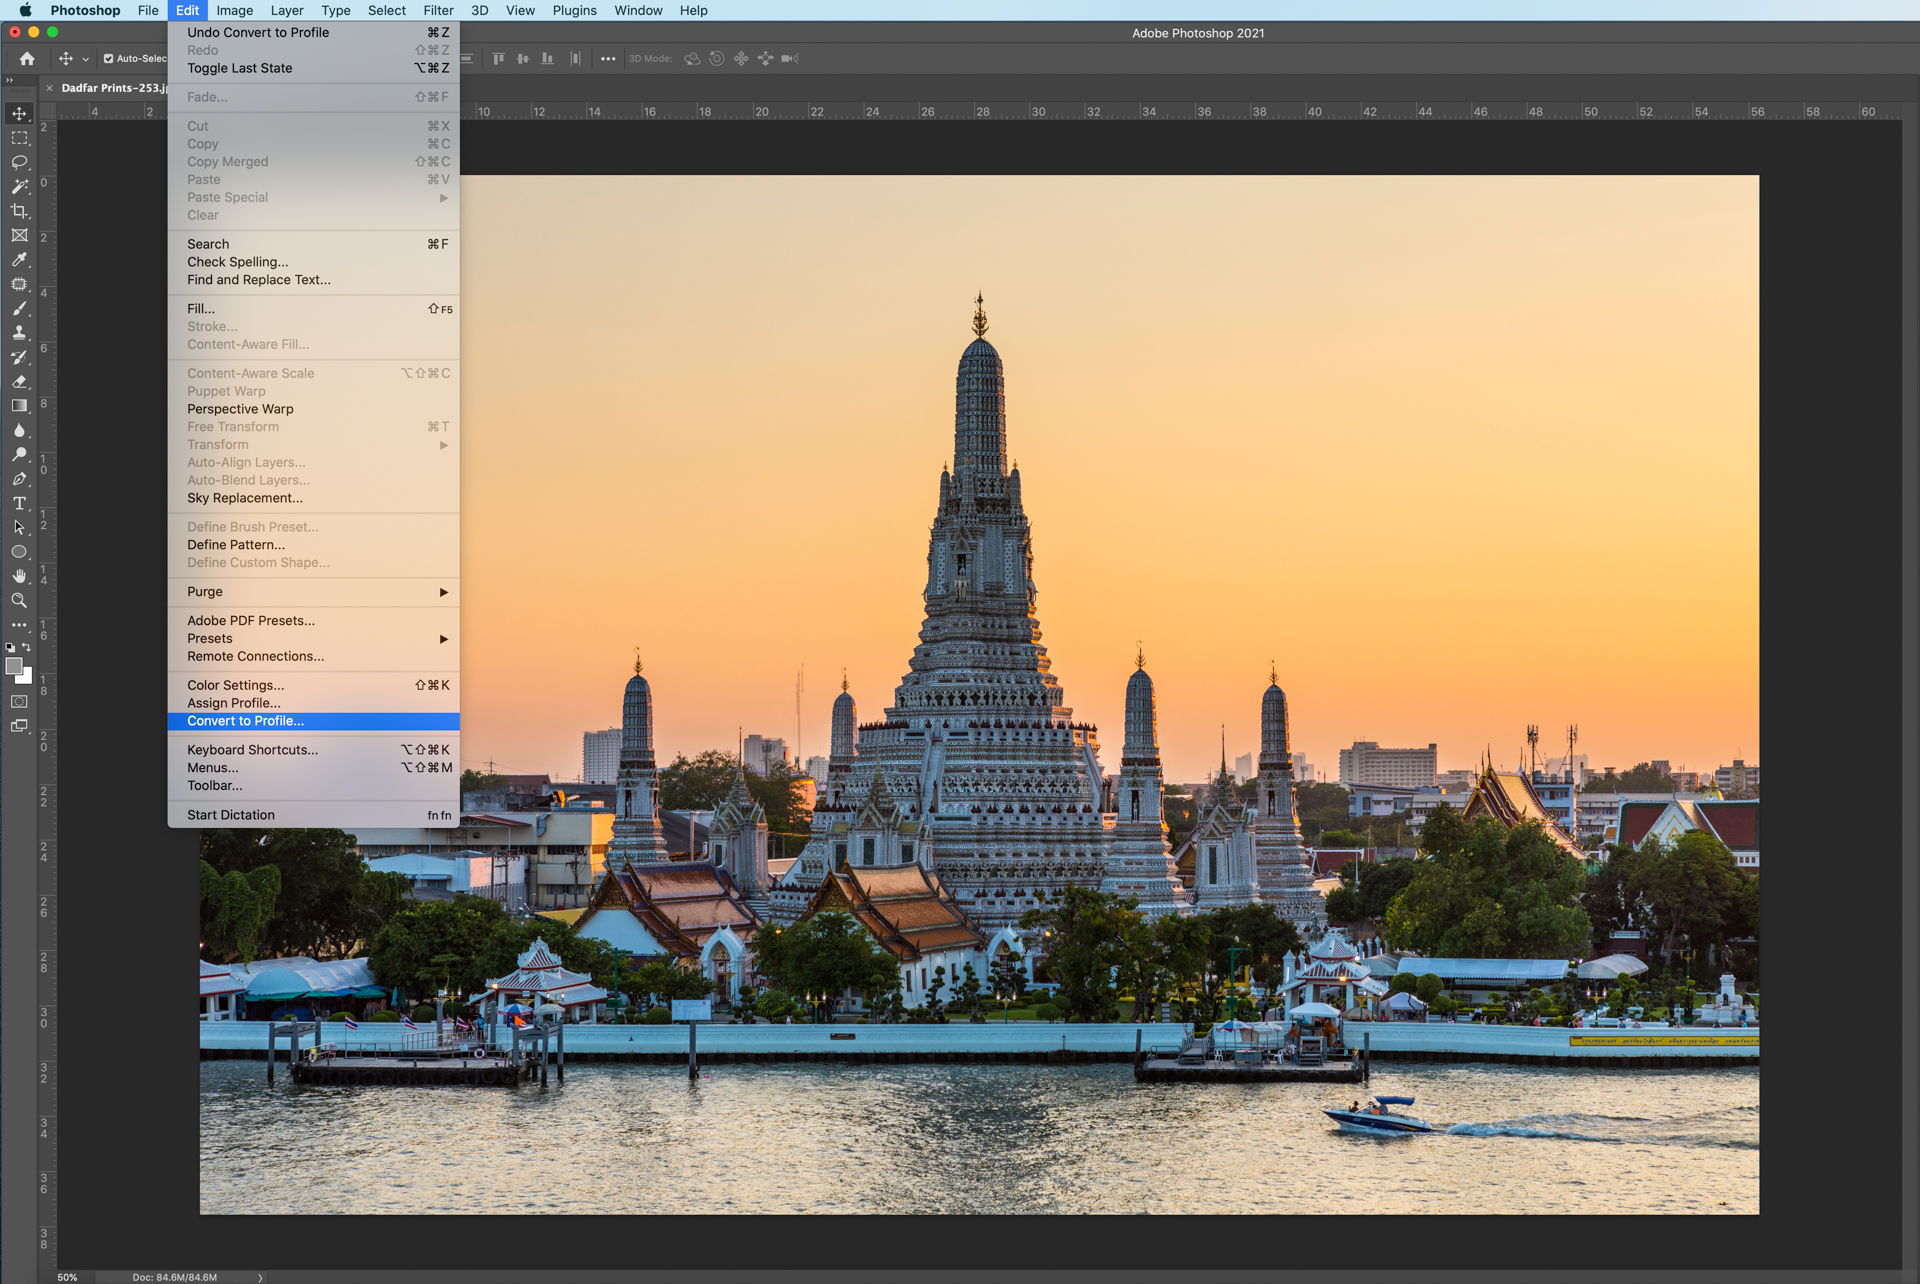
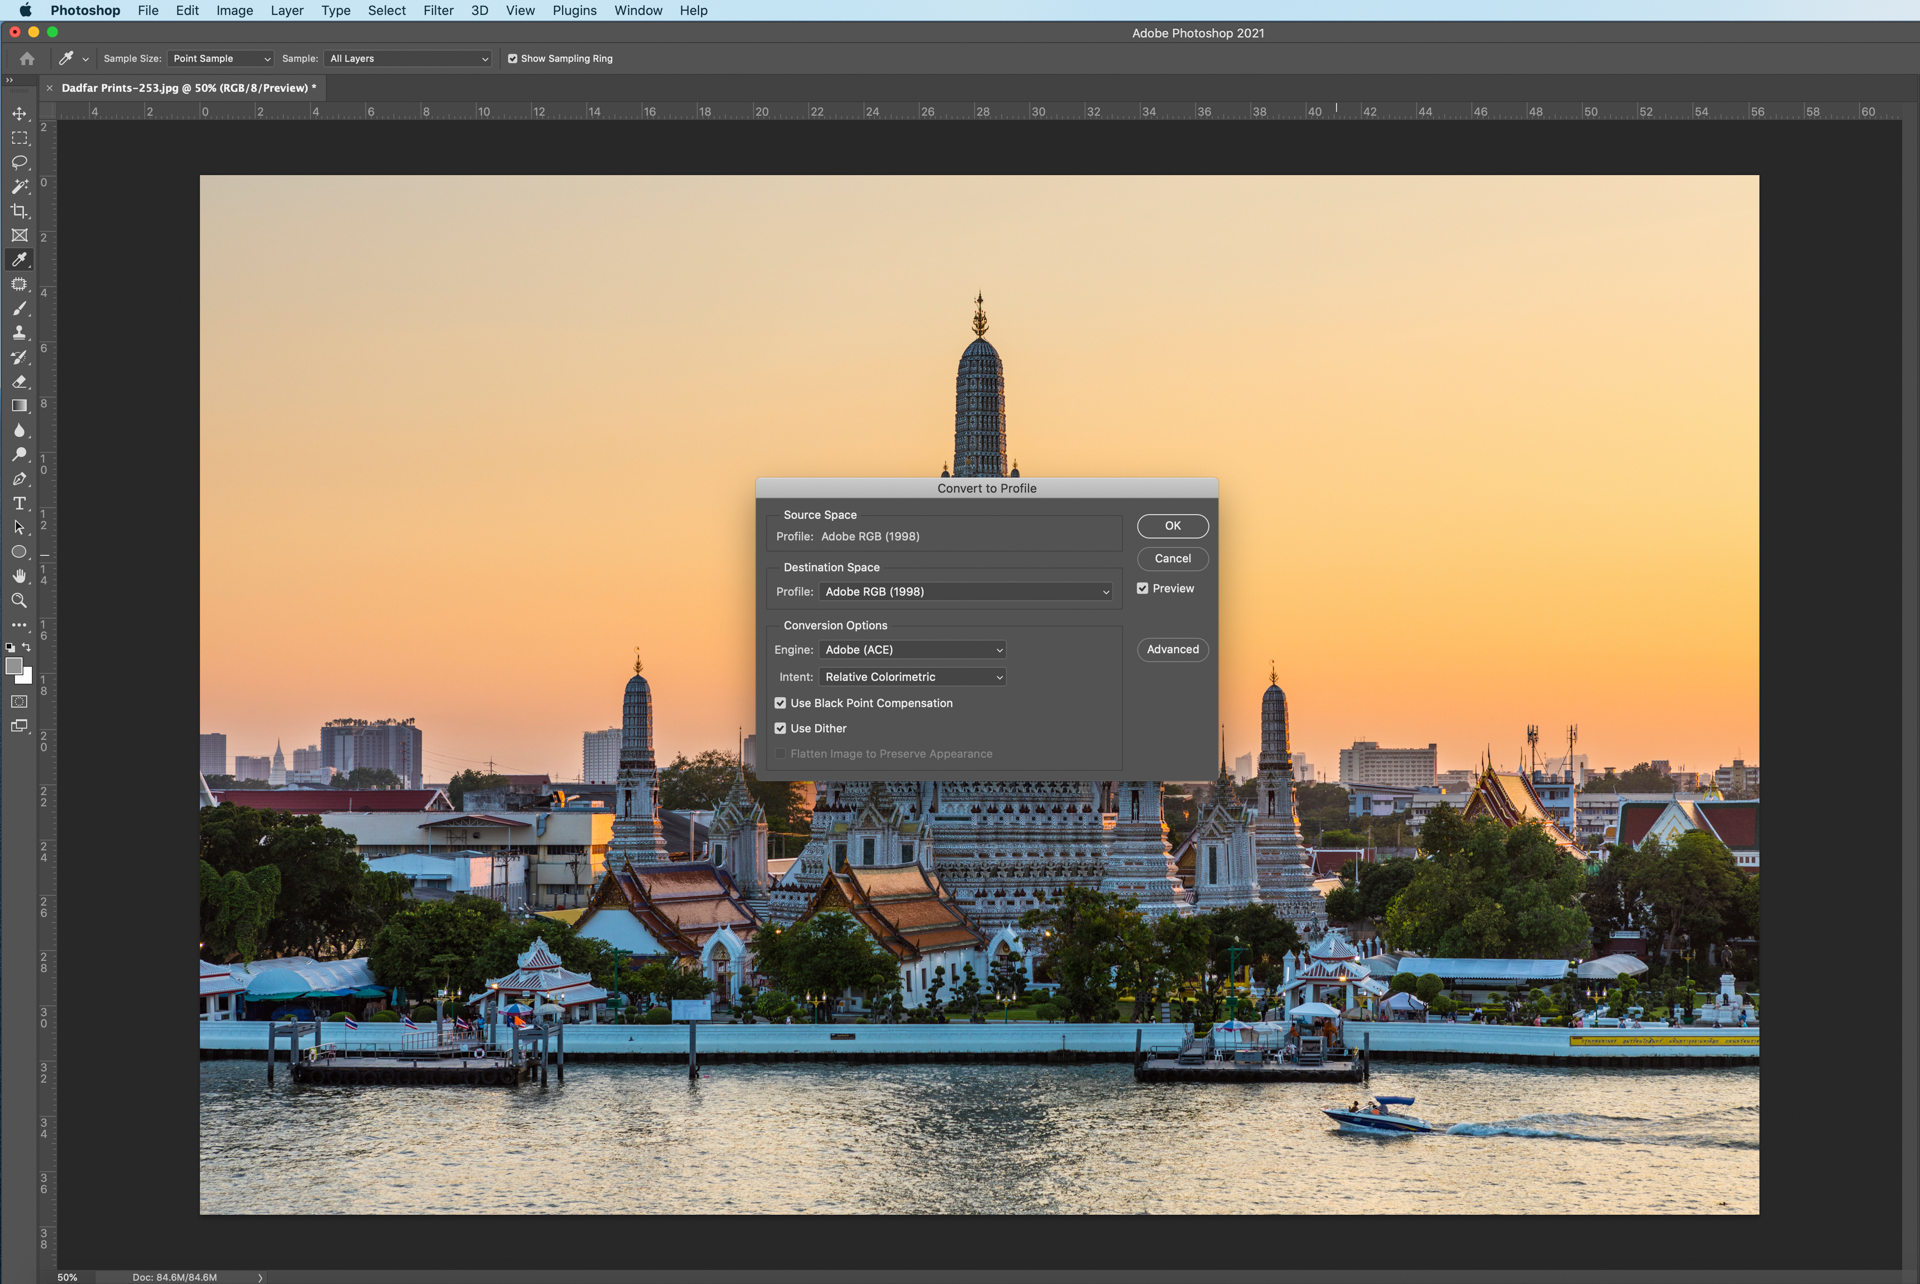
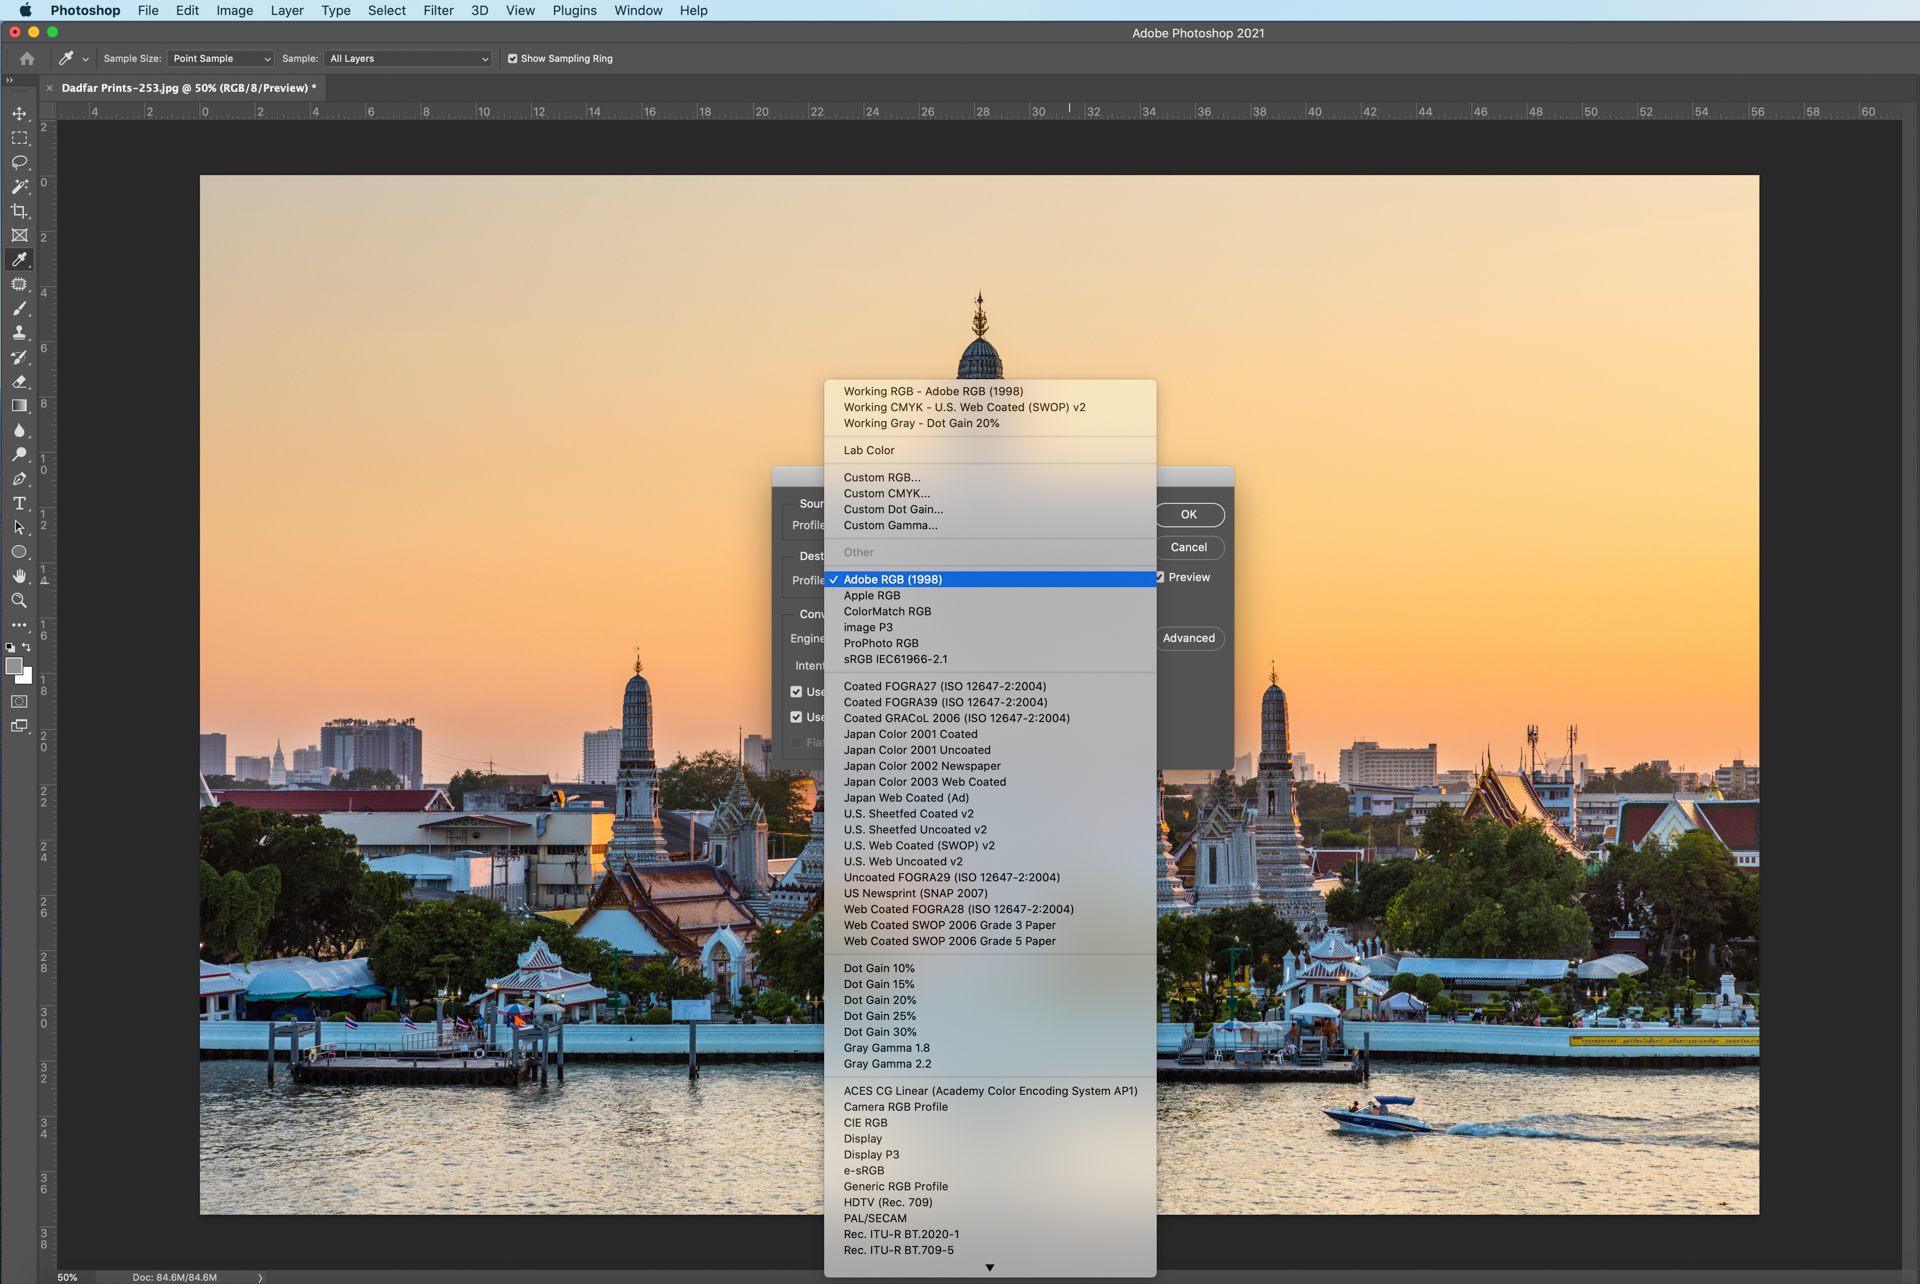
There is another dropdown menu called “Intent”. This is how the switch in color space will happen and is known as “Rendering Intent”. For simplicity, leave this on “Relative colorimetric”.
Note:
Relative colormetric compares the whites of both color spaces (the current one and the one to convert to) and changes them accordingly. Any out of gamut colors are reproduced to the closest possible color in that color space.

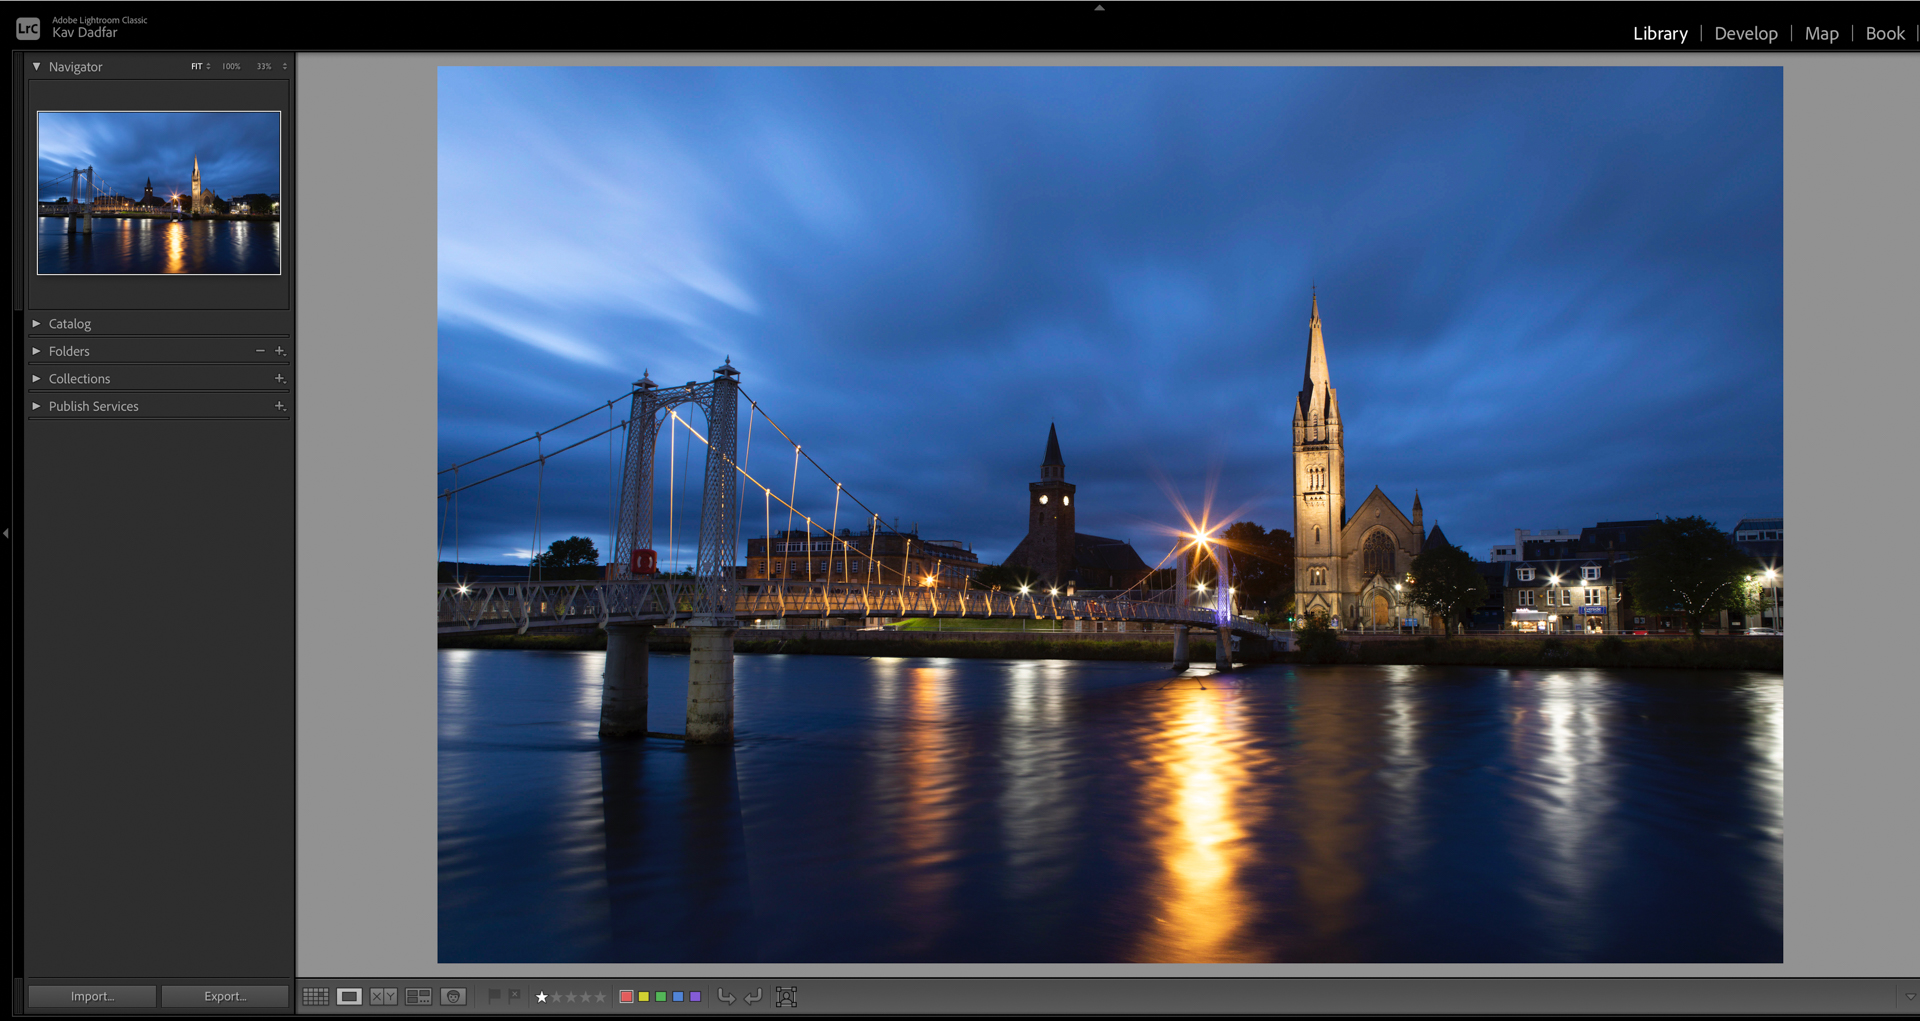
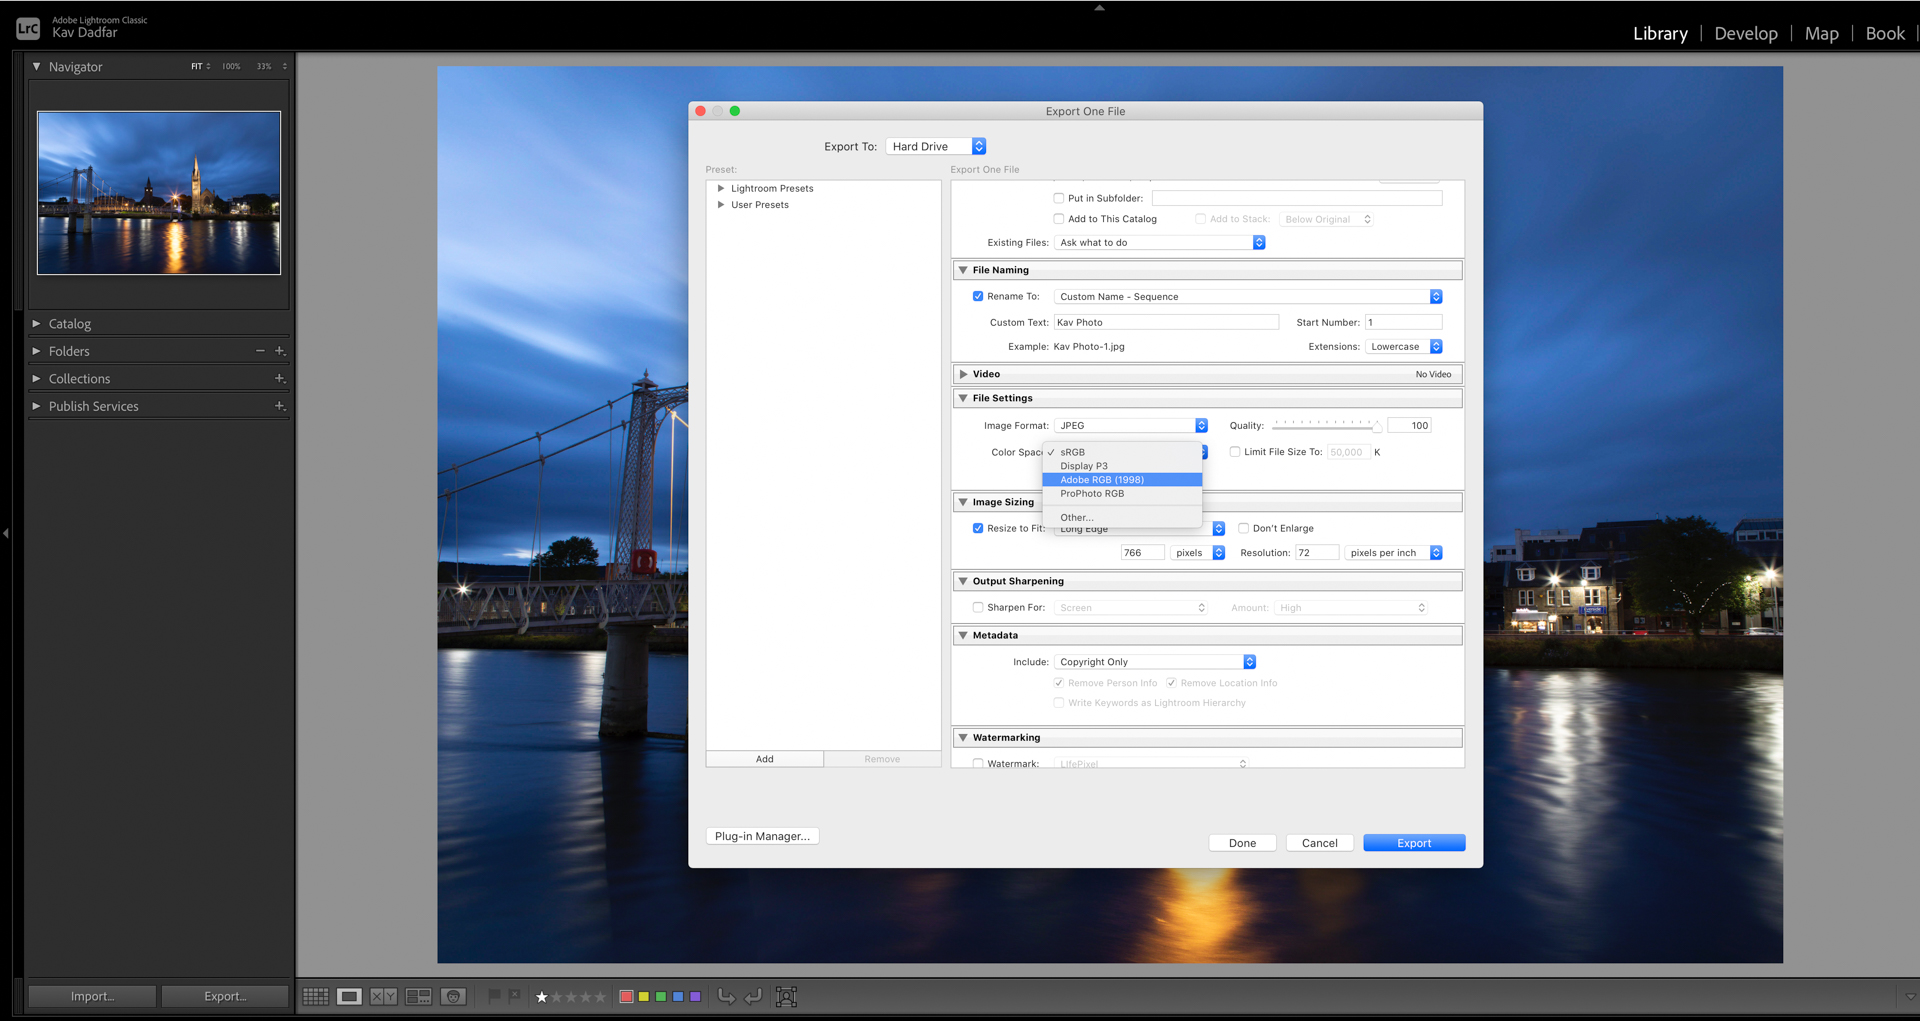
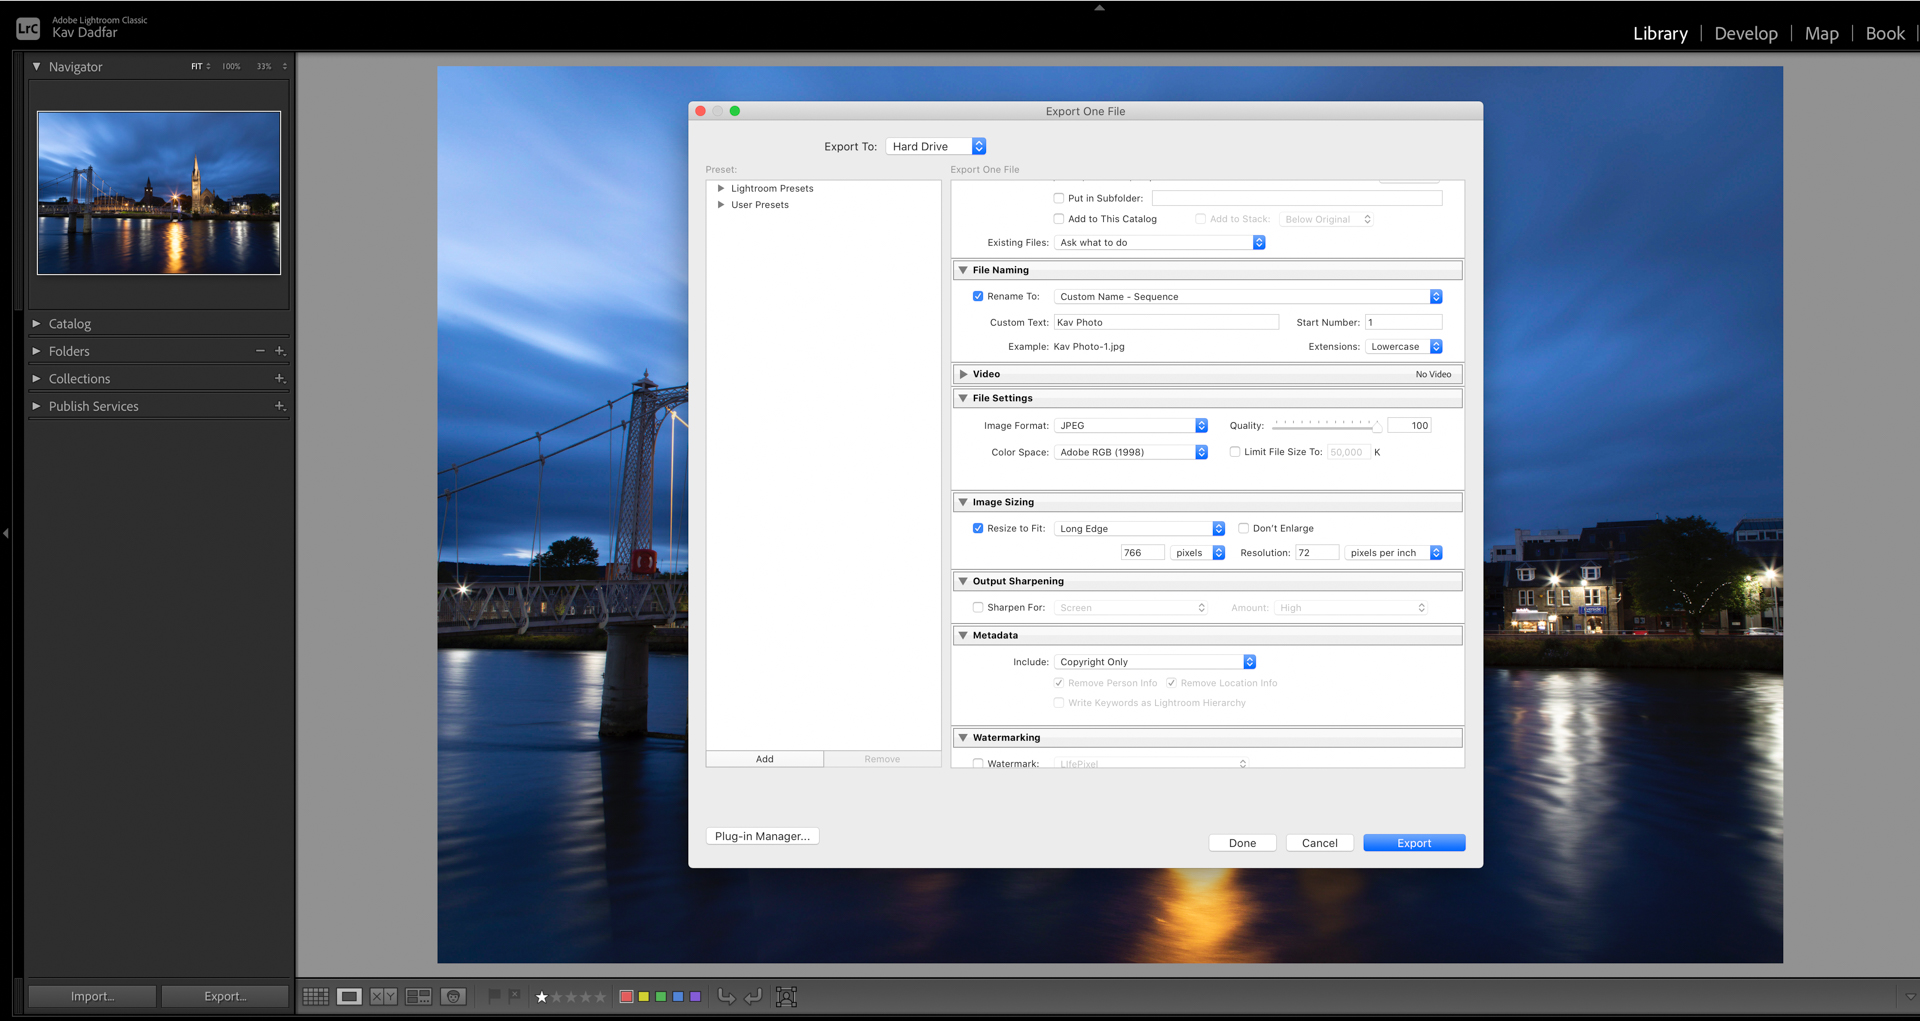
Color space in Lightroom
Lightroom works slightly differently to Photoshop in that images are shown in ProPhoto RGB in the “Develop” module and Adobe RGB in other modules such as “Library”. Don’t worry too much about these while using Lightroom. The critical part is when exporting photos.
Next steps
As you can see from above, there are a few things to consider before determining which is the best option for your specific needs:
- To capture the color spectrum as vividly as possible, it’s better to go with AdobeRGB. This is especially so if you regularly print your images or sell images for prints.
- However, for consistency in the photograph's colors across digital platforms, sRGB is the best choice. The compromise will be that when they are printed out, some colors will not look as vibrant.

Hopefully, this demystifies the whole color space dilemma, and you can select your color space accordingly. I shoot in AdobeRGB as it offers a broader range of colors, and I can always save images in sRGB very easily using editing software. But ultimately, the decision will come down to you.
All images by Kav Dadfar unless otherwise stated.

Kav is a full-time photographer and author of 400+ articles. He is also a judge on the Wanderlust Magazine Photography of the Year competition and leads small group photo tours around the world.
View all articles

