


Learn how to bring personality and authenticity to your architecture shots and get excellent results each time

The first encounter I had with a design by the architect Zaha Hadid forever changed how I thought about the built environment. It was the Nordpark Railway Stations in Innsbruck, Austria, and I was taking the train from the city to a mountain station.
As we departed, I noticed the passengers looking out the window, admiring the tunnel’s design. It struck me how design changed what would typically be a mundane event into a memorable and exciting experience.
I had always enjoyed architecture photography, but this event helped me understand some of the reasons why. Almost ten years have passed since the railway experience, and I am now well into a career as a full-time architectural photographer.
In this article, I’ll attempt to distil some of the lessons I’ve learnt through my career as an architecture photographer and show you how you can create stunning images of the built environment too.

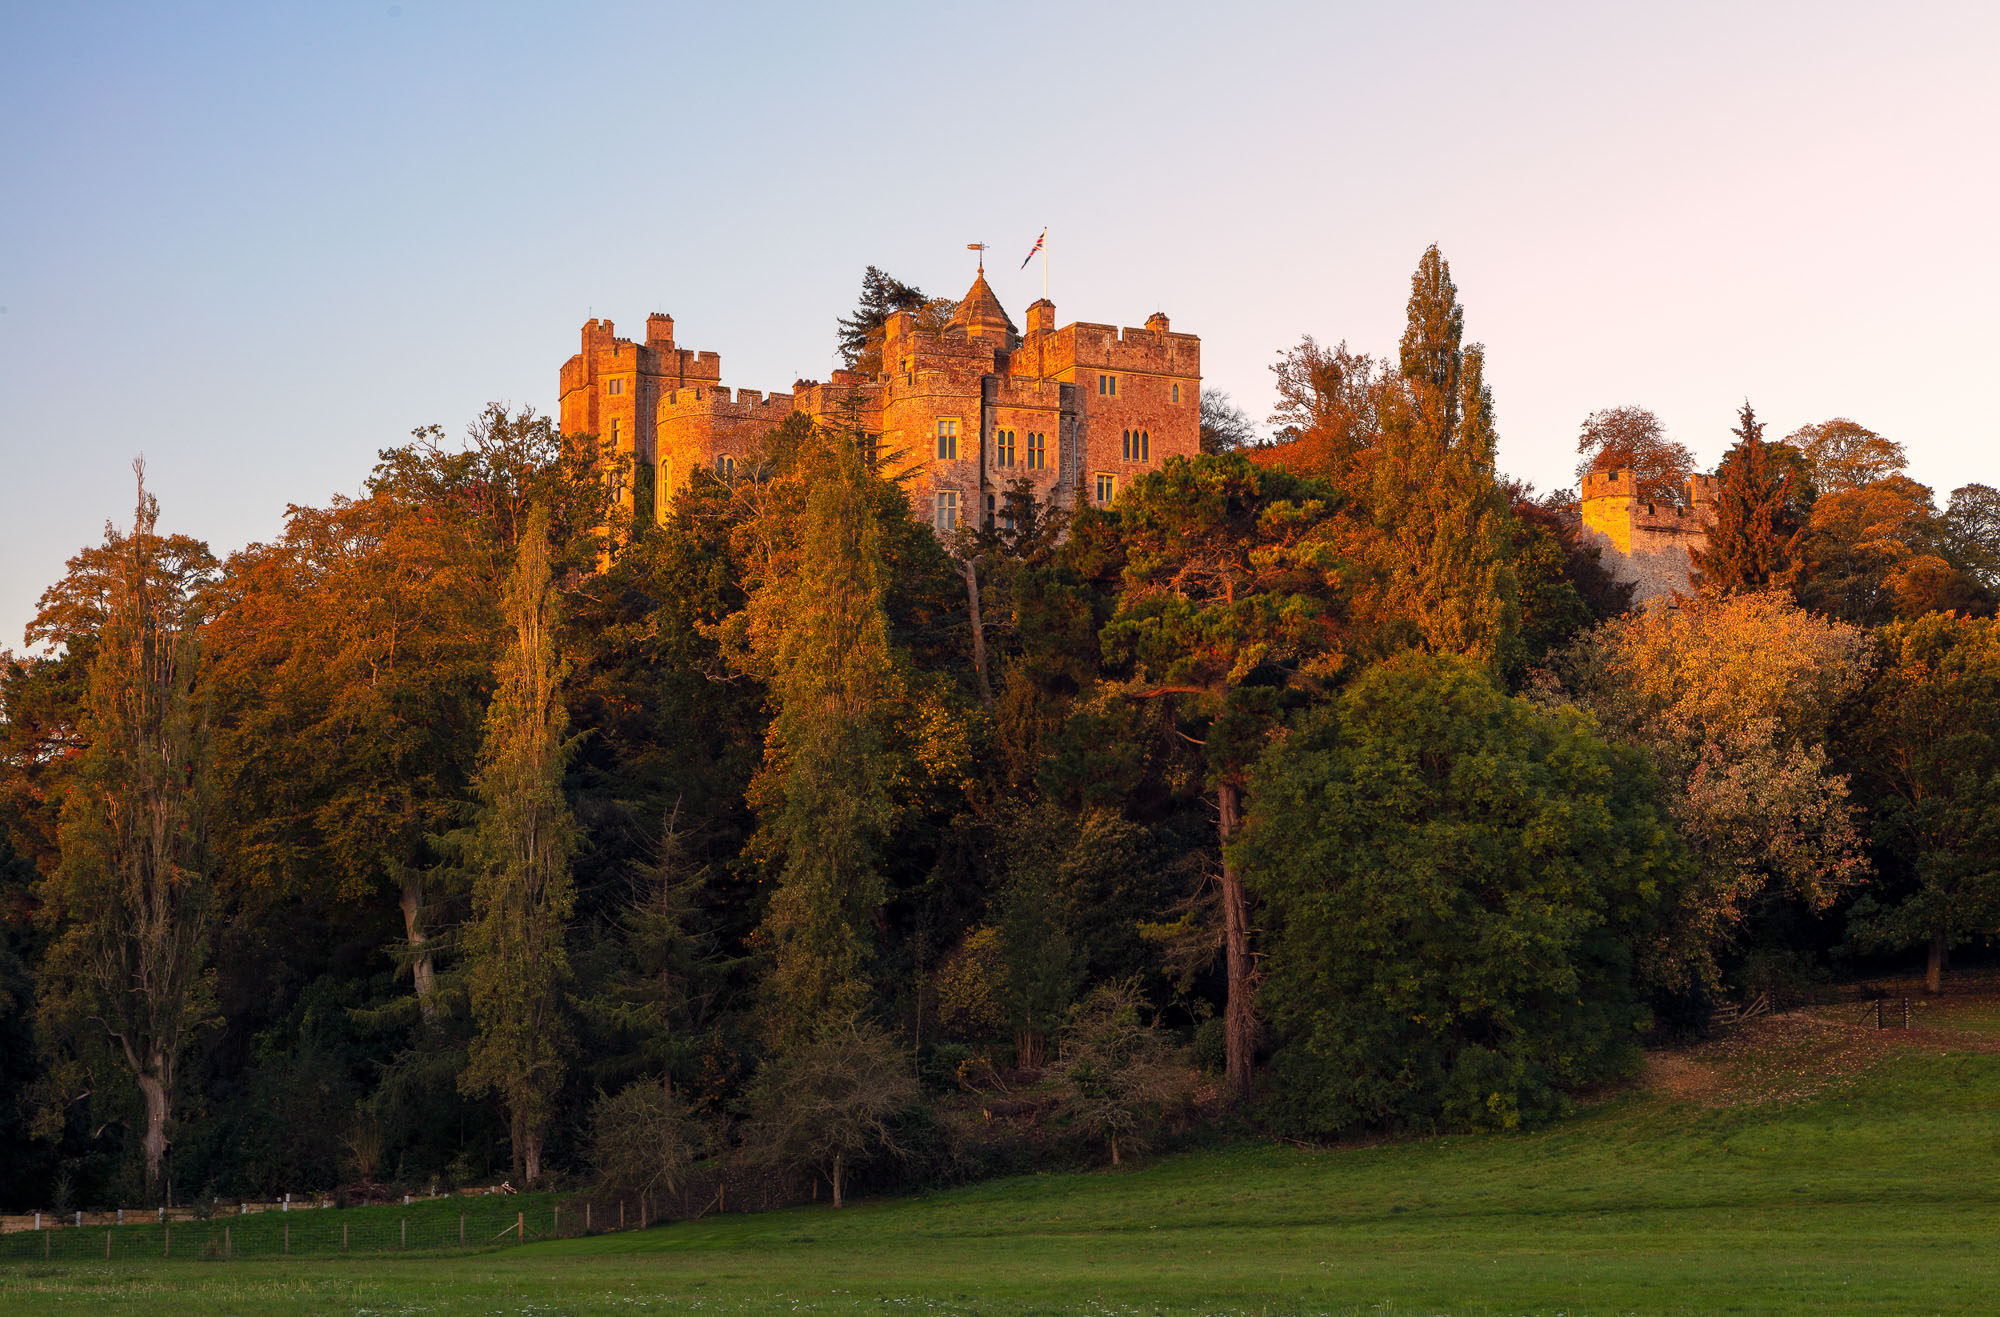
Sony A7RII | 24-105mm at 75mm | f9 | 1/5sec | ISO 100
What is an architectural image?
First of all, when it comes to authentic architecture photography, a distinction needs to be made between an architectural image and images of buildings.
Before I became an architectural photographer, I was a travel photographer, and many of the commissions I received involved photographing buildings. In most cases, these were not accurate architectural images, but instead, they served to make the building look attractive to tourists.
An actual architectural image should be an accurate record of a building that showcases its design and contents. And it's these types of images that you'll see used by architects, product designers and craftsmen.
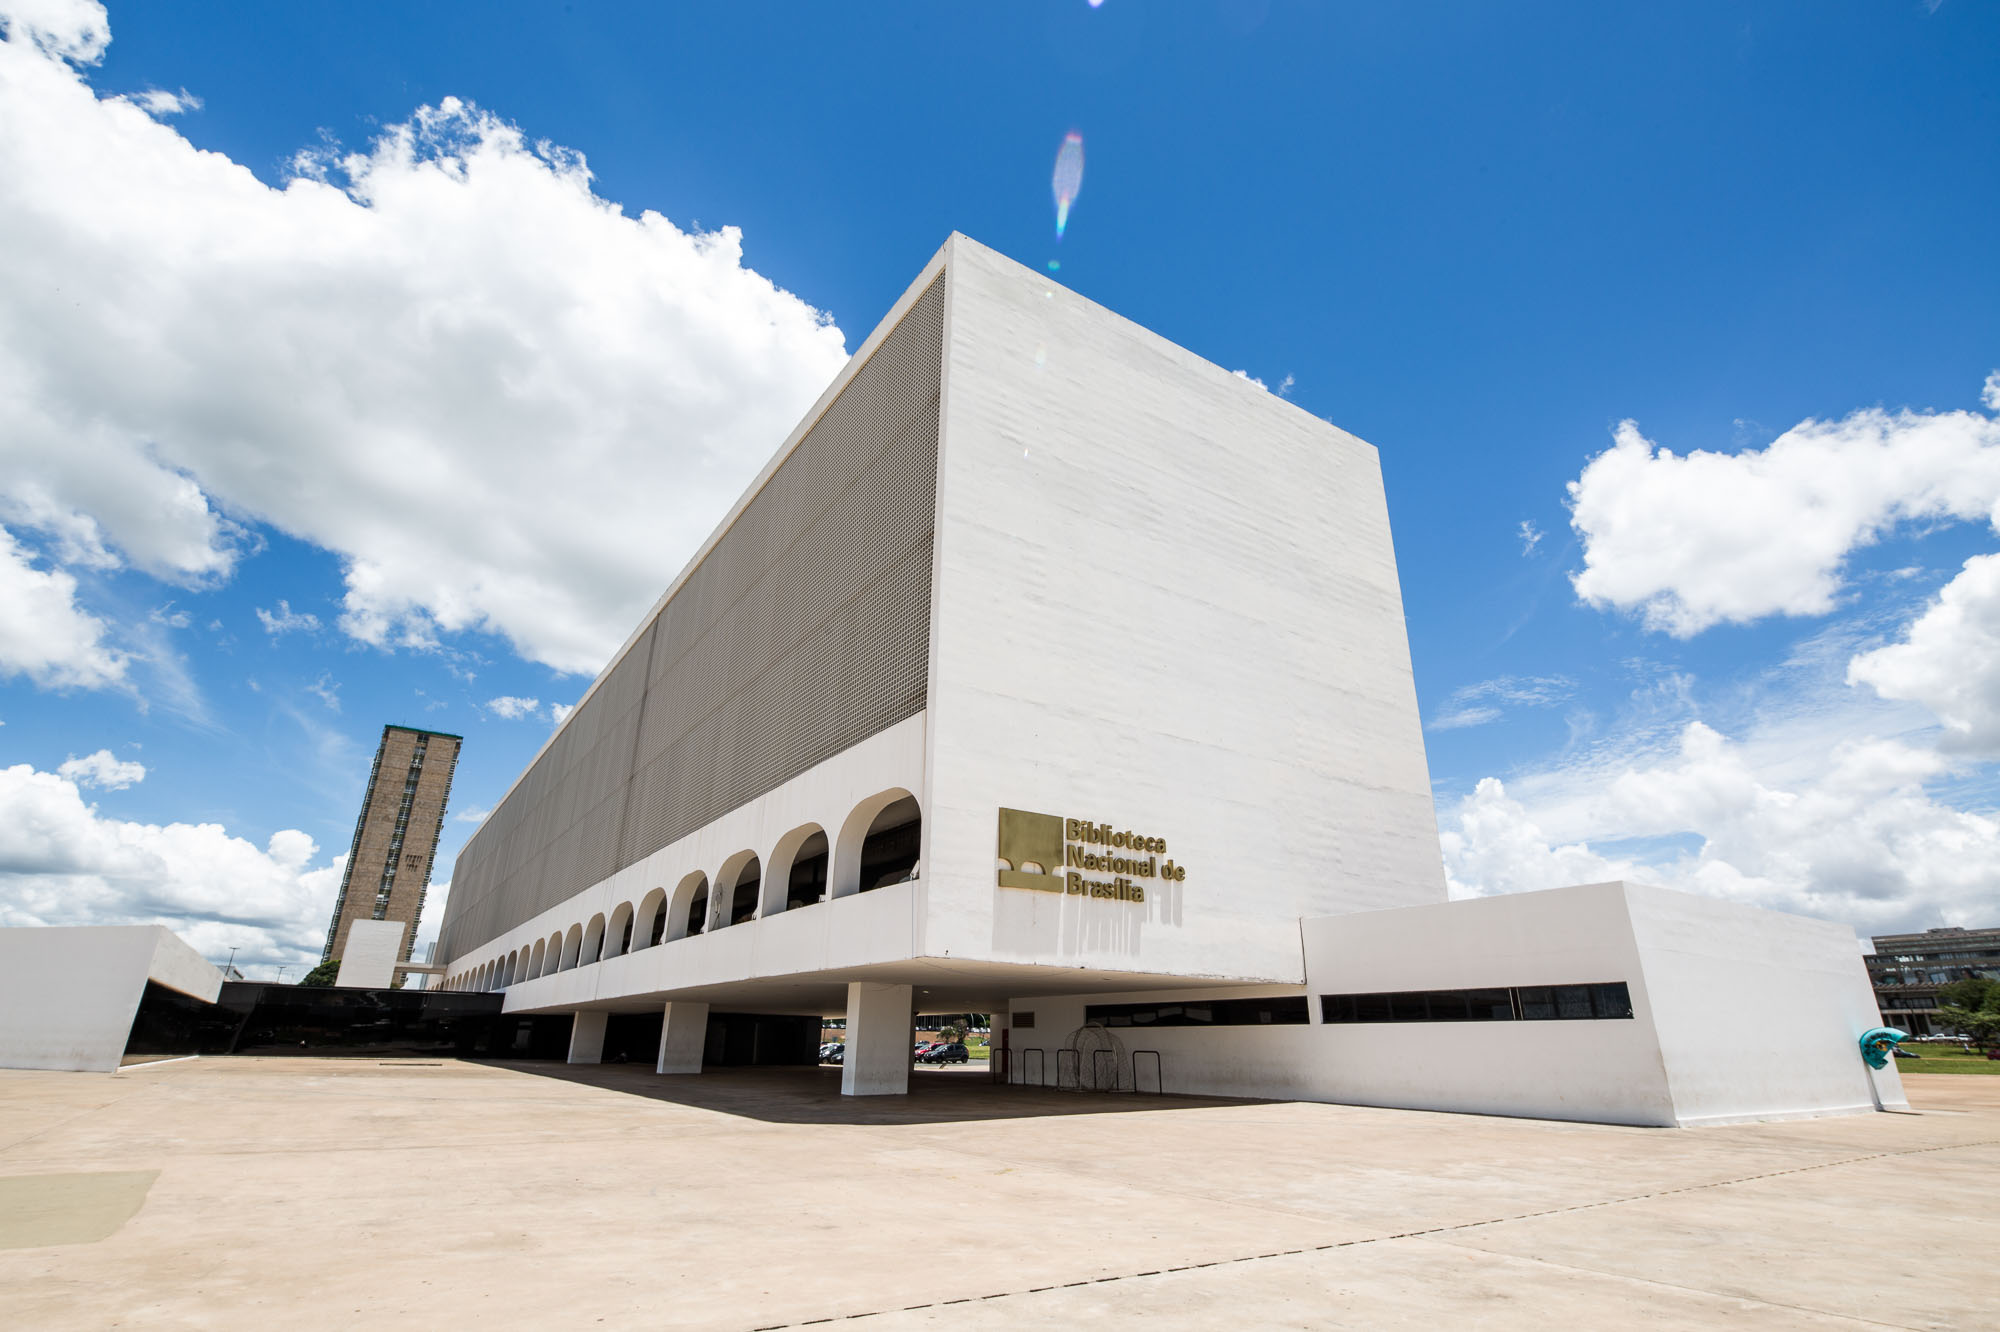
Canon 5DS | 24-105mm at 73mm | f11 | 0.5sec | ISO 100
To get that authentic architecture shot, there are some specific guidelines and techniques that you should try to stick to:
1 Equipment to make life easier
Great architectural photography can come from any camera. However, using equipment designed for architectural photography can make the process far more straightforward. Here are some recommendations:
- A tilt-shift lens has two main benefits for architectural photography. The first is that it helps correct perspective, a process that is detailed below. Secondly, a good tilt-shift lens will be a lenticular lens. A fisheye lens bends straight lines, whereas a lenticular lens does the opposite – consecutive lines are kept straight with minimal distortion. For a visual of how a tilt-shift lens works, see tip 2. View some of Canon's tilt-shift lenses here.
- A sturdy tripod is useful for architectural photography because images should be taken with small apertures and the lowest ISO sensitivity. This is to keep all the details in the shot crisp and clear. And this combination of camera settings will require slow shutter speeds, making the use of a tripod a necessity. I use a Nova Explora T20.
- A geared tripod head helps make micro-adjustments when the camera is attached to the tripod to ensure the camera is level and the composition is as close to perfect as possible. I use a Manfrotto 405 Geared Head.
- A full-frame camera will help create images with an extensive dynamic range (range of detail between highlights and shadows) and help keep digital noise levels down. This will help save time in post-production. I use Canon mirrorless cameras, but I’ve also used Sony and Canon DSLRs in the past.
Camera settings:
Images should be taken with small apertures and the lowest ISO sensitivity so that all the details in the shot are crisp and clear. This is important in architecture photography to get an accurate record of the space. Guides on how aperture (depth of field), ISO and shutter speed work, can be found here.

Canon EOS 5D Mark IV | f2.2 | 1/100s
2 Keep vertical lines at 90 degrees
Almost all architectural drawings and renders are from a level perspective, and this is also how spaces are naturally perceived.
However, when architecture is photographed, the camera tends to point upwards to show the entire scene. As soon as this happens, the vertical lines of the building lean inwards. See the example below:
Canon 5D Mark III | 17mm TSE | f16 | 1/60sec | ISO 100
Canon 5D Mark III | 17mm TSE | f16 | 1/60sec | ISO 100
People expect to see spaces from a level perspective. This requires keeping the vertical lines at 90 degrees to the horizontal frame. This can be done in three ways:
1 Photograph from the mid-point height of the building, which helps to keep the camera level.
2 Photograph using a tilt-shift lens which also helps keep the camera level.
3 Point upwards, take a photograph and correct the perspective in post-production. For more detail on correcting perspective, see this article.
3 The 1-point perspective
Simply put, a 1-point perspective is a straight view and should be used to capture elevations.
Elevations are angles of a building that show parallel, horizontal lines at 0 degrees and are standard to document in architectural photography. Three key elevations are:
1 Front elevation – view of the front
2 Side elevation – view of the sides
3 Rear elevation – view of the back
To capture these elevations in full requires a 1-point perspective.
To find this angle, align the top of the viewfinder/LCD frame with a horizontal line near the top of the building and do the same with the bottom of the frame of the viewfinder/LCD. See this example:
.jpeg)
Canon 5DS | 17mm TSE | f11 | 1/25sec | ISO 100
The 1-point perspective is also useful for interiors:
.jpeg)
4 The 2-point perspective
A 2-point perspective introduces a second dimension to the image. Simply put, a 2-point perspective is any angle; this is not straight on while keeping vertical lines at 90 degrees.
For an exterior, the 2-point perspective will show the building’s corner, including a view of both the façade and the building’s side. For an interior image, the 2-point perspective will be from one corner to the diagonally opposite corner.
.jpeg)
Canon EOS R | 17mm TSE | f11 | 1/100sec | ISO 100
The 2-point perspective is useful for adding depth to the image. It also creates a sense of movement, which can help make the composition more interesting.
.jpeg)
Canon 5DS | 17mm TSE | f11 | 1/4sec | ISO 100
5 Use intentional angles
A lot of architectural images fail because there is no clear angle to document the building. This can result in an image that looks like a one or 2-point perspective shot slightly off.
There are times when this is the only angle possible for the shot – for example, because of space constraints. If a weak angle is the only option, then, by all means, choose it, but I recommend always being deliberate with angles when composing images.
Remember, for a proper 1-point perspective; there should be many parallel, horizontal lines at 0 degrees. A 2-point perspective tends to create a triangle shape.
.jpeg)
Canon 5DS | 24mm TSE | f11 | 1/10sec | ISO 100
.jpeg)
.jpeg)
Canon 5DS | 17mm TSE | f11 | 3sec | ISO 100
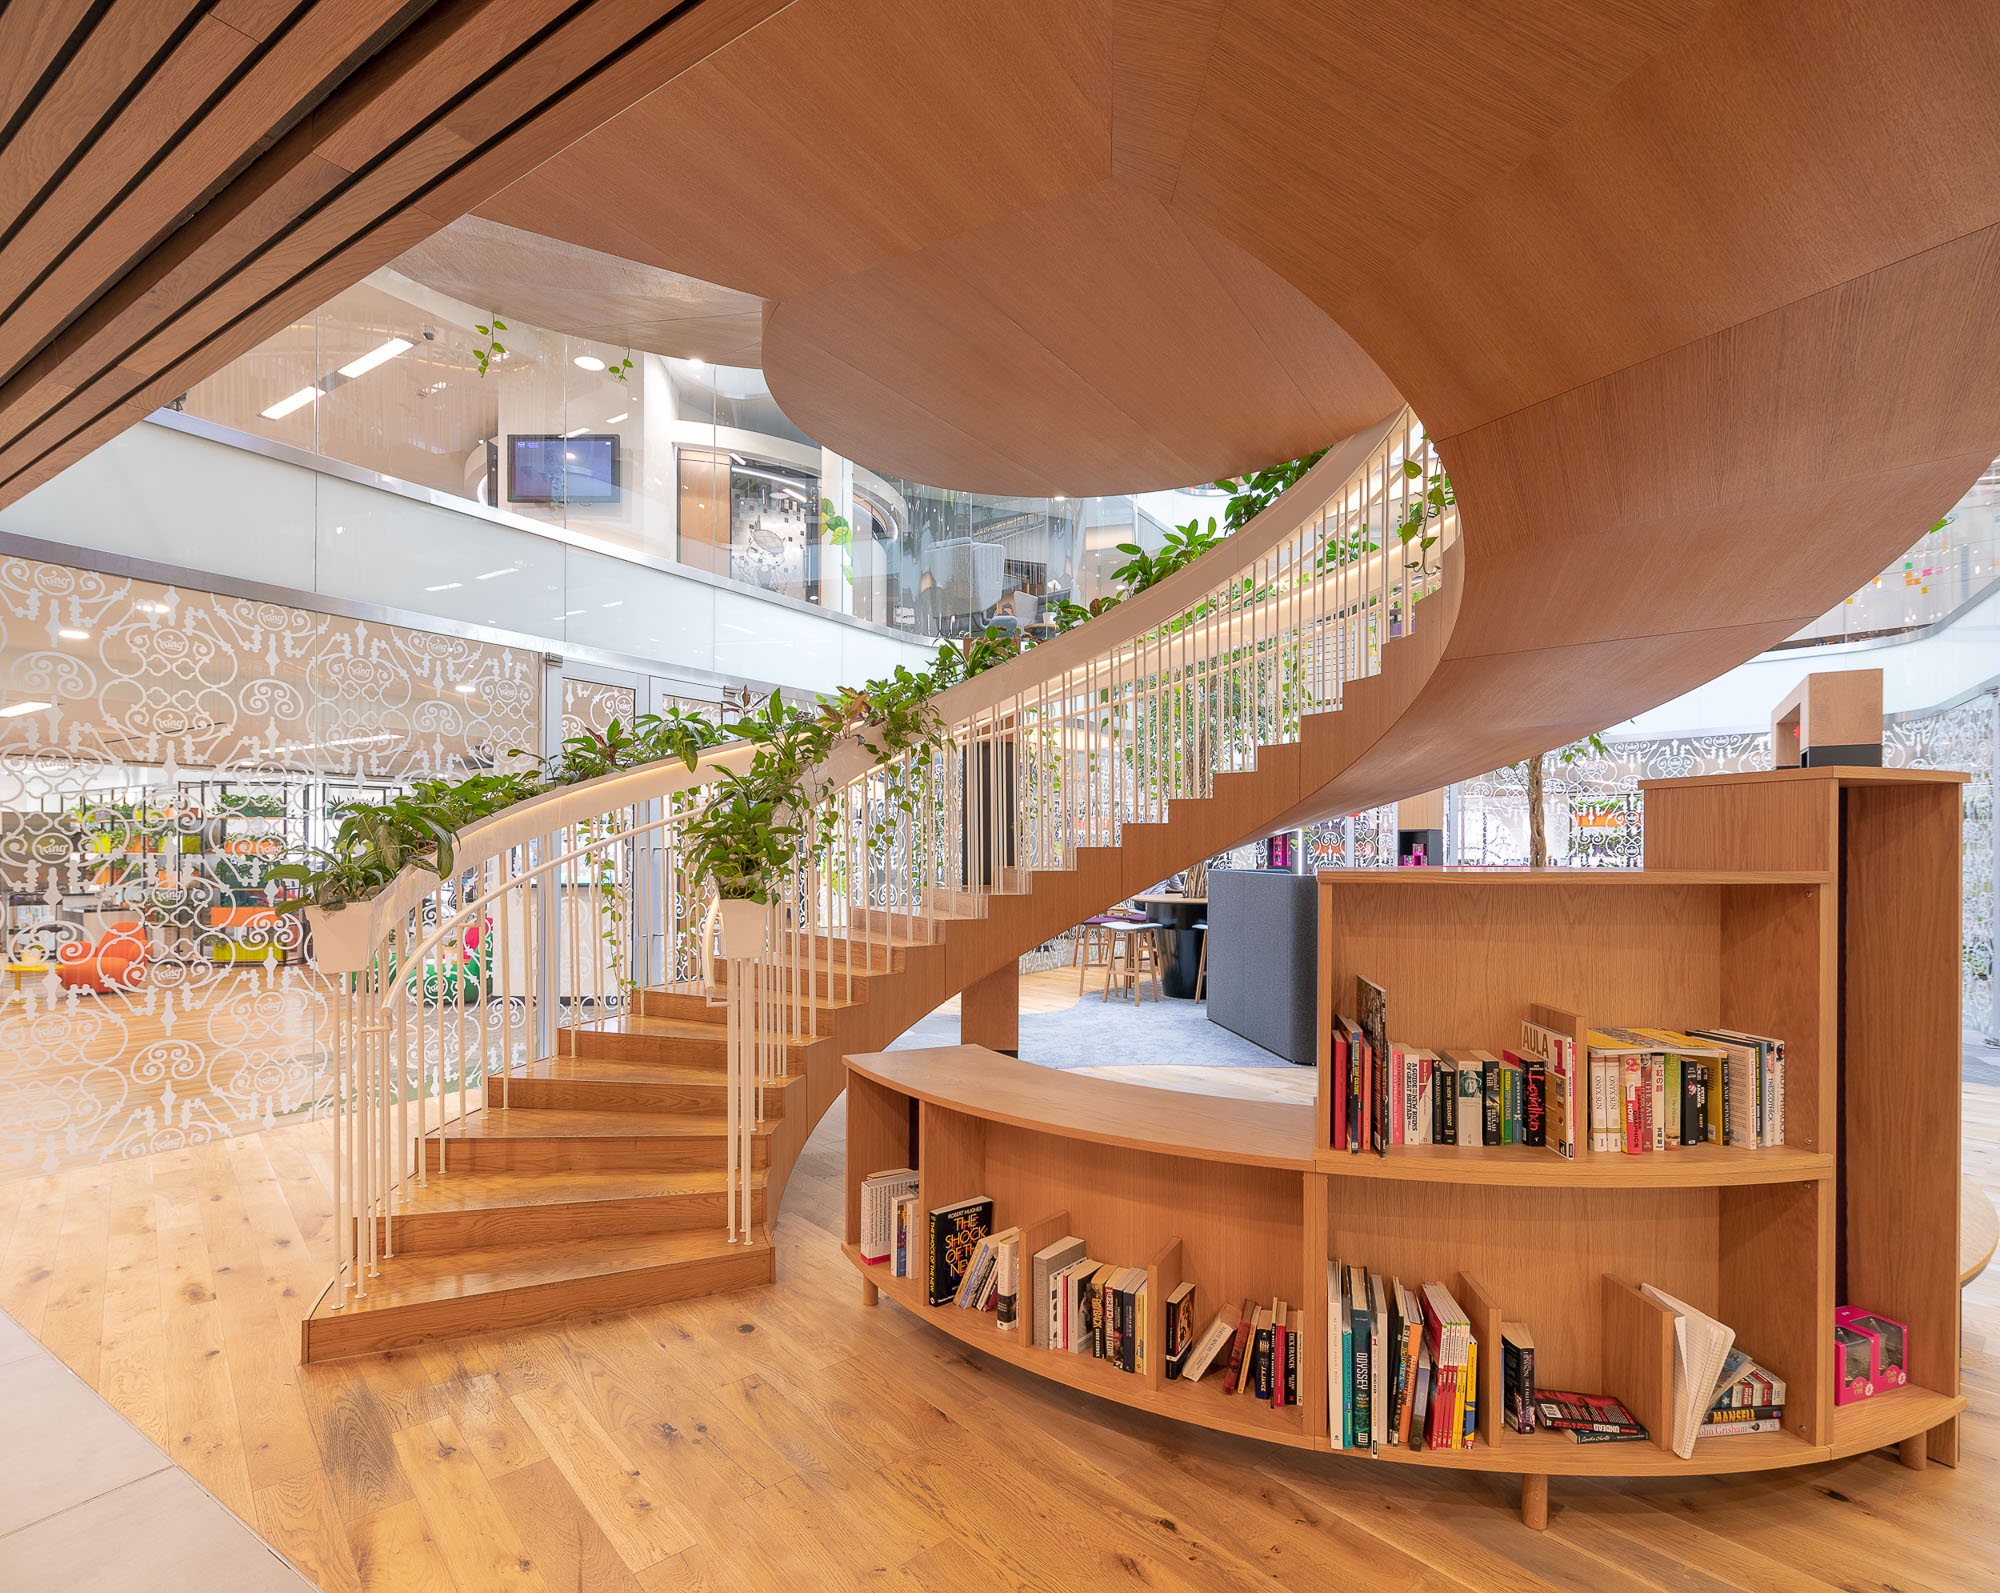
6 Document the story of the space
During my first few years as an architectural photographer, I spent most of my effort trying to create the “hero” image. After working with architects for a while, I noticed that they were less interested in a hero image and more interested in a series of images as a package. Architects want images that provide a sense of the space. This is impossible to do in a single image.
For me, this is where architectural photography is most impressive. Ask yourself, how can you photograph the space to give a sense of what it is like to be there and experience it in person?
This may seem like a formula, but to get used to the process of creating a story - take the approach as if the viewer were on a building tour. Start with the far-out exterior view, showing the building in context with its’ surroundings. Come in closer with a front elevation. Continue to explore the exterior with a wide-angle lens. Next, enter the space from the main entrance, photographing the interior space with a wide (20-30mm) lens.
Try a longer lens and isolate interesting or important detail, both inside and out. Look for textures and the use of unusual or high-quality material. Aim to create detail images that people want to touch.
.jpeg)
Canon 5DS | 24-105 at 32mm | f4 | 1/80sec | ISO 1600
Throughout this walkthrough, take note of how the light is interacting with each space. As the sun moves through the sky, the play of light will create different looks. I flag 3 or 4 locations to cover for when the light is ideal.
.jpeg)
Canon 5DS | Canon 24-105 at 40mm | f11 | 1/10sec | ISO 100
7 Experiment
When on location, carve out a little bit of time to experiment. By experiment, I mean trying something new.
For example, I shoot all of my images on a tripod and a geared head for precise movements. Sometimes, to shake things up, I take the camera off the tripod, and I shoot handheld. This results mostly in throw away images but occasionally leads to a photograph that I love that I wouldn’t have considered on a tripod.
Canon 5DS | 24-105mm at 70mm | F4 | 1/100s | ISO 800
Top tip:
The use of drones has dramatically increased the opportunity for experimentation in architecture photography. I started shooting video with drones as an experiment, and now it is another service that I can offer to my clients. Consider adding drone work to your portfolio as it can increase your offering to customers.
8 Add your personality
The first four tips in this article focus on architectural photography’s basic rules. However, even when photographs stick perfectly to these rules, you should add your unique style to your images.
Part of style is personality, and I encourage you to photograph the things that interest you. In the introduction, I mentioned I enjoy how design can make a mundane situation an exciting experience. And because this interests me, I look for it whenever I photograph architecture. This is some of my personality rubbing off on my images:
Canon 1DX Mark II | 17mm TSE | F8 | 0.6 sec | ISO 100
Add your unique style to make your images instantly recognisable. When you add a recognisable element to your pictures, they will become more attractive.
9 If it looks good, do it
The problem with rules and guidelines is that images that don’t conform to them are perceived as bad images. This simply isn't true.
Rules and guidelines are helpful as a starting point for getting the best possible image. But if you break the rules, and the shot looks great and adds value to the series of images, keep it!
There are many instances where it is necessary to break these traditional rules to get the best possible composition.
Take a look at this series of 'rule-breaking' shots below. I usually would avoid including people in my architecture shots (another rule), however in these images; the people add life to space:
.jpeg)
.jpeg)
.jpeg)
.jpeg)
Canon 5DS | 24mm and 17mm TSE | f8 | 1/15sec | ISO 200
Bonus 10th tip: practice
Like any skill, architectural photography becomes better with practice. Fortunately, as the built environment surrounds us, there is plenty of opportunities to practice.
It may be tempting to wait until you’re able to access incredible architecture.
Still, your skills will be sharpened more effectively if you learn to create beautiful images of everyday spaces around you.
As photographer Nick Onken says... “ABS”... always be shooting!
Canon 1DX MarkII | 24mm TSE | f8 | 1/60sec | ISO 400
What to photograph in your local area?
In many towns and cities, public spaces are home to some groundbreaking architecture, and there might be a space that you walk past every day that you haven't ever noticed!
Do some research, scour Google Maps and make a list of where to visit. Here are some places to inspiring architecture:
- Museums
- Libraries
- Theatres and opera houses
- Leisure spaces
- Transport hubs
- Commercial buildings such as shopping malls and office blocks
- Docklands
- Subways
- Town halls and municipal buildings

Practical tip:
Always check to see if permission is needed to take pictures in the space you intend to visit.
While many public spaces freely allow photography, places such as shopping malls and office blocks are often privately owned. Always check in advance whether permission is needed.
For security reasons, places like railway stations and airports may actively prohibit photography. You could get into trouble if you turned up unannounced and started setting up camera equipment. It doesn't necessarily mean that you can't take pictures there, but you may need to seek official authorisation in advance.
The rules can vary hugely depending on the location and even the country that the place is in, so there's no one-rule-fits-all approach. Therefore, it's always worth researching in advance.
All images by Jonathan Reid unless otherwise stated.

I have three passions in life - travel, architecture and cycling. Happily, I get to photograph two of my passions for a living keeping cycling for fun.
View all articles

