Learn how you can enjoy the creative freedom of shooting landscapes handheld while still enjoying fantastic image quality
Landscape photography is traditionally one of the slower and more thoughtful subjects; composing with the camera attached to a tripod and selecting the right filters are part of a process that allows us to slow down and carefully consider the scene in front of the camera. And quite often, shooting around golden hour results in slow shutter speeds that make a tripod a necessity, or does it?
"Shooting handheld and not carrying a tripod can be a liberating experience on top of saving your back when walking in the hills and mountains or for long distances."
Fortunately for photographers, advances in camera technology, including image stabilisation and impressive ISO handling, mean that we don’t necessarily have to use tripods when shooting what you might call a ‘standard’ exposure. Of course, long exposures will always require a tripod, but these days you can achieve fantastic image quality at ISO settings as high as 1600.
Tripods are undoubtedly essential kit when it comes to landscape and cityscape photography. But they’re not necessary in every situation and can be a burden to carry for long periods when you may only really need to use your tripod a few times. Plus, working handheld allows you to work faster and more freely. So, with the following 10 tips, you’ll learn everything you need to know to take your best handheld landscapes and cityscapes yet.
1 Let highlights go when they’re not important

We’re often told that maintaining highlights is important in most situations, but there are times when letting highlights blow produces more interesting results. This image above is all about the architecture and figures on the escalators, and letting the highlights blow has resulted in a more graphic result with no unnecessary exterior distractions. What’s more, shooting this way allowed exposure to be set to 1/60 sec, f/8 at ISO 400 for handholding the camera.
2 Lean against something

Leaning against any kind of solid object will provide more stability and allow you to shoot with slower shutter speeds to avoid camera shake. This can be used alongside image stabilisation and help you to remain as still as possible and shoot at shutter speeds not normally possible when handholding the camera. Another trick you can use is to set the camera to continuous shooting and shoot in bursts of three to increase the chance of one of the shots being sharp.
3 Crank up ISO

Modern digital cameras are capable of excellent noise handling up to ISO 1600, and for some professional cameras it’s much higher. This means that you can, if you need to shoot handheld, still achieve fantastic image quality up to this setting.
This image of frozen grass was taken at 1/125 sec, f/8 at ISO 1600 and the level of detail present in the frost-covered subject is excellent. f/8 was chosen because it’s the sharpest aperture of the lens used – the ‘sweet spot’.
4 Use a beanbag (or bunched up jacket)
.jpg)
Photographic beanbags are typically used to support the camera and lens when shooting macro and wildlife, but they can also be placed on a wall or log, for instance, to support the camera when shooting landscapes. The idea behind using a beanbag is that the polystyrene ‘beans’ can be manipulated to hold the camera in the desired position. Use the camera self-timer to avoid camera shake, and if you don’t have a bean bag you could use a bunched up jacket instead.
5 Activate image stabilisation

Image stabilisation is a feature found in some lenses and cameras, where the sensor or optics move to counteract movement of the camera. Some image stabilisation systems claim they can support up to five stops below the shutter speed required for a sharp shot, but this isn’t often possible.
Aim for 2-3 stops below the shutter speed, remain as still as possible and if you can combine with Tip 2. As a general rule-of-thumb, the shutter speed should match or exceed the focal length eg. 50mm at 1/60 sec for a sharp shot, so image stabilisation may allow you to go down to 1/15 sec.
6 Expose for highlights
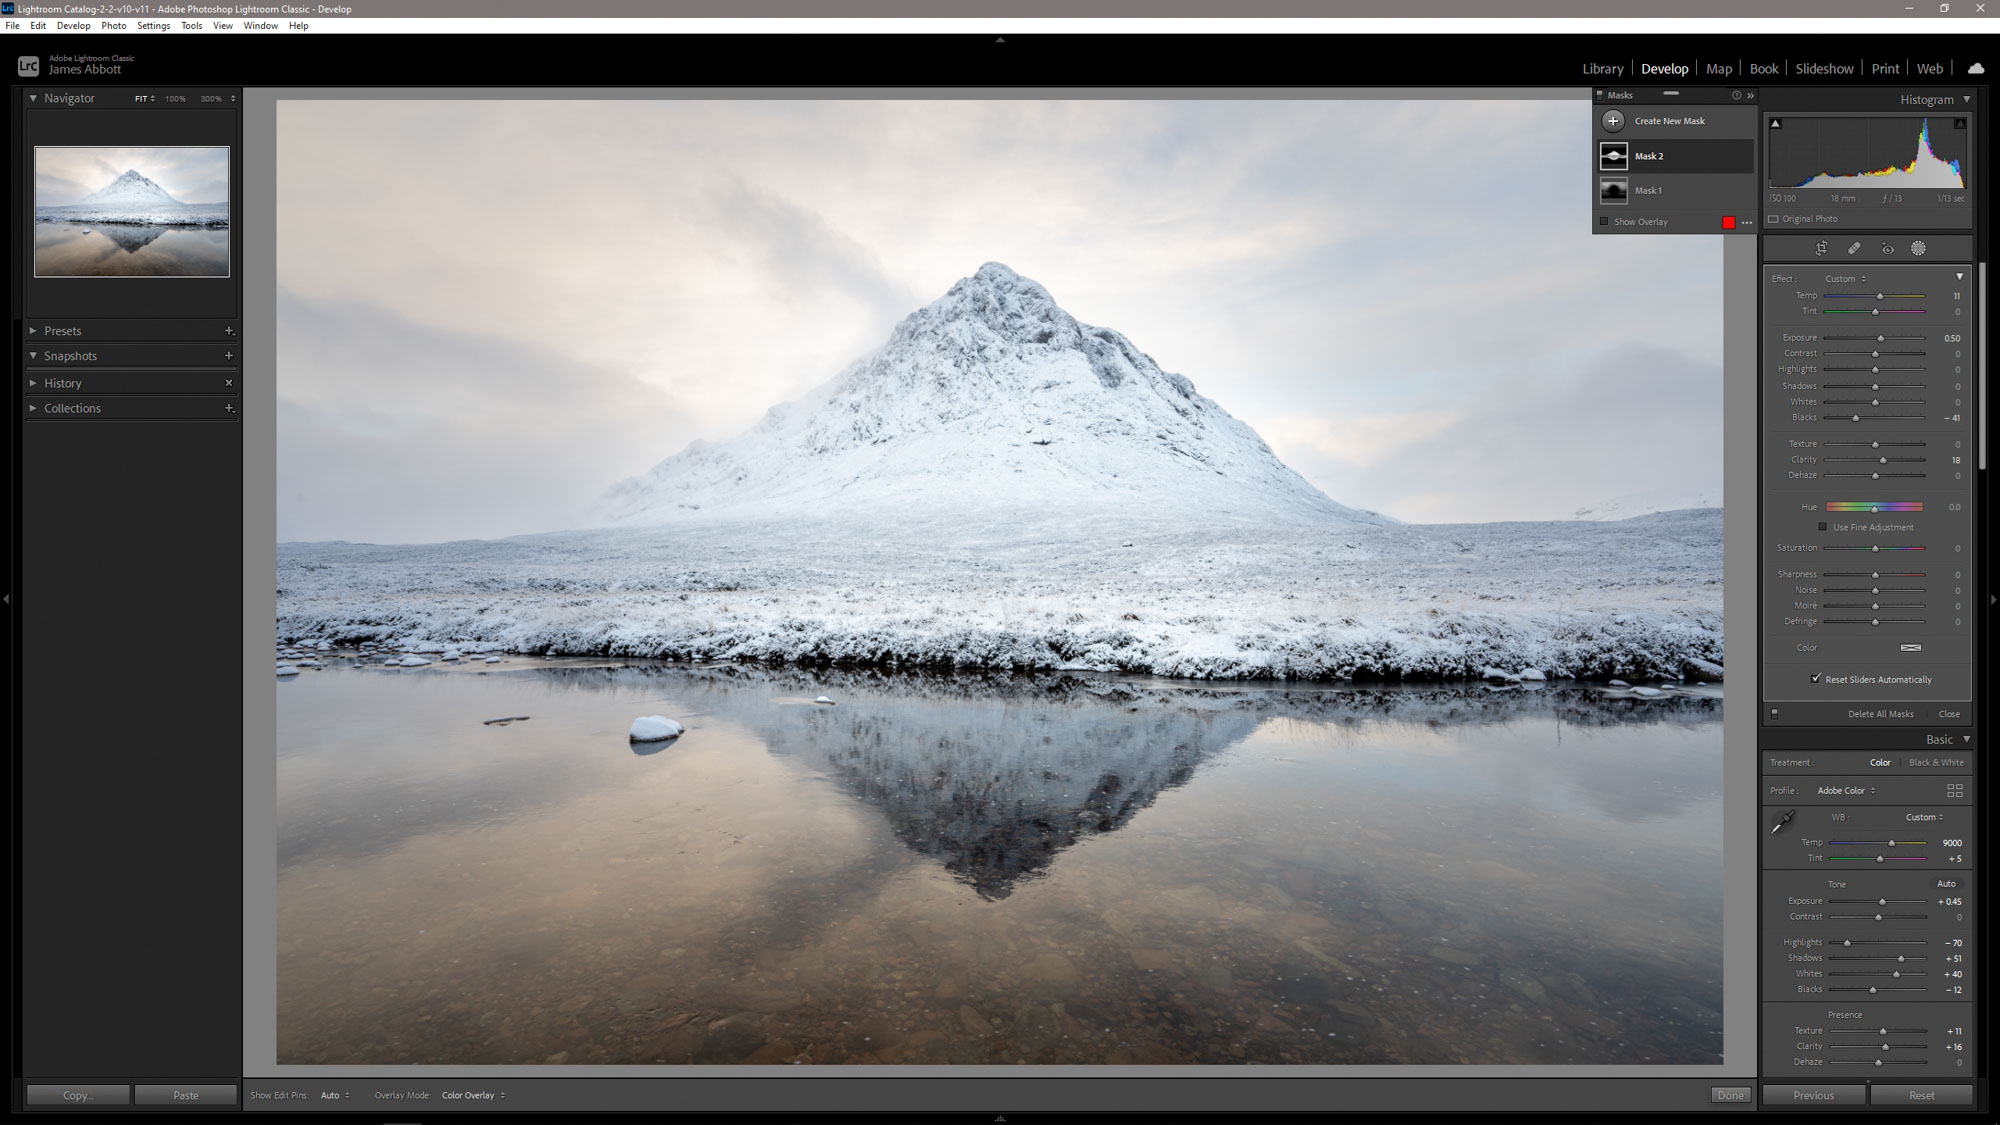
If you don’t have a tripod or filters with you, the best course of action is to expose for the highlights in the image – typically the sky. The ground will be underexposed, sometimes severely, but you can always pull detail out of shadows whereas blown highlights are lost forever.
Process your Raw file in Lightroom or similar software, taking advantage of localised adjustments to raise the exposure in underexposed areas of the scene while allowing highlight areas to remain at the original exposure.
Video tutorial:
See how to fix an underexposed image in Lightroom and Photoshop
7 Shoot wide open

Setting the aperture of your lens to the widest setting possible (lowest f-stop) may sound counterintuitive when shooting landscapes but it can, in some situations, work to your creative advantage as well as allowing you to shoot handheld.
The image above was taken at f/1.8 with focus on the lighthouse to make the foreground blur and take on the appearance of movement while remaining identifiable. This ultimately allowed exposure to be set to 1/60 sec, f/1.8 at ISO 100 in low light conditions.
8 Compose with the light behind you

This image was taken at 1/100 sec, f/11 at ISO 100 and exhibits detail throughout the scene that’s lit by the warm light of the setting sun.
When shooting around sunrise and sunset, it’s common to face the rising or setting sun. This can often result in the need for a tripod and filters, but another option is to shoot with the sun behind you so that the ground is bathed in bright light allowing you to shoot with a faster shutter speed that will also help to maintain sky detail.
9 Enjoy more creative freedom

Shooting handheld and not carrying a tripod can be a liberating experience on top of saving your back when walking in the hills and mountains or for long distances.
This image is a handheld panoramic captured at 13mm on a full-frame camera to create a more circular appearance in the clouds and reflection. Shooting handheld made it quick and easy to shoot, and the exposure settings for the above image were set to 1/100 sec, f/13 at ISO 200 to avoid camera shake.
10 Take advantage of noise reduction

The best way to apply noise reduction is manually in Raw editing software because applying it in-camera requires as much time to process the image as the exposure itself takes. Not to mention, applying noise reduction manually means you’re in full control of its application.
By default, Lightroom applies 25 Color and 0 Luminance noise reduction, drag Color to 0 and then increase until the coloured spots disappear. For luminance/grain, go no higher than 40 to maintain fine detail.
Further reading: See our 10 essential tips and techniques for RAW editing

James is a freelance photographer and journalist producing content for photography magazines and websites and is a former deputy editor of Practical Photography magazine. He’s also the author of The Digital Darkroom: The Definitive Guide to Photo Editing.
View all articles