Get to grips with the fundamentals of raw editing and make the most of your raw photos with these top tips
1 The raw trade-off
When you switch your camera’s quality setting from jpeg to raw you’re effectively taking decisions about how your image should look out of your camera’s control and into your own hands. You’re also making a commitment to spend extra time editing and processing your photos, as well as the need for more storage for larger file sizes.
The pay-off is greater control and more editing options. An 8-bit jpeg holds 256 levels of luminosity per colour channel, or to put it another way, about 16 million colours. A 12-bit raw image holds 4096 levels of luminosity, or 68 billion colours. A 14-bit raw with 16,384 levels of luminosity has a whopping 4.3 trillion colour shades. All this extra colour information gives us greater headroom for image-editing and can ultimately lead to higher quality photos.
Editor's tip:
If you're not sure if your camera or device has raw capabilities or how you can change the settings to shoot in raw, check the user guide which will have instructions.
Almost all current digital cameras have raw-shooting capabilities, and now shooting in raw is possible with many smartphones too. You can even download apps which allow you to shoot in raw with smartphones too.
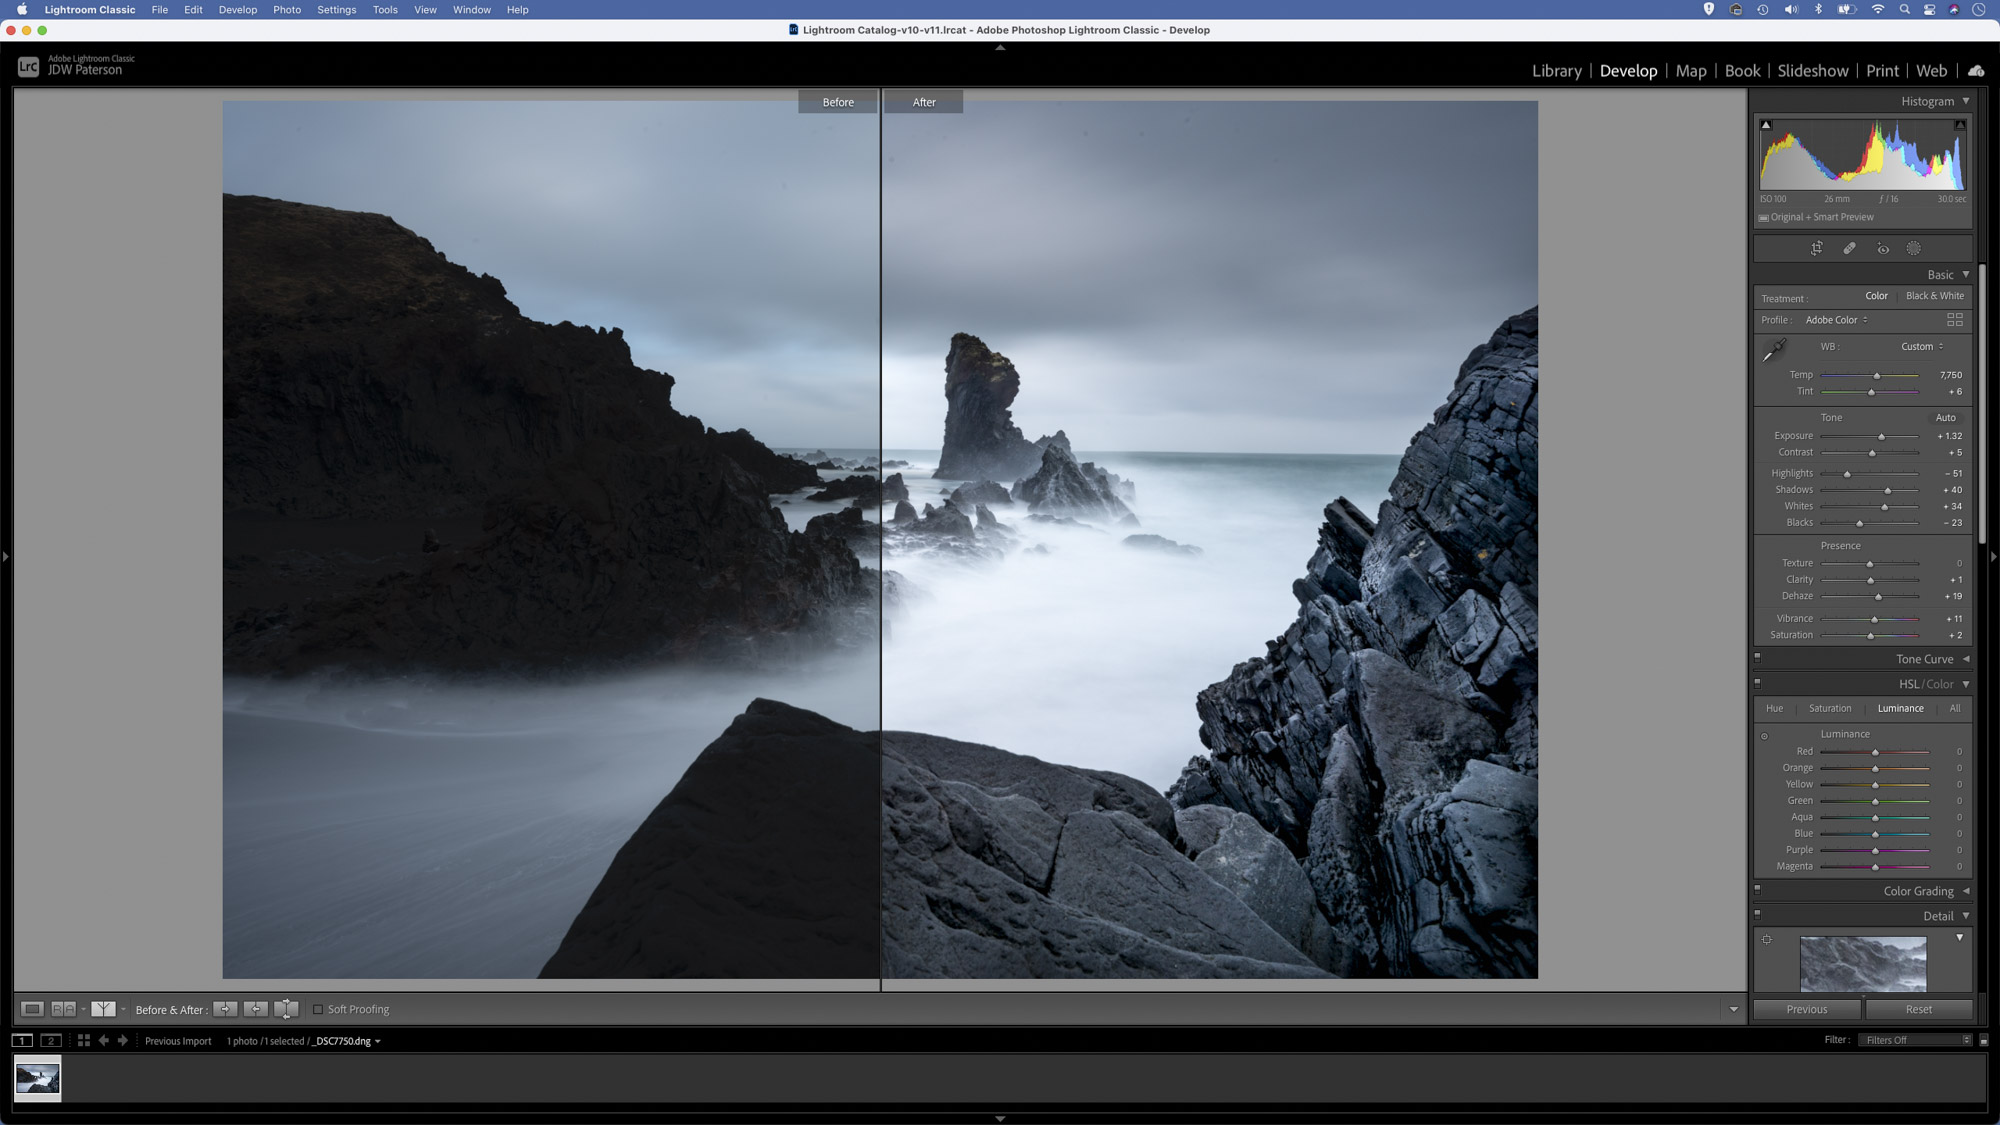
2 Make the most of dynamic range
The big advantage you have when working with raws is the increased dynamic range these files have over JPEGs. This means you can pull greater detail out of the highlights and shadows, as well as rescue under or over-exposed images. In Lightroom, if your image is overly dark or bright try hitting the Auto button in the Basic Panel then tweak the tonal sliders to improve the tones. Alternatively, you can hold Shift and double-click individual sliders to set them to their auto amounts. This works especially well with the whites or blacks sliders, as you can automatically set them to make maximum use of the dynamic range of the image.
Editor's note:
Learn more about the fundamentals of dynamic range on photography with our in-depth guide and explainer here.
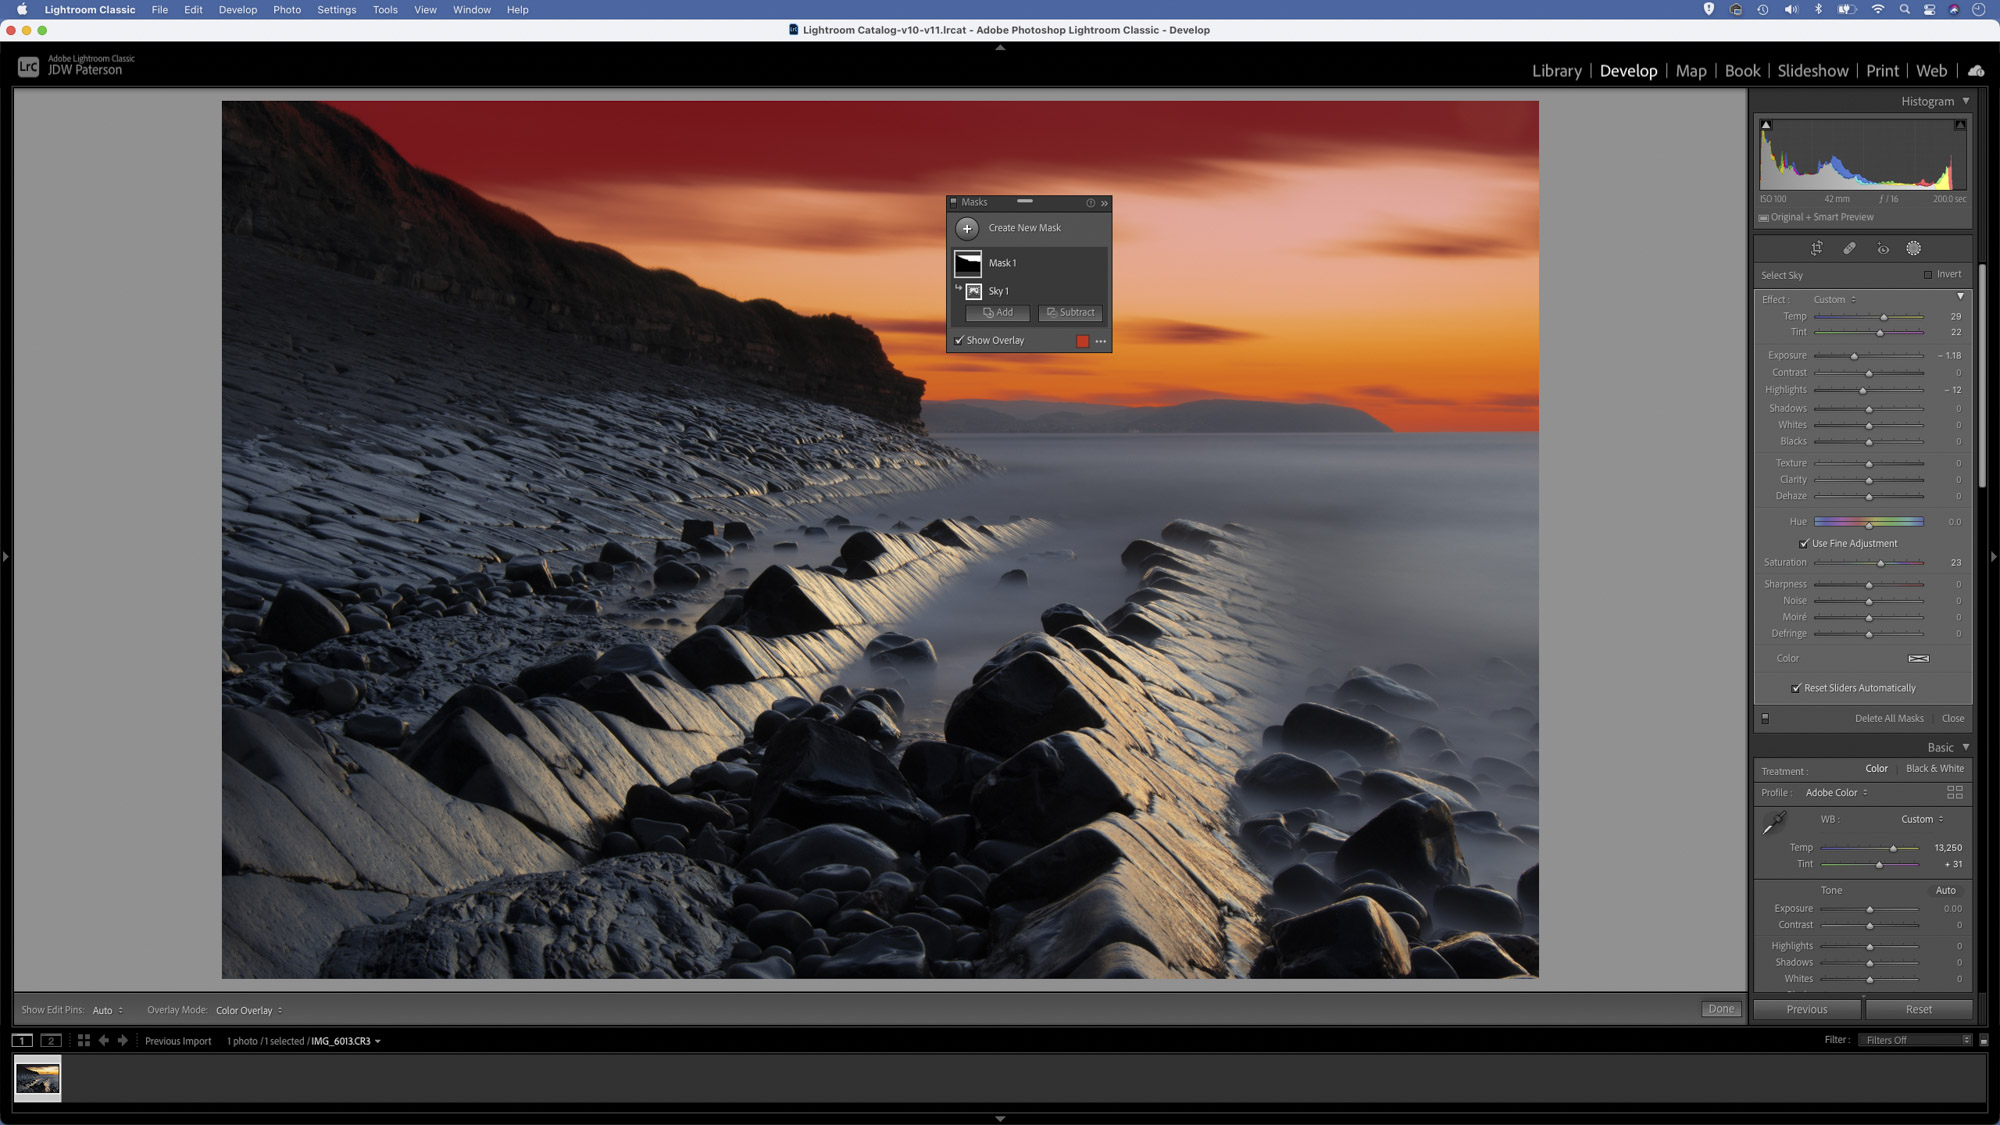
3 Powerful sky selections
"When you switch your camera’s quality setting from jpeg to raw you’re effectively taking decisions about how your image should look out of your camera’s control and into your own hands."
Skys can often come out overly bright in outdoor photos, as they’re usually much lighter than the land below. Thankfully, raws can hold an astonishing amount of hidden detail in the highlights. If you want to tease out this detail then you need to master local adjustment tools. Lightroom offers a powerful array of tools and settings for local adjustments. The recently introduced Sky mask is hugely useful for enhancing overly-bright skies. Simply click the mask button, choose Select Sky then use a combination of negative Exposure and Highlights, plus positive Clarity, Dehaze and Saturation to boost the sky and enhance the clouds. If you need to tweak the area covered, use the Add or Subtract buttons in the Mask panel.
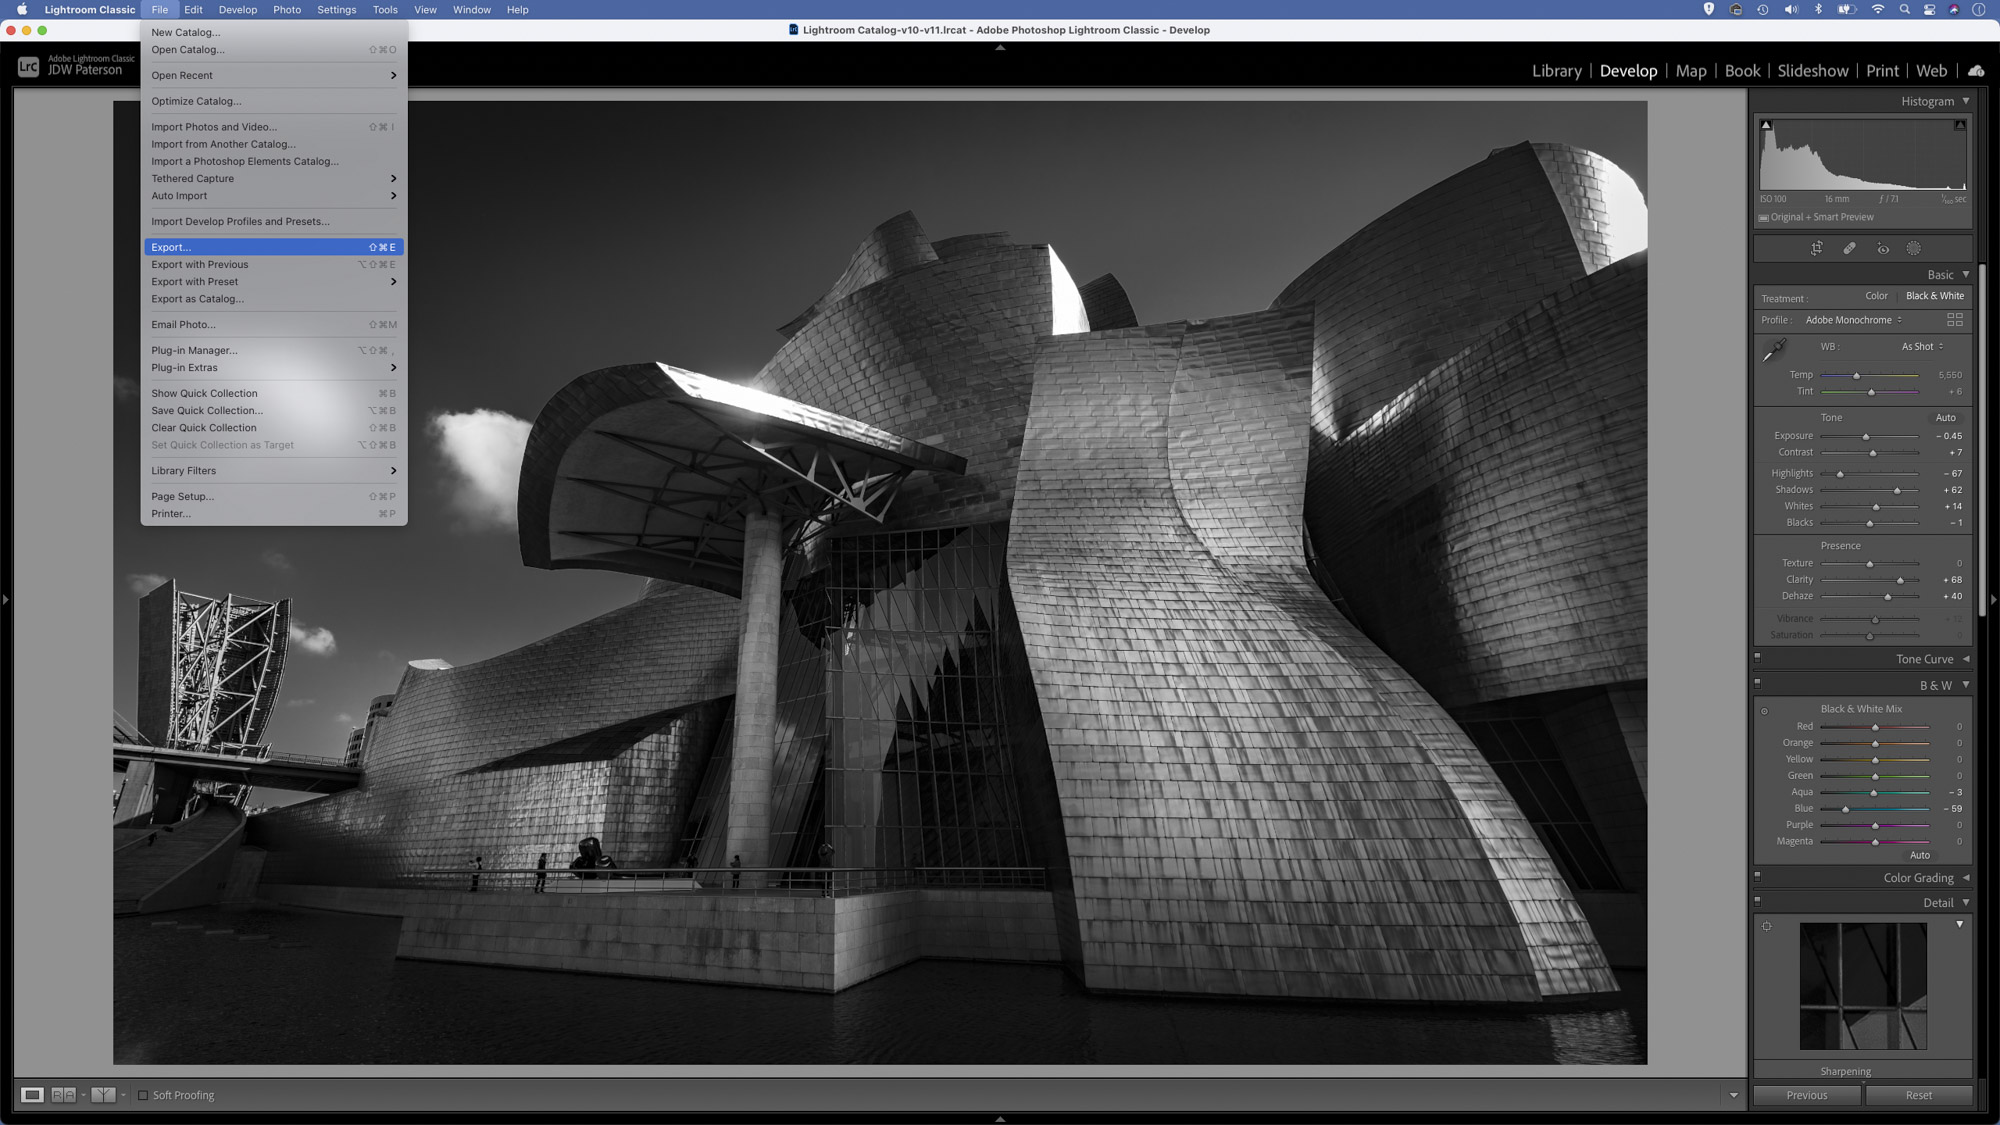
4 Dedicated Raw profiles
If you shoot and edit in raw, then you can make use of the excellent Adobe Raw profiles that are available in Lightroom and Camera Raw. Found in the Profile Browser within the Basic Panel, an array of raw-only profiles offer great starting points for your image editing. Each profile will optimise your raw photo in different ways. For example, the Adobe Landscape profile will enhance textures, boost blues in skies and lift greens in foliage, so it’s a great way to kickstart your landscape photo editing. By contrast, the Adobe Portrait profile prioritises natural-looking skin tones. As well as the Adobe Raw profiles, you also have the option to apply Camera Matching profiles to your raws. This set will match the picture styles in your camera's menu.
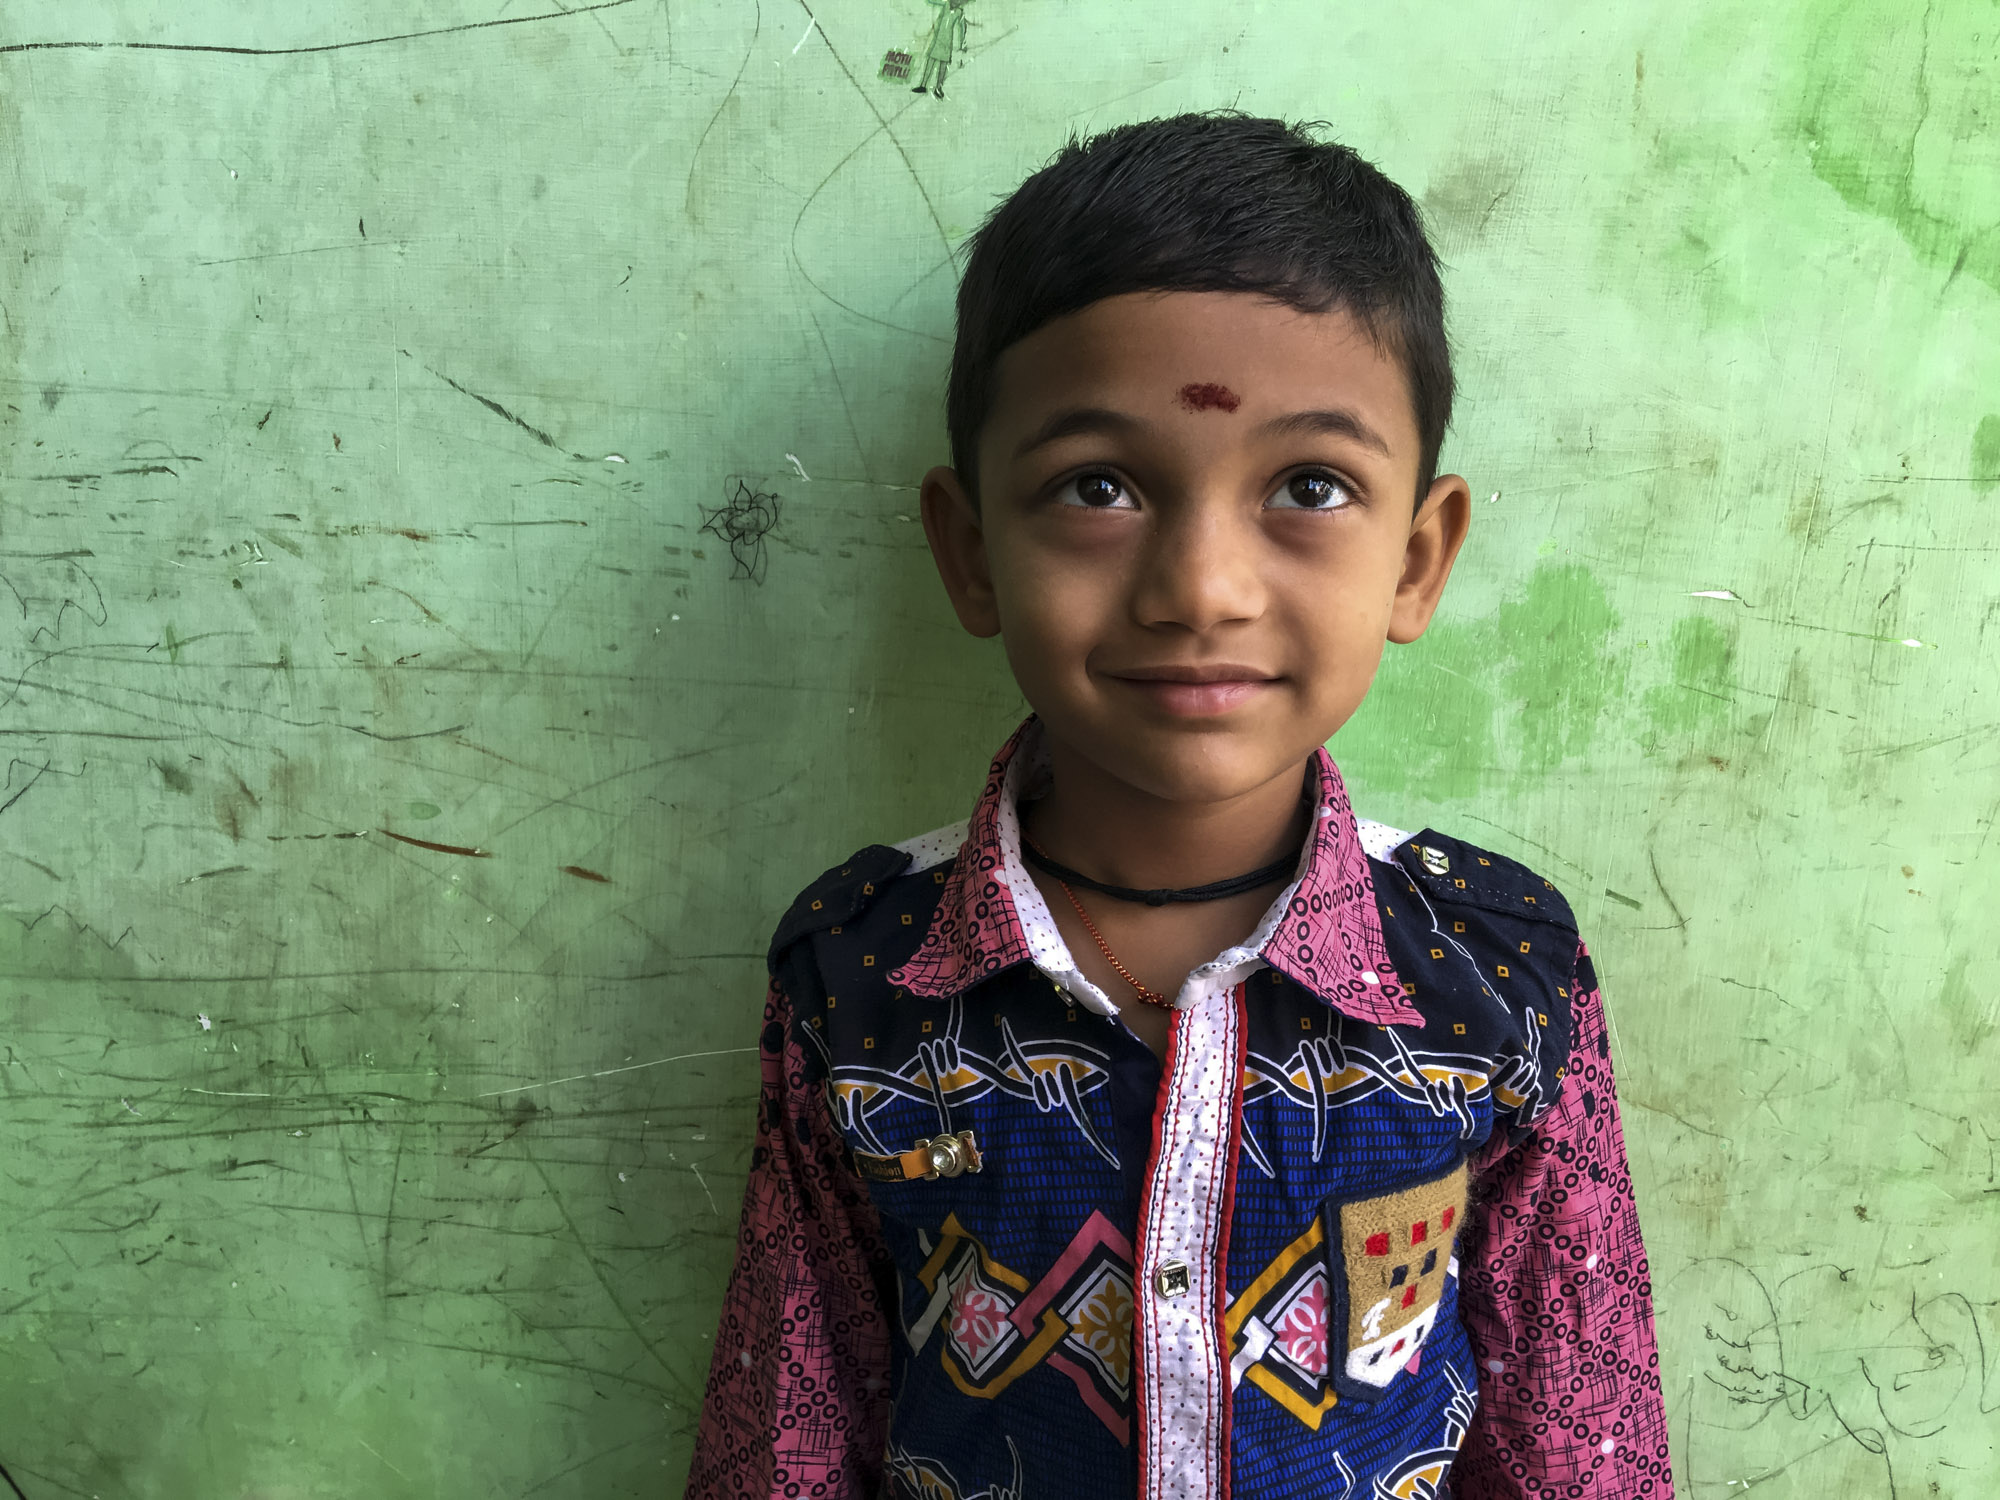
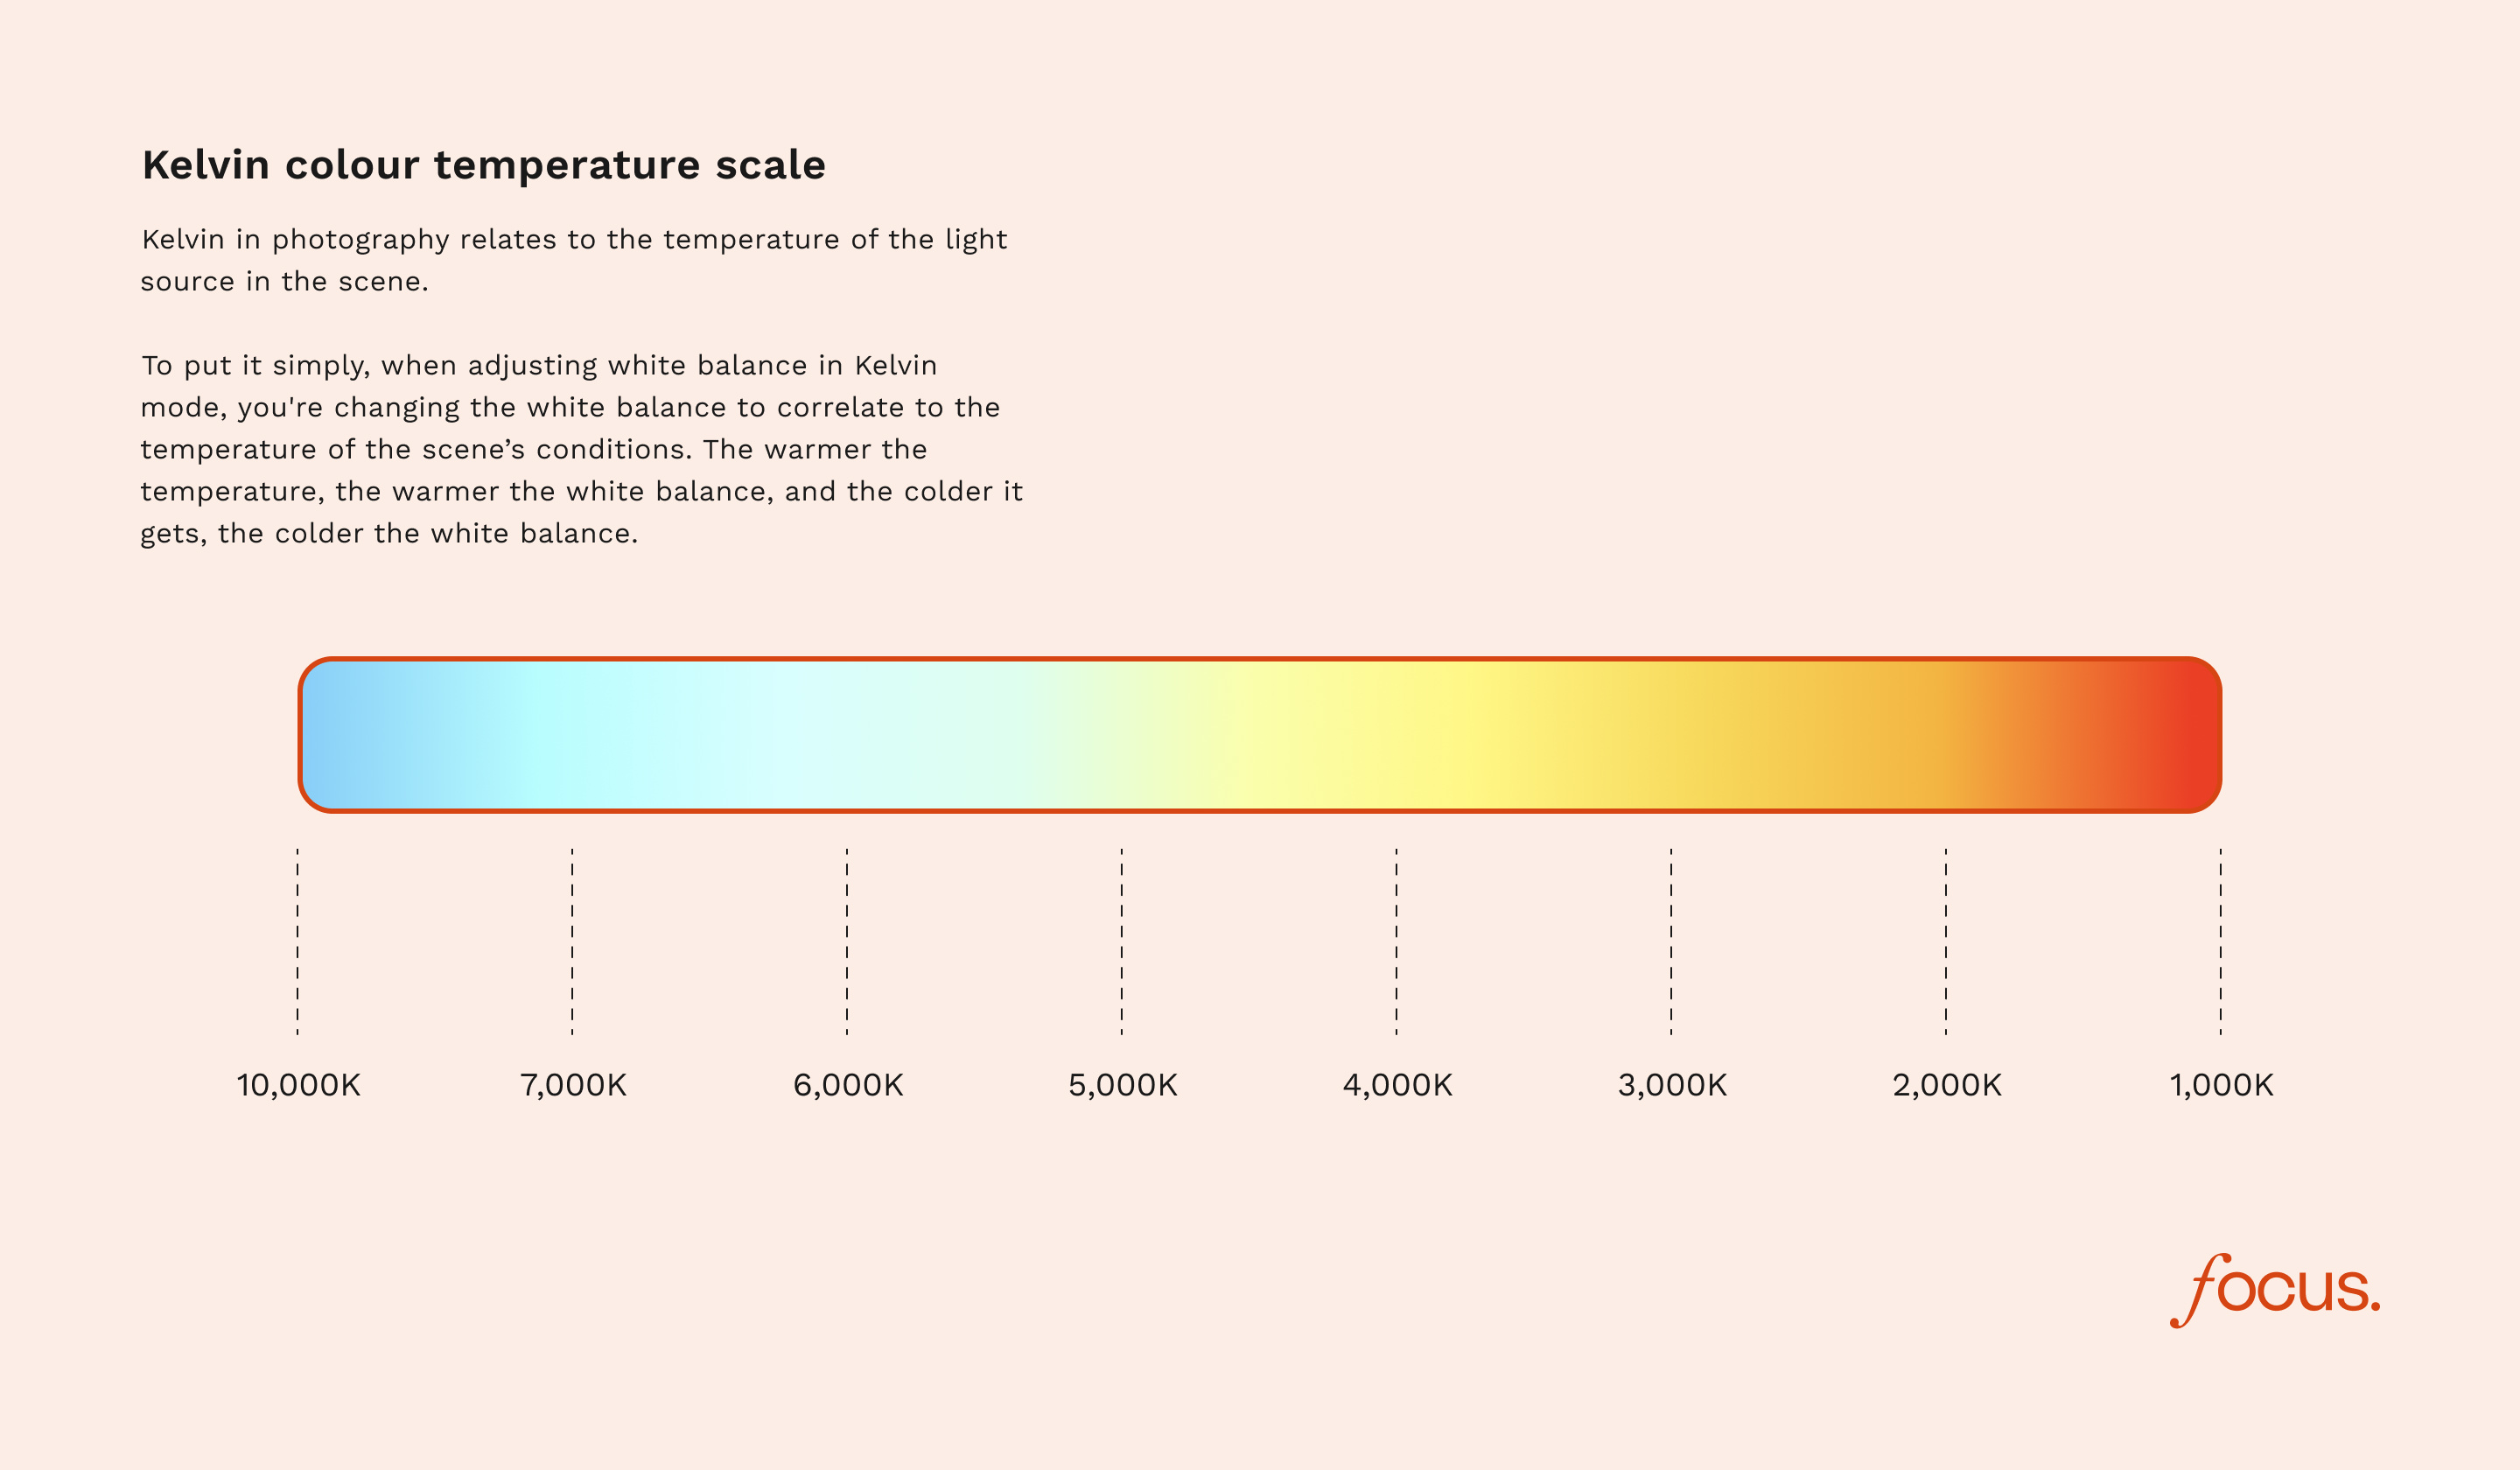
5 White balance after the fact
The extra colour information held in a raw file means we can choose a white balance preset when editing the photo, with the exact same results as if we’d done so before taking the shot.
"We often hear of ‘correcting’ white balance, but we needn’t be constrained by the idea that there’s only one correct setting."
Not only does this give us a safety net if we accidentally choose the wrong white balance while shooting, it also frees us to fix unwanted colour casts and ensure accurate colours. In Lightroom, use the WB dropdown in the Develop Module’s Basic Panel to choose from common presets like Daylight or Tungsten. Alternatively, use the Temp and Tint sliders to fine-tune the white balance, or grab the eyedropper tool and click over a point in the image you know should be neutral, like a white wall or a grey rock.
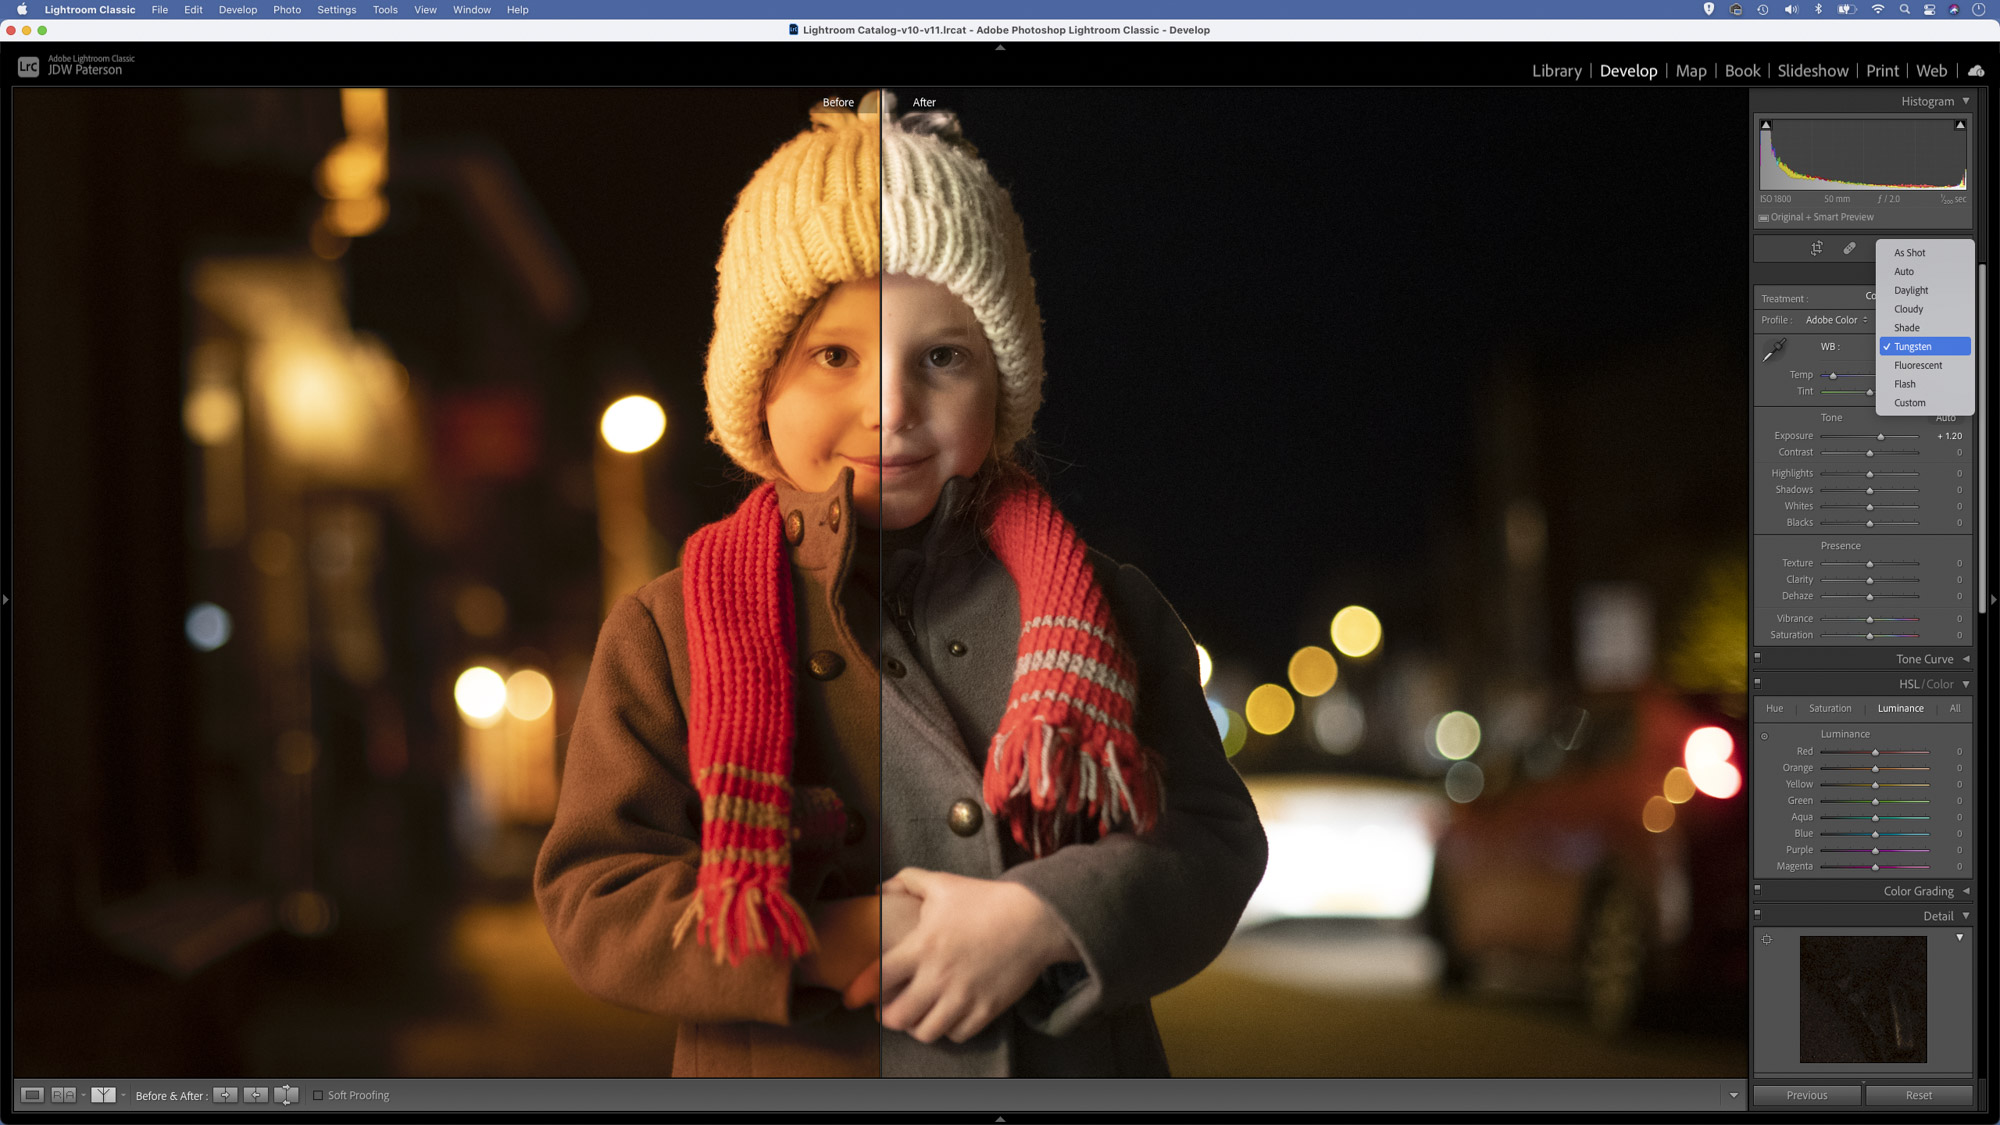
6 Finding the balance
If you’re struggling to find the right white balance setting for your raw image, try temporarily setting Vibrance and Saturation to +100. The over-saturated image can make it easier to identify colour casts. Tweak the Temperature and Tint sliders to remove the cast, then reset the Saturation and Vibrance sliders by double-clicking them.
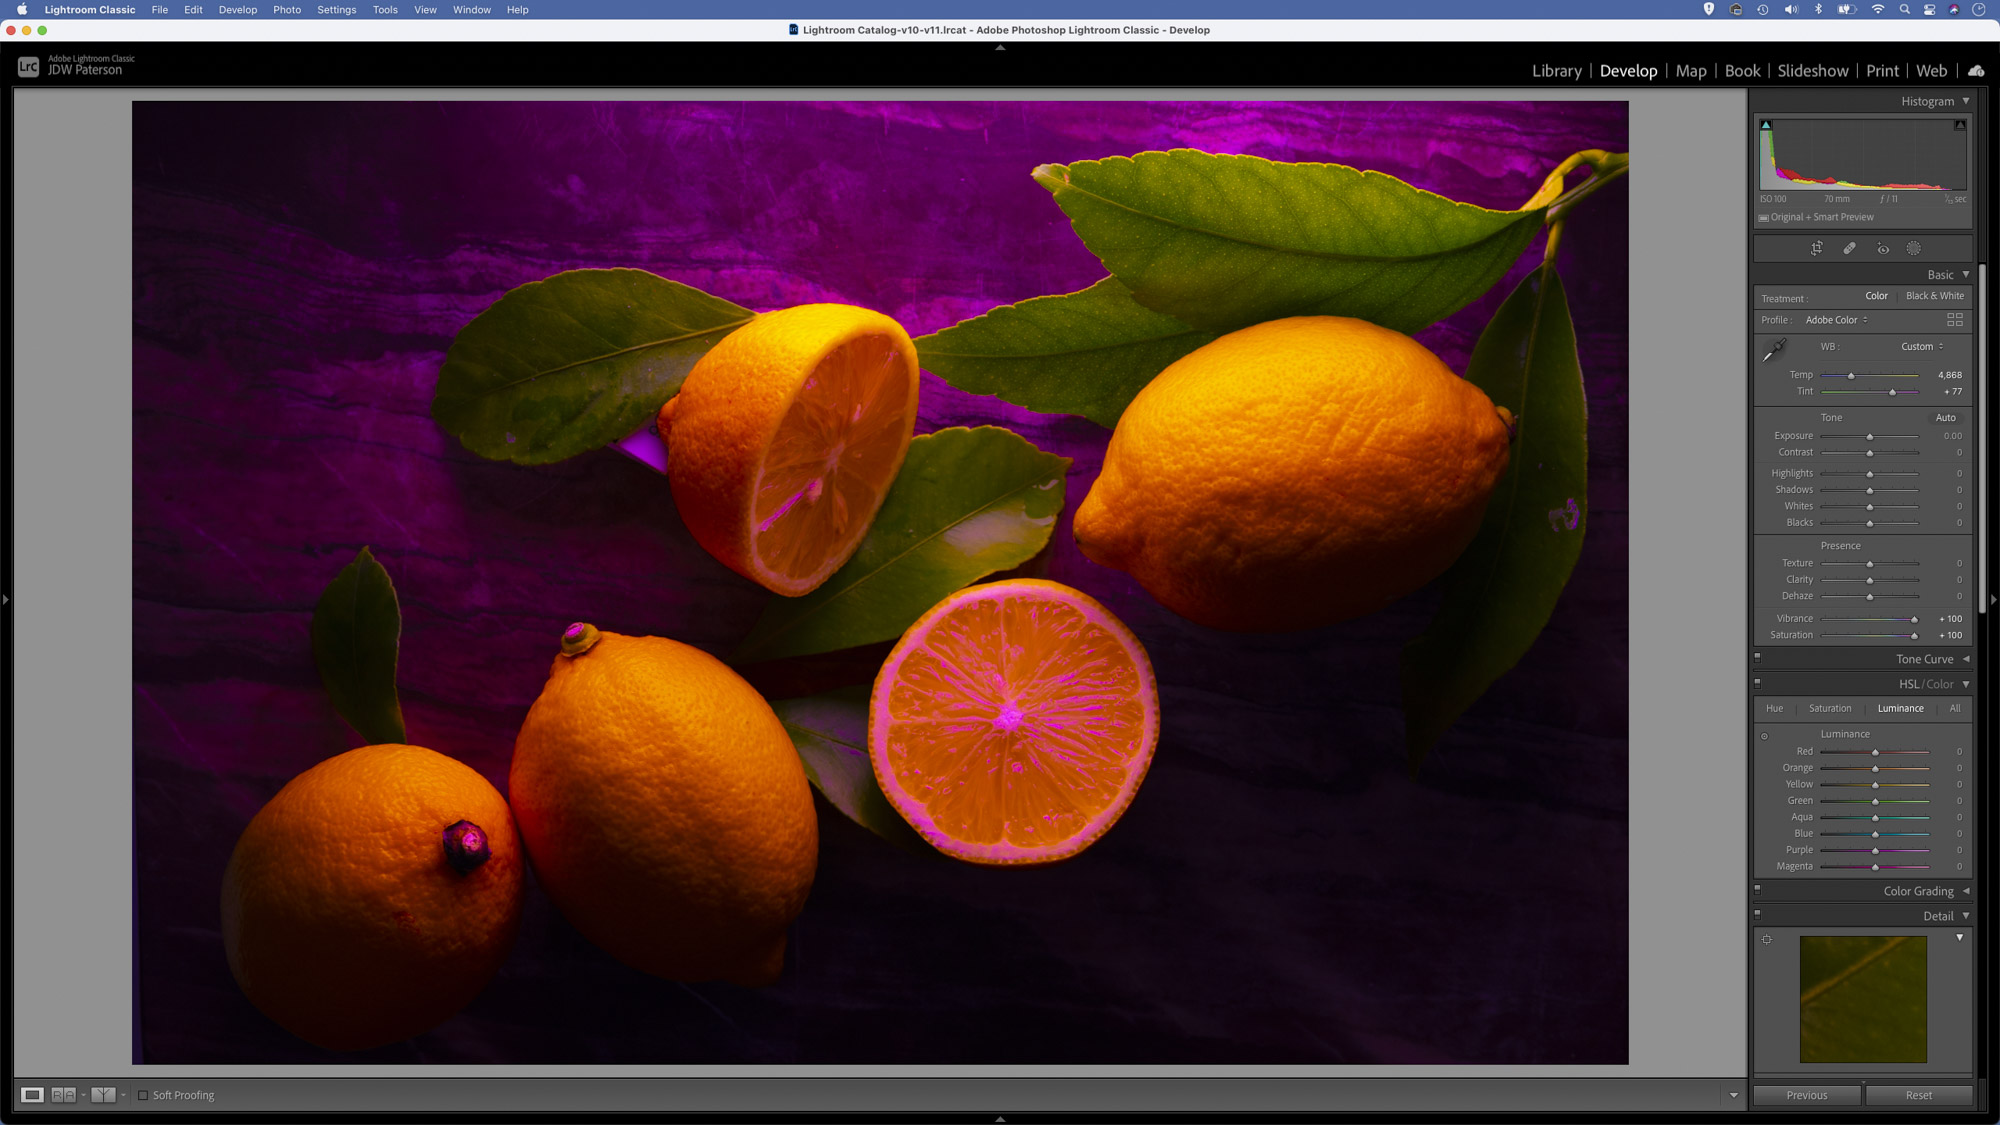
7 Creative white balance choices
We often hear of ‘correcting’ white balance, but we needn’t be constrained by the idea that there’s only one correct setting. The white balance controls can be used like any other to make creative changes to your photos (and if you’re working on a raw file then you’re free to shift them to any colour temperature you like). Creative white balance shifts can help to enhance the mood of a scene by making it feel warmer or cooler. It may mean the colours aren’t completely accurate, but atmosphere beats accuracy every time.
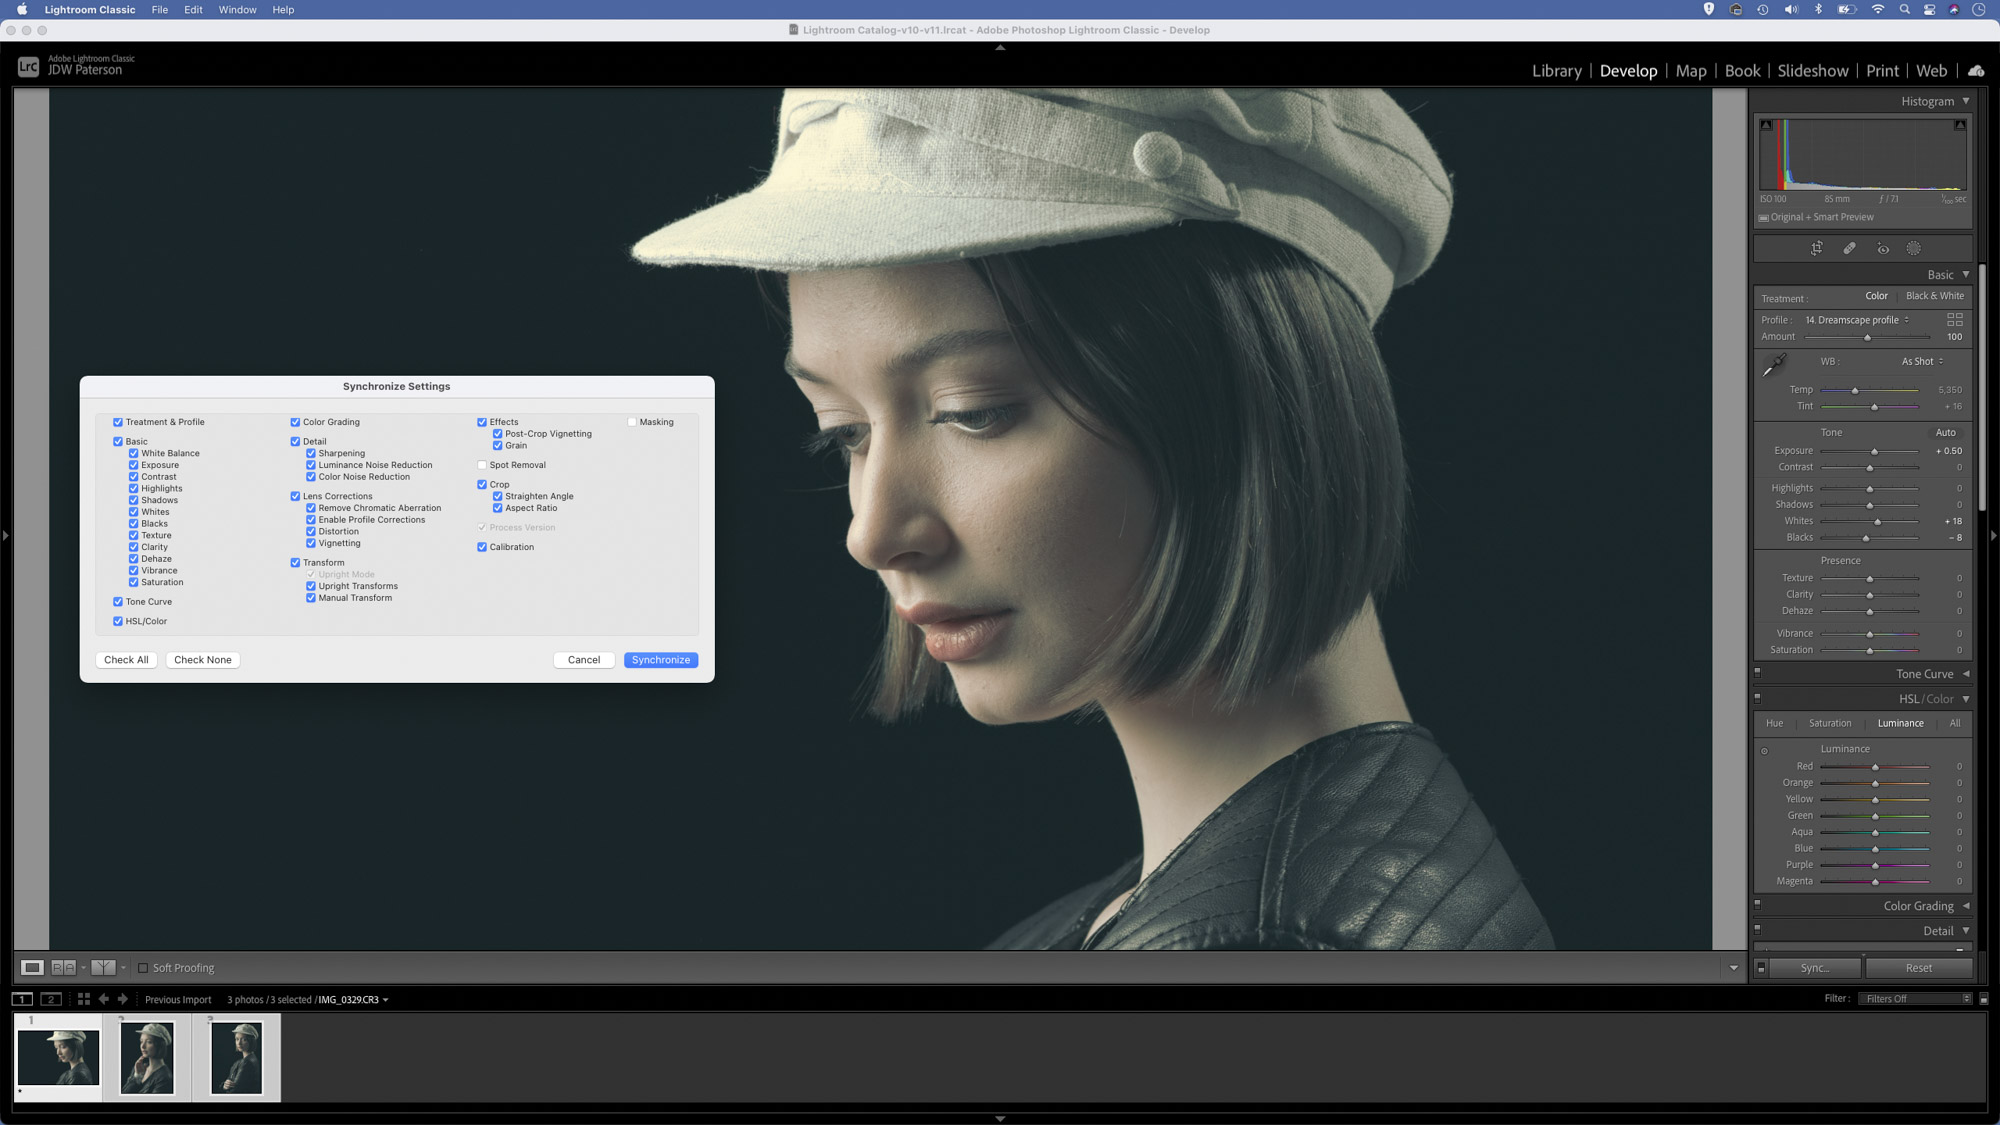
8 Sync your edits
When it comes to editing raw photos one of the most important things to grasp is that the changes you make to a raw in an editor like Lightroom or Camera Raw will never alter the original file. Instead, they only change the way the photo looks in the preview.
Alterations are only ‘burnt in’ if you export in a different format like a tiff or jpeg. This is sometimes called parametric editing, as rather than altering the pixel make-up of the image we’re instead tweaking the parameters that determine how it should be viewed. The handy thing about parametric editing is that any changes remain non-destructive and editable. What’s more, parametric edits made on one image can quickly be copied to another (or an entire set) simply by syncing the images. In Lightroom, highlight one file then Cmd/Ctrl-click to select others and hit the Sync button to copy edits over.
9 Double your resolution
There are some things that Lightroom lets you do exclusively to raws, such as the Enhance Details command. This can be found by right-clicking the image in Lightroom and choosing Enhance. The command works in combination with the Super Resolution tool, which intelligently analyses your image using Machine Learning and builds in extra detail, resulting in an image double the size with four times the number of pixels.

Editor's tip:
Watch our video tutorial on how to use Photoshop's Super Resolution feature here.
10 A typical raw workflow
One of the best ways to get to grips with raw shooting and editing is to find a raw workflow that works for you, then stick to it.
"One of the best ways to get to grips with raw shooting and editing is to find a raw workflow that works for you, then stick to it."
In Lightroom, this might begin with sorting and rating your favourite photos, then making a collection of your best. Next you might want to make universal changes to the set of photos, perhaps by syncing white balance and colour settings. From here, you could go on to enhance individual photos using Lightroom’s array of tonal tools. Finally, you can export the raws in a universal format. While not the best format for heavy editing, jpegs are perfectly fine for exported photos, although Tiffs are uncompressed and less ‘lossy’ than jpegs. Of course, you can always go back to the original raw file and export in other formats or at different resolutions to suit your needs.
Editor's tip:
When uploading your images to your Picfair Store remember to export them as JPEG files at a maximum of 30mb file size. You can read more on Picfair's upload specifications here.
All screenshots by James Paterson
A reminder of the basics:

James has been a professional photographer and award-winning journalist for the past 15 years. He is editor of Practical Photoshop magazine and contributes to leading photography publications worldwide.
View all articles